The perfect V-Stitch market bag for all your shopping needs
Look to this simple v-stitch market bag to get all your produce and baked goods home safely. The crochet pattern is beginner friendly and free on the blog.
If you’re like me, you’re looking for ways to have a positive impact on the environment by reducing the amount of plastic you use and throw away. Crochet an easy v-stitch market bag and you’ll be well on your way!
Construction of the V-Stitch Market Bag
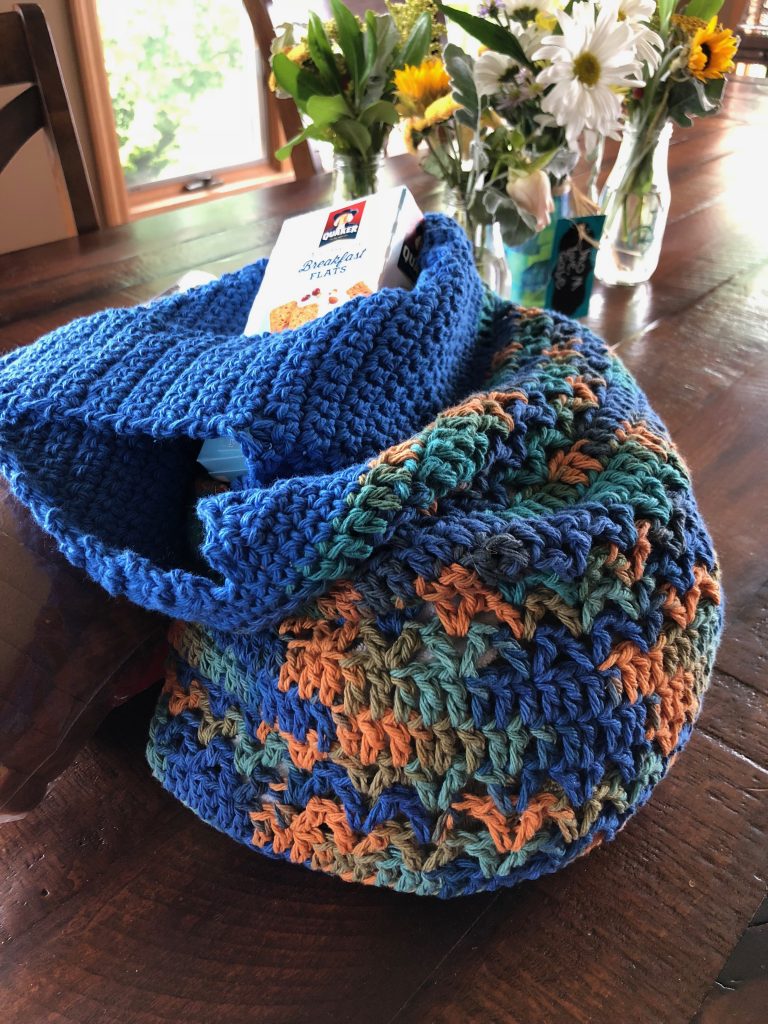
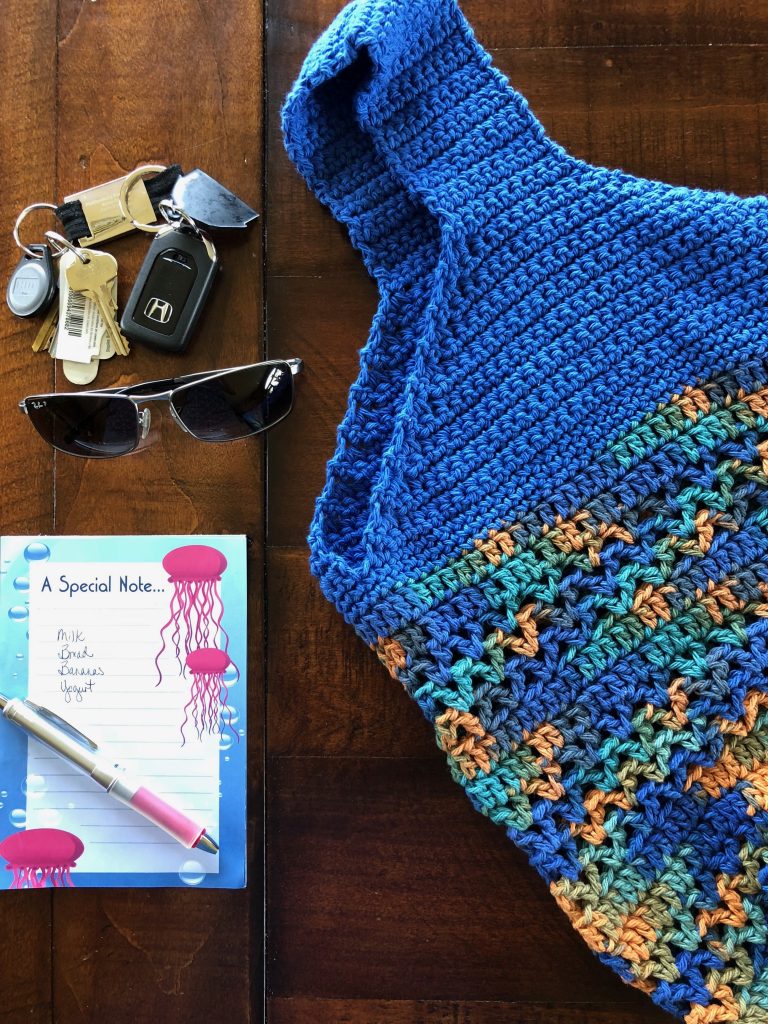
This market bag is great for that trip to the farmers market. Choose worsted weight cotton yarn to make it sturdy and strong, esp. if you use mercerized cotton that won’t stretch out of shape. Be sure you select a yarn that’s easy to care for so you can simply pop it into the washing machine and air dry. I used Lily “Sugar ‘n Cream” in Dazzle blue and Capri ombre for the sample.
Besides the yarn, you’ll need a size US H-8 crochet hook. I chose this size to give me a tighter, more compact stitch that gives the bag added strength for those heavy loads.
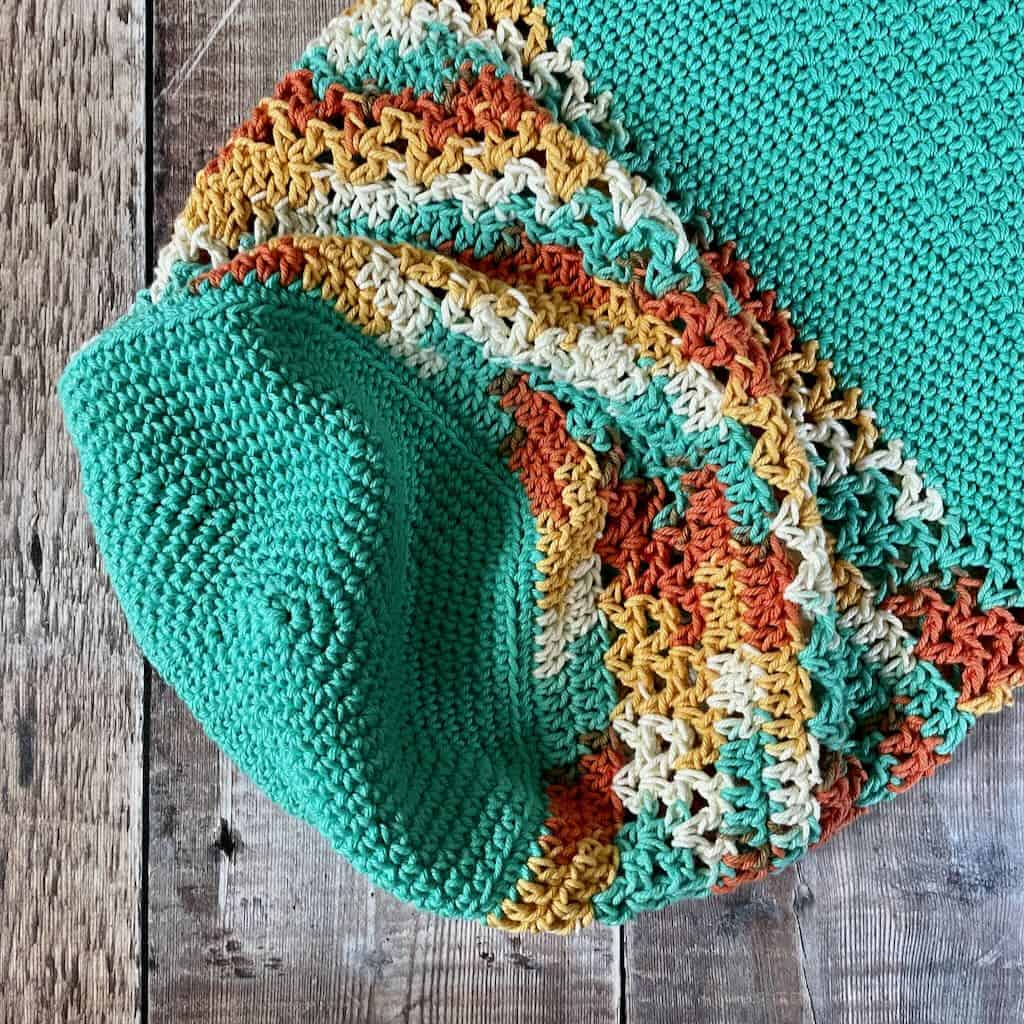
The bottom of the bag is worked in the round using the spiral method. If you’ve never crocheted a flat circle using the spiral method, check out this helpful tutorial by Cherry Heart. You might want to keep a removable stitch marker close by to mark the beginning of each round while you’re crocheting the bottom.

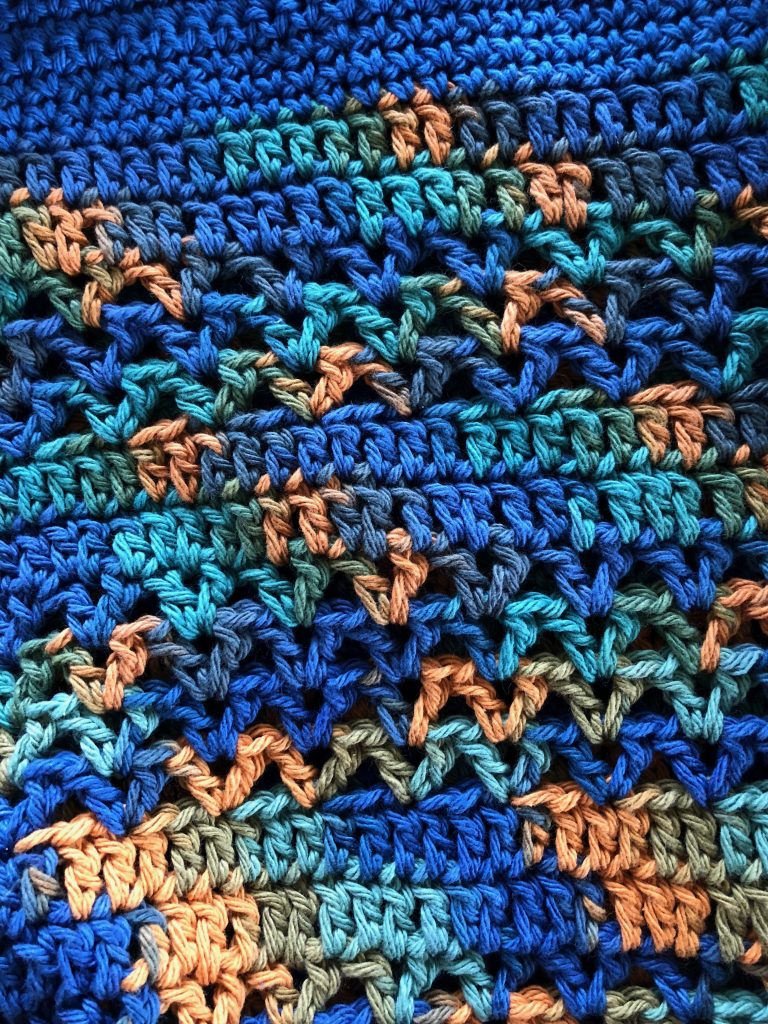
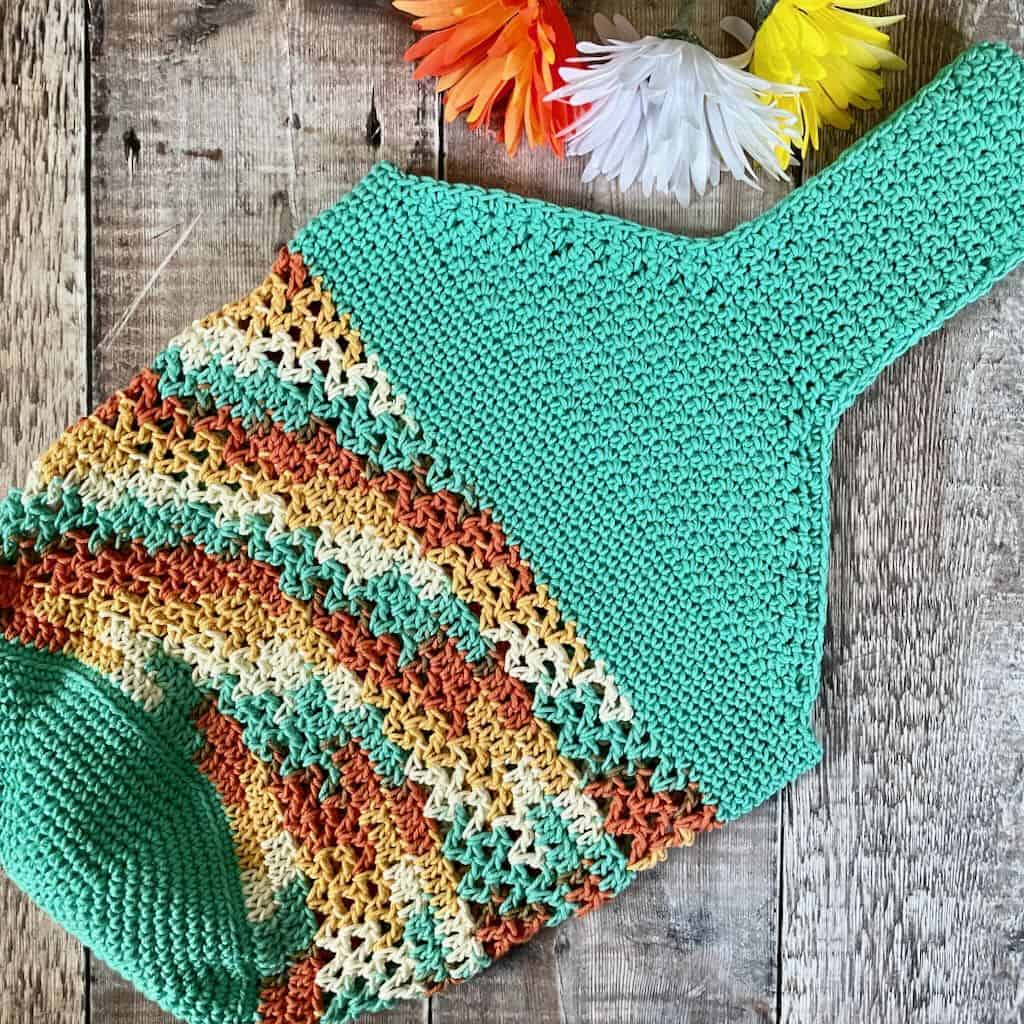
The alternating sections of solid double crochet and openwork v-stitch give the bag some room to expand while keeping its shape. It’s sturdy enough to hold heavy produce and holds a surprising number of items.
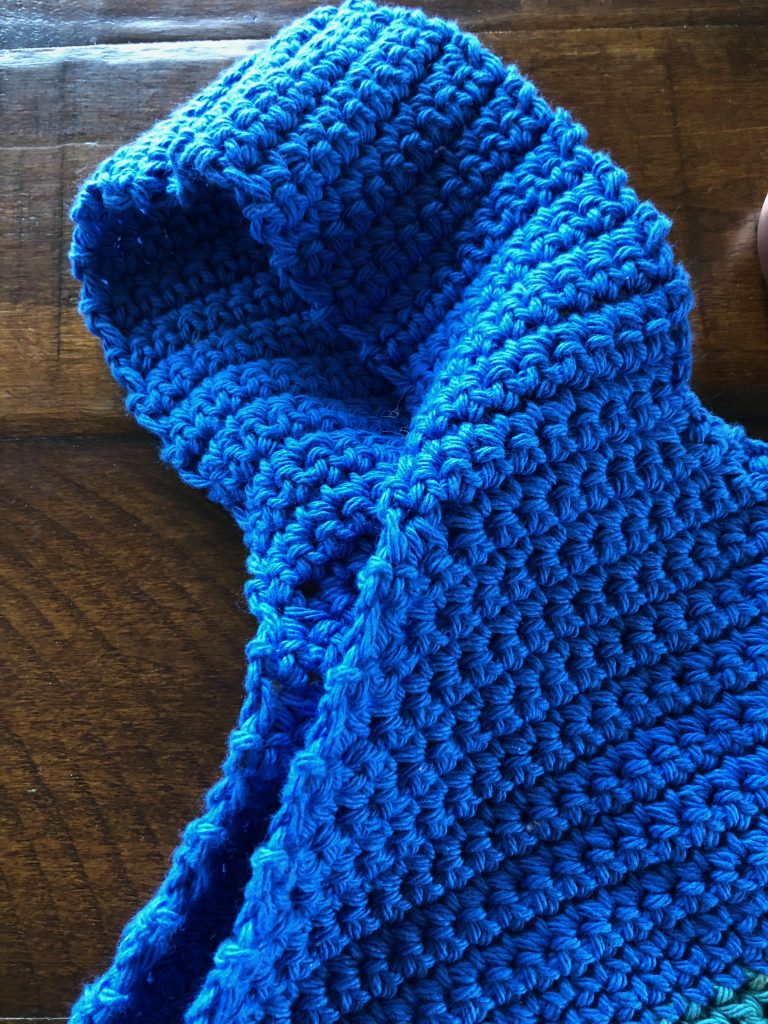
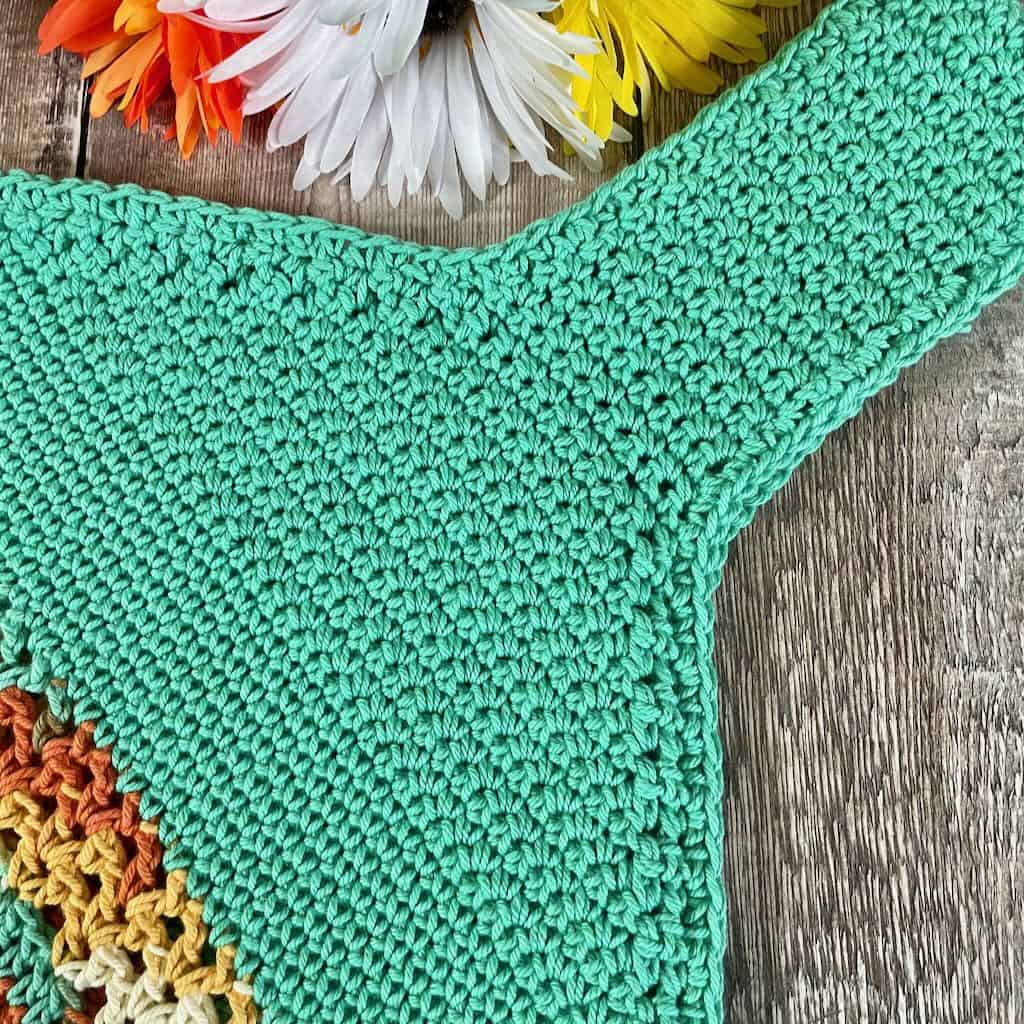
I made the strap a bit wider for comfort when you carry the bag. However, if that doesn’t suit your preferences, you can easily adjust the width of the strap by changing the number of stitches in each row once you’ve completed the decreases. In fact, you can also easily adjust the overall size of your bag.
The pattern has been updated. Read on for more details.
Not long ago I felt the V-stitch Market Bag needed an update. I chose new yarn that I like better than Lily’s. But, as I began making the new version, I realized the yarn wasn’t producing the same results as the original bag.
I followed the same instructions but adjusted repeats and number of rounds in some sections to ensure that the new version was basically the same size as the original.
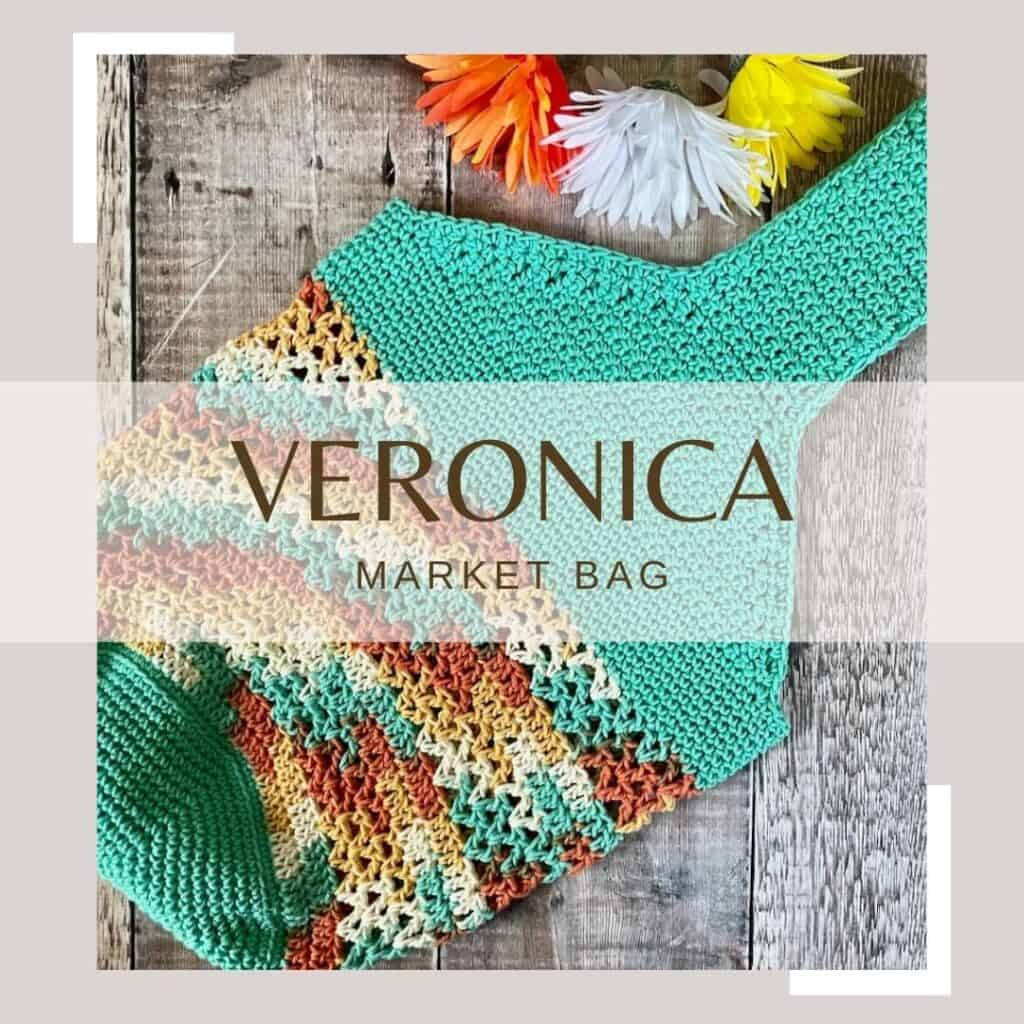
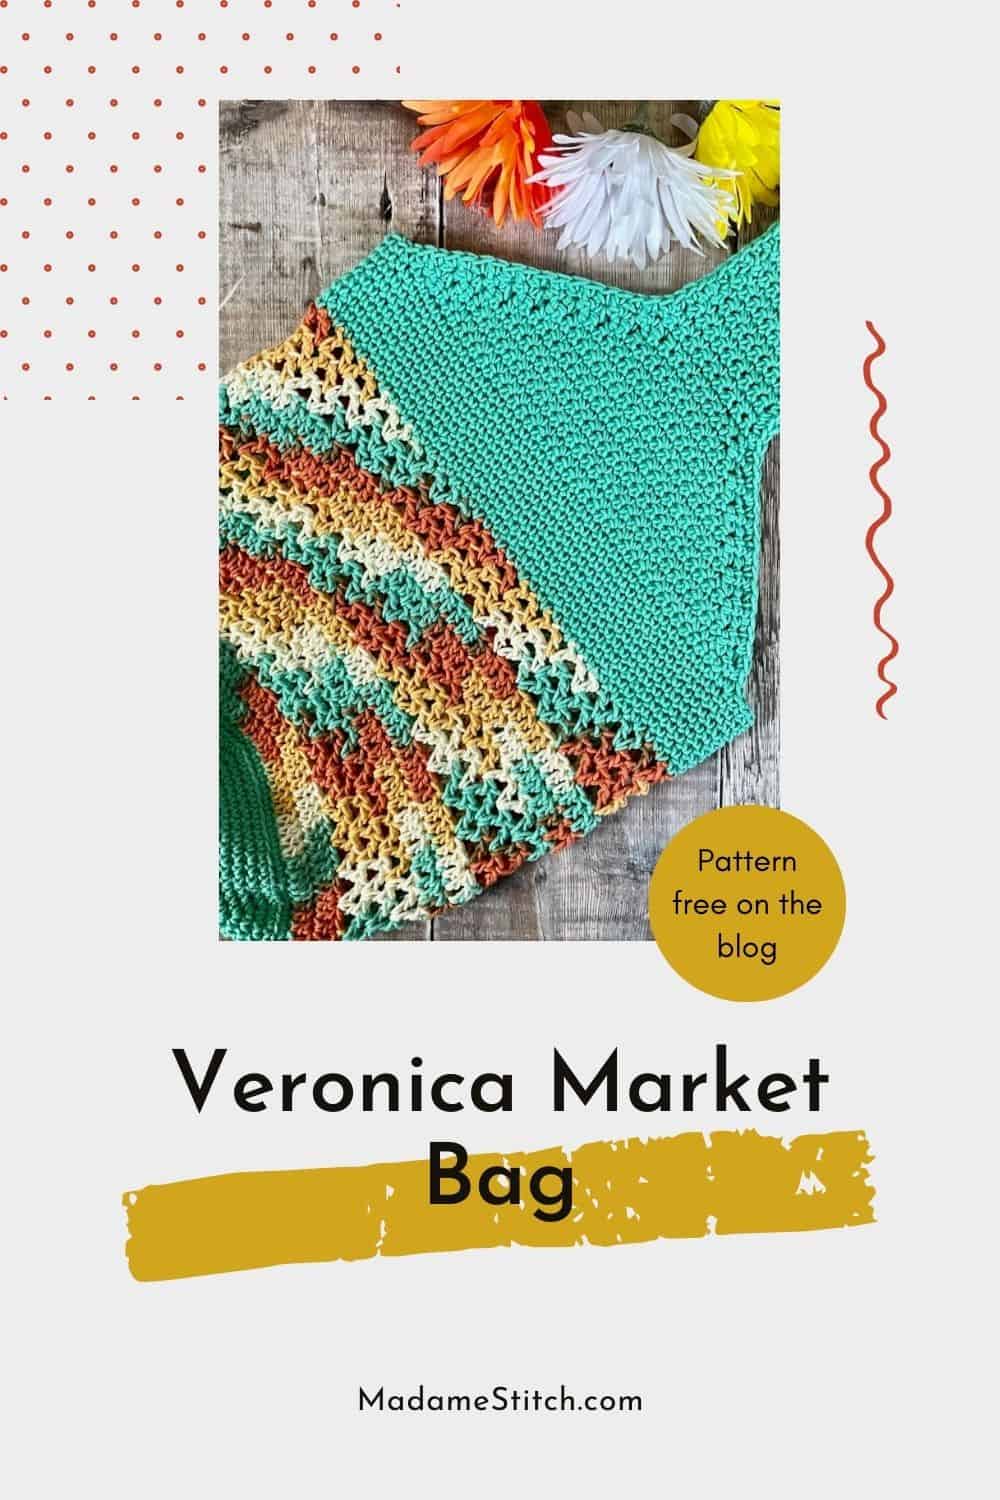
The Veronica Market Bag is the new version! You’ll find it in the PDF and I’ve included the pattern below – free on the blog!
Where can I get the V-Stitch Market Bag Pattern?
Since I’ve updated the pattern for the V-Stitch Market Bag, I’m offering the updated version here on the blog. The PDF includes both versions of the market bag so you can be confident that whatever cotton yarn you choose you’ll have the bag you want.
Find the PDF in all my shops.


Happy shopping!
The Veronica V-Stitch Market Bag – Update
Thank you for staying on this post and reading my patterns right here on the blog, without copy/pasting. When you stay here to follow the free version of my pattern, I am compensated for my time and energy. This is a great, free way to support a designer. If you would like to save this for later, bookmark the page to save it in your mobile browser.
Yarn
Color A – KnitPicks “Dishie” 100% cotton worsted weight (190 yds/100g) – 2 skeins of Verdigris #28098
Color B – KnitPicks “Dishie Multi” 100% cotton worsted weight (190 yds/100g) – 1 skein of Route 66 #28086
Hook
US size H-8 (5mm)
Tools
- Removable stitch marker
- Scissors
- Tapestry needle
Finished size: 15” high (from center of bottom to beginning of strap shaping) x 13” across (when laid flat)
Gauge: Rnds 1-8 of the bottom = 4” across
Skill level: Confident beginner
Abbreviations – US crochet terminology
- beg – beginning
- BLO – back loop only
- ch – chain
- dc – double crochet
- rep – repeat
- rnd(s) – rounds
- sc – single crochet
- st(s) – stitch(es)
- YO – yarn over
Special Stitches
Single crochet decrease (sc dec) – Insert hook in indicated st, YO and pull up loop, insert hook in next st, YO and pull up loop (3 loops on hook), YO and draw through all 3 loops.
V-stitch (V-st) = (dc, ch 1, dc) in same st. (Find the photo tutorial here.)
Written Instructions for the Veronica V-Stitch Market Bag
Thank you for staying on this post and reading my patterns right here on the blog, without copy/pasting. When you stay here to follow the free version of my pattern, I am compensated for my time and energy. This is a great, free way to support a designer. If you would like to save this for later, bookmark the page to save it in your mobile browser.
Pattern Notes
- The bottom of the bag is worked using the spiral method. At the end of each rnd, do not join and do not turn.
- For the bottom of the bag, place a removable marker in the first st of each rnd to keep track of where you are. After working the final rnd of the bottom, you may remove the marker.
- At the beginning of each dc rnd of the body, I work a ch-2. However, you may find that to be too short, in which case you may work a ch-3 instead.
- If you would like to make the strap longer, work more 10-st rows on each side of the strap before fastening off.
Pattern Instructions
Bottom of bag
Note: The bottom of the bag is worked in a spiral. At the end of each rnd, do not join and do not turn until instructed to do so.
With color A, ch 2.
Rnd 1: 6 sc in 2nd ch from hook. (6 sc)
Rnd 2: 2 sc in each st around. (12 sc)
Rnd 3: * 2 sc in next st, 1 sc in next st; rep from * around. (18 sc)
Rnd 4: * 2 sc in next st, 1 sc in each of next 2 sts; rep from * around. (24 sc)
Rnd 5: * 2 sc in next st, 1 sc in each of next 3 sts; rep from * around. (30 sc)
Continue increasing each rnd as established (adding 1 sc between “2 sc in next st” each rnd) until Rnd 16 is complete (96 sc). Join with slip st to beg st of Rnd 16, do not turn, remove marker. (End of spiral construction)
Rnd 17: Ch 1, sc BLO in each st around, join with slip st to beg st. (96 sc) Do not fasten off; continue to Body of Bag.
Body of bag
Note: The body of the bag is worked in alternating sections of solid dc and V-stitch.
Solid section
Rnd 1: With color B, ch 2 (counts as dc here and throughout), dc in next st and in each st around, join with slip st to top of beg ch-2, do not turn here and throughout Body of Bag. (96 dc)
Rnd 2: Ch 2, dc in next st and each st around, join with slip st to top of beg ch-2.
V-stitch section
Rnd 3: Ch 3 (counts as dc + ch 1 here and throughout), dc in same st (V-st made), * skip 2 sts, V-st in next st; rep from * around, join with slip st in 2nd ch of beg ch-3. (32 V-sts)
Rnd 4: Slip st into ch-1 sp of V-st, ch 3, dc in same st, V-st in next ch-1 sp and in each ch-1 sp around, join with slip st in 2nd ch of beg ch-3.
Rnd 5: Rep Rnd 4.
Solid section
Rnd 6: Ch 2 (counts as dc), dc in every ch-1 sp and dc around, join with slip st to top of beg ch-2. (96 dc)
Rnd 7: Ch 2, dc in next st and each st around, join with slip st to top of beg ch-2.
Rnds 8-12: Rep Rnds 3-7.
Rnds 13-15: Rep Rnds 3-5. At the end of Rnd 15, change to color A.
Rnd 16: With color A, ch 1, sc in the same st and in each st and ch-1 sp around, join with slip st to beg st. (96 sc)
Rnds 17-24: Rep Rnd 16; do not fasten off.
This is the end of working in the round. You will now work in rows to create the straps.
Strap
Note: The strap is worked in 2 pieces, beginning at the top of edge of the bag and working up to the center of the strap. Once both pieces are worked, the seam at the midpoint of the strap is sewn.
Side 1
Row 1: Continuing with color A, ch 1, sc in same st and in each of the next 41 sts, turn. (42 sc)
Row 2: Ch 1, sc in same st, sc dec, sc to the last 3 sts, sc dec, sc in last st, turn. (40 sc)
Rep Row 2 until 10 sts remain.
Work 23 more rows of sc, maintaining 10 sts per row.
Fasten off.
Side 2
Rotate the bag around to begin Side 2 in the unworked sts along the top edge of the body.
With RS of bag facing, count 6 sts to the left of the edge of Side 1 (these sts will be left unworked for now). Attach color A in the 7th st. Beginning with Row 1 of Side 1, follow the instructions to complete Side 2.
Note: There should be 6 unworked sts on either side of Row 1 for a total of 12 unworked sts along the top edge of the Body.
Join ends of strap together
Holding WS of each side together, use a slip st seam to join the ends of the strap. Work through back loops only (the ones adjacent to each other) to allow the seam to lay flat and prevent a bulky seam.
Strap Reinforcement
With RS of bag facing you, attach color A to one side of the strap. Ch 1 and work a sc in the end of every row and in each of the unworked sts between sides of the strap. Join with a slip st to the beg st. Fasten off. With RS of bag facing you, attach color A to the opposite side of the strap and work a round of sc the same as the 1st side. Fasten off.
Weave in all ends.
More market bags and totes from MadameStitch


3 Comments