A fun, easy mitered afghan square for the Memories Blanket
The Mitered Afghan Square is the first square released in the Memories Blanket Crochet Along. The pattern is free on the blog.

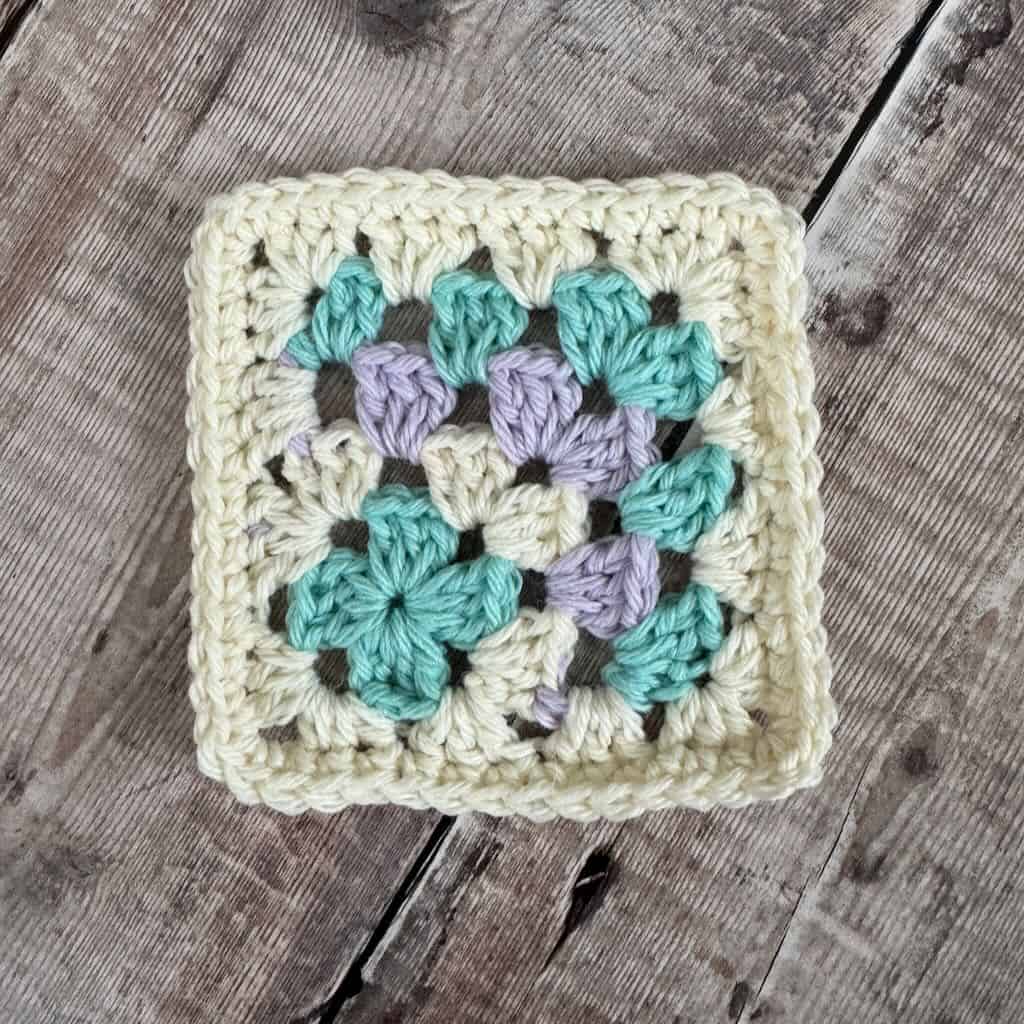
The Mitered Afghan Square for the Memories Blanket
Welcome to the Mitered Afghan Square, the first square of the Memories Blanket crochet along!
Note: This pattern will be forever free to view here on my blog. Bookmark this page to easily return when you have to step away.
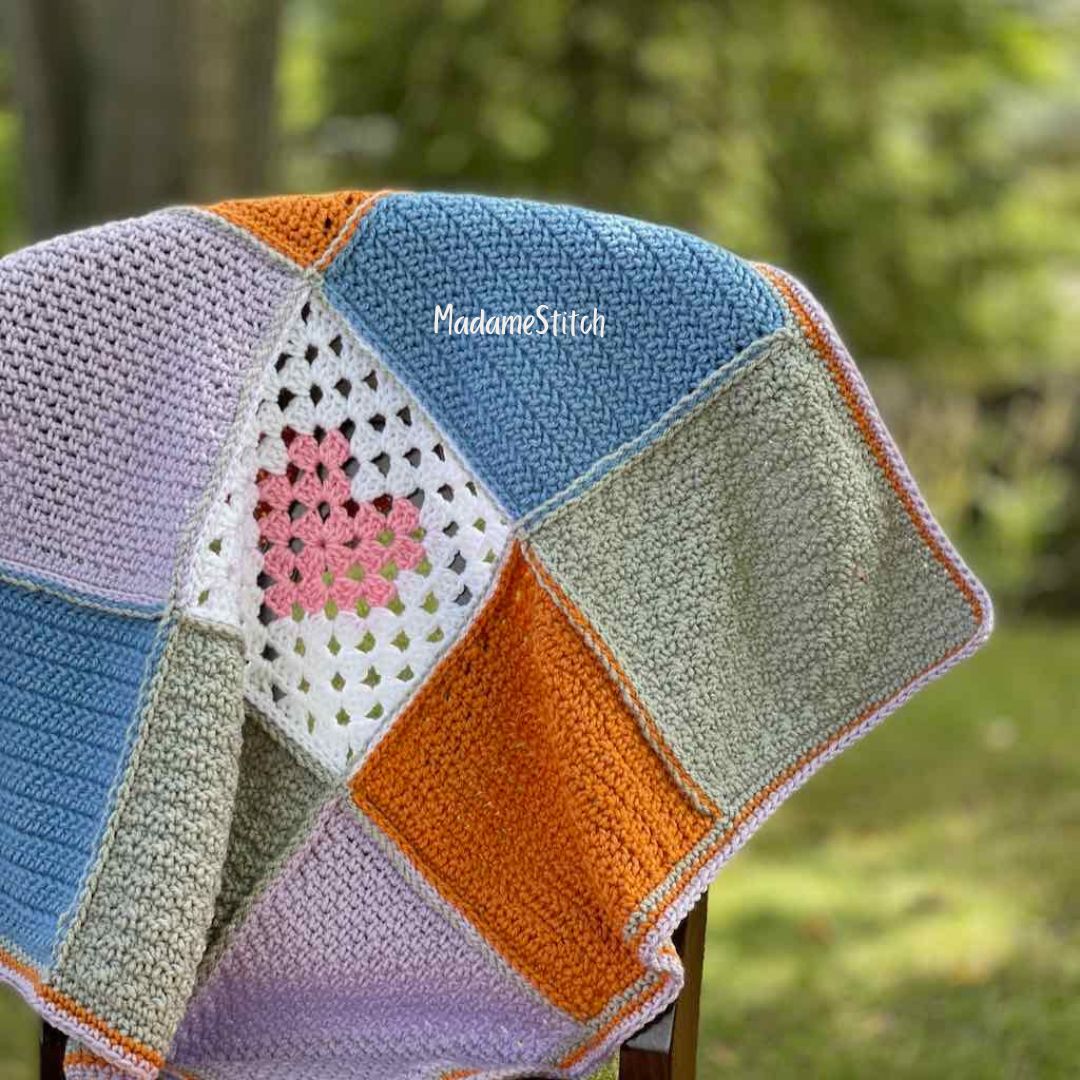
When Biz and I created the one-of-a-kind Memories Blanket, we drew inspiration from designs we had made in the recent past.
While none of my designs included a mitered afghan square, the granny stitch is everywhere. The mitered afghan square design lends itself beautifully to becoming an interesting granny square variation.
Memories Blanket Crochet Along
If you’ve decided to crochet the Memories Blanket in our free crochet along, you’re in for a treat!
The Memories Blanket is a way to capture and preserve the past through techniques that we’ve used in our designs and through leftover yarn from memorable projects. It’s the perfect vehicle for reducing your yarn stash and creating a cost-efficient yet beloved heirloom.
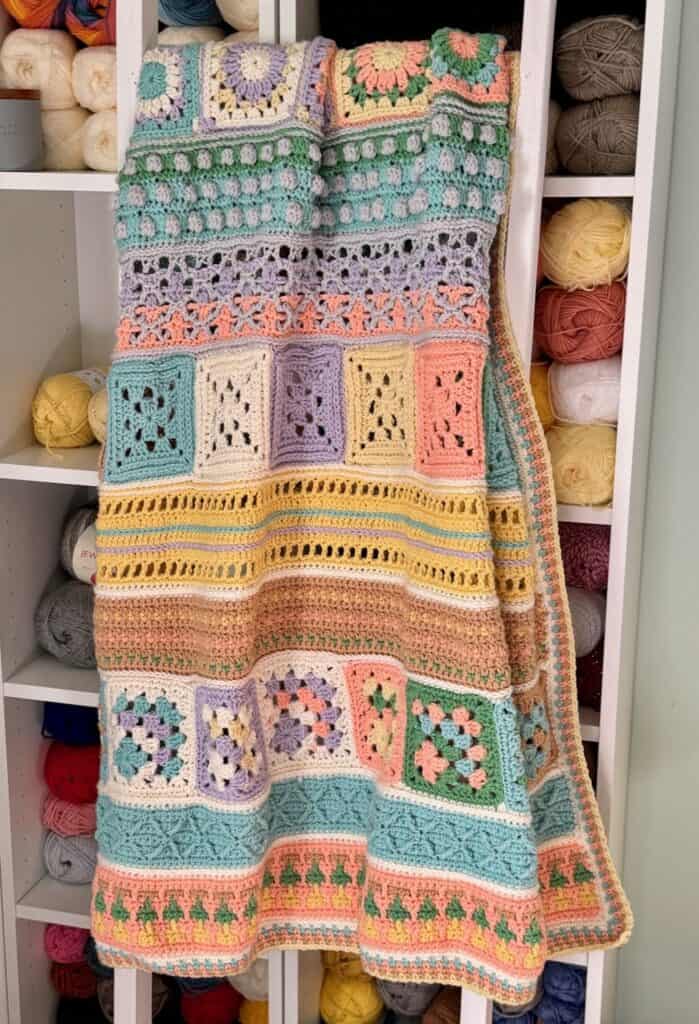
In this beautiful work of art you’ll find stitches, techniques and stitch patterns that will recall old favorites while presenting you with some that will help you grow as a crocheter.
The Memories Blanket isn’t a sampler blanket in the traditional sense. However, the sheer number and variety of stitches we’ve incorporated will add to your crochet toolbox for future use.
Never miss a thing in the crochet along. Sign up for email notifications below…
Purchase the Memories Blanket full pattern PDF in the version you like by clicking the appropriate image below.
What is a mitered afghan square?
A crochet mitered square is an afghan square worked diagonally from one corner of the square to the other. It differs from corner to corner because there are no decreases or increases to create the square shape.
Instead, by working rows out from the center square set up by the first round, it’s almost as if you’re working a half square out from the center. Starting with the beginning square, you’ll work in rows along 2 sides of the square.
Just about any stitch pattern can be adapted to the mitered afghan square construction. For this square, specifically designed for the Memories Blanket crochet along, the granny stitch takes center stage.
Design + Construction
I’ve always wanted to try a mitered afghan square because I love the artistic effects you can create with them. Have you ever seen a blanket that looks like an optical illusion? It was probably made with mitered squares.
This variation on a traditional granny square is easy to work and unique in its appearance. Round 1 is a complete square. Rounds 2-4 begin with yarn attached in a way that you work along just 2 sides of the square. Round 5 works all around the entire square to even out the edges. The entire square is finished off with a round of single crochets.
When working the square, pay close attention to where the yarn is attached to start a round and where the stitches are placed. It may seem awkward at first but, once you’ve worked the first square, the others are a breeze.
Note: Because of the construction of this granny mitered afghan square, the finished square will be a bit distorted because of the way the stitches pull. Blocking is necessary to get a true square shape.

The Free Pattern Starts Here
Materials
Yarn
This post contains affiliate links. That means, if you purchase something using the link, I receive a small commission. You don’t pay any extra and your information is safe. Thanks for supporting my small business.
Make this square in any worsted weight yarn you like, with yarn from your stash or some that you’ve purchased. If working from your stash, make sure the fiber content of your chosen yarn is compatible with what you’ll be using for the rest of the blanket so that your blanket is easy to care for when it’s finished.
I used Paintbox “Wool Mix Aran” for my blanket; Biz used Hobby Lobby’s “I Love This Yarn” for hers (see the details for both on the main CAL post).
How to make the mitered square for the Memories Blanket CAL
The square requires 3 colors, indicated in the pattern below by CA, CB, and CC. Choose the colors that fit your blanket’s color palette using the yarn you have on hand.
Make all 8 squares in the same color combination for a unified look. Or, choose a different 3-color combination for each square like I did. There is no wrong answer here!
Here’s the color combination I used for the sample, from left to right in the strip , listed in order CA, CB, CC:
- Caramel, Seafoam, White
- Seafoam, White, Rose
- White, Rose, Banana
- Rose White, Peach
- Banana, Peach, Spearmint
- Peach, Spearmint, Teal
- Spearmint, Teal, Caramel
- Teal, Caramel, Seafoam
Hook: US size H-8 (5mm)
Finished Size: Approx. 5″ across
Abbreviations – US crochet terminology
- beg – beginning
- ch – chain
- dc – double crochet
- hdc – half double crochet
- rnd(s) – round(s)
- sc – single crochet
- sp – space
- st(s) – stitch(es)
- YO – yarn over
Special Stitches
Granny stitch (GS) – 3 dc in the same st or sp
Stacked single crochet (STsc) – (This stitch is used at the beginning of a row or round to replace the traditional turning ch-3. It has the appearance of a dc.) – Insert hook in same st as loop, YO, draw up loop, YO, pull through 2 loops (bottom sc made), insert hook in left vertical bar of bottom sc, YO, draw up loop, YO, pull through 2 loops (top sc made).

Pattern Notes
- Do not turn after any rnd. Keep the right side facing at all times.
- A ch-3 may be substituted for the STsc at any time.
- Ch 1 at the beg of a rnd does not count as a st.
- STsc counts as a dc throughout.
- A MR may be substituted for the ch-4 ring. Be sure to tighten the ring at the end of Rnd 1.
- Make 8 of each square and join together in a strip using your favorite joining method. Used in the samples: Biz – whip stitch; Deb – mattress stitch.
Pattern Instructions
Make 8 squares for the Memories Blanket.
Note: Every round in this square is worked from the right side without turning.
With CA, ch 4, join with slip st to form ring.
Rnd 1: (STsc, 2 dc) in the ring, ch 3 (corner sp), [GS in the ring, ch 3] 3 times, join with slip st to beg st. Fasten off. (4 GS, 4 ch-3 corner sp)
Rnd 2: Attach CB to any corner sp, (STsc, 2 dc) in the same corner, ch 1, (GS, ch 2, GS) in the next corner, ch 1, GS in the next corner. Fasten off. (4 GS, 2 ch-1 sp, 1 ch-2 corner sp)
Rnd 3: Attach CC to the STsc of Rnd 2, STsc in the same st, ch 1, GS in the next ch-1 sp, ch 1, (GS, ch 2, GS) in the corner, ch 1, GS in the next ch-1 sp, ch 1, dc in the last st of Rnd 2. Fasten off. (2 dc, 4 GS, 4 ch-1 sp, 1 ch-2 corner sp)
Rnd 4: Attach CA to 1st ch-1 sp of Rnd 3, (STsc, 2 dc) in the same sp, ch 1, GS in the next ch-1 sp, ch 1, (GS, ch 2, GS) in the corner, ch 1, GS in the next ch-1 sp, ch 1, GS in the last ch-1 sp. Fasten off. (6 GS, 4 ch-1 sp, 1 ch-2 corner sp)
Note: In Rnd 5, the corners are worked with hdc instead of the typical dc to keep the square as straight as possible.
Rnd 5: Attach CB to the ch-2 corner sp of Rnd 4, ch 1, (3 hdc, ch 2, 3 hdc) in the same corner, [GS in the next ch-1 sp] twice, (3 hdc, ch 2, 3 hdc) in the last st of Rnd 4, GS around the last dc of Rnd 3, GS in the partial corner of Rnd 1, (3 hdc, ch 2, 3 hdc) in the next corner, GS in the next partial corner of Rnd 1, GS around STsc of Rnd 3, (3 hdc, ch 2, 3 hdc) in the 1st st of Rnd 4, [GS in the next ch-1 sp] twice, join with slip st to beg st. Do not fasten off. (24 hdc, 8 GS, 4 ch-2 corner sp)
Rnd 6: Ch 1, sc in the same st and in each st across to corner, [3 sc in the corner, sc in the next st and in each st across to the next corner sp] 3 times, 3 sc in the corner, sc in the next st and in each st across to beg st, join with slip st to beg st. (60 sc)
Fasten off and weave in ends.
Note: This square tends to pull to one corner. It will need to be blocked to a square shape. Join all 8 squares using your favorite joining method, keeping all right sides facing.
Sew the 8 squares into a strip for the Memories Blanket.
Use your favorite seaming method (Biz used whip stitching; Debbie used mattress stitch) to join the squares into a strip, keeping all right sides facing.
You’re now ready for Section 1 of the Memories Blanket which will be released on Thursday, February 22nd. Return to the main CAL post to find the link when it’s posted.


Good afternoon! Can you help me find the free download button? I’ve been through the post at least 3 times and keep missing it. Thanks!
Kim,
There are no free downloads for this CAL. All of the sections, including this square, are free to view on the blog.
You’ll need to purchase the PDF to get a downloadable copy.
-Debbie