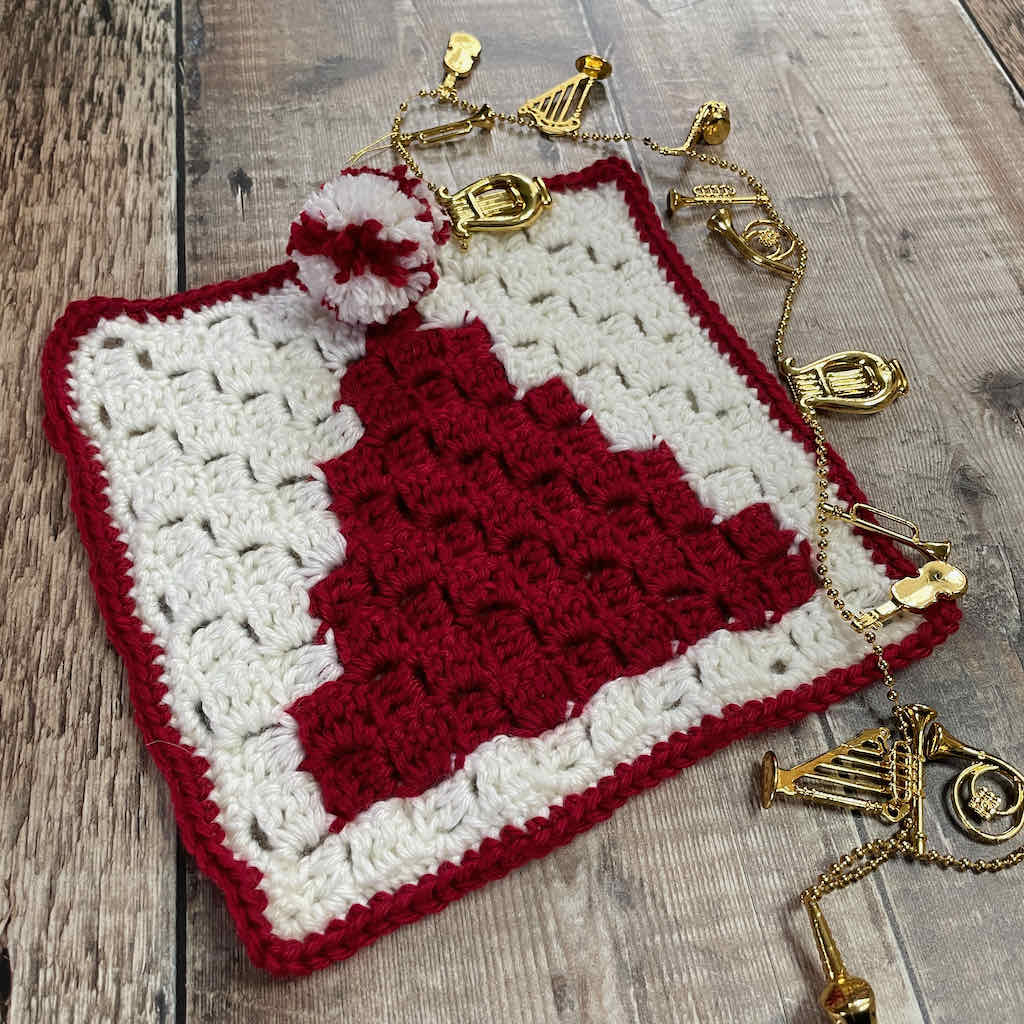
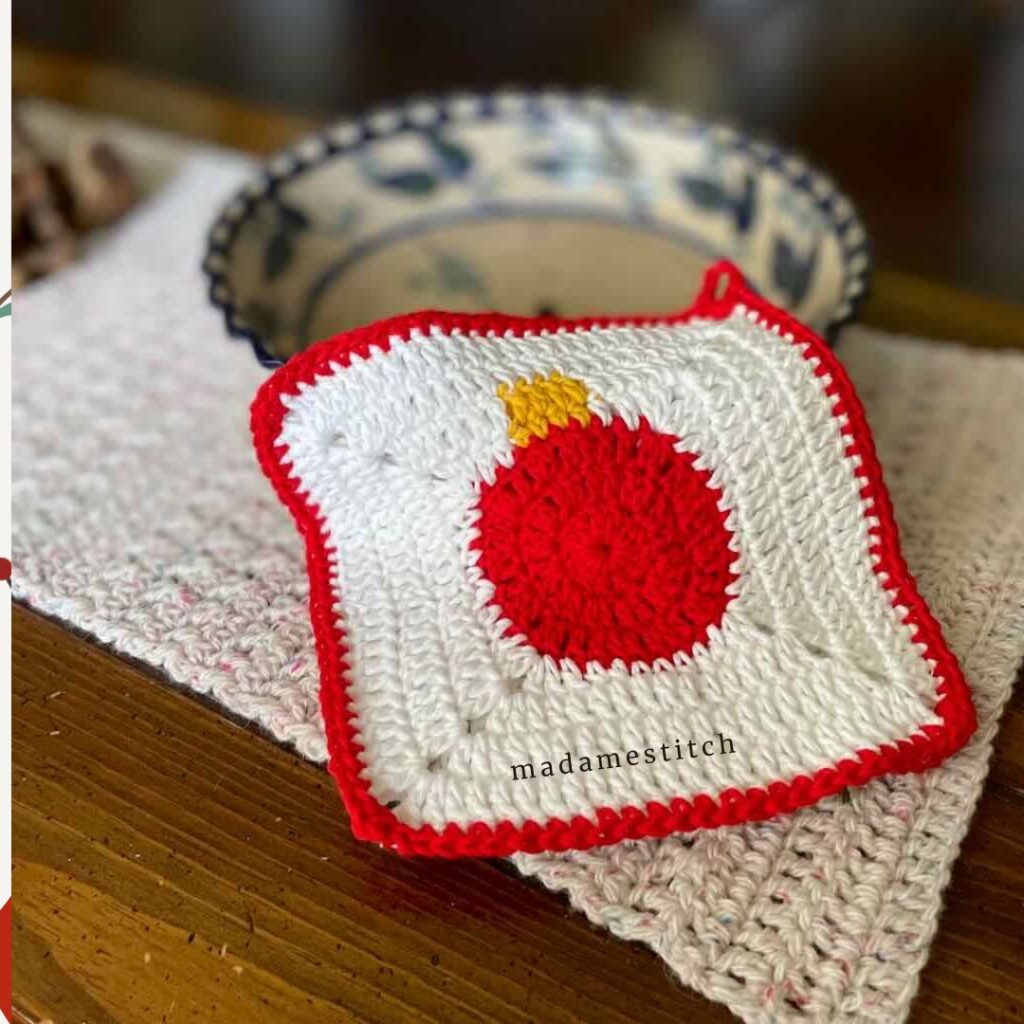
Christmas Crochet Blanket Square
Crochet this beautiful C2C blanket square for your next Christmas blanket.
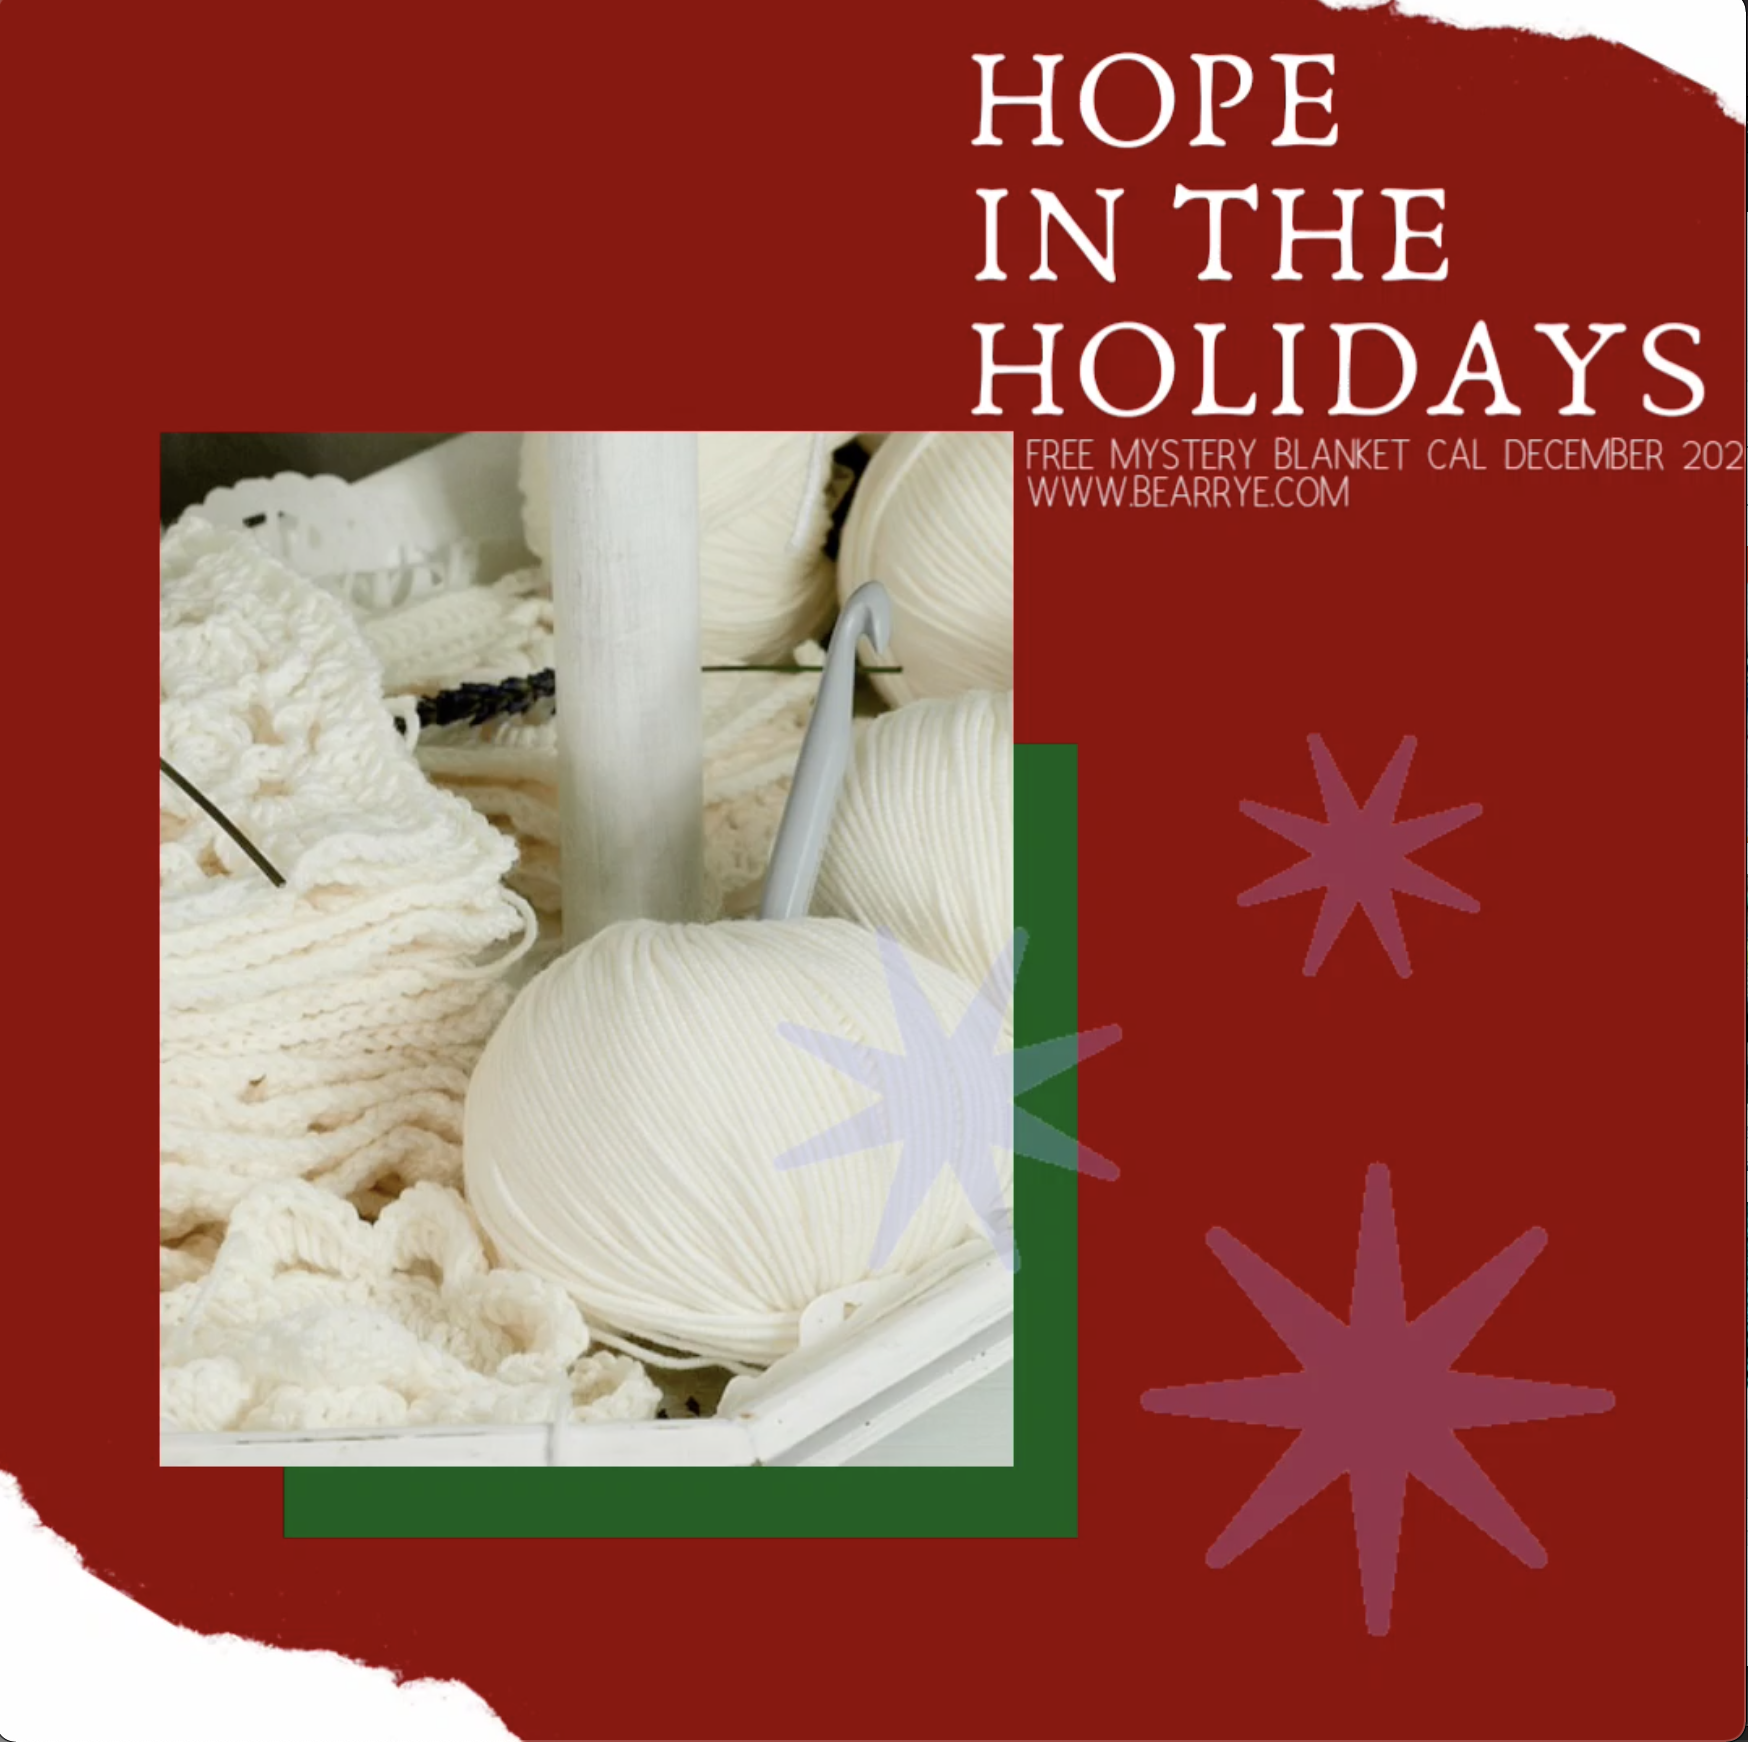
Thank you for joining me in the Hope in the Holidays Mystery Blanket CAL sponsored by Claire of Bear Rye Crochet! Details for the entire blanket and how to get all the squares are below…read on!
How to get ALL the squares…
23 crochet designers have come together to design unique, one-of-a-kind squares for this mystery CAL. Each day, a new square is released at Bear Rye Crochet. On the day the square is released, the pattern for the square is free with the provided code. You can visit the blog every day until Jan. 1 to get the patterns free.
Note: This CAL is over. Visit the link above to find access to all of the squares. Or, click the link below to buy the entire bundle.
If you don’t want that kind of commitment or, you forget to pop over, you can get the entire bundle for just $7. That’s 23 patterns, all in one place, for a crazy low price. Just click HERE to purchase the bundle.
Construction
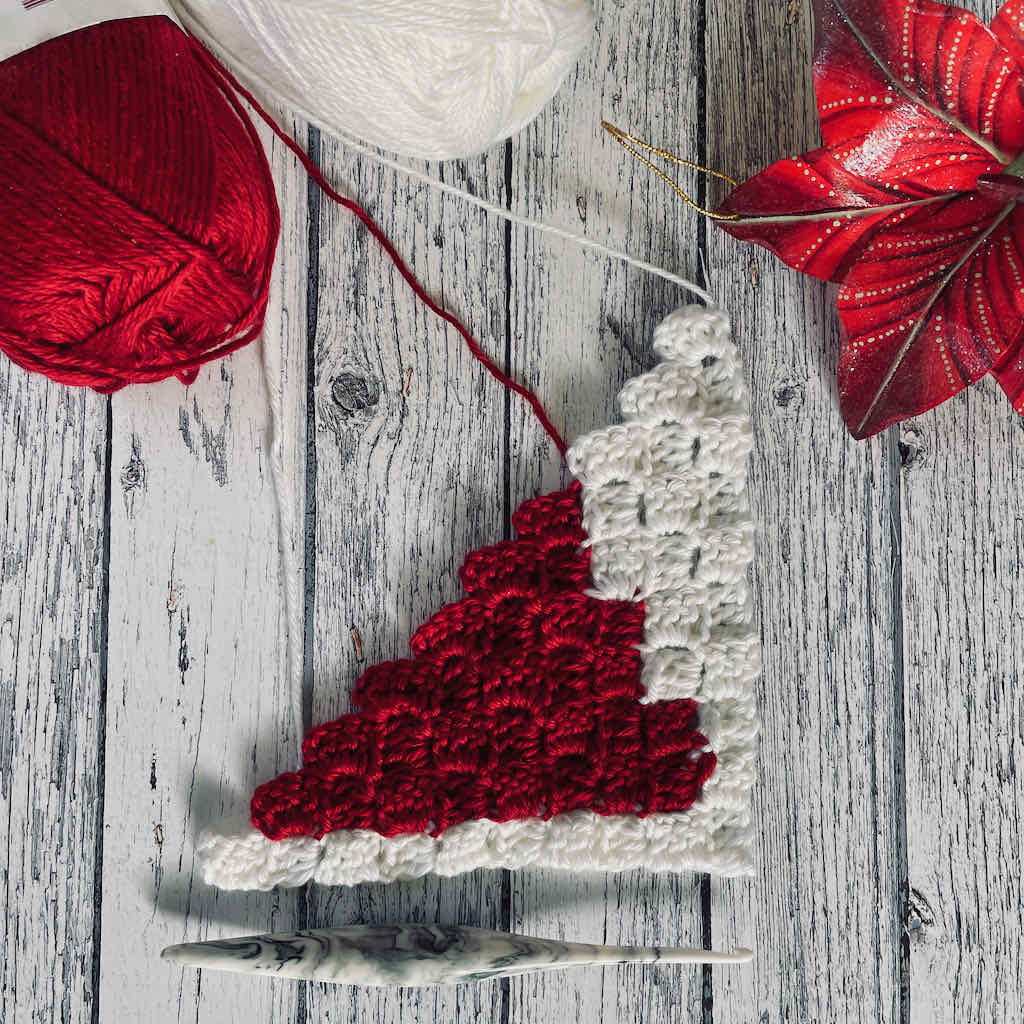
The Christmas Stocking Cap blanket square is crocheted using the C2C (corner to corner) crochet technique. That means all of the rows are worked on the diagonal. If you aren’t familiar with this technique and would like to learn it before making the square, check out this video by Make and Do Crew that explains the basics of the technique.
About the yarn
(Thank you to WeCrochet, a division of KnitPicks, for yarn support for this project.)
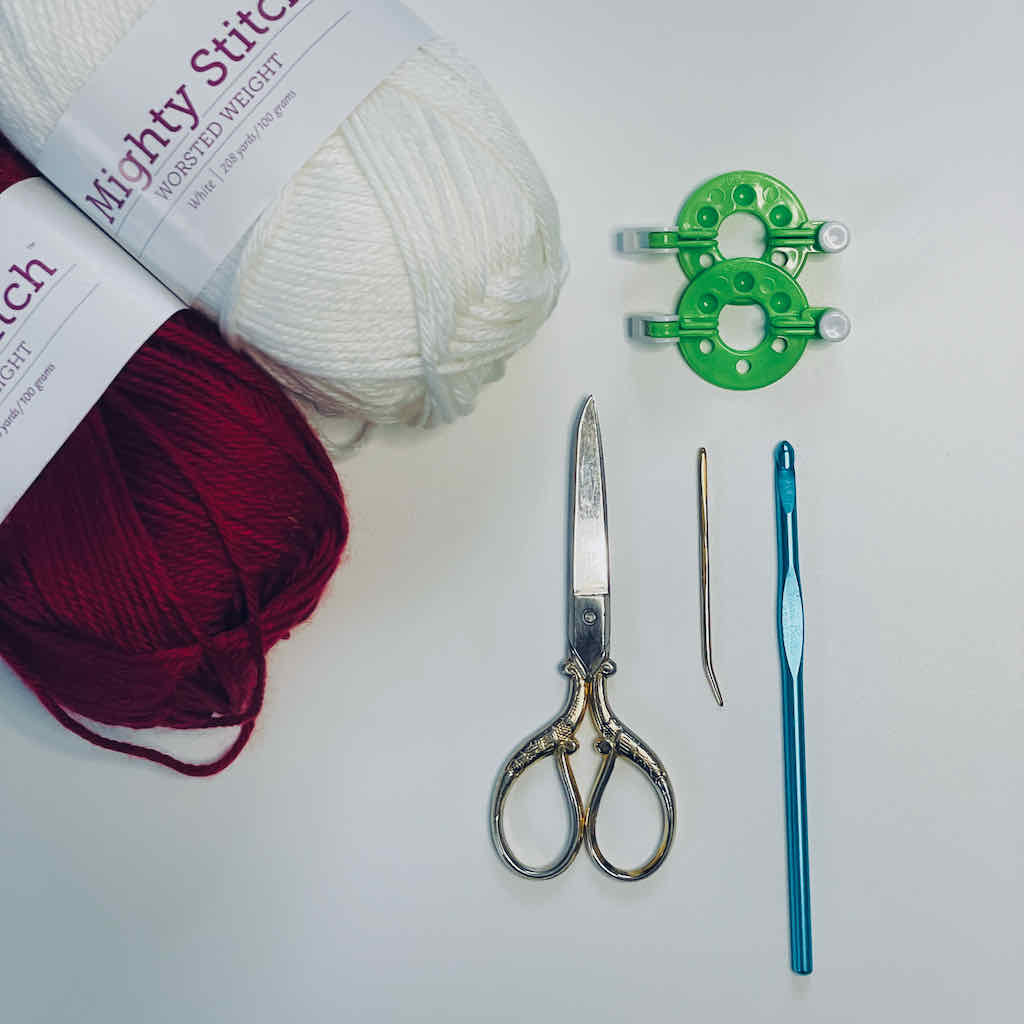
All of the squares for this CAL were designed and made with KnitPicks “Mighty Stitch” worsted weight yarn. The yarn is 80% acrylic, 20% super wash wool and has a beautiful sheen to it. Each skein is a generous 100g. The yarn is perfect for a blanket because of its durability and softness.
What you’ll need for this blanket square…
Thank you for staying on this post and reading my patterns right here on the blog, without copy/pasting. When you stay here to follow the free version of my pattern, I am compensated for my time and energy. This is a great, free way to support a designer. If you would like to save this for later, bookmark the page to save it in your mobile browser.
Yarn: KnitPicks “Mighty Stitch” worsted weight yarn; 1 skein each of White and Love Letter (Red)
Hook: US size H-8 (5mm)
Tools: 1″ pompom maker, tapestry needle for weaving in ends
Pattern notes
- Recommended: While working the square, you’ll need 2 separate working yarns in White. You can either take the second yarn from the outside of the skein (while pulling from the center at the same time). Or, you can wind a small bobbin of White before beginning.
- Be sure to keep all non-working yarn to the wrong side of the work. All color changes will be made on the wrong side as well.
- Odd rows are RS and even rows are WS.
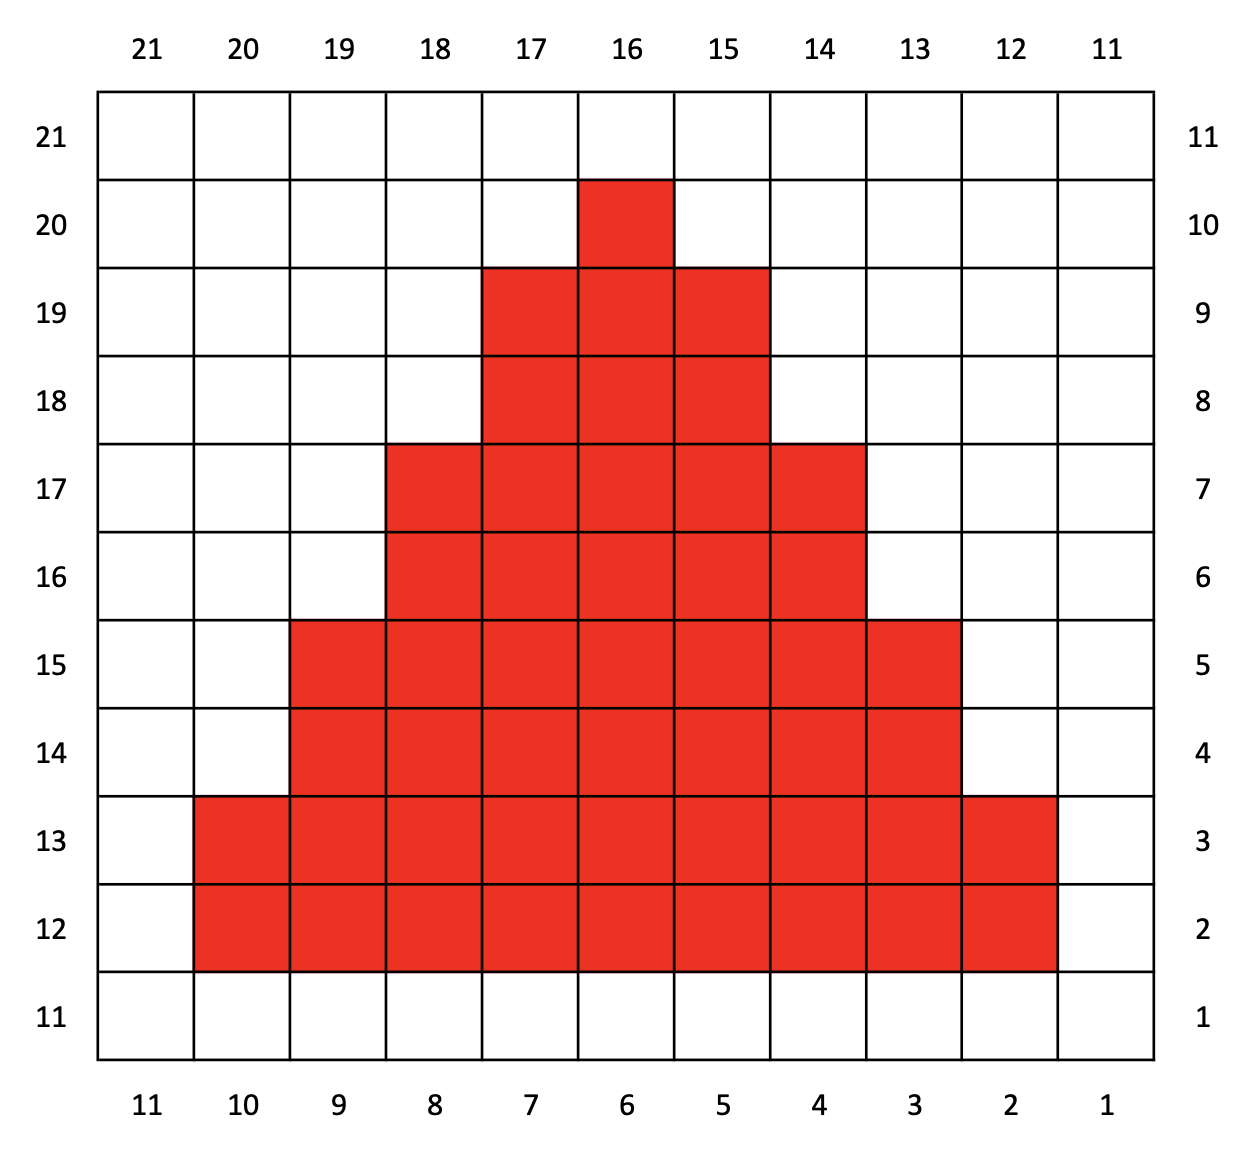
- C2C is worked on the diagonal in blocks of 3 dc and 3 ch. Start at square 1 on the chart, work the first block, then move on to row 2. Because row 2 is an even row (a WS row), it will be read from bottom to side ↗︎. Once row 2 is complete, move on to row 3 (a RS row, read from side to bottom ↙︎). Continue reading in this manner until you read row 21, the final block of the square.
Abbreviations – US crochet terminology
- beg – beginning
- ch – chain
- dc – double crochet
- rnd – round
- sc – single crochet
- st(s) – stitch(es)
- RS – right side
- WS – wrong side
Pattern Instructions for the Christmas Stocking Cap Blanket Square
Square
Using the C2C crochet technique, begin at 1 on the chart and follow the chart for the main part of the square. Increase at both ends of the row through row 11, then decrease at both ends from row 12 on. When you’ve completed the block for row 21, do not fasten off the white yarn. Proceed to the border.
Border
Note: The border is worked in sc. To ensure the sts are worked evenly around, work Rnd 1 as follows: Work 3 sc around each horizontal dc or ch-3. Work 1 sc in each vertical st. That means you’ll be working 6 sc over 2 blocks. Work 3 sc in the same st at each corner.
Rnd 1: Continuing with White yarn, sc around according to the instructions above, join with slip st to beg st. Do not turn.
Rnd 2: Change to Red yarn, ch 1, sc in same st and in each st around, working 3 sc in each corner, join with slip st to beg st.
Fasten off and weave in ends.
Make a pompom and sew it to the tip of the cap at the top of the square.
That’s it! I hope you enjoyed making this square for the #HopeintheHolidaysCAL. Be sure to use this hashtag on Instagram when you post pics of your work. Can’t wait to see them!
Would you like the PDF? Click on the button below – you’ll find it in my Ravelry shop!
More Christmas from MadameStitch

[mailerlite_form form_id=3]


One Comment