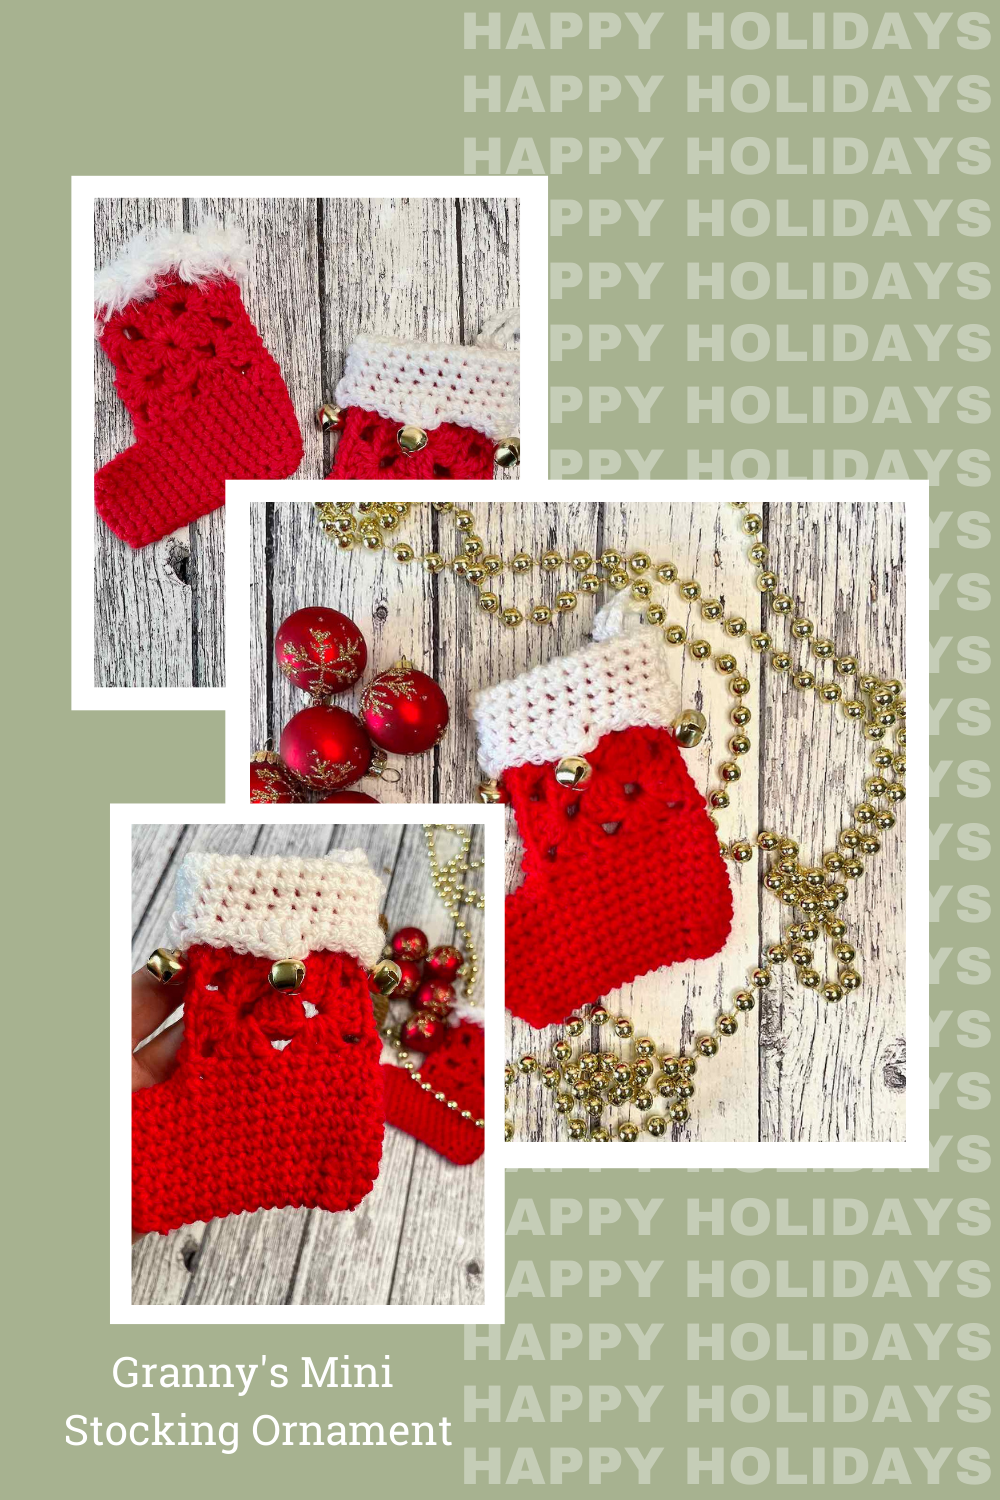
A mini granny square stocking ornament to brighten your tree
This year I’ll add a mini granny square stocking ornament to my beautiful Christmas tree…maybe more than one!

Thank you for staying on this post and reading my patterns right here on the blog, without copy/pasting. When you stay here to follow the free version of my pattern, I am compensated for my time and energy. This is a great, free way to support a designer. If you would like to save this for later, bookmark the page to save it in your mobile browser.
My family loves to decorate the Christmas tree. In fact, we have a yearly tradition that we look forward to with great anticipation.
We used to chop down a fresh tree from a local farm. Now, we pick up a freshly cut tree from our local water rescue organization as part of their annual fundraiser. After breakfast on the Saturday after Thanksgiving, we head out and pick up the perfect tree.
During the day, my husband gets it set up in the tree stand and strings the lights. After dinner, I put on our favorite Christmas music, serve up some egg nog and we begin carefully placing the ornaments on the tree.
Each one of our ornaments has a special meaning, collected from all over the world. I’m so excited to add this mini granny square stocking ornament to our ever growing collection.
[mailerlite_form form_id=11]Design + Construction
As far as I can tell, there isn’t anything a granny square can’t accomplish. It’s the little crochet engine that could!
If you follow my designs at all, or read my posts on Instagram, you’ll know I never miss an opportunity to include a granny square (or many) in my designs. This mini granny square stocking ornament is no exception.
I had a lot of fun designing this mini granny square stocking ornament. So many Christmas stockings made with granny squares try to fold the squares in odd ways and the resulting stocking never looks quite right.
So, instead of using squares for the entire ornament, I chose to use them just for the cuff and work a single crochet foot.
The foot is slightly shaped to look more like an actual heel and toe. And a fun top border is folded out to the right side with 4 points you can add tiny bells to.
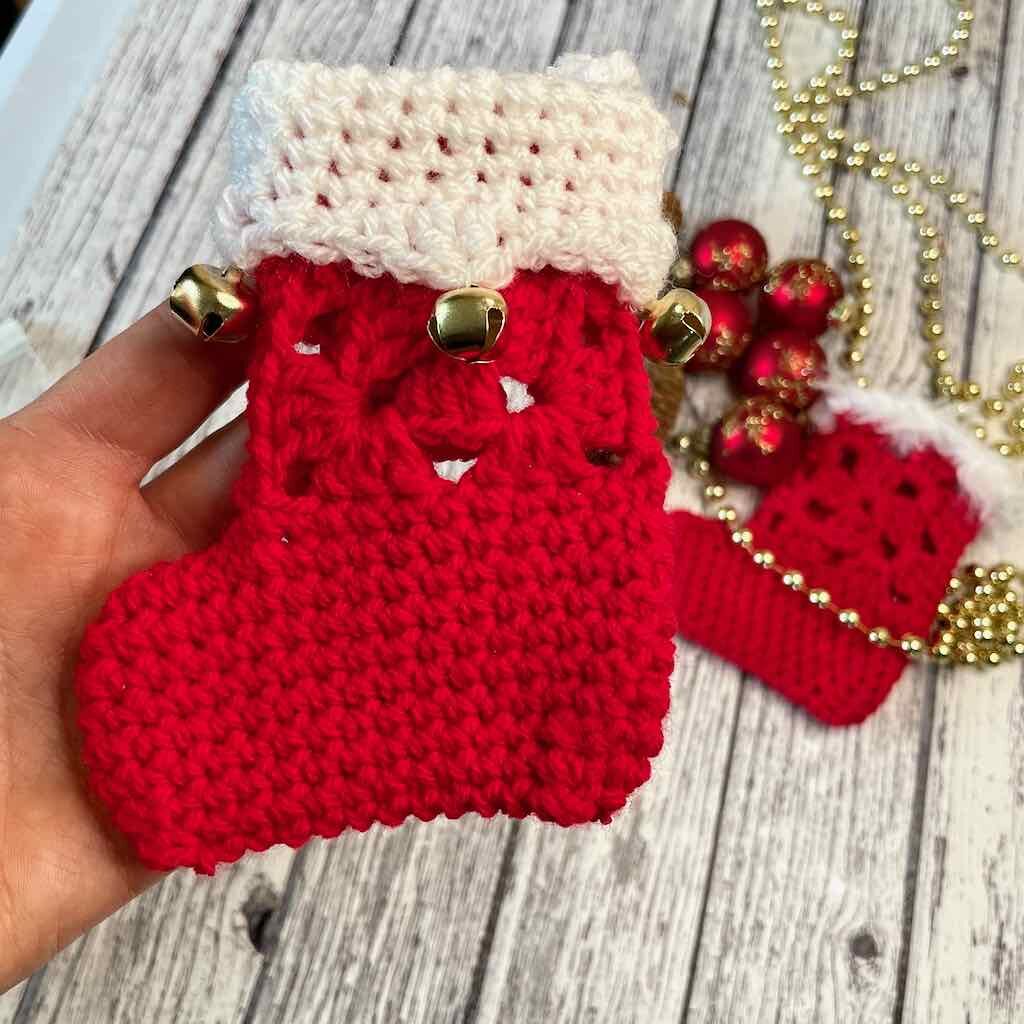
Do you have some faux fur in your stash? Instead of working the top border, you can substitute a faux fur border at the top for a fun look.
I chose DK weight yarn because I wanted this mini granny square stocking ornament to be lightweight so that it would hang without drooping on those delicate evergreen branches. A lighter weight yarn gives the little stocking a less clunky appearance.
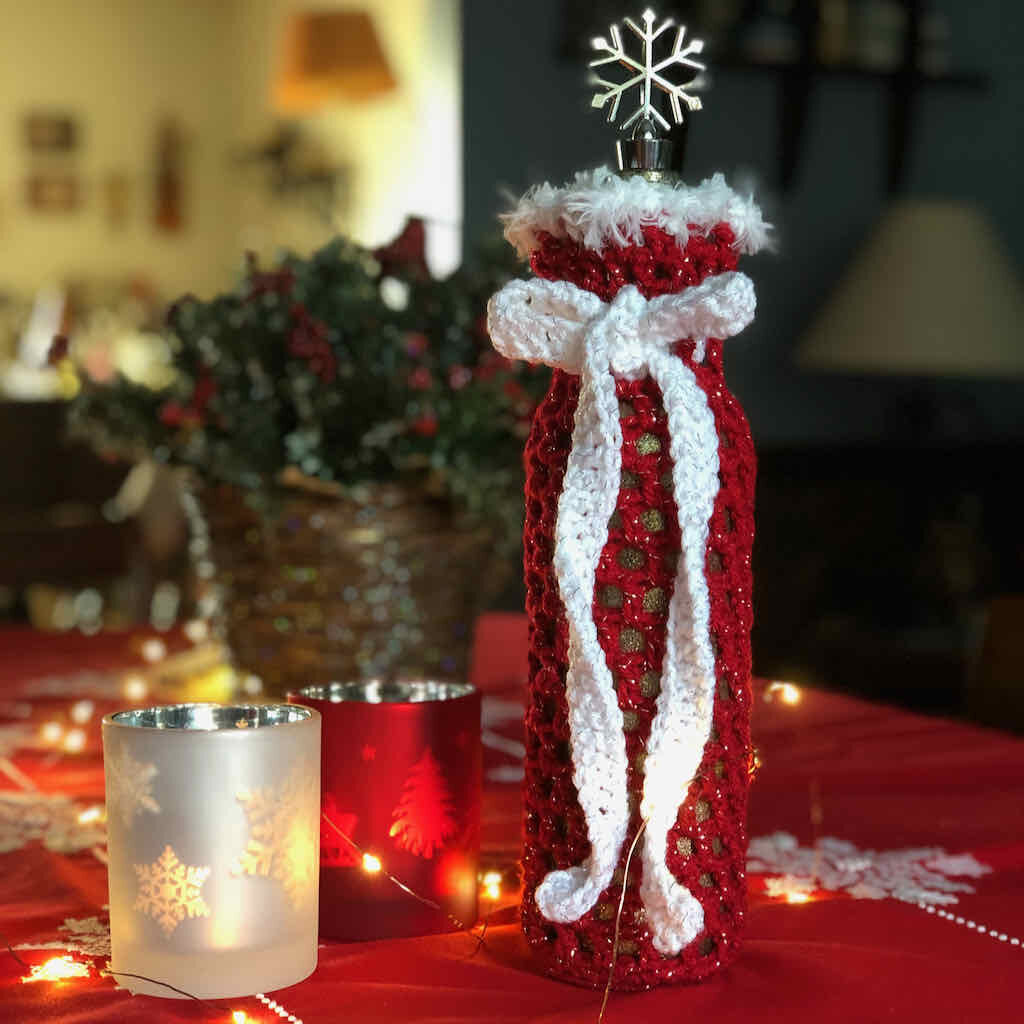
If you love to decorate for Christmas, you’ll love this wine bottle sleeve. Turn any empty wine bottle into an elegant table topper.
The crochet pattern is free on the blog!
Why buy the PDF for the mini granny square stocking ornament
- You’ll get a beautifully formatted, ad-free PDF.
- You won’t have to bookmark this page or keep refreshing it.
- You’ll have the pattern at hand whenever you need it.
Quick Christmas Makes blog hop
I’m thrilled to be one of the featured designers in the Quick Christmas Makes blog hop hosted by Fosbas Designs!
On Saturday, Nov. 19th, Granny’s Mini Stocking Ornament pattern will be available as a free PDF download for that day only. Click on the graphic below to find out how you can get your free copy of the pattern for this cute handmade Christmas ornament.

When you arrive back here, click on the graphic below to get your free PDF download.

This fabulous blog hop is almost over…have you missed the other free designs? Do you love a great bargain? All 32 featured designs are available in one beautiful inexpensive bundle. It’s only available until Nov. 22nd so hurry to get your copy today!

Mini Granny Square Stocking Ornament Crochet Pattern
Thank you for staying on this post and reading my patterns right here on the blog, without copy/pasting. When you stay here to follow the free version of my pattern, I am compensated for my time and energy. This is a great, free way to support a designer. If you would like to save this for later, bookmark the page to save it in your mobile browser.
Yarn
Stylecraft “Special DK” in 2 colors: The sample was made in Red (Cuff/Boot) and White (Top Border).
Any DK weight yarn (#3) will work. You’ll need approx. .4oz for the entire ornament.
Optional: The Top Border can be replaced by a round of white faux fur.
Hooks
US size G-6 (4mm) for the Cuff and Foot
US size H-8 (5mm) for the Top Border
Tools + Materials
4 tiny bells (optional)
Tapestry needle for weaving in ends and sewing seams
Finished Measurements
Square = 2.25” across; Foot = 3.75” w x 2” high
Abbreviations
beg – beginning
BLO – back loop only
ch – chain
dc – double crochet
rnd(s) – round(s)
sc – single crochet
sp – space
st(s) – stitch(es)
YO – yarn over
RS – right side
WS – wrong side
Special Stitches
Double crochet 2 together (dc2tog) – YO, insert hook in indicated st, YO, draw up loop, YO, pull through 2 loops (3 loops on hook), YO, insert hoop in next st, YO, draw up loop, YO, pull through 2 loops, YO, pull through 4 loops on hook.
Stacked single crochet (STsc) – (This stitch is used at the beginning of a row or round to replace the traditional turning ch-3. It has the appearance of a dc.) – Insert hook in same st as loop, YO, draw up loop, YO, pull through 2 loops (bottom sc made), insert hook in left vertical bar of bottom sc, YO, draw up loop, YO, pull through 2 loops (top sc made).

Pattern Notes
- Do not chain at the beginning of a round of the Foot or Top Border. It makes a cleaner, less bulky join and keeps the seam fairly vertical.
- Because there is no ‘ch 1’ at the beg of the rnd, pull the first loop of the round up a little higher so the first sc stands to its full height.
- The beg of the rnd in the Foot section shifts slightly to the right as subsequent rnds are worked. Rnd 9 compensates for that shift by working the first sc in the next st instead of the same st of the previous rnds.
- A ‘ch 3’ can be substituted for any STsc. They are interchangeable and the substitution will not affect the overall construction.
Written Instructions for the Mini Granny Square Stocking Ornament
Thank you for staying on this post and reading my patterns right here on the blog, without copy/pasting. When you stay here to follow the free version of my pattern, I am compensated for my time and energy. This is a great, free way to support a designer. If you would like to save this for later, bookmark the page to save it in your mobile browser.
Cuff
Granny square – make 2
With main color and smaller hook, ch 4. Join with slip st to form ring.
Rnd 1: STsc, 2 dc in ring, ch 3, (3 dc in ring, ch 3) 3 times, join with slip st to top of beg st. (4 3-dc groups, 4 ch-3 sp)
Rnd 2: Slip st to corner, (STsc, 2 dc, ch 3, 3 dc) in the corner, ch 1, [(3 dc, ch 3, 3 dc) in the next corner, ch 1] 3 times, join with slip st to beg st.
Fasten off and weave in ends.
Seaming
With WS facing each other, stitch squares together along one side. Use the whip stitch method, catching only the BLO of each square. Attach yarn in the middle ch of ch-3 sp and stitch across to the middle st of the next ch-3 sp. Sew the squares together on the opposite side in the same manner. This will form a ring with the 2 squares that becomes the cuff of the stocking.
Turn RS out and proceed to Foot.
Foot
Rnd 1: Attach yarn to the left of one seam (through the middle ch of the ch-3 corner), ch 1, sc in same st, sc in next ch, sc in each st and ch-1 sp to next seam, including the ch to the right of the seam (11 sc), ch 10, sc in ch to the left of the seam, in the next ch, and in each st and ch-1 to next seam (11 sc), join with slip st to beg st, do not turn. (22 sc, 10 ch)
Rnd 2: Sc in same st and in each st and ch around, join with slip st to beg st. (32 sc). Note: The first and last ch of the ‘ch 10’ may pull tight and be difficult to see. Be sure to work a sc in each of those sts.
Rnd 3: Sc in same st and in next 14 sts, sc inc twice, sc in next 15 sts, join with slip st to beg st. (34 sc)
Rnds 4-7: Sc in same st and in each st around, join with slip st to beg st. (34 sc)
Rnd 8: Sc in same st and in next st, sc dec, sc in next 11 sts, sc dec, sc in next 2 sts, sc dec, sc in next 11 sts, sc dec, join with slip st to beg st. (30 sc)
Rnd 9: Sc in next st, sc dec, sc in next 10 sts, sc dec, sc in next st, sc dec, sc in next 10 sts, sc dec, join with slip st to beg st. (26 sc)
Fasten off, leaving a tail long enough to sew bottom of Foot closed.
Turn WS out, sew bottom seam closed with a whip stitch, catching both loops of both sides in the seam. Sew top of Foot closed in the same way. Weave in ends. Continue to the Top Border with WS out.
Top Border
With the back seam facing, attach contrasting yarn to corner sp to the left of the seam.
Rnd 1: With larger hook, ch 1, sc in corner sp, sc in each st and ch-1 sp around, working a sc in the seam and on either side of each seam, join with slip st to beg st. (22 sc)
Rnds 2-5: Sc in same st and in each st around, join with slip st to beg st. (22 sc)
Rnd 6: Sc in next st and in each st around, join with slip st to beg st. (22 sc)
Rnd 7: Sc in the next 4 sts, ch 1, dc2tog, ch 1, (sc in next 3 sts, ch 1, dc2tog, ch 1) twice, sc in next 4 sts, ch 1, dc2tog, ch 1, join with slip st to beg st. (14 sc, 4 dc2tog)
Fold Top border to the RS between Rnds 5 & 6. Sew bells on all 4 points formed by dc2tog.
Hanger
With larger hook and contrasting color, ch 20. Fasten off the end. From the RS, at Row 1 of the Top Border, thread both ends of the ch through to the WS of the stocking. Tie securely and weave in ends.
Optional Faux Fur Edging
With the stocking RS out, attach faux fur to any st or sp. With larger hook, ch 1, sc in same st and in each st, ch-1 sp and seam around. Join with slip st to beg st. Fasten off and weave in ends.
Your mini granny square stocking ornament is now complete! Go hang it on the tree!
[mailerlite_form form_id=3]

6 Comments