The perfect crochet wine bottle tote for any occasion
Introducing the ultimate crochet wine bottle tote – where style meets functionality! Carry your wine with confidence with this chic and trendy accessory that not only protects your favorite wine but also adds a touch of elegance to any gathering. Cheers to keeping your spirits high and your wine secure!
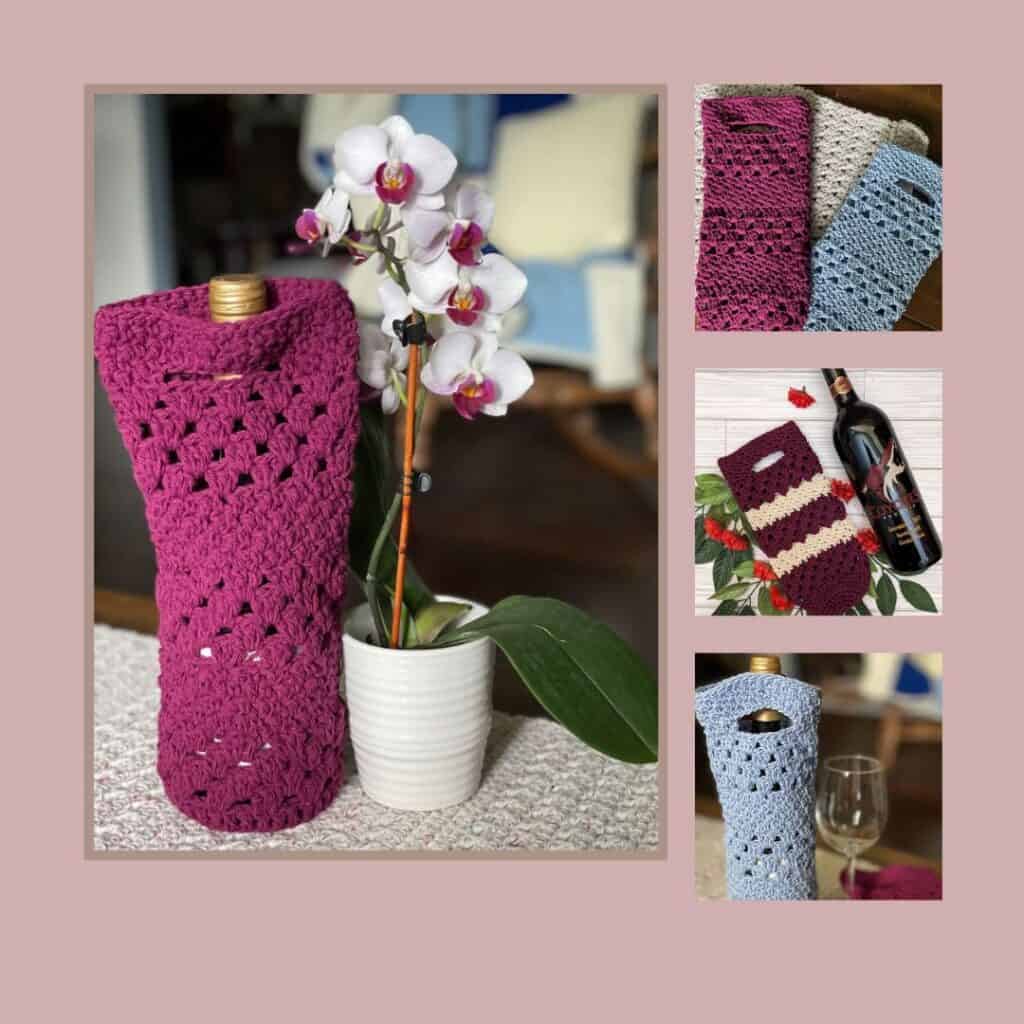
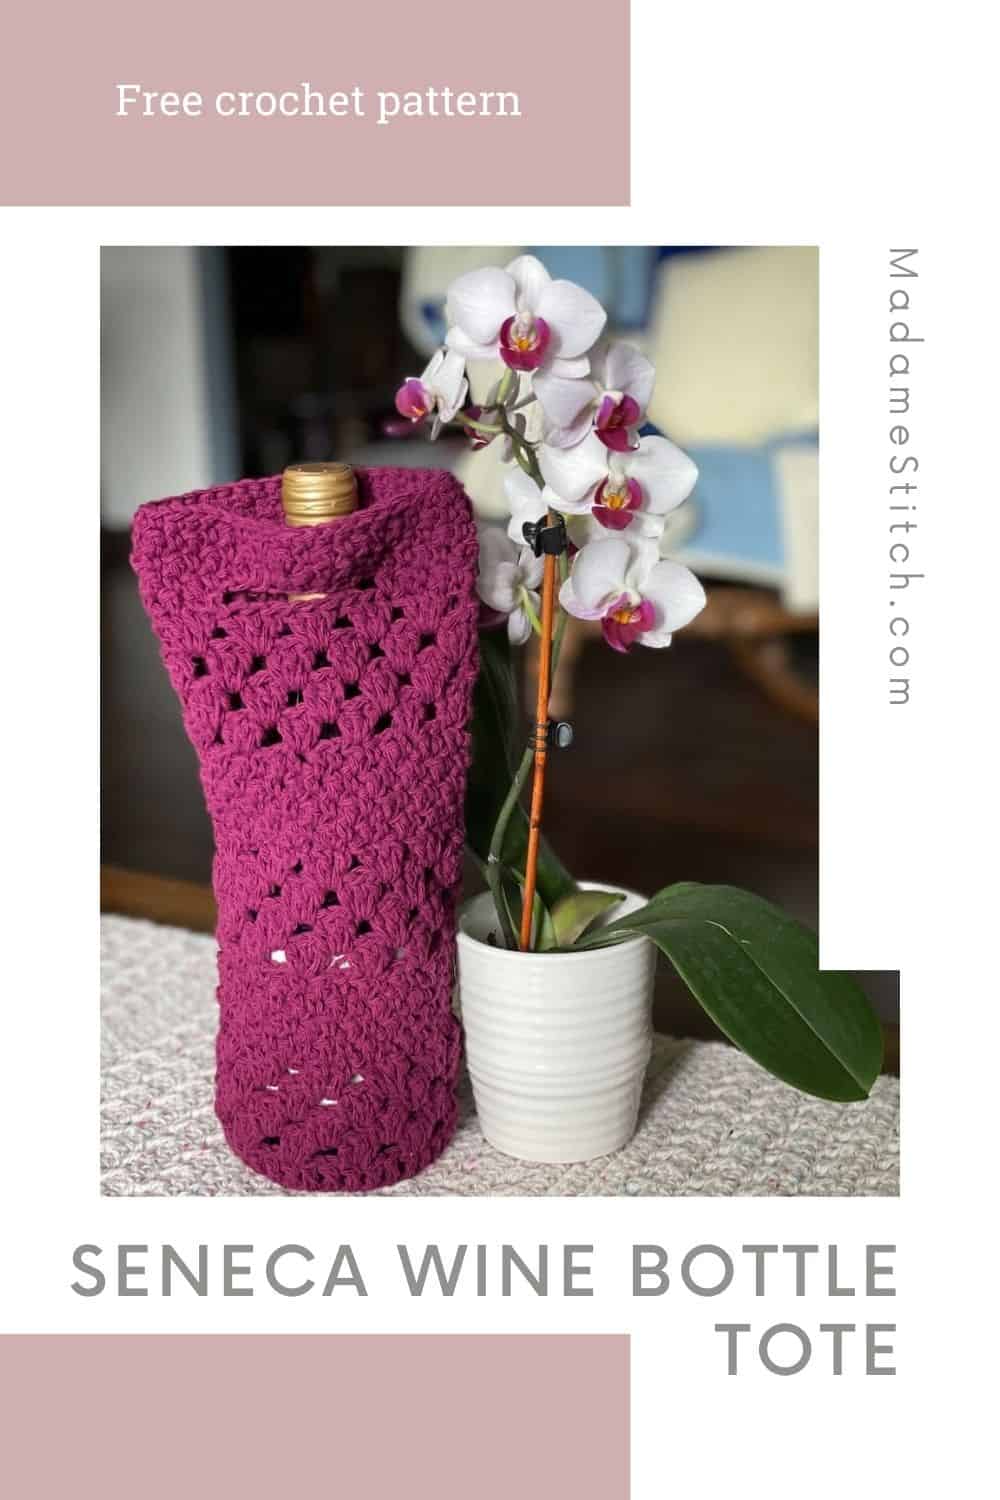
The Seneca Wine Bottle Tote Crochet Pattern
Every year in September, we join our best friends for a weekend of wine tasting in the Finger Lakes. We taste at our favorite wineries around Seneca and Keuka Lakes and bring home wines we know we’ll enjoy.
Occasionally, when we get together to play cards or share a meal together, we bring one of our favorite wines over to our friends’ home. Instead of simply carrying the bottle in, I love to use a special tote for the occasion.
The Seneca Wine Bottle Tote is a tribute to that annual trip to Seneca Lake. It provides a stylish mode of transportation for the wine and protects it until you arrive at your destination.
If you love crocheting items that are beautifully stylish while maintaining a measure of function, the Seneca Wine Bottle Tote should be your next project. And, while you’re working on it, go grab a great bottle of wine to put in it!
Design + Construction of the Seneca Wine Bottle Tote
The design of this wine bottle tote combines 2 stitches – the seed stitch and the granny stitch. Each stitch has its own unique visual features, combining the two in alternating sections gives the wine bottle tote a pretty texture.
The bottom of the wine bottle tote is a flat circle worked in continuous rounds. While the tote will handle most wine bottle sizes and shapes, the flat circle bottom makes it easy to adjust for carrying larger bottles.
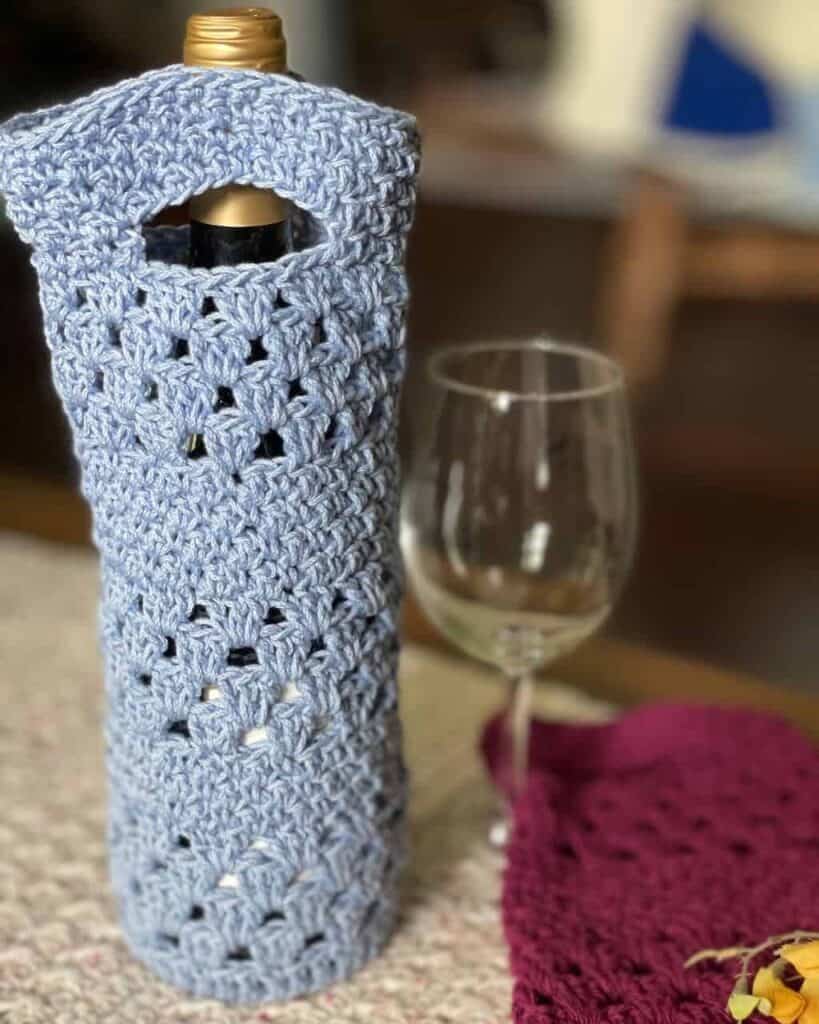
The body of the wine bottle tote alternates sections of granny stitch and seed stitch, creating both openwork and textured sections. The handle opening at the top is a part of the final seed stitch section.
If you’re looking for a project that’s quick, easy, and beginner friendly, this wine bottle tote is for you. It’s the kind of project that can be made in an evening or weekend so you can start using it almost immediately!

The Yarn
This post contains affiliate links. That means, if you purchase something using the link, I receive a small commission. You don’t pay any extra and your information is safe. Thanks for supporting my small business.
When I decided to make this wine bottle tote, I found a skein of Paintbox Yarns “Recycled Cotton Worsted” I already had in my stash that was perfect for what I had in mind. The color “Jam” reminded me of red wine and the yarn was sturdy enough to protect the wine bottle.
The wine bottle tote works best in a worsted weight cotton because this fiber is less likely to overly stretch with the weight of the bottle. Any yarn with a lot of inherent stretch, like animal fibers, would cause the tote to drastically sag under the weight of the wine.
[mailerlite_form form_id=1]I made a 2nd wine bottle tote in Lion Brand “24/7 Cotton” in blue that produced a slightly smaller tote. Even when the yarn is in the same yarn category and has the same fiber content, the finished size can be slightly different. It doesn’t adversely affect the outcome and you’ll still have plenty of yarn to complete the project.
This is a great stash-busting project. It’s very likely you have plenty of worsted weight cotton yarn so, before you buy more (unless you really want to), check out what you already have. If you’re willing to use multiple colors, you can create a unique look.
The pattern is free here. So, why do I need to buy the PDF?
Every crocheter has her own style of setting up a project. Some are happy just working from the free pattern here on the blog.
But, if you prefer to work from a beautifully formatted, ad-free PDF that you can print out to make notes on or add to your favorite mobile device, purchasing the PDF is the way to go.
It’s available in all my shops. Simply click on the button for your favorite shop and you’re on you way!


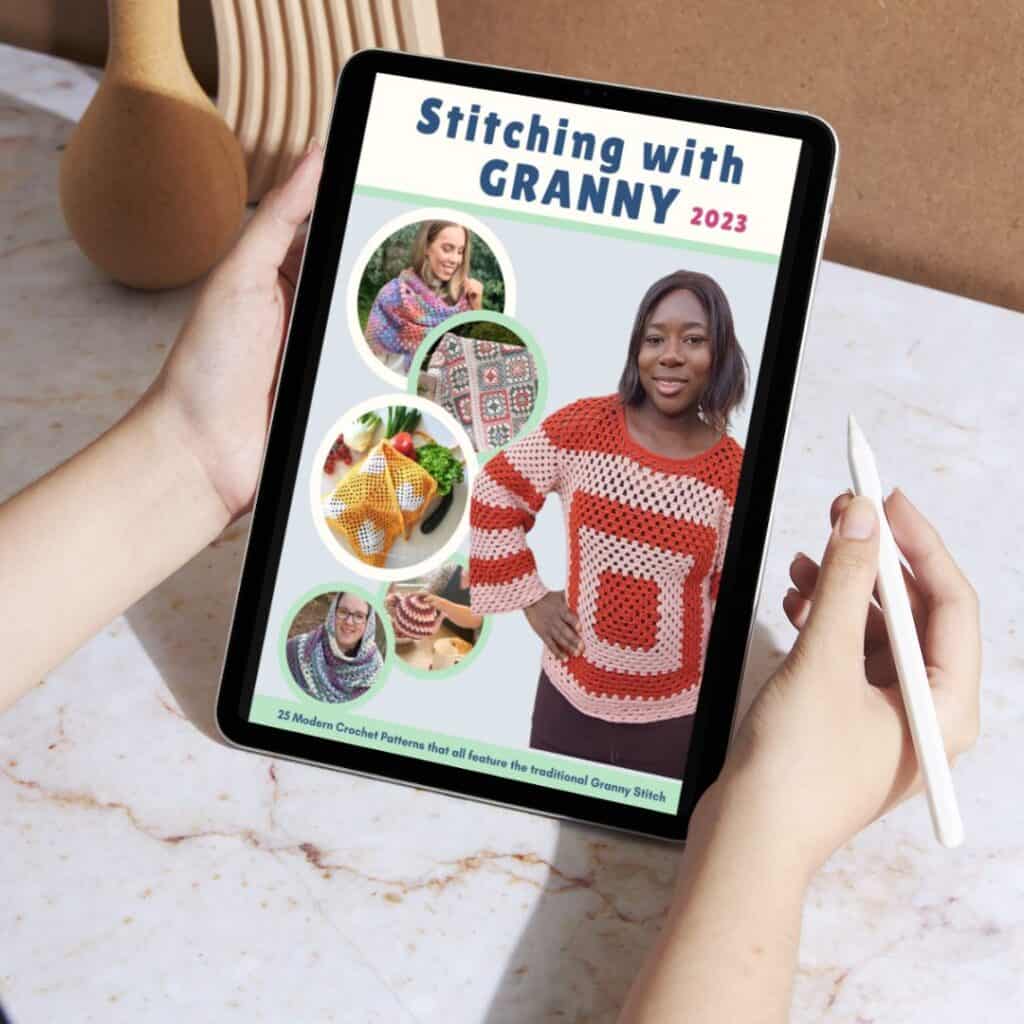
Stitching with Granny 2023 Blog Hop
The Stitching with Granny event, hosted by Cosy Rosie UK, is back for a 3rd year and you will find patterns featuring the granny stitch AND variations of it.
I’m so excited to be featured in this event once again. I absolutely love the granny square and granny stitch so this event is perfect.
On Thursday, August 10, the Seneca Wine Bottle Tote is the featured design. On that day, beginning at 8am EDT, you can purchase the PDF for 50% off. Here’s how to get your coupon code:
The coupon code is listed on the event post. Click on the graphic below to visit the event post. Make note of the code while you’re there.
Once you return here, click on the graphic below. The coupon code for 50% off is only good in my Ravelry shop until 8am EDT Friday, August 11. Use the code at checkout to get your discount.
All of the designs featured in the Stitching with Granny event are available in an inexpensive bundle you can purchase right now. Visit the sales page and you’ll get a sneak peek at all the beautiful designs.
Once this event is over, the bundle goes away forever. Grab your copy today!

The Seneca Wine Bottle Tote crochet pattern starts here!
Thank you for staying on this post and reading my patterns right here on the blog, without copy/pasting. When you stay here to follow the free version of my pattern, I am compensated for my time and energy. This is a great, free way to support a designer. If you would like to save this for later, bookmark the page to save it in your mobile browser.
Yarn
Any worsted weight cotton yarn will work, you’ll need approx. 130yd for one tote.
For the samples:
Paintbox Yarns “Recycled Cotton Worsted” (3.5 oz/169 yd; 100 g/155 m) Color #1305 – Jam – 1 skein
Lion Brand “24/7 Cotton” worsted weight (3.5oz/186yd; 100g/170m) Color #1071 – Sky – 1 skein
Hook
US size H-8 (5mm)
Finished size: Approx. 11.5″ tall x 5.5″ across when laid flat
Gauge: The bottom of the tote measures approx. 3″ across
Skill level: Confident beginner
Abbreviations – US crochet terminology
- beg – beginning
- BLO – back loop only
- ch – chain
- dc – double crochet
- inc – increase (work 2 of the indicated st in the same st)
- rep – repeat
- sc – single crochet
- sk – skip
- st(s) – stitch(es)
- YO – yarn over
Special Stitches
Granny Stitch (GS) – 3 dc in the same st
Seed Stitch – Single crochets alternate with double crochets across the row. In subsequent rows, double crochets are worked in the single crochets and the single crochets are worked in double crochets for a bumpy texture.
Stacked single crochet (STsc) – (This stitch is used at the beginning of a row or round to replace the traditional turning ch-3. It has the appearance of a dc.) – Insert hook in same st as loop, YO, draw up loop, YO, pull through 2 loops (bottom sc made), insert hook in left vertical bar of bottom sc, YO, draw up loop, YO, pull through 2 loops (top sc made).

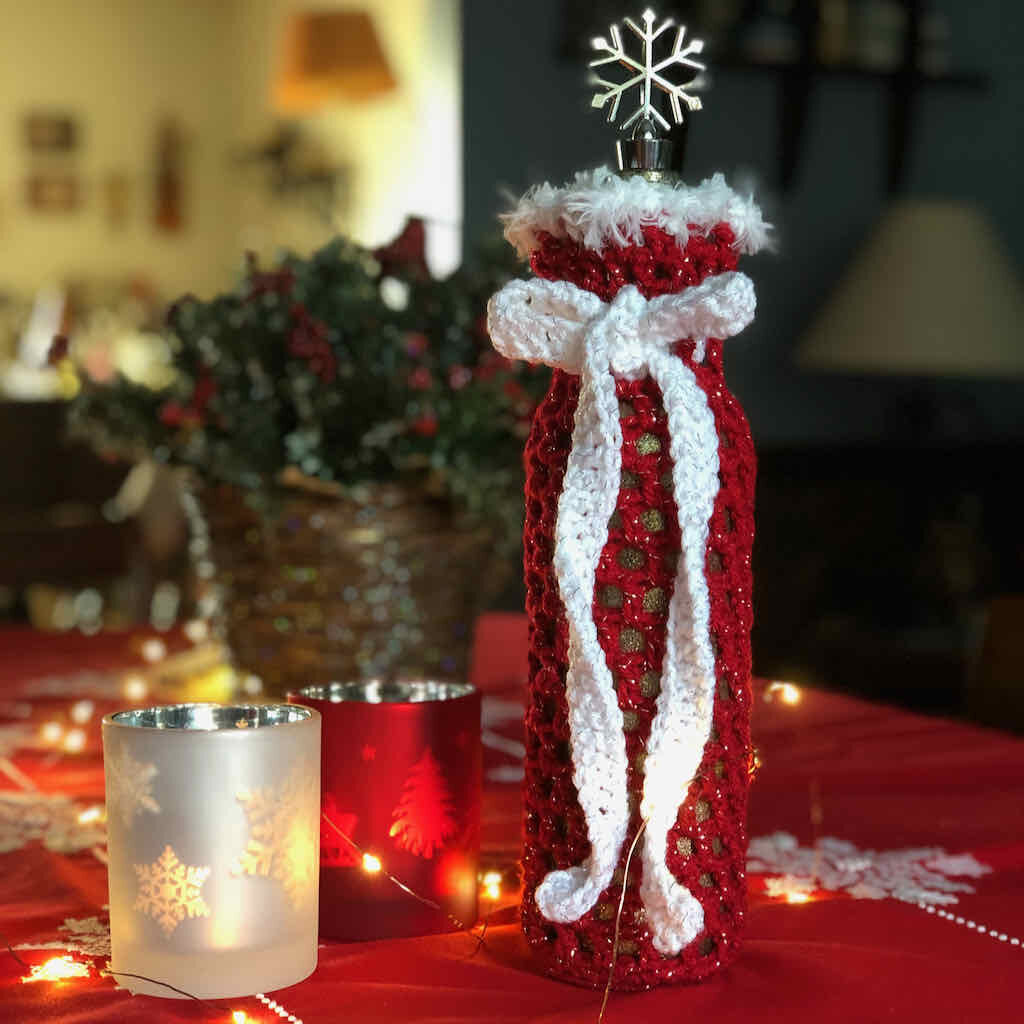
Dress up your wine bottle for Christmas with this beautiful wine bottle sleeve.
Written Instructions for the Seneca Wine Bottle Tote
Thank you for staying on this post and reading my patterns right here on the blog, without copy/pasting. When you stay here to follow the free version of my pattern, I am compensated for my time and energy. This is a great, free way to support a designer. If you would like to save this for later, bookmark the page to save it in your mobile browser.
Pattern Notes
- Do not turn after any round.
- A ch-1 at the beg of a rnd does not count as a st.
- A ch-2 or -3 may be substituted for the STsc throughout. If you do, it counts as a dc and should be worked into at the end of the row.
- The stitch count is indicated in places where it changes. When it stays the same, no stitch count will be listed.
Pattern Instructions
Bottom
Note: The bottom of the tote is worked in continuous rounds with no join. Use a stitch marker to indicate the 1st st of each rnd. Move it up with each new rnd.
Rnd 1: Ch 2, 6 sc in 2nd ch from hook. (6 sc)
Rnd 2: Sc inc in each st around. (12 sc)
Rnd 3: [Sc inc, sc in next st] around. (18 sc)
Rnd 4: [Sc inc, sc in next 2 sts] around. (24 sc)
Rnd 5: [Sc inc, sc in next 3 sts] around. (30 sc)
Rnd 6: [Sc inc, sc in next 4 sts] around. (36 sc)
At the end of Rnd 6, join with a slip st to the beg st. Remove the marker and proceed to Body.
Body
Note: From this point forward, join after every rnd.
Rnd 1: Ch 1, sc BLO in next st and in each st around, join with slip st to beg st. (36 sc)
Rnd 2: STsc, dc in next st and in each st around, join with slip st to beg st. (36 dc)
Granny Stitch
Rnd 3: (STsc, 2 dc) in same st, [sk 2 sts, GS in next st] around, join with slip st to beg st. (12 GS)
Rnd 4: STsc in the sp to the right of the hook (this GS will be completed at the end of the rnd), GS in the next sp and in each sp around to beg sp, 2 dc in beg sp to complete the GS, join with slip st to beg st.
Rnd 5: (STsc, 2 dc) in same sp, GS in next sp and in each sp around, join with slip st to beg st.
Rnd 6: Rep Rnd 4.
Seed Stitch
Rnd 7: Ch 1, sc in same st, dc in next st, [sc in next st, dc in next st] around, join with slip st to beg st. (18 sc, 18 dc)
Rnd 8: STsc, sc in next st, [dc in next st, sc in next st] around, join with slip st to beg st.
Rnd 9: Rep Rnd 7.
Rnd 10: Rep Rnd 8.
To complete the Body
Rnds 11-18: Rep Rnds 3-10.
Rnds 19-22: Rep Rnds 3-6. At the end of Rnd 22, do not fasten off; proceed to Handles.
Handles
Rnd 23: Ch 1, sc in same st, [dc in next st, sc in next st] twice, sk 8 sts, ch 10, [dc in the next st, sc in the next st] 5 times, sk 8 sts, ch 10, [dc in the next st, sc in the next st] twice, dc in the next st, join with slip st to beg st. (20 ch, 10 sc, 10 dc)
Rnd 24: STsc, sc in the next st, [dc in the next st, sc in the next st] around (in the sts and chains), join with slip st to beg st. (20 sc, 20 dc)
Rnd 25: Ch 1, sc in the same st, dc in the next st, [sc in the next st, dc in the next st] around, join with slip st to beg st.
Rnd 26: Rep Rnd 24.
Rnd 27: Ch 1, sc in the same st and in each st around. (40 sc)
Fasten off and weave in ends.

Great pattern, just what I was looking for. I wanted it super sturdy, so I used two strands of 4 wt cotton. I love how it turned out. Thank you for sharing!
Lesa,
I’m so glad you enjoyed making the wine bottle tote! It’s definitely one of my favorites!
Best,
Debbie