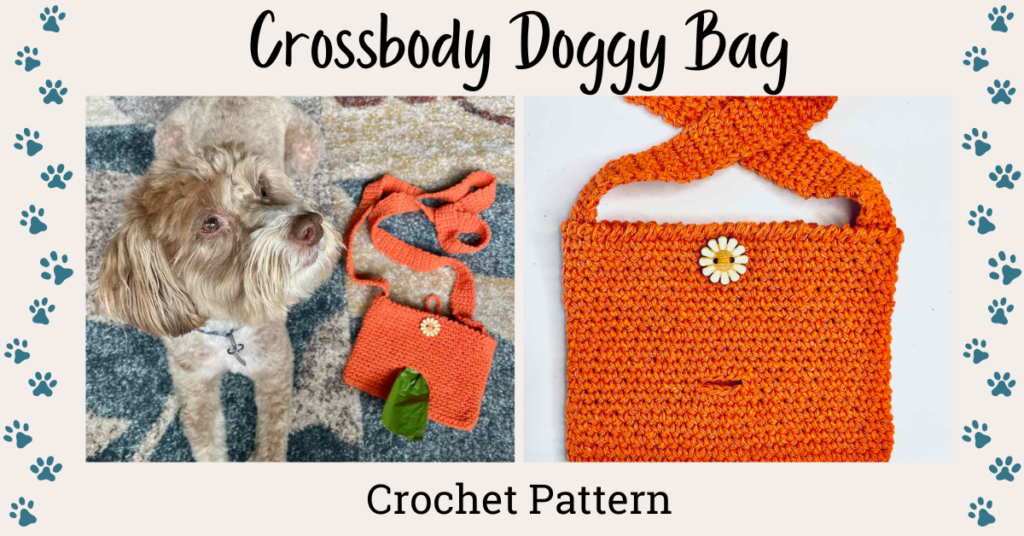
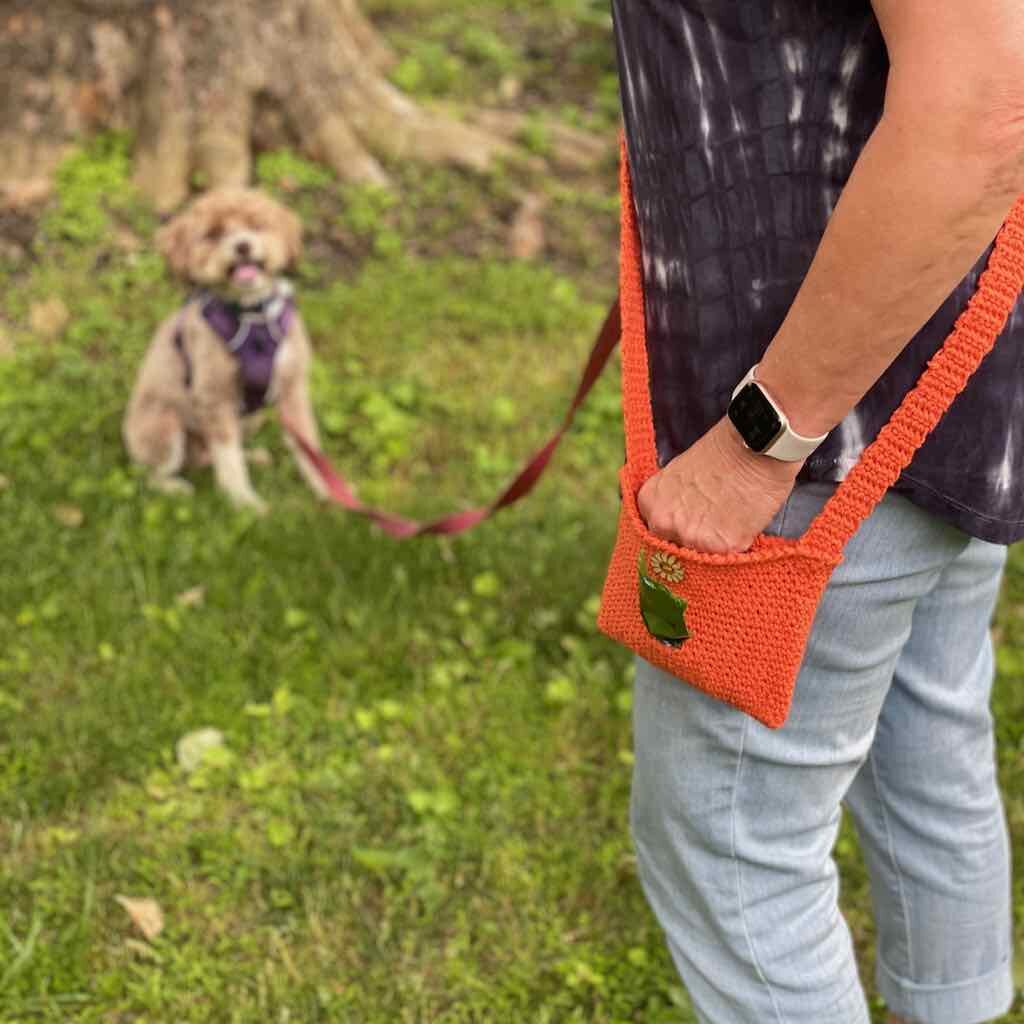
A crossbody bag – A fun accessory for every dog walk
This convenient crochet crossbody bag is just the accessory you need for your next training session or dog walk.
This post contains affiliate links. That means, if you purchase something using the link, I receive a small commission. You don’t pay any extra and your information is safe. Thanks for supporting my small business.
Training and going for walks are an essential part of taking care of a dog. It’s not just about hooking on a leash and leaving the house. You’ll need to grab your treats and disposable bags for that walk.
I designed the Crossbody Doggy Bag to be a stylish yet functional way to carry all the things you need when out with your dog.
Inspiration
I remember when Daisy was a puppy. Training was a huge part of her first year. She had SO much energy that we had to actively and consistently harness that energy. That meant we carried treats with us everywhere so we wouldn’t miss an important training moment.
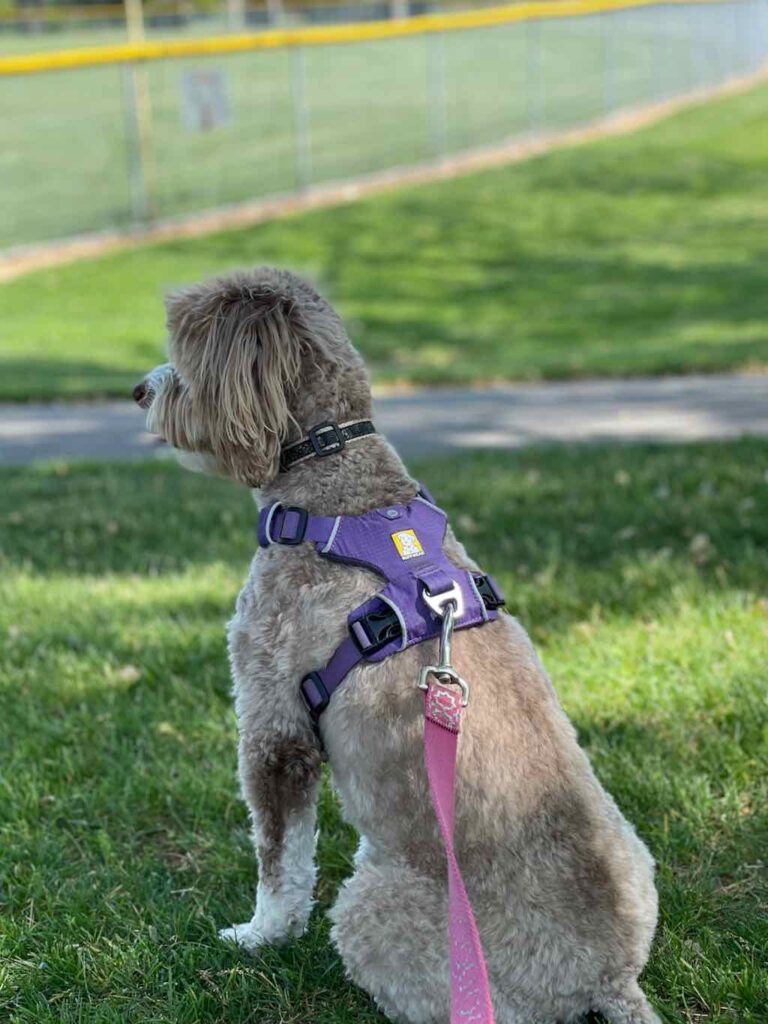
We also knew that she needed loads of walks. Most dogs need to take a walk when nature calls or to work out some of that doggy energy. That meant we needed to carry treats for training reinforcement and disposable bags for….well, you know!
I wish I’d had the Crossbody Doggy Bag back then. I wouldn’t have ended up with so many crumbs in my pockets!
Design
This crochet crossbody bag is designed to be just the right size to carry a roll of disposable bags, a clicker (if you’re in the midst of training), treats for said training, and will even hold a collapsible water bowl for those longer hikes.
It’s worn crossbody so it won’t slip off your shoulder when your focus should be on safely controlling the leash. It sits at just the right length for easy access when you need a quick treat. And, the front opening means you can easily grab one bag from the roll without rummaging around.

Why buy the PDF
- How to customize for your dog’s size
- Detailed written instructions
- Ad-free, beautifully formatted PDF that you don’t have to keep refreshing
About the yarn
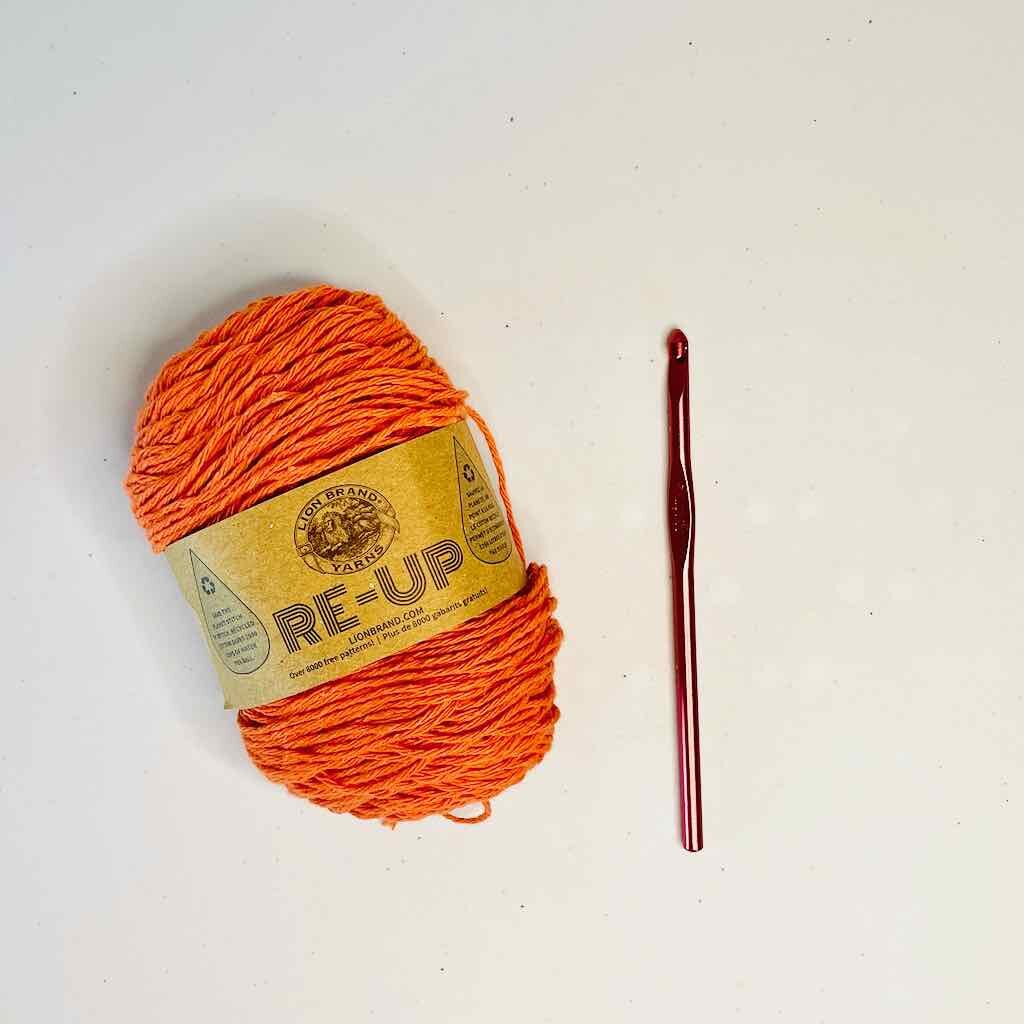
I wanted a durable, easy care yarn for something that would get a lot of wear. That’s why I chose mercerized cotton. It also reduces stretching and retains its shape through repeated uses and washings.
I love Lion Brand “Re-Up” for those reasons and more. The colors are absolutely gorgeous. And, it’s good for the environment and easy to work with.
Any worsted weight cotton will work. Another alternative is WeCrochet’s “Dishie”. I love this yarn for its equally beautiful colors and the way it works up.
The Crossbody Doggy Bag crochet pattern
Written in English using US crochet terminology
Skill level: Confident beginner
Yarn
Lion Brand “Re-Up” 85% cotton, 15% polyester worsted weight (2.5oz/114yd; 70g/105m) – Color 133 (Orange) – 2 skeins
Any worsted weight cotton will work. You’ll need approx. 2.8oz.
Hooks
US size G-6 (4mm)
US size H-8 (5mm)
Materials + Tools
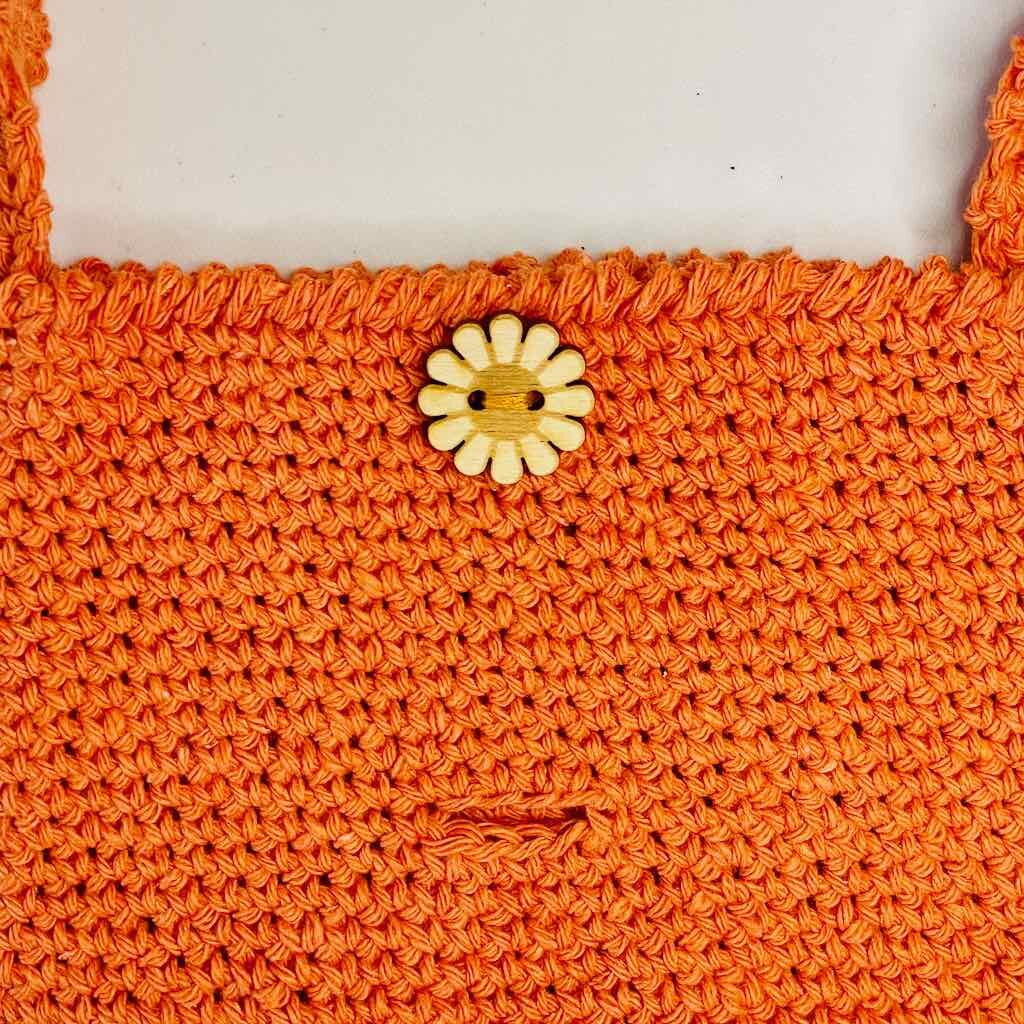
- Optional buttons for closure and decoration (I purchased my wooden buttons from Kathy’s Kozies on Etsy
- Removable stitch marker
- Tapestry needle
Finished measurements
- Body: 6.5” w x 5” h
- Strap: 50” long
Gauge: 17 sc x 19 Rows = 4”
Abbreviations
- beg – beginning
- ch – chain
- pm – place marker
- rm – remove marker
- rnd(s) – round(s)
- sc – single crochet
- sk – skip
- sp – space
- st(s) – stitch(es)
- YO – yarn over
Special Stitches
Reverse single crochet (rsc)
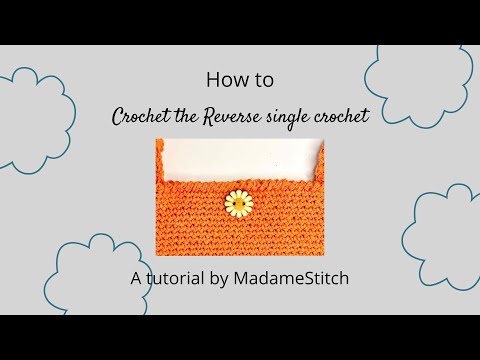
For right-handed crocheters: Insert hook in the st to the right of the hook, YO, draw up a loop, YO, pull through 2 loops.
For left-handed crocheters: Insert hook in the st to the left of the hook YO, draw up a loop, YO, pull through 2 loops.
This stitch is typically used for edgings as it is in this crossbody bag. Instead of working a sc in the next st to the left of the hook as normal, the single crochets are worked in the st to the right of the hook (or, behind the hook). In other words, you’re working the row of single crochet in the reverse direction.
Pattern Notes
- Do not turn after any round.
- The body of the bag is worked in continuous rounds without joining. Place a marker in the first st of each round to keep track of where each round begins.
- When working the opening for the disposable bag dispenser, be sure the 4 skipped sts in Rnd 8 are centered on the front of the bag.
Written Instructions
Body
Using the larger hook, ch 27.
Rnd 1: 2 sc in 2nd ch from hook, sc in next 24 ch, 3 sc in last ch, turn work 90 degrees to work on other side of ch, sc in next 24 ch, sc in the same ch as beg 2 sc. (54 sc)
Rnds 2-7: Sc in each st around. (54 sc)
Before beginning Rnd 8, lay the piece flat with the stitch marker to the right. Find the 4 sts that sit in the exact center of the front and place a marker in the st on either side of those 4 sts. These 4 sts will become the opening through which the disposable bags will thread for easy access.
Rnd 8: Sc to the first marker and into the st with the marker, rm, ch 4, sk 4 sts, sc in st with second marker, rm, sc around. (50 sc, 4 ch)
Rnd 9: Sc around, working 4 sc in the ch-4 sp. (54 sc)
Rnds 10-22: Sc around. (54 sc)
Rnd 23 (Top edge): Ch 1, rsc around the top edge, join with slip st to first st.
Fasten off and weave in ends.
Strap
Using the smaller hook, ch 6.
Row 1: Sc in 2nd ch from hook and in each ch across, turn. (5 sc)
Row 2: Ch 1, sc in same st and in each st across, turn.
Repeat Row 2 until strap measures 50” in length. Leave both yarn tails for sewing the strap ends to the body.
Finishing
Strap
- Pin each end of the strap just inside the center of each side fold, being careful not to twist.
- Using the yarn end, sew down each end securely, using your favorite method.
Button closure (optional)
Attaching the button
- Position button just under the reverse single crochet edge on the front of the bag. Center it horizontally, aligning it with the opening below.
- Stitch down securely, being careful not to sew it too tightly. There should be enough space under the button to accommodate the loop.
Optional loop
- Turn the bag with the back facing up and insert a marker around the center stitch just under the rsc edge. (The marker indicates the spot where the hook will be inserted and the loop attached.)
- Make a slip knot.
- Insert smaller hook from right side of bag to wrong side of bag through the stitch indicated by the marker.
- Slip the knot onto the hook and pull through to the right side of the bag back.
- Ch 15.
- Remove loop from hook. Insert hook from wrong side to right side of bag through the stitch indicated by the marker.
- Pull the loop and chain from the right side to the wrong side of the bag back.
- Keeping the hook in the loop, reposition the chain so that only the loop is visible on the inside of the bag back. Cut the working yarn and pull the end back through the loop.
- Tie the yarn ends together in a simple knot. Weave in each end securely.
That’s it…all done! Enjoy your walk!
Give your pup some love with this gorgeous blanket.
The Puppy Love Blanket is an easy C2C crochet make that every dog will love. Click on the picture below for more information.

This is cute; I may make one for my neighbor, who uses a walker, and it might be something easier to wear when ge takes his little Coco for her walks.
Willie,
It’s a super helpful bag for carrying treats and clean up bags. You’d be the hit of the neighborhood!
-Debbie
I made this and it turned out super cute.
Donna,
That makes me so happy! I’m so glad you gave it a try.
Best,
Debbie