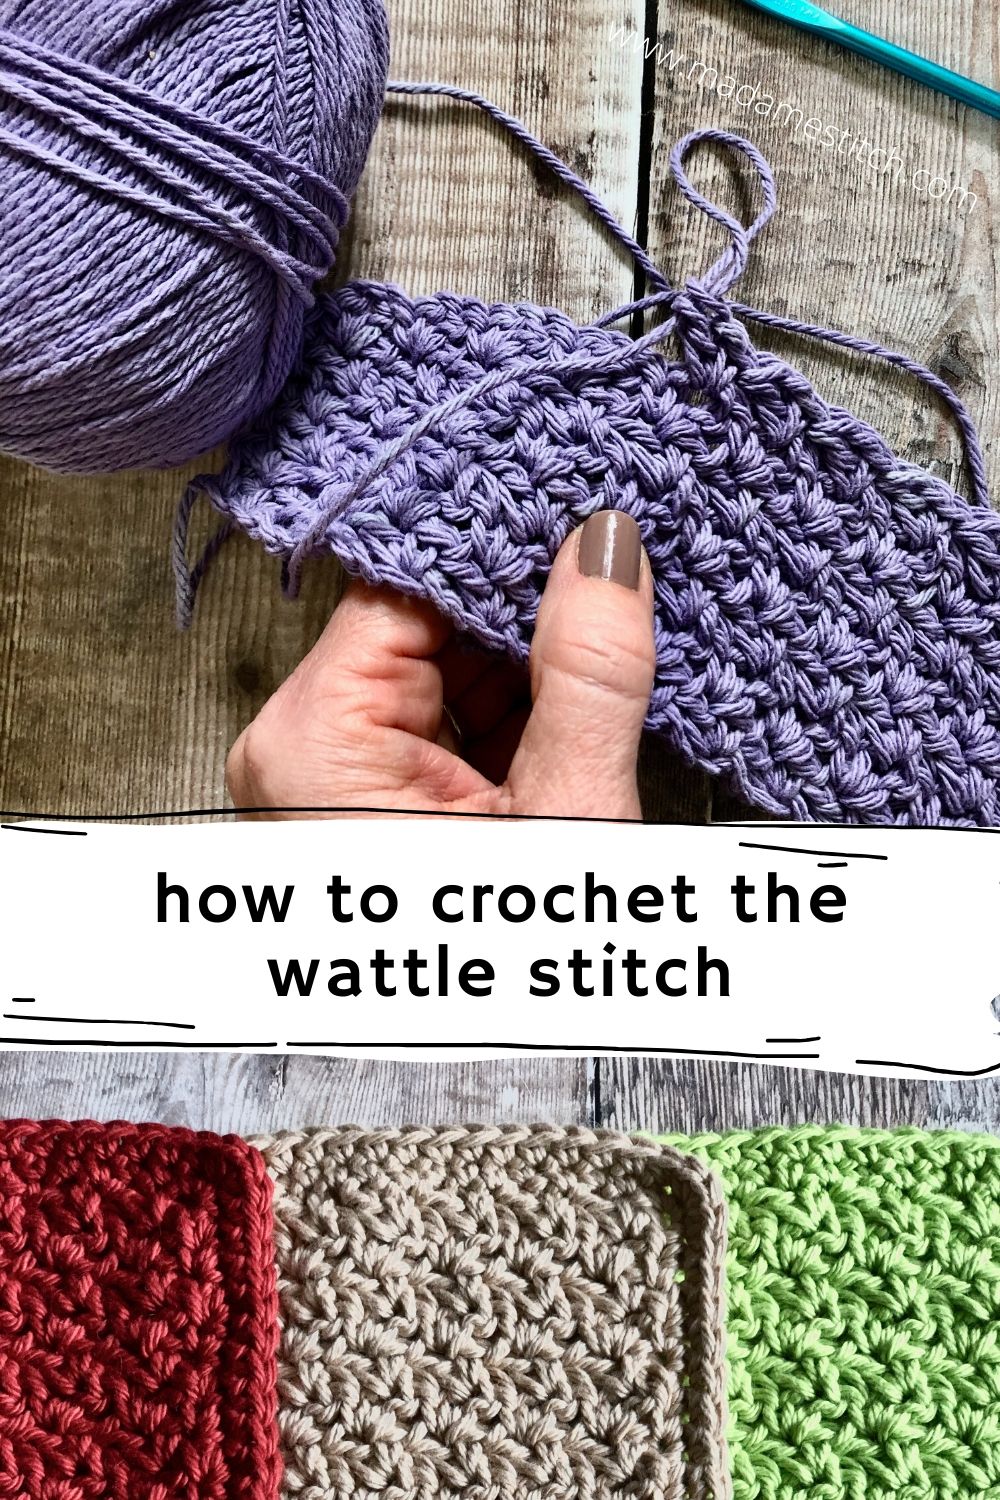
How to crochet the wattle stitch
This photo tutorial will show you how to successfully crochet the Wattle Stitch.
Ready to learn a new stitch? Here’s a beginner friendly stitch pattern just for you!
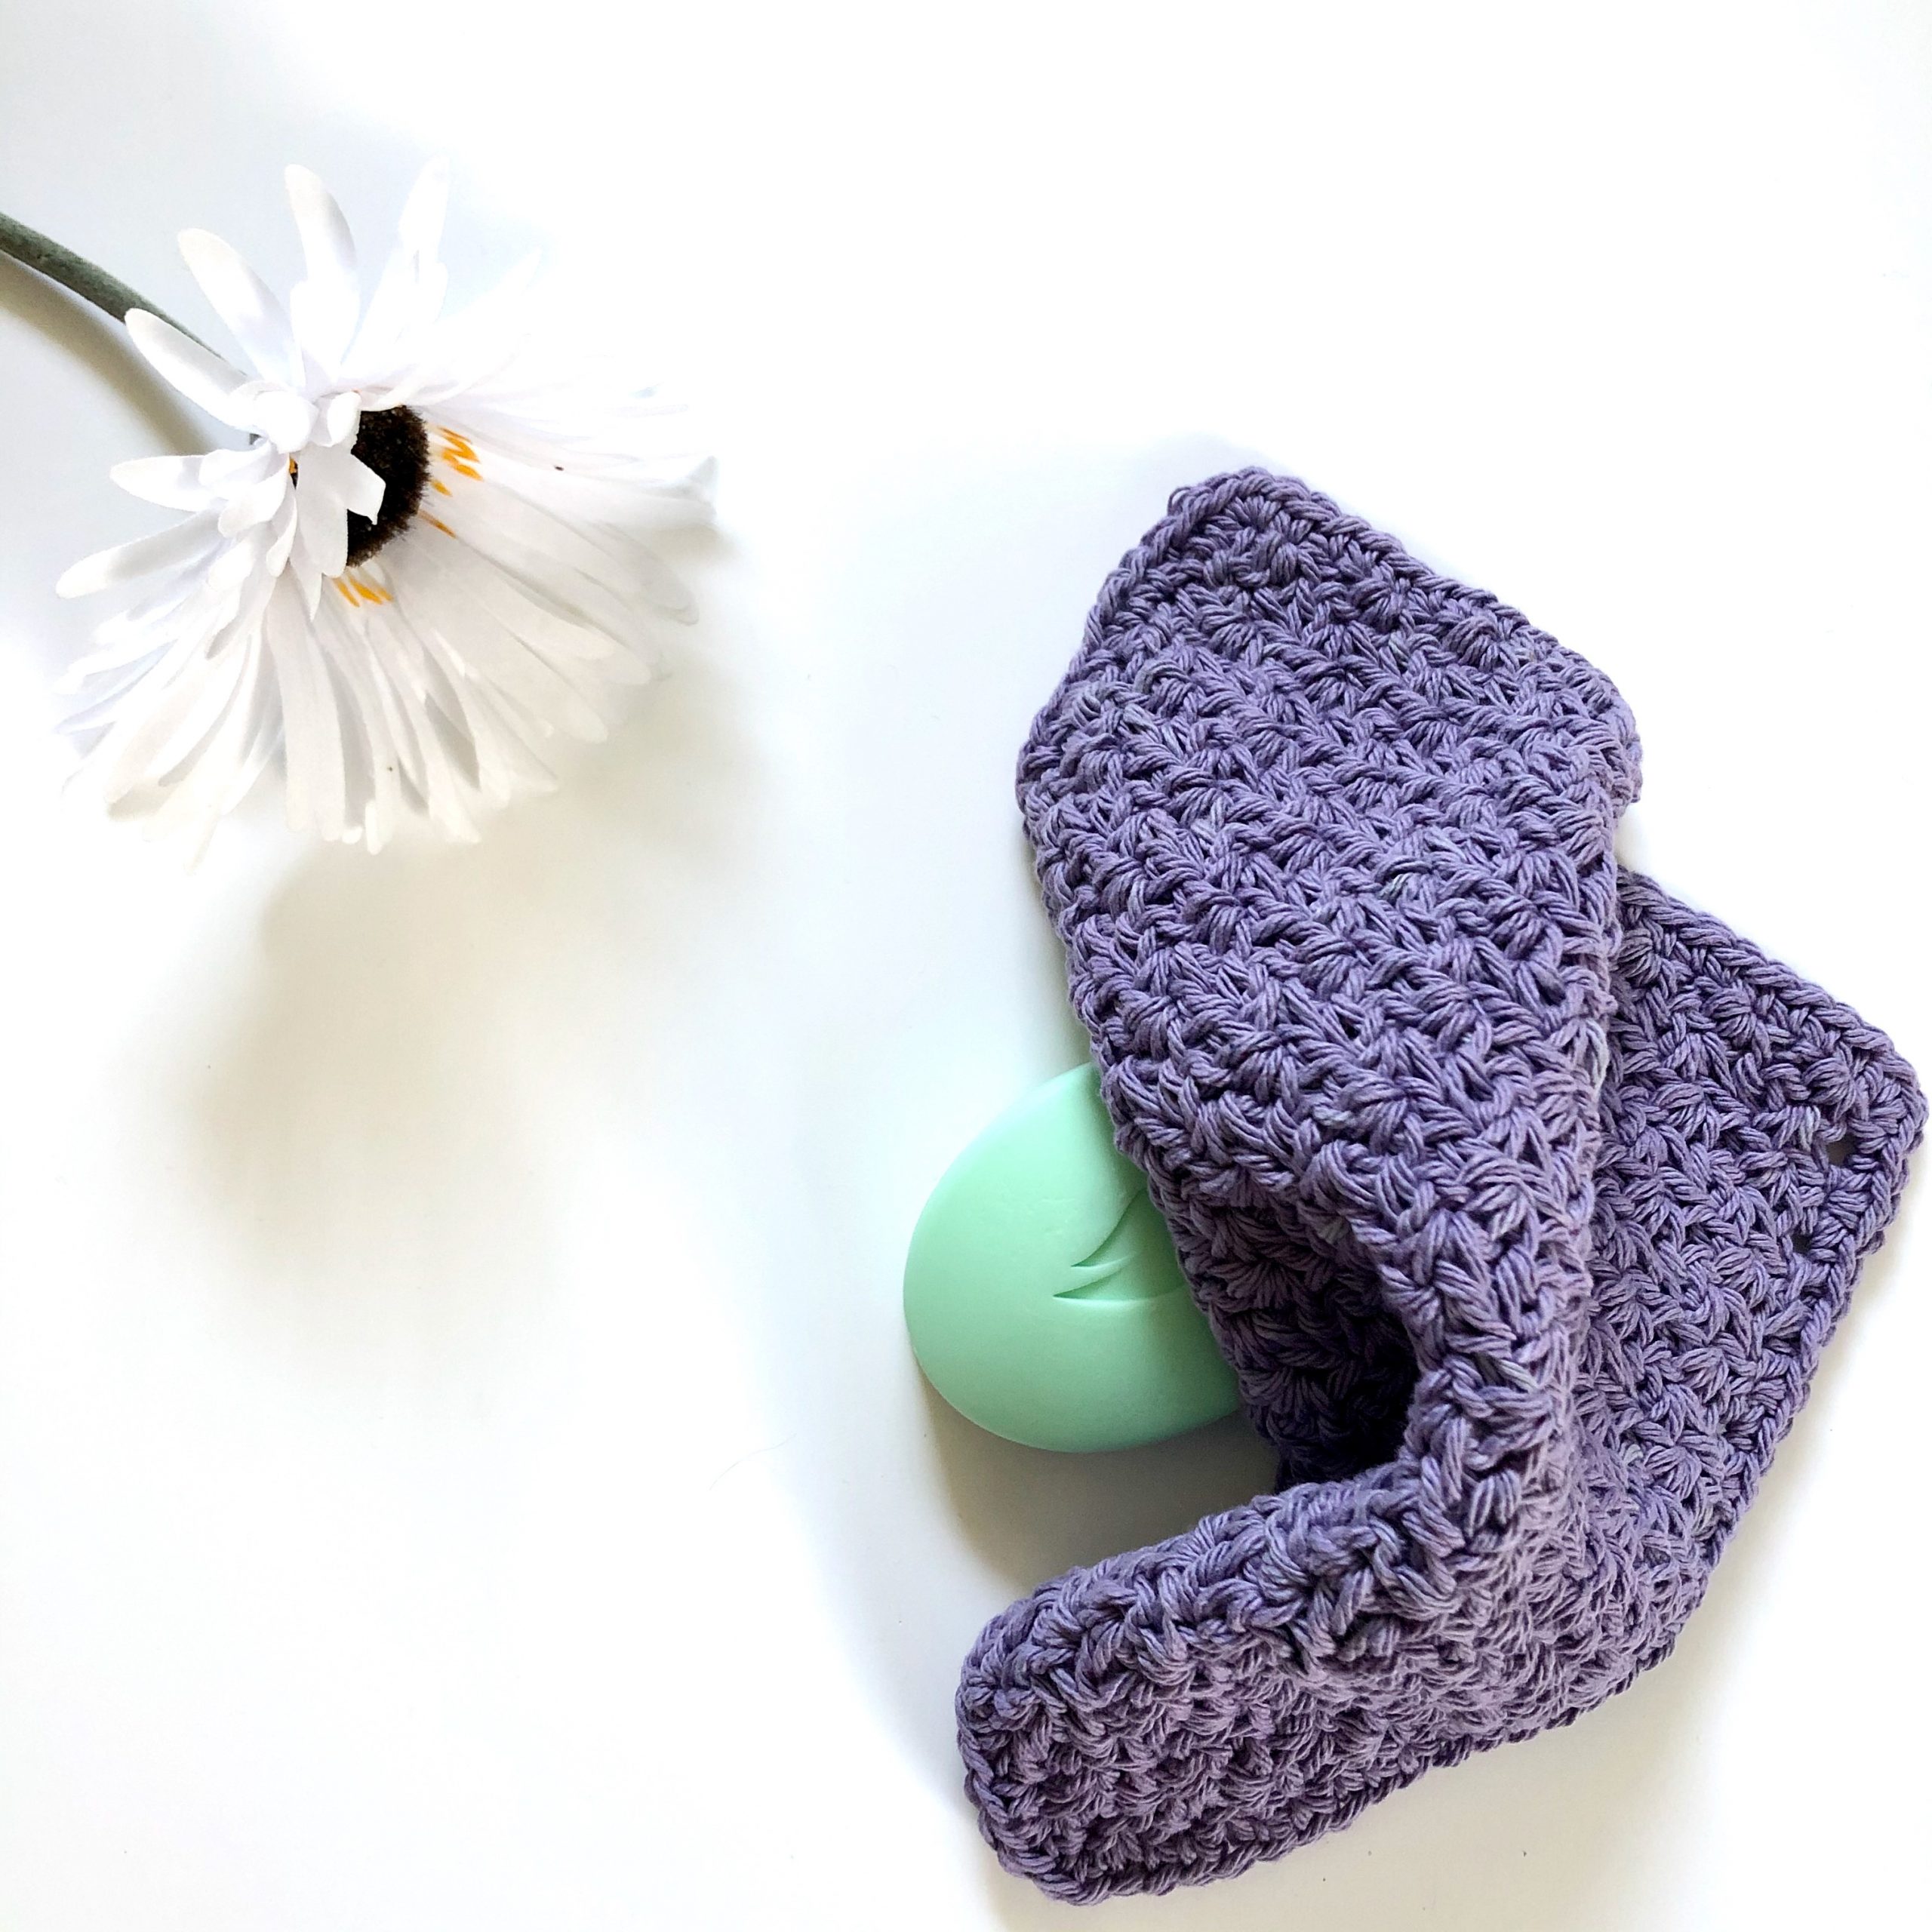
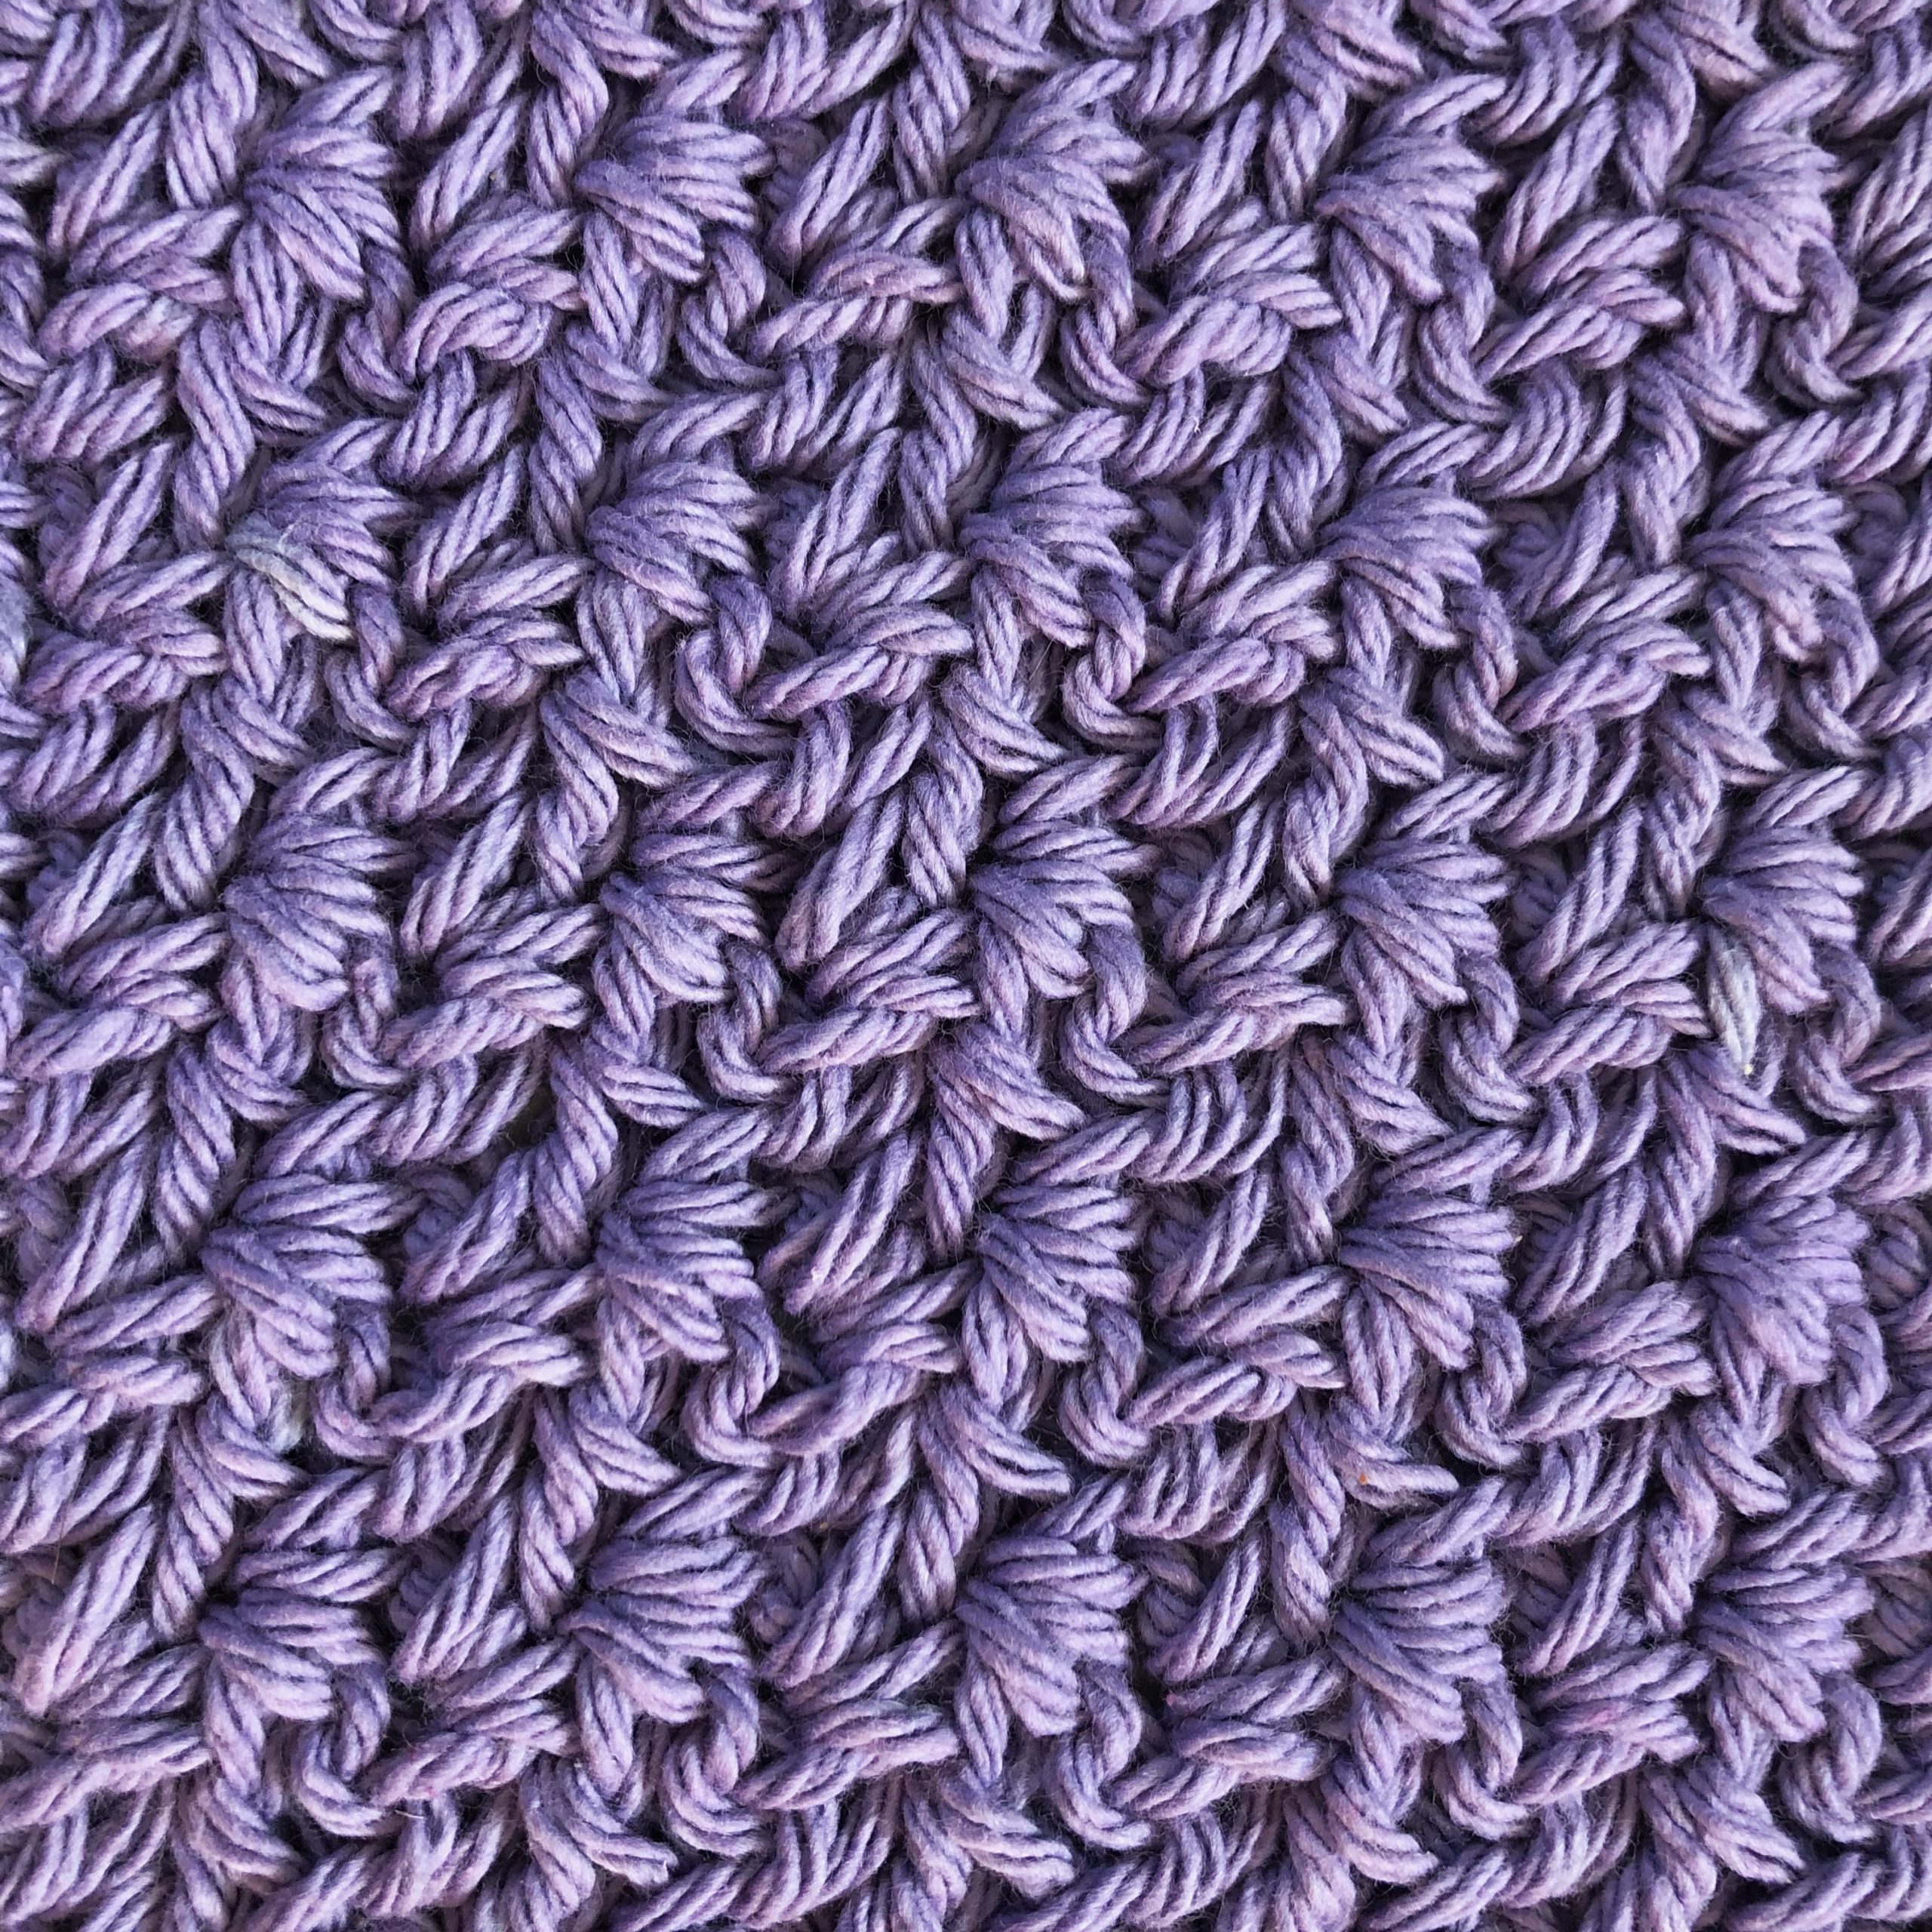
The wattle stitch is such a simple stitch pattern. It’s very much like a lopsided V-stitch because it leans to one side instead of standing straight up! The wattle stitch creates a beautiful, luxurious texture with a nice drape. It’s perfect for blankets, scarves, and washcloths to name a few. I used it in my free pattern, The Wattle Stitch Washcloth. The pattern is a great way to practice this stitch if it’s new to you.
If you’d like to try the stitch before making the washcloth, scroll down for a handy photo tutorial along with swatch making instructions.
The wattle stitch is beginner friendly. The only stitches you need to know are chain, single crochet and double crochet. To practice with the photo tutorial below, follow these instructions.
The Wattle Stitch Photo Tutorial
Abbreviations: ch – chain, dc – double crochet, rep – repeat, sc – single crochet, sk – skip, sp – space, st(s) – stitch(es)
To practice with this tutorial, you’ll need worsted weight yarn (cotton or acrylic will do) and a hook US size H-8 (5mm) or I-9 (5.5mm).
Practice swatch
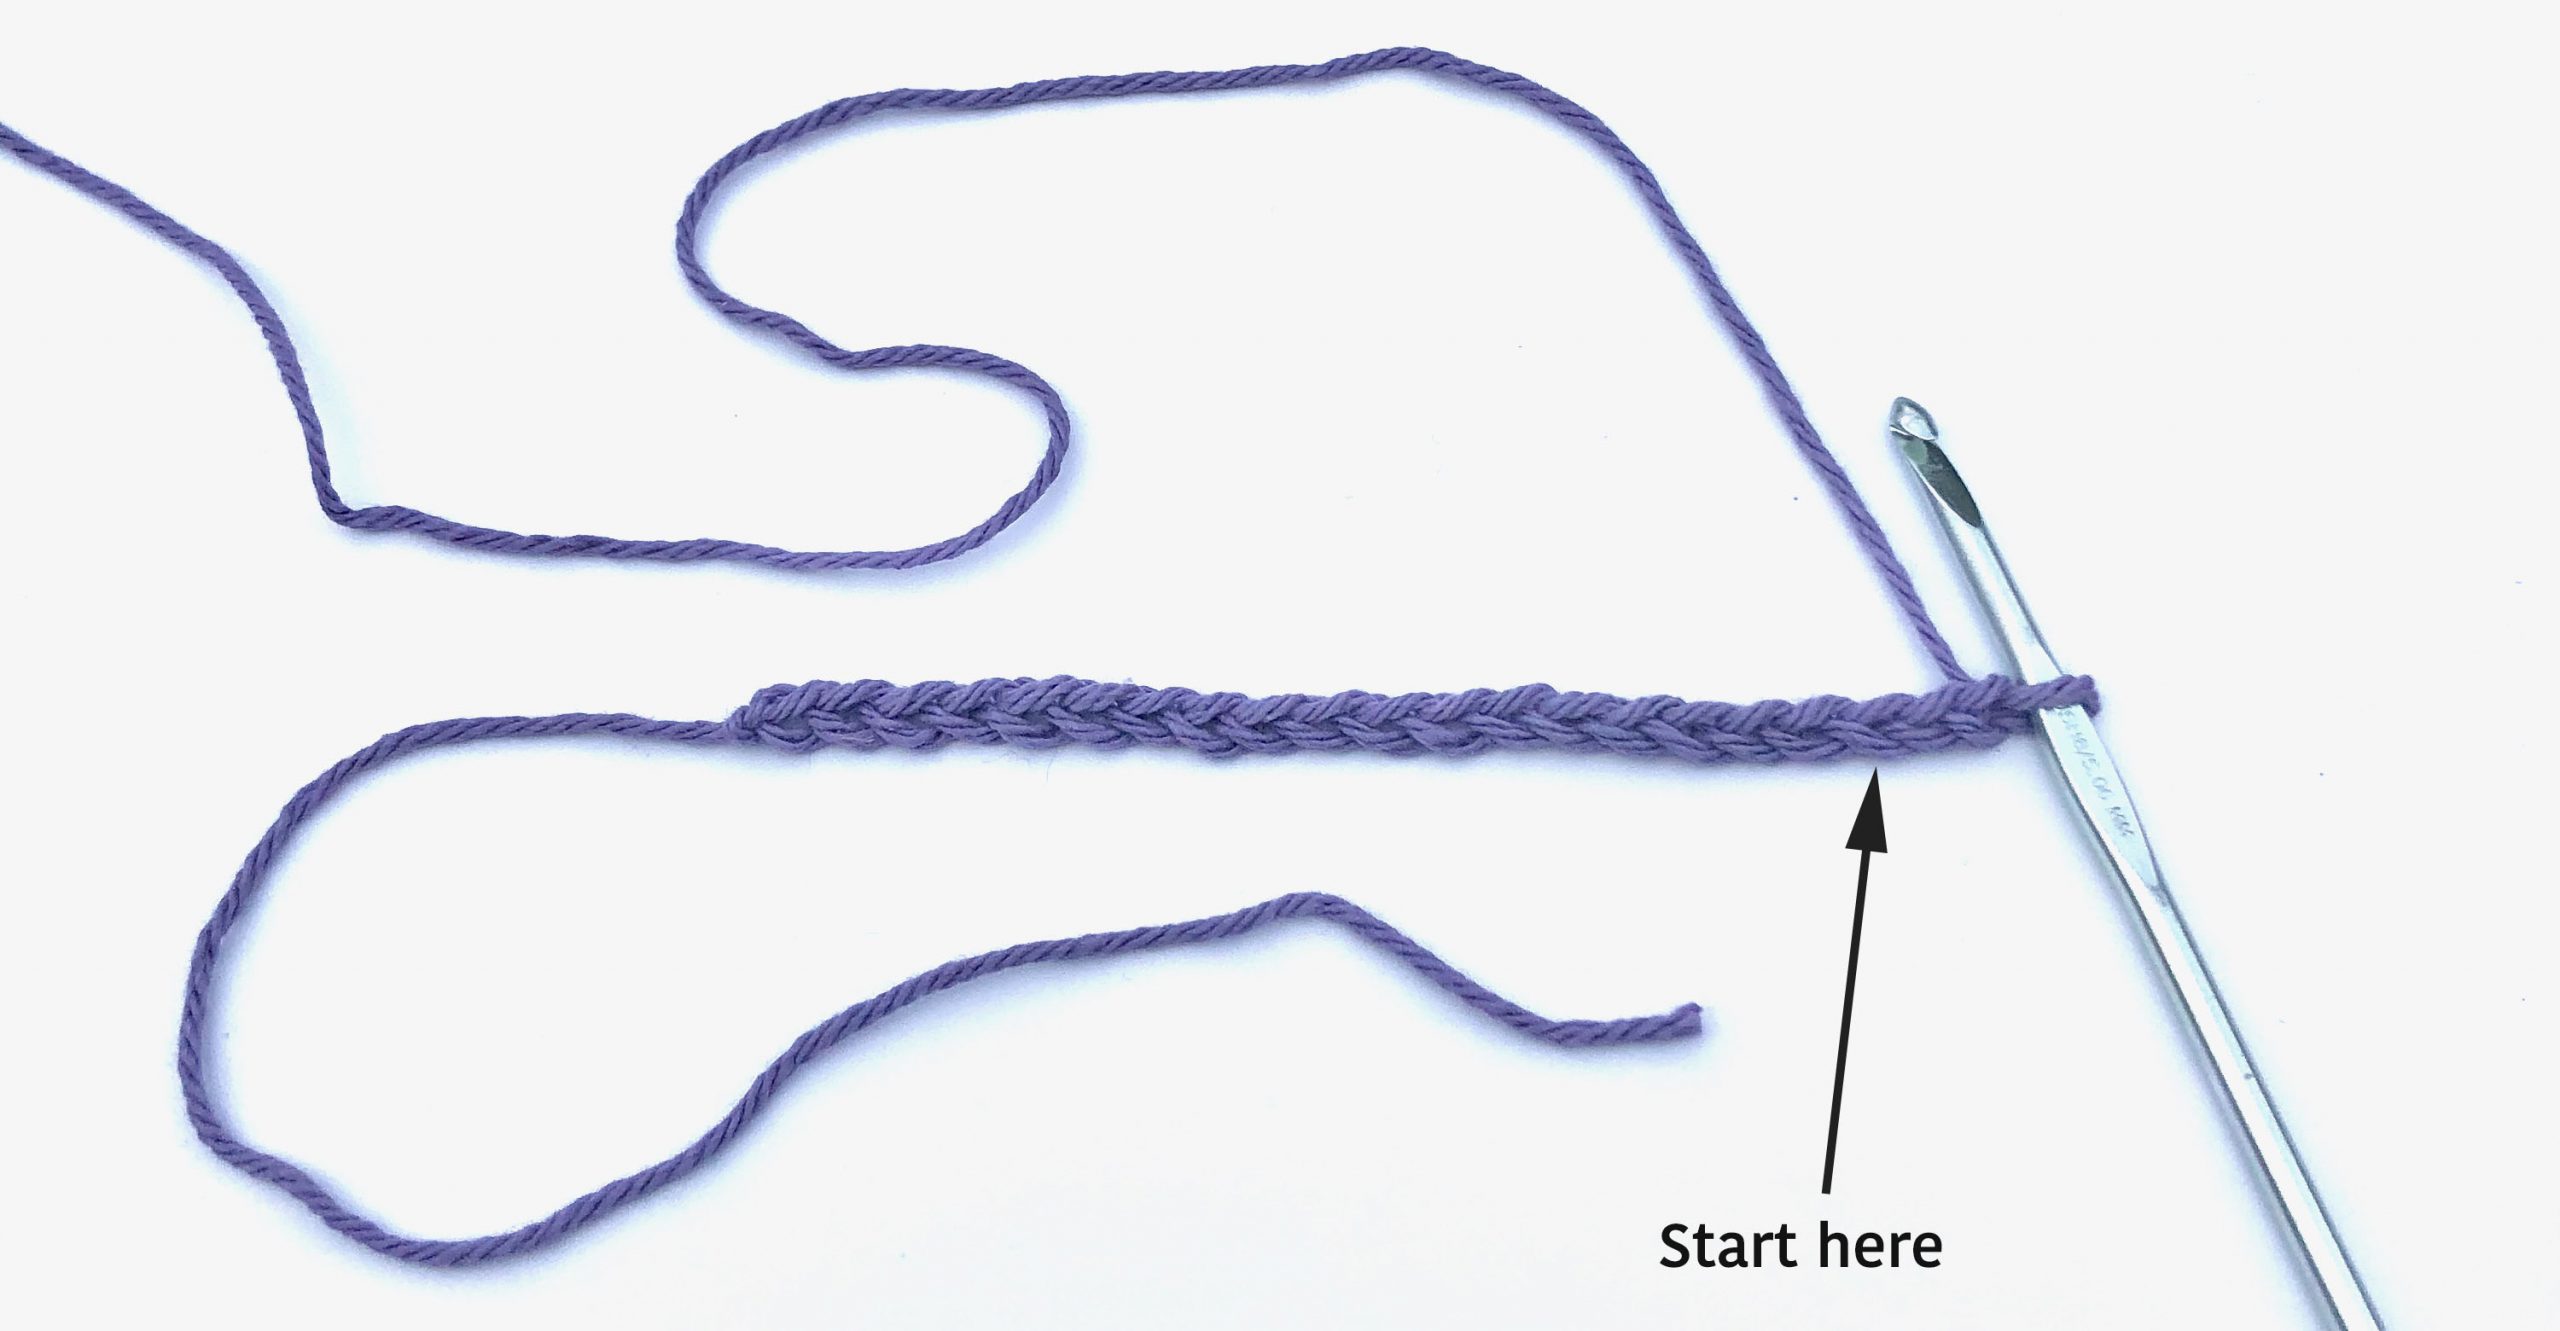
Chain 21.
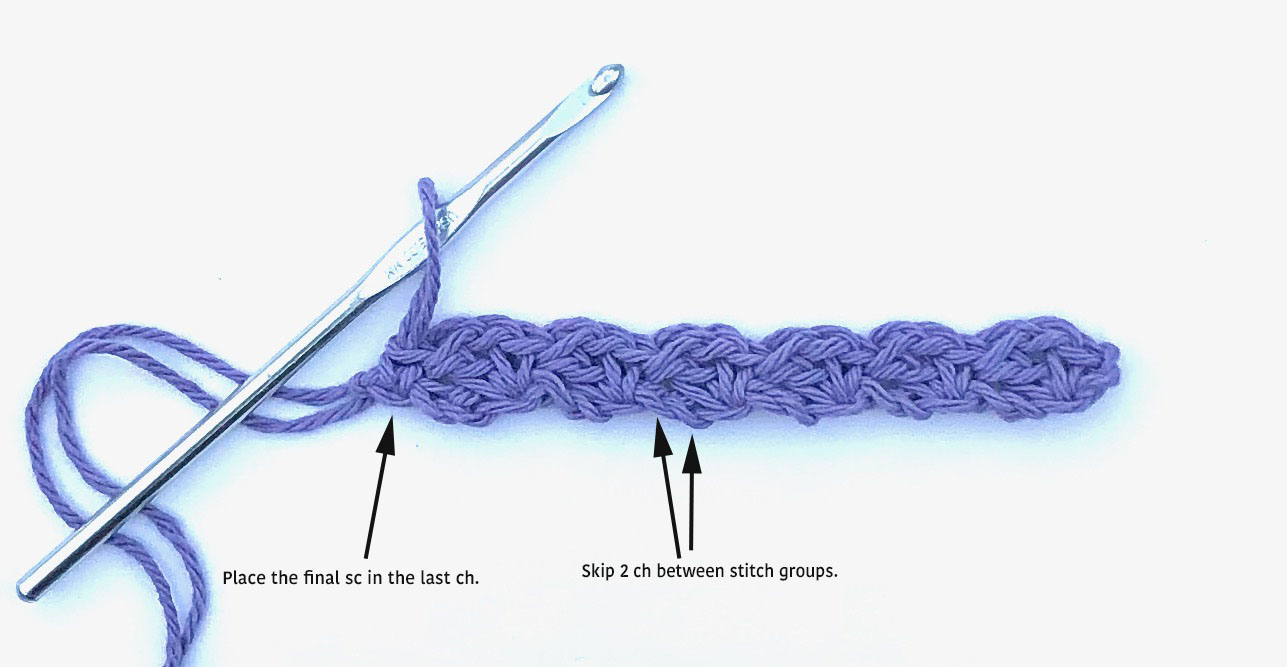
Row 1: In the 3rd ch from the hook, (sc, ch 1, dc), sk 2 ch, * (sc, ch 1, dc) in next ch, sk 2 ch; rep from * across, sc in last ch of foundation ch, turn.
In the photo below, you can see where to place the first st.
In this next photo, you’ll see what it looks like to sk 2 ch and where to place the final st of row 1.
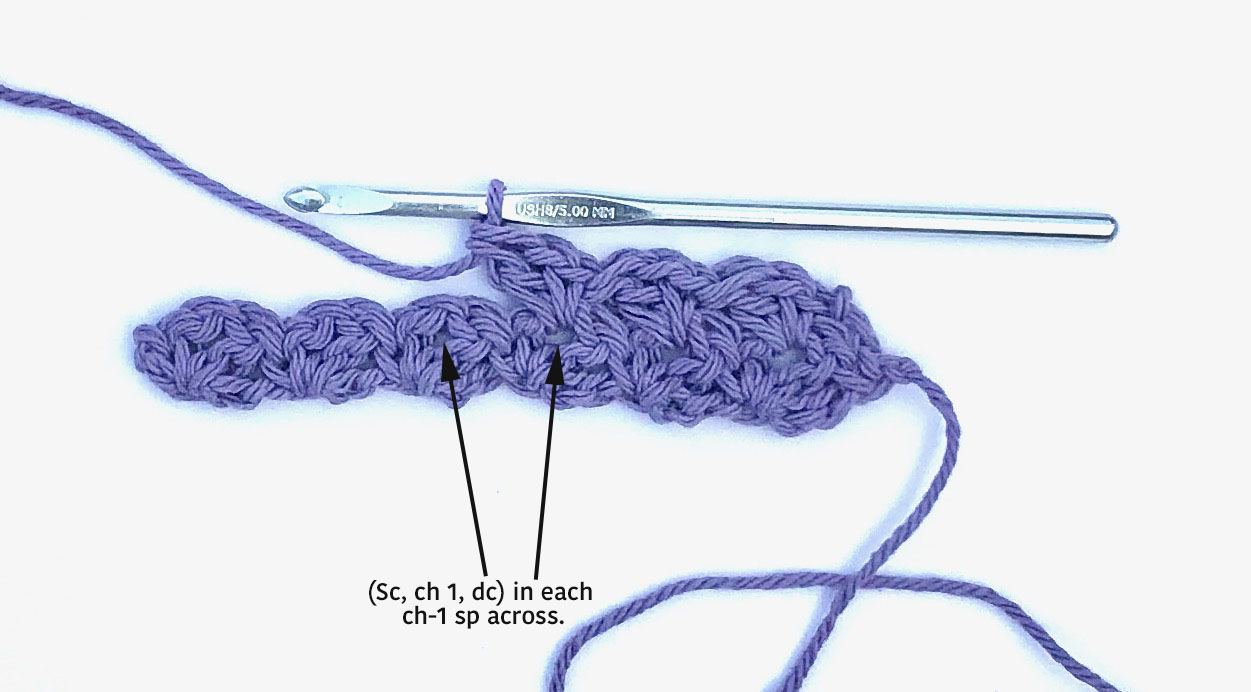
Row 2: Ch 1 loosely (counts as sc), (sc, ch 1, dc) in 1st ch-1 sp and in each ch-1 sp across, sc in turning ch, turn.
In the following photo, you can see where to work each wattle stitch group.
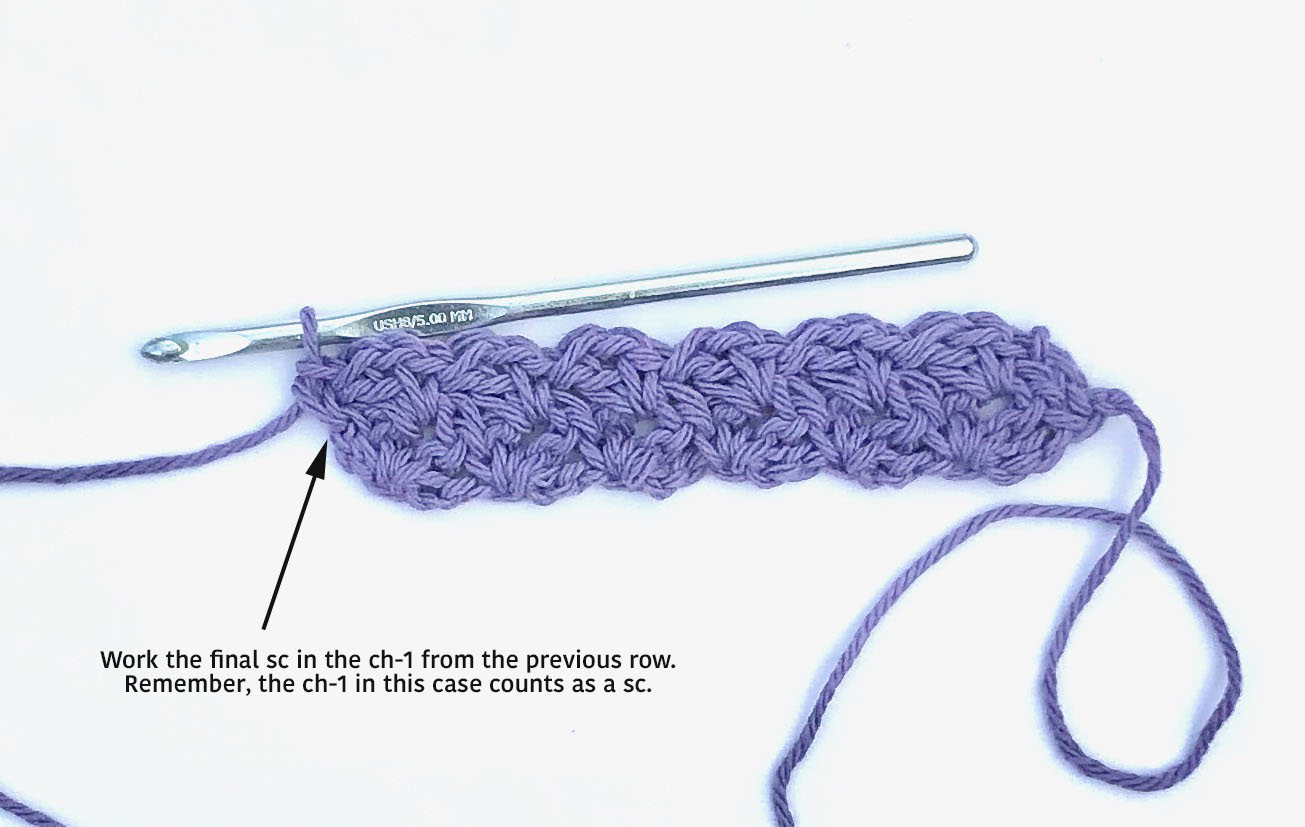
The last photo shows where to place the final st of each row.
Rep row 2 to desired length, or until you have that stitch mastered!


One Comment