A free crochet along that takes you on a road trip
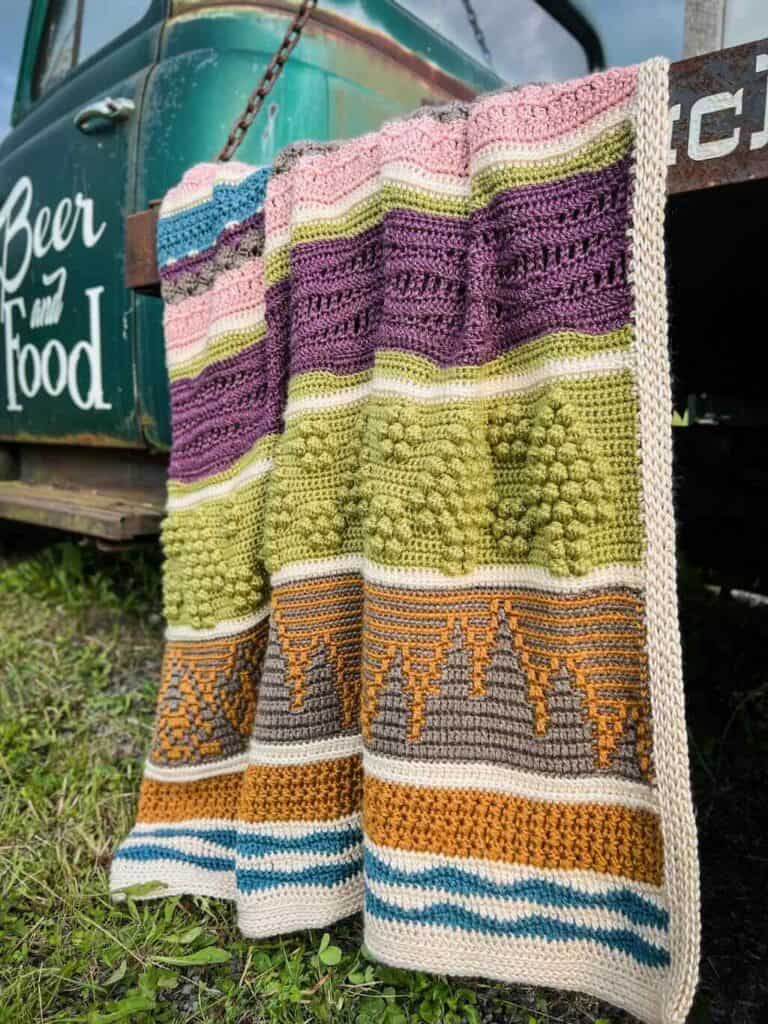
Create a stunning blanket that takes you to destinations far and near. The Road Trip Blanket is a free crochet along right here on the blog.
The Road Trip Blanket Free Crochet Along 2025
There’s something magical about hitting the road—windows down, playlist queued, and the excitement of discovering new places (or revisiting old favorites) just around the bend. Whether you’re venturing across state lines or simply exploring your own hometown, road trips have a way of refreshing the soul and inspiring the imagination.
That’s exactly the spirit behind our Road Trip Blanket Free Crochet Along!
This free crochet along invites you to take a virtual road trip with your crochet hook—no gas money or packing required. Each section of the blanket is inspired by a different destination, turning your stitches into scenic stops along the way.
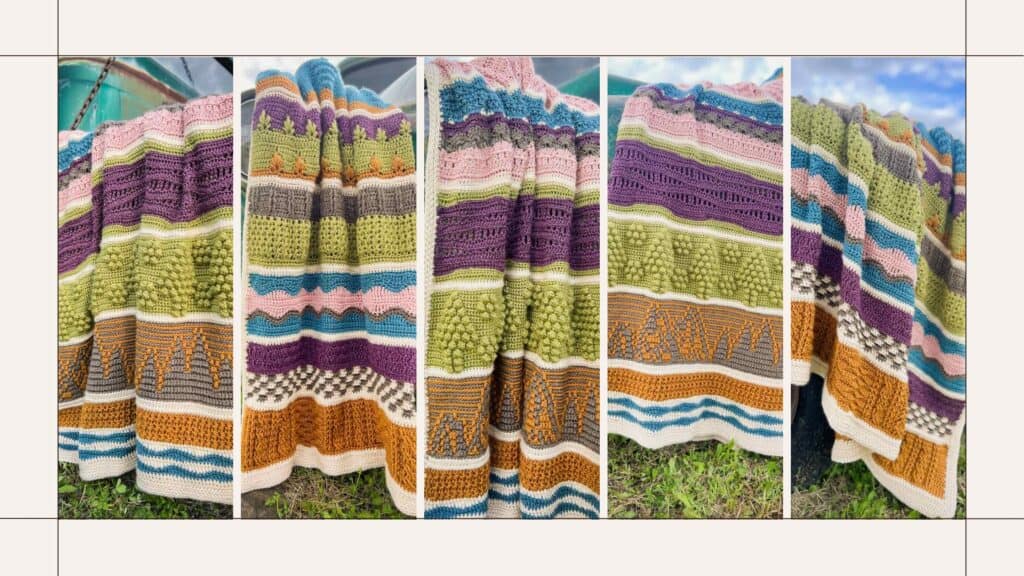
From majestic mountains to oceanside towns, every strip is a tribute to the beauty and wonder of travel. Cozy, creative, and full of meaning, the Road Trip Blanket is the perfect project to work on from the comfort of home while your mind wanders the open road.
Let’s make something special—one mile, one stitch at a time.
The Road Trip Blanket Design
This free crochet along is hosted by Debbie of MadameStitch and Christine of Spotted Horse Design Co.
Not long ago, Christine had a dream about a crocheted blanket that took the maker on a journey. With that dream, the Road Trip Blanket was born.
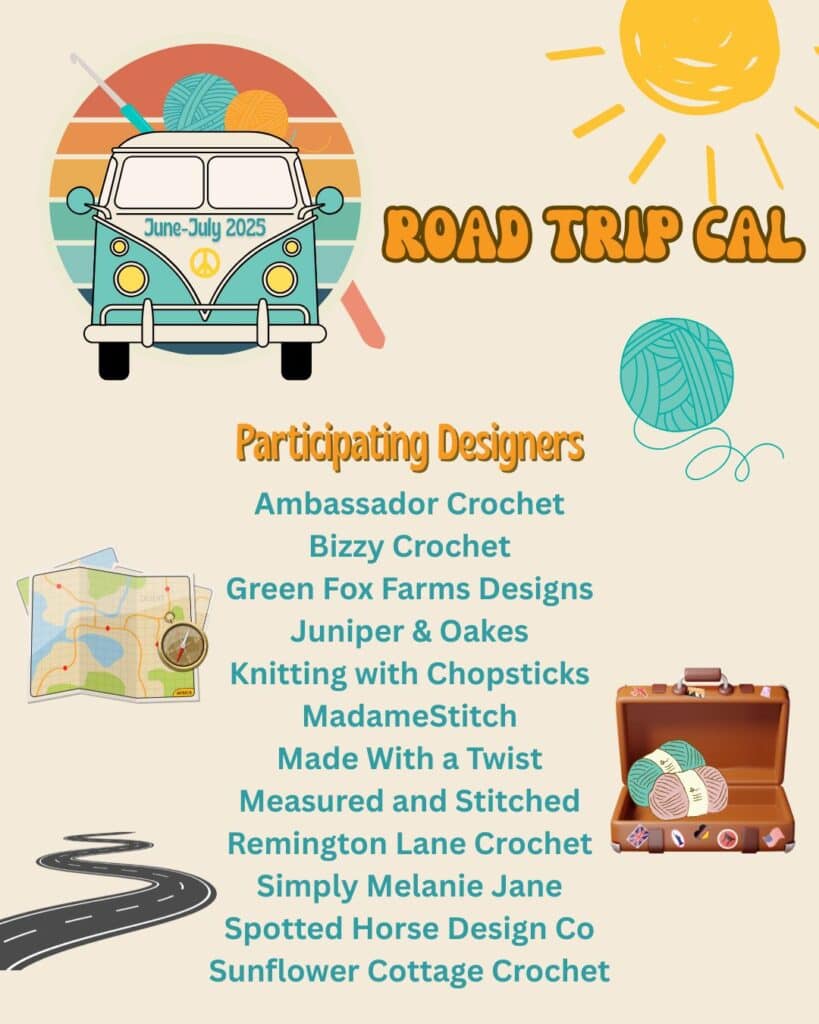
The blanket is a collaborative design, bringing together 12 crochet designers from across the US with stops in Scotland and Belgium as well. Each designer was asked to tell a story about where they’re from or where they live now.
Using a variety of stitches and techniques, each destination is depicted in a creative strip design that captures the imagination and transports the maker to the next stop on the journey.
What is a free crochet along?
Participating in a free crochet along is such a special experience. If you’ve never been a part of one, here’s what you can expect when you join a free crochet along.
- Everyone crochets the same project at the same time.
- Each part of the project is released one at a time. That way all of the participants can work at the same pace.
- The fun part comes when everyone is sharing progress photos with the group. It’s so motivating!
How this free crochet along works
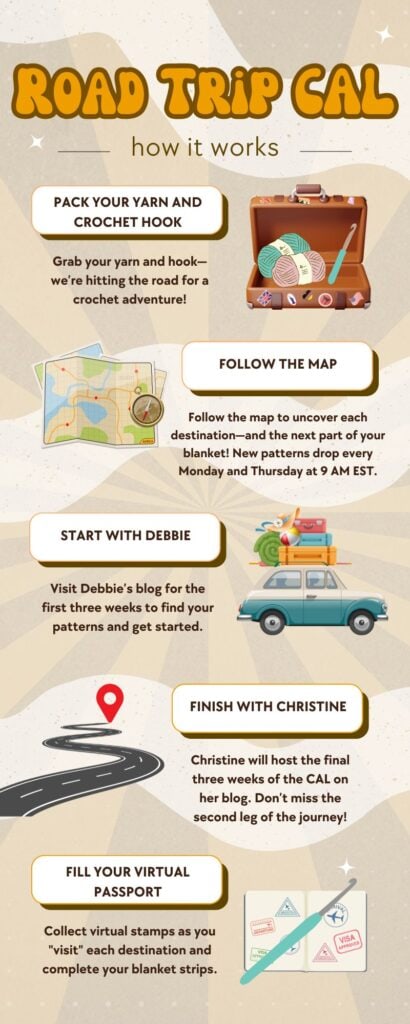
Here’s how to participate in this free crochet along
- The CAL officially begins Monday, June 16, with the release of the instructions for the first strip.
- A new strip or part of the pattern will be released every Monday and Thursday through the end of July.
- Each strip pattern will be forever free on the designer’s blog. All other sections of the blanket pattern will be forever free on event post here and on Christine’s blog.
- The CAL concludes with the release of the border instructions on Monday, July 28th.
- The entire pattern will be available for purchase.
Join in the fun on Facebook
Want to share the experience with other crocheters as you travel through the blanket construction?
Join my MadameStitch Crochet Corner Facebook group for the full experience!
Sign up for CAL emails
Get updates and reminders sent directly to your inbox by filling out the form below.
Note: The parts of the pattern will NOT be emailed out to anyone. These emails are only for information about the CAL.

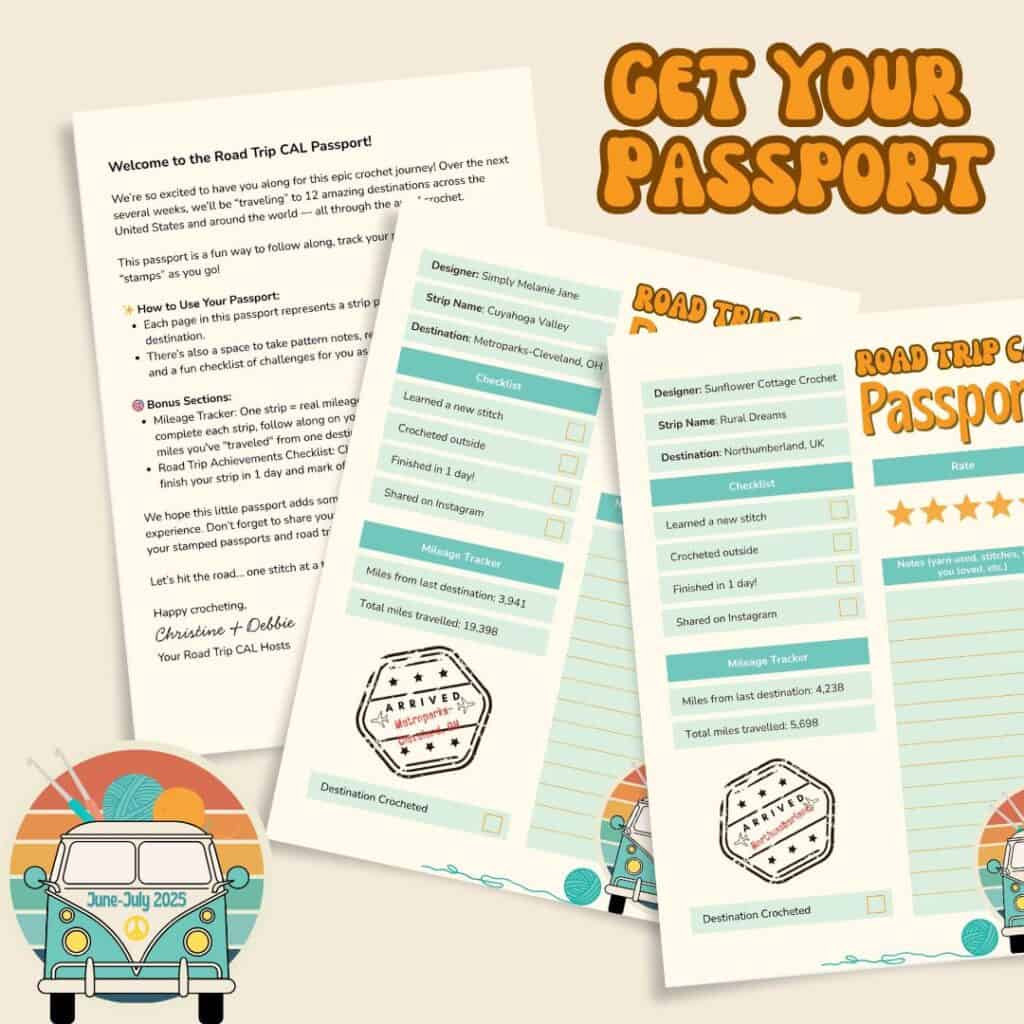
Here’s your free Passport!
“Stamp” your passport as you visit and crochet each destination on your journey. This fun official document will help you celebrate each place along the way.
Skill Level: Intermediate
This is NOT a beginner level blanket. It’s only for crocheters who are at least Intermediate level. Here’s why:
- While there are plenty of basic stitches included, every strip of the blanket presents a stitch or technique, sometimes both, that challenge the crocheter.
- The blanket is a project that requires you to pay close attention. Very little of the blanket construction is mindful repetitive stitching.
- This project takes a high level of commitment to complete. But, boy, is it worth it!
As a beginner, you may be tempted to take on this blanket. While there are tutorial resources included, the blanket requires an Intermediate level of crochet understanding.
We would love for every crocheter to make this blanket. But, you must be honest and realistic about your crochet skills before you commit.
Purchase the full pattern ebook
Participating in the free crochet along is great fun. But, sometimes navigating between blog posts to get the free pattern can become a slog.
Purchase the full ebook pattern because:
- Everything is included – Detailed instructions for the entire blanket start to finish!
- Work at your own pace – Crochet when you’re ready and when it fits into your schedule.
- One click access – No need to bookmark pages or hunt for the pattern online.
- Printable format – Keep the pattern handy as you crochet.
- Start anytime
- No FOMO – Don’t miss a thing during or after the CAL!
- Lifetime access – Keep the pattern forever in your personal pattern library!
Pattern presale begins Monday, June 9. Use the button below to get your very own copy!

The 2025 Road Trip Blanket Begins Here
General Information
Finished Measurements
- Each strip measures approx. 5″ x 50″ wide.
- The entire blanket is approx. 52.5″ wide x 72.5″ long.
The Yarn
We chose Lion Brand’s “Heartland” for our blanket because it’s just so soft and comfy. It’s a dream to work with and offers such beautifully rich colors.
Best of all, the colors are inspired by the beauty of America’s national parks which fits the concept and narrative of the Road Trip Blanket perfectly.
Here’s what you’ll need:
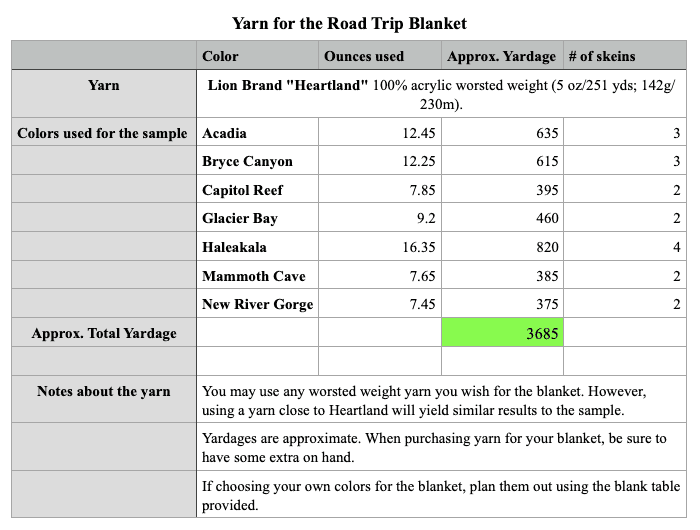
Want to plan your own colors?
Click here to download your free PDF.
Hook and Other Tools
- US size H-8 (5mm)
- Removable stitch markers
- Scissors
- Tapestry needle for weaving in ends
Abbreviations – US crochet terminology
These abbreviations are common to the entire blanket. Specific abbreviations will be listed with the instructions for each strip.
- Beg – beginning
- Ch – chain
- Dc – double crochet
- Fhdc – foundation half double crochet (used to start the blanket)
- Hdc – half double crochet
- Hdc 3lp – half double crochet in the 3rd loop (used in the Border)
- Rep – repeat
- Rnd(s) – round(s)
- Sc – single crochet
- Sc 3lp – single crochet in the 3rd loop (used in the Transition Rows
- Sp – space
- st(s) – stitch(es)
- Tr – treble crochet
- RS – right side
- WS – wrong side
- YO – yarn over
Special Stitches
Any special stitches used in the individual strips will be listed with that strip’s instructions on the designer’s post.
Errata
Try as we might, with all the testing and tech editing, mistakes still slip through. We as designers do our best but we are only human.
Thank you for your patience. And, most of all, thank you for your support. We’re so grateful!
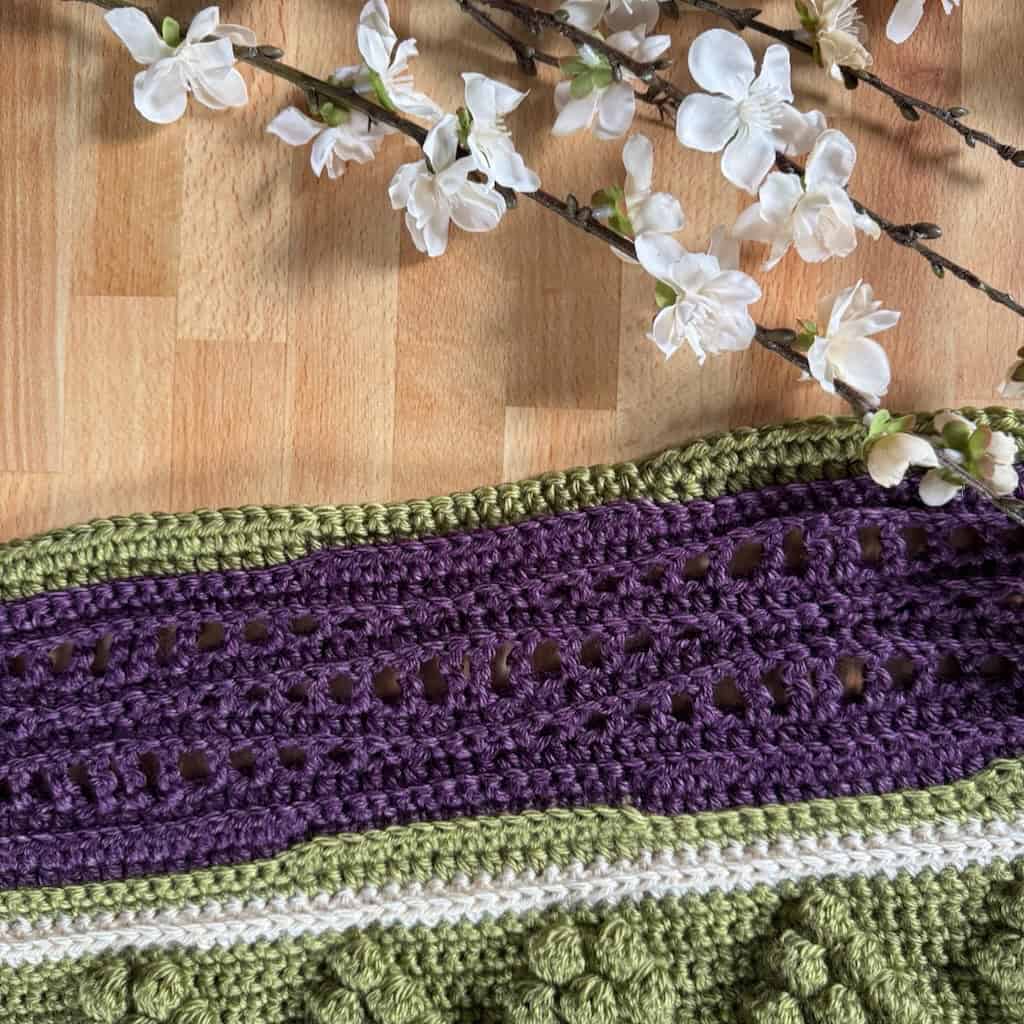
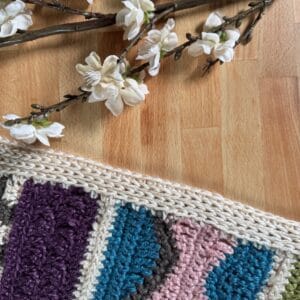
Strip 12: The Grape Escape
New instructions for Row 3: hdc in first 5 sts, [FPdc around next st 2 rows below] 2 times, hdc in next st, [FPdc around next st 2 rows below] 4 times, hdc in next st, [FPdc around next st 2 rows below] 2 times, hdc in next st, [FPdc around next st 2 rows below] 4 times, hdc in next st, [FPdc around next st 2 rows below] 2 times, * [sl st in next 4 sts, hdc in next 4 sts] 2 times, sl st in next 4 sts, [FPdc around next st 2 rows below] 2 times, hdc in next st, [FPdc around next st 2 rows below] 4 times, hdc in next st, [FPdc around next st 2 rows below] 2 times, hdc in next st, [FPdc around next st 2 rows below] 4 times, hdc in next st, [FPdc around next st 2 rows below] 2 times; rep from * across to last 5 sts, hdc in last 5 sts, ch 1, turn.
New instructions for Row 5: hdc in first 5 sts, [FPdc around next 2 FPdc below] 2 times, hdc in next st, sk next 2 post sts, FPtr around 3rd post, FPtr around the 4th post, FPtr around 1st skipped post, FPtr around 2nd skipped post, hdc in next st, [FPdc around next 2 FPdc below] 2 times, hdc in next st, sk next 2 post sts, FPtr around 3rd post, FPtr around the 4th post, FPtr around 1st skipped post, FPtr around 2nd skipped post, hdc in next st, [FPdc around next 2 FPdc below] 2 times, *[hdc blo in next 4 sts, sl st blo in next 4 sts] 2 times, hdc blo in next 4 sts, [FPdc around next 2 FPdc below] 2 times, hdc in next st, sk next 2 post sts, FPtr around 3rd post, FPtr around the 4th post, FPtr around 1st skipped post, FPtr around 2nd skipped post, hdc in next st, [FPdc around next 2 FPdc below] 2 times, hdc in next st, sk next 2 post sts, FPtr around 3rd post, FPtr around the 4th post, FPtr around 1st skipped post, FPtr around 2nd skipped post, hdc in next st, [FPdc around next 2 FPdc below] 2 times; rep from * across to last 5 sts, hdc in last 5 sts, ch 1, turn.
Pattern Notes
- Transition rows separate each strip. They also begin and end the blanket construction. Be sure to work them after each blanket strip.
- Acadia is used for the transition rows and the border.
- Every strip begins with a RS row and ends with a WS row.
- The border is worked in rnds with RS always facing.
- Weave in ends as you go.
Start Here
Before you begin Strip 1, work these 2 rows.
Row 1 (RS): With Acadia, Fhdc 180 OR ch 181, hdc in the 2nd ch from the hook and in each ch across, turn. < 180 hdc >
Row 2 (WS): Ch 1 (does not count as a st), sc 3lp in the same st and in each st across, turn. < 180 sc 3lp >
At the end of Row 2, do not fasten off. Proceed to Strip 1.
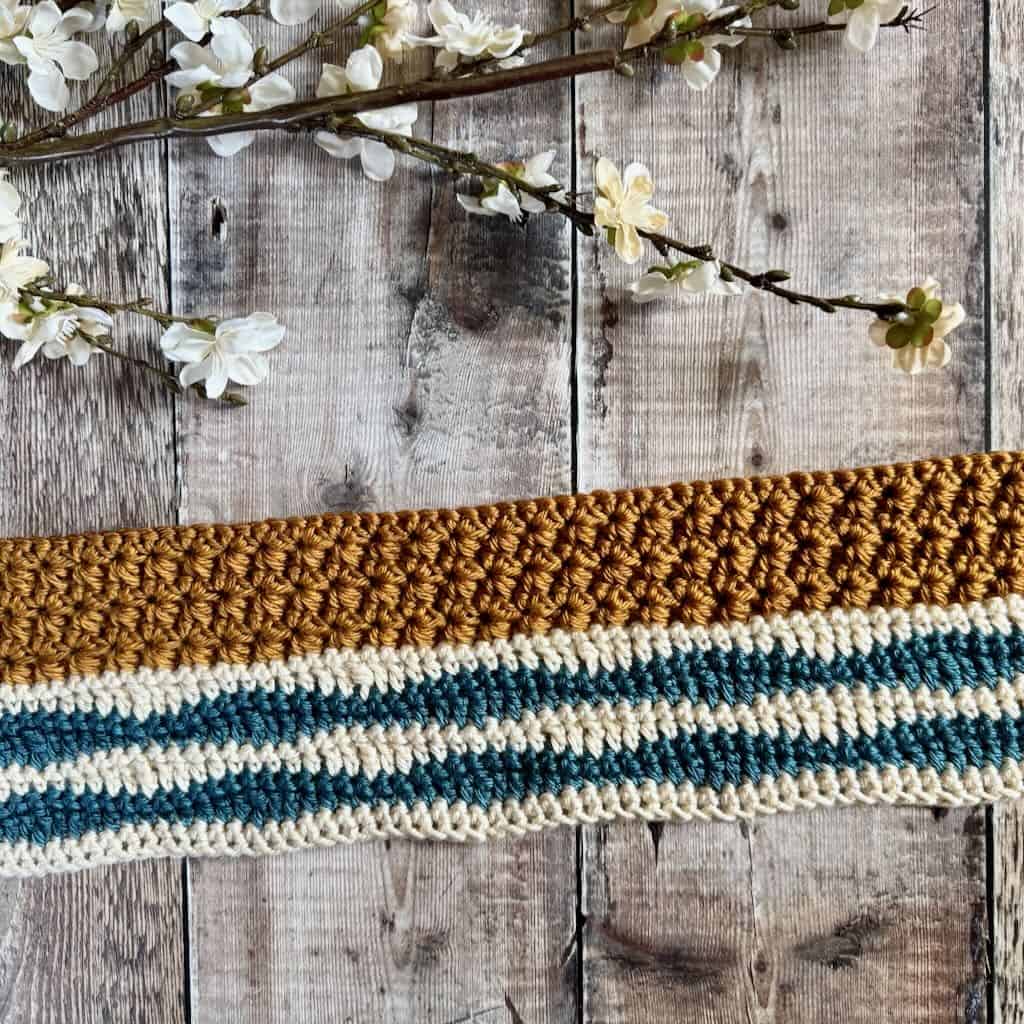
Strip 1 – Star Over the Valley by MadameStitch
Colors used in the sample:
- Color A – Glacier Bay
- Color B – Acadia
- Color C – Bryce Canyon
The instructions for this strip are free on the designer’s blog.
Transition Rows
Note: These 2 rows are worked between each blanket strip.
Row 1 (RS): With Acadia, ch 1 (does not count as a st), hdc in the same st and in each st across, turn. < 180 hdc >
Row 2 (WS): Ch 1 (does not count as a st), sc 3lp in the same st and in each st across, turn < 180 sc 3lp >

Strip 2 – Paha Sapa (aka Mosaic Black Hills) by Juniper & Oakes
Colors used in the sample:
- Color A – Mammoth Cave
- Color B – Bryce Canyon
The instructions for this strip are free on the designer’s blog.
Transition Rows
Use the instructions above to work these rows before moving on to Strip 3.
Strip 3 – Rural Dreams designed by Sunflower Cottage Crochet
Color used in the sample:
- Haleakala
The instructions for this strip are free on the designer’s blog.
Transition Rows
Use the instructions above to work these rows before moving on to Strip 4.
Strip 4 – Meandering Mississippi designed by Green Fox Farms Designs
Color used in the sample:
- Color A – Haleakala
- Color B – New River Gorge
The instructions for this strip are free on the designer’s blog.
Transition Rows
Use the instructions above to work these rows before moving on to Strip 5.

Strip 5 – Rocky Mountain Highway designed by Made With a Twist
Colors used in the sample:
- Color A – Capitol Reef
- Color B – Mammoth Cave
- Color C – New River Gorge
- Color D – Acadia
- Color E – Glacier Bay
The instructions for this strip are free on the designer’s blog.
Transition Rows
Use the instructions above to work these rows before moving on to Strip 6.

Strip 6 – Brussels designed by Knitting With Chopsticks
Color used in the sample:
- Capitol Reef
The instructions for this strip are free on the designer’s blog.
Transition Rows
Use the instructions above to work these rows before moving on to Strip 7.
Strips 7-12
The links to the instructions for Strips 7-12 can be found on my co-host’s blog. Click to button below.

Release Schedule
- Monday, July 7 – Cuyahoga Valley designed by Simply Melanie Jane
- Thursday, July 10 – Fall Foliage in New England designed by Ambassador Crochet
- Monday, July 14 – Pine Pathways designed by Measured and Stitched
- Thursday, July 17 – Florida’s Emerald Coast designed by Bizzy Crochet
- Monday, July 21 – Indy Victory Lap designed by Remington Lane Crochet
- Thursday, July 24 – The Grape Escape designed by Spotted Horse Design Co
Remember to work the Transitions Rows between each strip and after Strip 12.
The Border
Use the main color (Acadia) for the Border.
Rnd 1 (RS): Ch 1 (does not count as a st here and throughout the Border), (hdc, ch 1, hdc) in the same st, hdc in the next st and in each st across to the last st, (hdc, ch 1, hdc) in the last st, along the side of the blanket work a hdc in the end of each transition row and 15-16 hdc across the side of each strip, along the bottom edge of the blanket, (hdc, ch 1, hdc) in the 1st st, hdc in the next st and in each st across to the last st, (hdc, ch 1, hdc) in the last st, along the side of the blanket work a hdc in the end of each transition row and 15-16 hdc across the side of each strip, join with a slip st to the beg st, do not turn.
Note for Rnds 2-4: Be sure to work the 1st stitch after each corner in the hidden st.
Rnd 2 (RS): Ch 1, hdc 3lp in the same st, (hdc, ch 1, hdc) in the ch-1 corner sp, [hdc 3lp in the next st and in each st across to the next ch-1 corner sp, (hdc, ch 1, hdc) in the ch-1 sp] 3 times, hdc 3lp in the next st and in each st across to the beg st, invisible join.
Rnd 3: Ch 1, hdc 3lp in the same st and in each st to the ch-1 corner sp, (hdc, ch 1, hdc) in the ch-1 corner sp, [hdc 3lp in the next st and in each st across to the next ch-1 corner sp, (hdc, ch 1, hdc) in the ch-1 sp] 3 times, hdc 3lp in the next st and in each st across to the beg st, invisible join.
Note: if you wish your Border to be wider, rep Rnd 3 to desired width. End with Rnd 4.
Rnd 4: Ch 1, sc 3lp in the same st and in each st across to the ch-1 corner sp, (sc, ch 1, sc) in the ch-1 corner sp, [sc 3lp in the next st and in each st across to the next ch-1 corner sp, (sc, ch 1, sc) in the ch-1 sp] 3 times, sc 3lp in the next st and in each st across to the beg st, join with a slip st to beg st.
Fasten off and weave in ends.
The alternative color planner is a great idea, but it’s difficult to use.
First: we don’t know which destination corresponds to which designer, and second: we don’t know which colors were selected originally. I have no idea how to assign new colors from my stash.
To be easily used, the color planner should show the destination name and original colors selected. The designer’s name is irrelevant.
Joan,
You’re absolutely right…that’s actually been on my mind this morning.
I’m working on a new version and will have it uploaded soon. Thanks for the suggestion!
-Debbie
Hey all,
The new version of the “Plan Your Colors” PDF is linked in the post. It should be much easier to use!
Best,
Debbie
Will the row be available to go back to
Debbie,
I’m not sure what you’re asking.
All instructions, including the links for the strip instructions, will be forever free and accessible so you are able to make the Road Trip Blanket long after the CAL is over.
Best,
Debbie