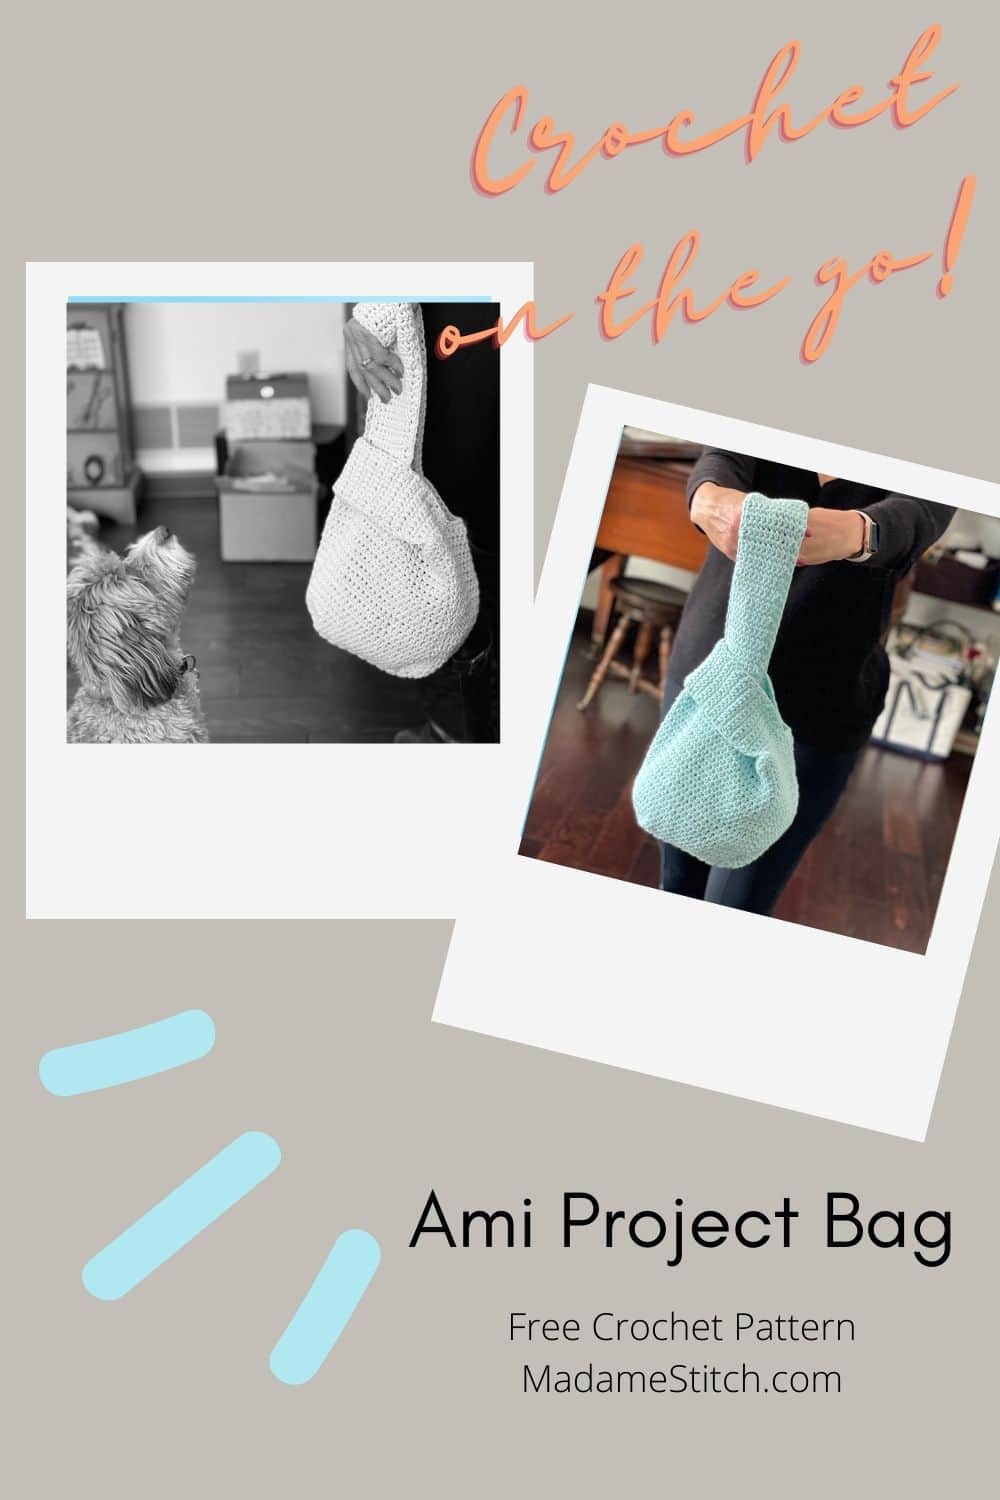
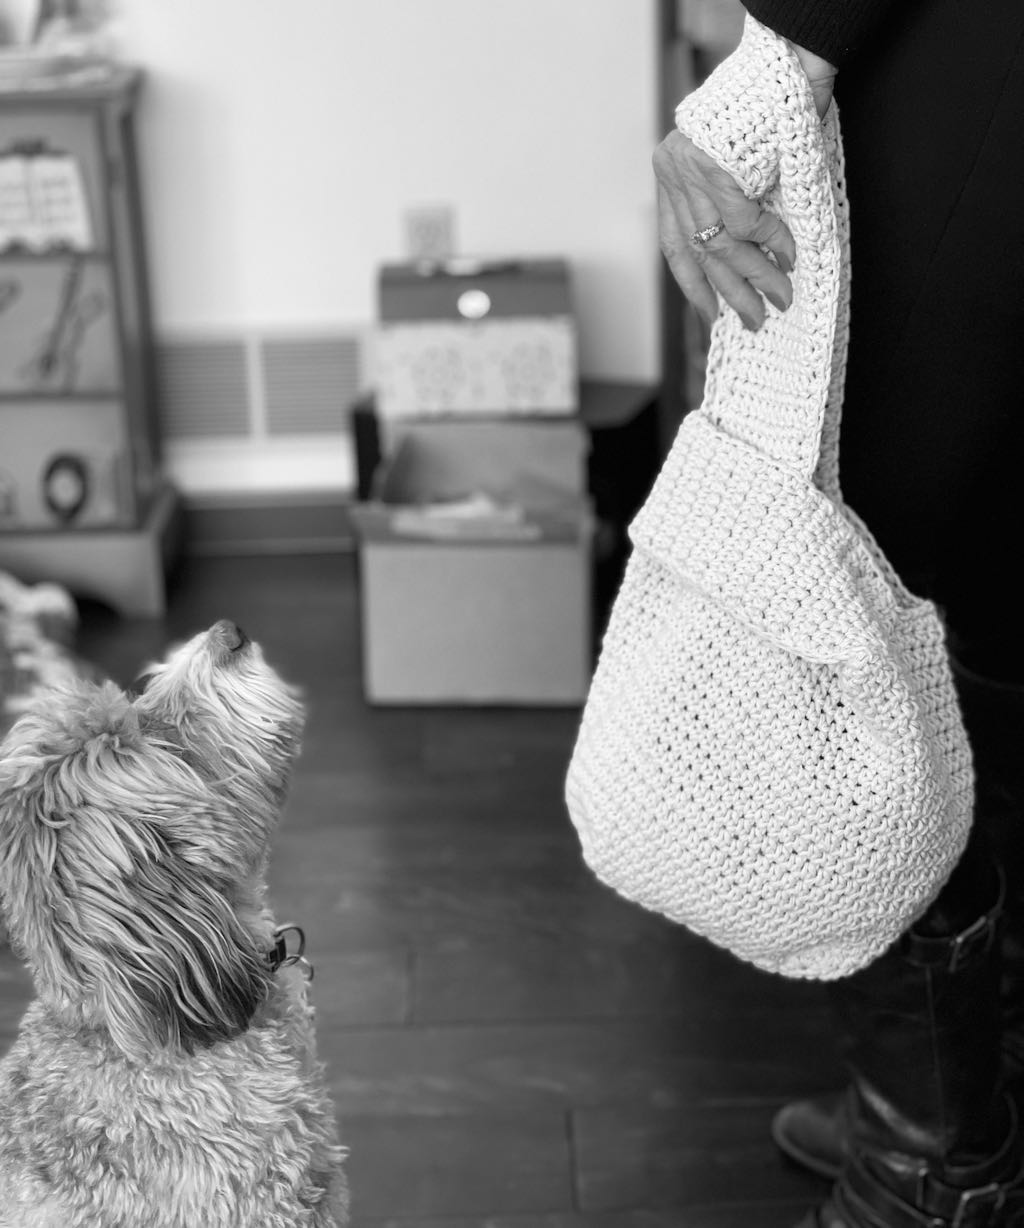
The perfect project bag to carry your crochet when you’re on the go
Carry your small crochet projects in style with this Japanese knot-style project bag—compact, chic, and perfect for crafting on the go.
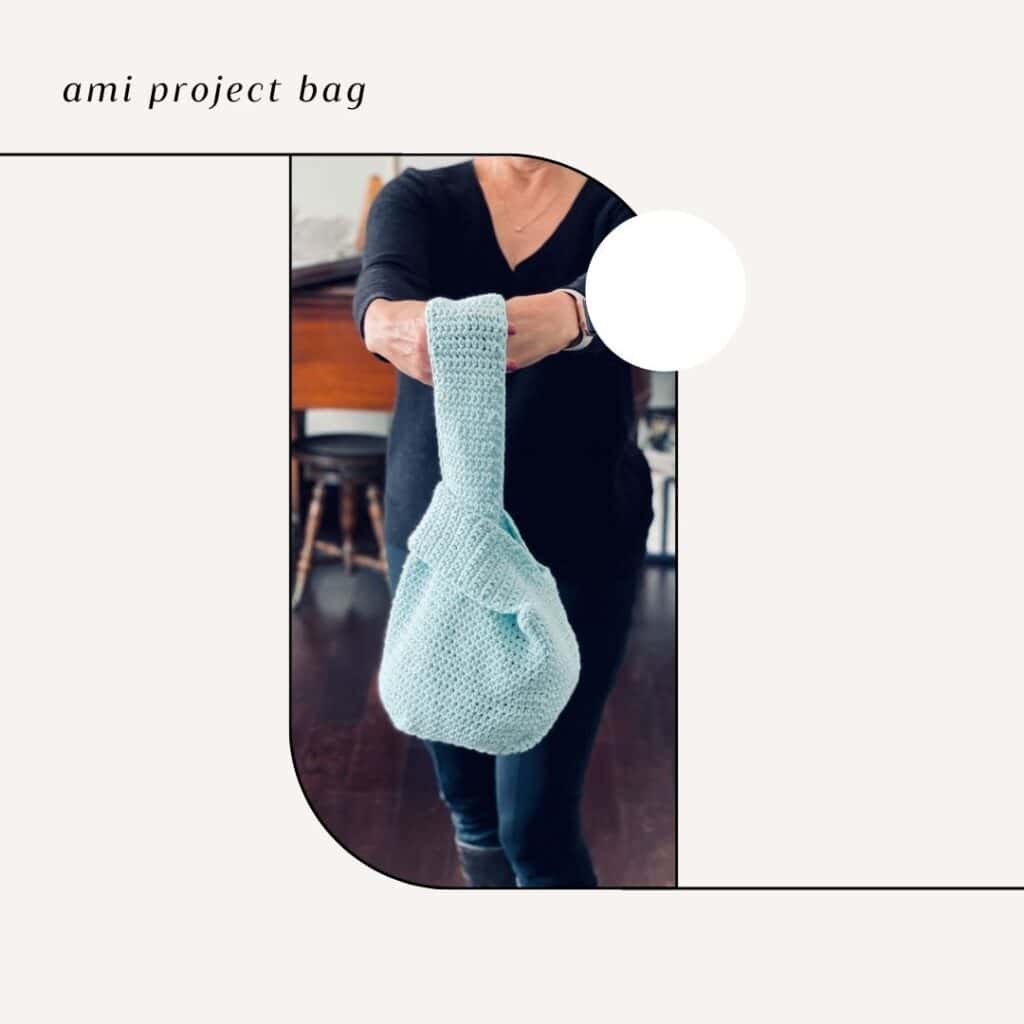
“Ami” is the Japanese word for “crochet”, so it’s certainly fitting that this crochet project bag design is derived from a Japanese knot bag.
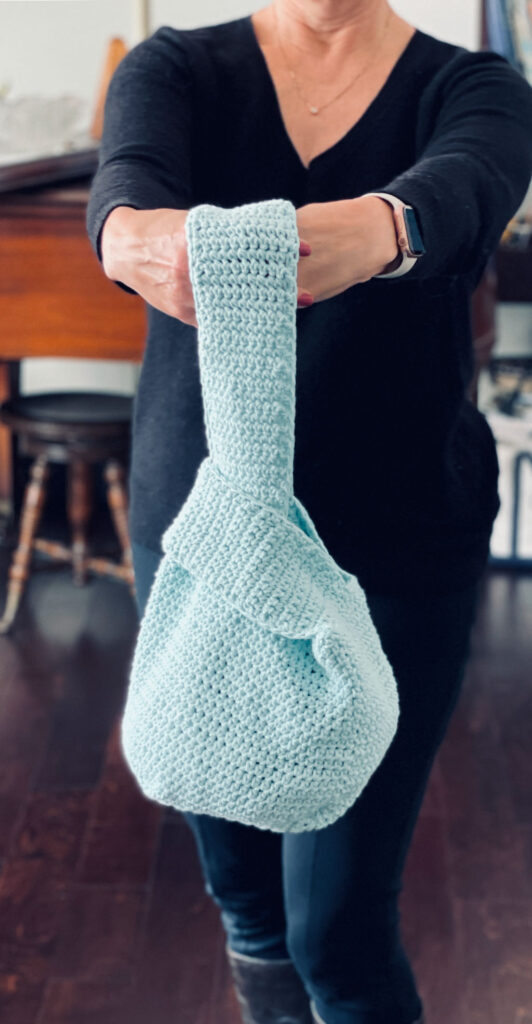
The unique closure of the Ami Project Bag creates a slight opening at the top when the long handle threads through the smaller handle. The long handle can then be held on your wrist, creating a hands-free solution for the busy crocheter who wants to crochet on the go. The project bag makes a wonderfully thoughtful gift for any crocheter, especially you!
Crocheters need project bags of all shapes and sizes to accommodate their WIPs! This particular project bag has a generous size without being too large. It can hold a large cake of yarn with room for the project and tools as well.
The Ami Project Bag
Design + Construction
I’ve always been fascinated with the design of a Japanese knot bag. It just seems like the perfect solution to hands-free crocheting in such a simple design.
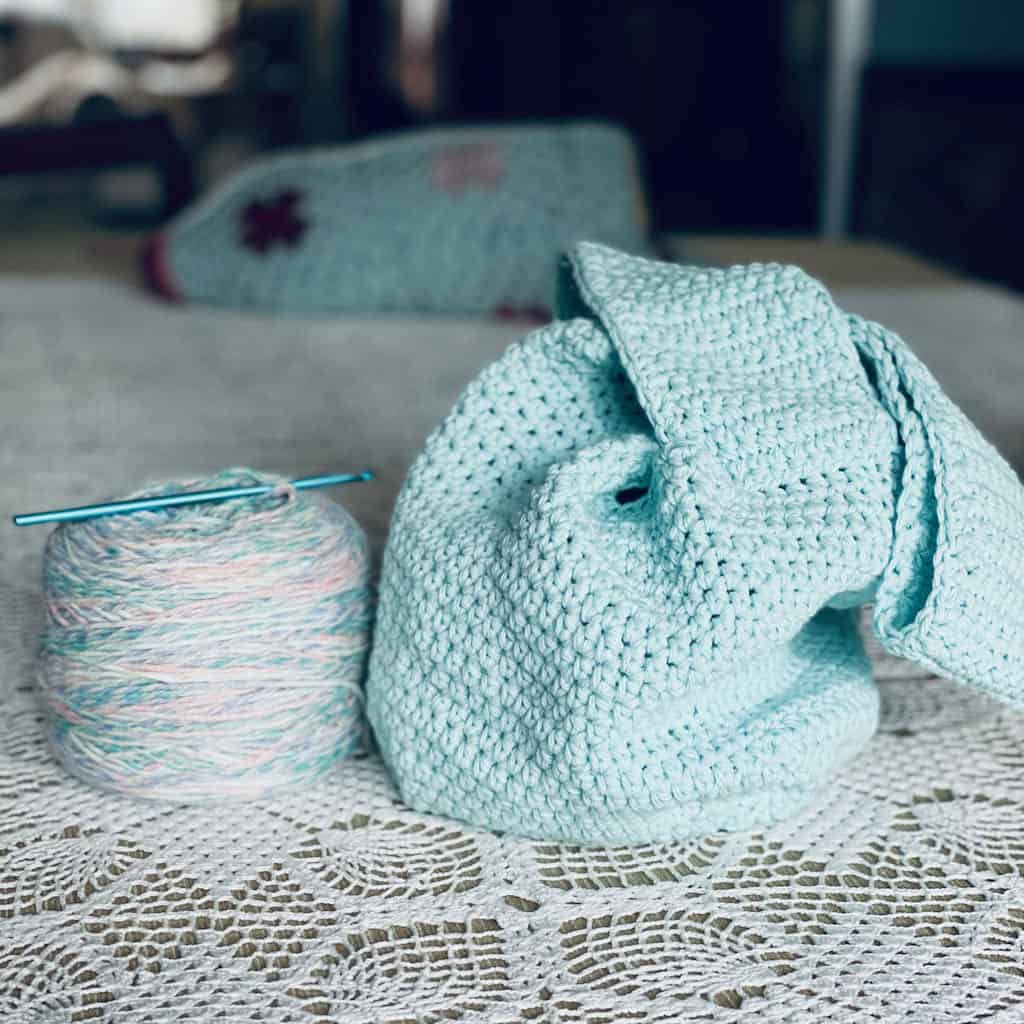
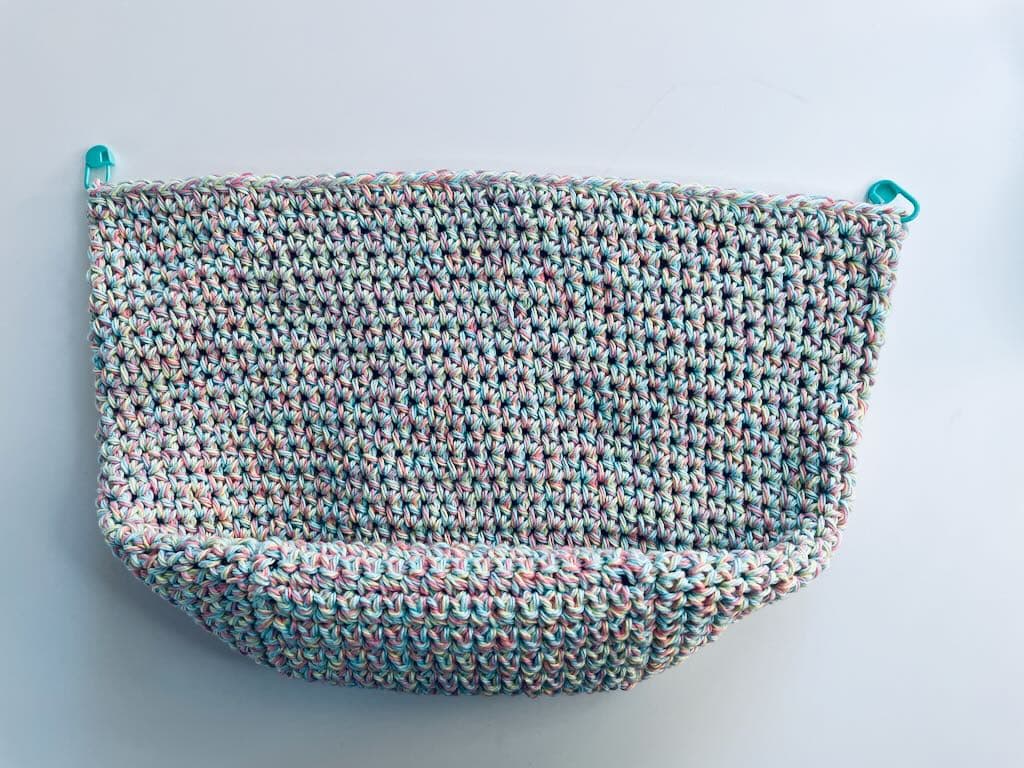
Most of the knot bags I’ve seen begin with a flat circle that continues into the body portion of the bag. I chose instead to make a square-ish bottom, giving the bag a bit more stability on the bottom. It’s a bit unconventional for a crochet version but I think it makes the bag design pretty unique!

I used single crochet for the bottom and half double crochet for the body because I wanted a fabric that was pretty close-knit. A lot of knot bags are lined but this one doesn’t need to be.
What’s to love about the Ami Project Bag
- The pattern is beginner friendly (although it’s more appropriate for an advanced beginner).
- The bag works up quickly.
- By using cotton worsted weight yarn, the bag is durable and easy to take care of.
- Construction is pretty straightforward.
The Yarn
I’ve been on a mission to try a number of new (to me) worsted weight cotton yarns. Because there are many popular choices out there, I didn’t want to be limited to one or two favorites.
When I sampled Bernat “Handicrafter”, I knew I had a winner. The yarn is easy to work with, has a nice feel and works up into a very pretty fabric.
The regular “Handicrafter” has a diverse selection of colors so there’s probably a color for you. I also made a sample in the Twists version. Only 3 colors but I like the way it looks when it’s made up.
Yarn Substitution
Of course, you can use any cotton worsted weight yarn you like. I would recommend a mercerized cotton, one without stretch to it. The bag will have a bit of stretch because of the nature of the crochet stitches. Adding to that with a stretchy yarn would result in a misshapen bag and no one wants that!
If you’re looking for a suitable substitute, use my Yarn Substitution Worksheet to see if what you have or want would work for this project bag.
Where to get the premium PDF for the Ami Project Bag
The Ami Project Bag is a free crochet pattern here for blog subscribers. Scroll down to view the free version.
Upgrade to the premium PDF to get a printer friendly and downloadable versio of the pattern, available from any of my shops.
The premium PDF can be uploaded to your favorite mobile device so you can take your WIP Ami Project Bag with you to work on whenever you’re out and about. The PDF is easy to read and beautifully formatted without ads for a great experience.
Get your copy today!


The free pattern for the Ami Project Bag starts here
General Information
Yarn
Bernat “Handicrafter” 100% cotton worsted weight yarn (1.75oz/80yd; 50g/73m) – 4 skeins (the sample was made in Robins Egg.
OR
Bernat “Handicrafter Twists” 100% cotton worsted weight yarn (1.5oz/68yd; 42.5g/62m) – 5 skeins (the sample was made in Candy Sprinkles)
Please note that these 2 yarns have differing yardages and therefore need a different number of skeins. Order enough for the entire project!
Any worsted weight 100% mercerized cotton would work for this project bag.
Hook
US size H-8 (5mm) or size needed to achieve gauge listed in the printed pattern.
Tool: Tapestry needle for seaming and weaving in ends
Finished Size
Approx. 8” tall (for the body not including the straps) x 12.5” wide
Gauge
Approx. 14 sc x 15 rows = 4″
Skill Level: Advanced Beginner
Abbreviations – US crochet terminology
- beg – beginning
- ch- chain
- hdc – half double crochet
- pm – place marker
- rep – repeat
- rm – remove marker
- rnd(s) – round(s)
- RS – right side
- sc – single crochet
- st(s) – stitch(es)
Pattern Notes
- The yardage per skein for “Twists” is less than for the regular “Handicrafter”. I used all but a few yards of the 4th skein of Twists to complete the sample. I encourage you to buy the 5th skein just in case. Yarn chicken is stressful!
- The “ch 1” at the beginning of any rnd or row does not count as a st.
- The bottom of the bag and the straps are worked in sc. The body of the bag (with the exception of the first rnd) is worked in hdc.
Unlock Exclusive Subscriber Content
To unlock Exclusive Subscriber Content, click on the button in the box below. The Grow.me app window will pop up where you can either create an account or sign in if you already have one.
To create an account, sign in with your existing Google or Facebook account. You can also create an account with an email address and new password.
If you forget your password, simply click the “Forgot my Password”button. I have no access to your Grow account so I’m unable to retrieve or reset your password.
Remember, once you’ve created a Grow account, you never have to do it again. Your Grow account unlocks all the exclusive content created by Grow
Thank you for being a loyal blog subscriber. I hope you enjoy the exclusive content!
Pattern Instructions
Bottom
Ch 18.
Row 1: Sc in 2nd ch from hook and in each ch across, turn. < 17 sc >
Row 2: Ch 1, sc in same st and in each st across, turn.
Rows 3-20: Rep Row 2. Do not fasten off and do not turn at the end of Row 20. Continue on to the Body.
Body
Notes
- Rnd 1 establishes the stitch count for all subsequent rnds of the Body. Be sure you have the required number of sts at the end of Rnd 1.
- Do not turn at the end of any rnd.
- This section should measure 8” from Rnd 1-20.
Rnd 1: Ch 1, 2 sc in the same st, * work 19 sc evenly spaced across to corner, 3 sc in the corner st, sc in the next 16 sts across to the corner, 3 sc in the corner st; rep from *, ending with sc in the same st as the beg 2 sc to complete the corner, join with slip st to beg st. < 82 sc >
Rnd 2: Ch 1, hdc in each st around, join with slip st to beg st. < 82 hdc >
Rnds 3-20: Rep Rnd 2. At the end of the last rnd, fasten off.
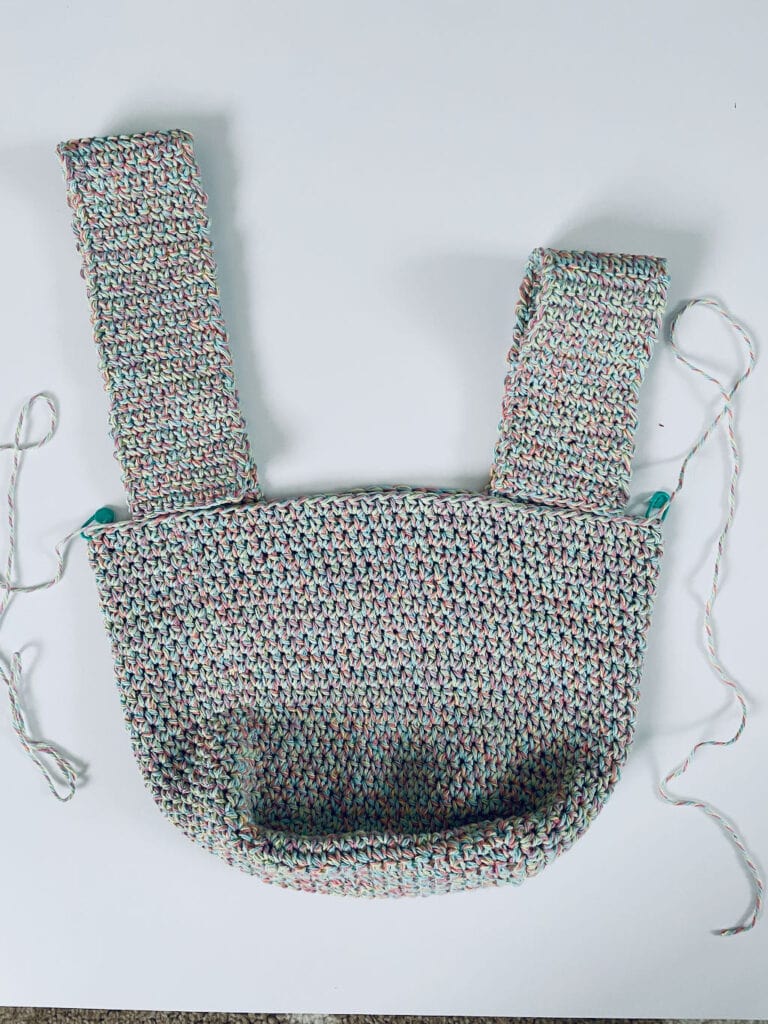
Straps
Before working the straps: Fold the bag in half with RS out. Pm at each side edge (be sure you have 40 sts between markers on both sides of the bag).
For the long strap
Attach the yarn to the 4th st from the marker on the right.
Row 1: Ch 1, sc in same st and in the next 9 sts, turn. < 10 sc >
Row 2: Ch 1, sc in same st and in each st across, turn.
Rep Row 2 until strap measures 18” (approx. 66-68 rows).
Fasten off, leaving a long tail for seaming. Proceed to the short strap.
For the short strap
Beginning on the same side as the long strap just made, attach yarn to the 13th st from the marker on the left.
Row 1: Ch 1, sc in same st and in the next 9 sts, turn. (10 sc)
Row 2: Ch 1, sc in same st and in each st across, turn.
Rep Row 2 until strap measures 12” (approx. 44-45 rows).
Fasten off, leaving a long tail for seaming.
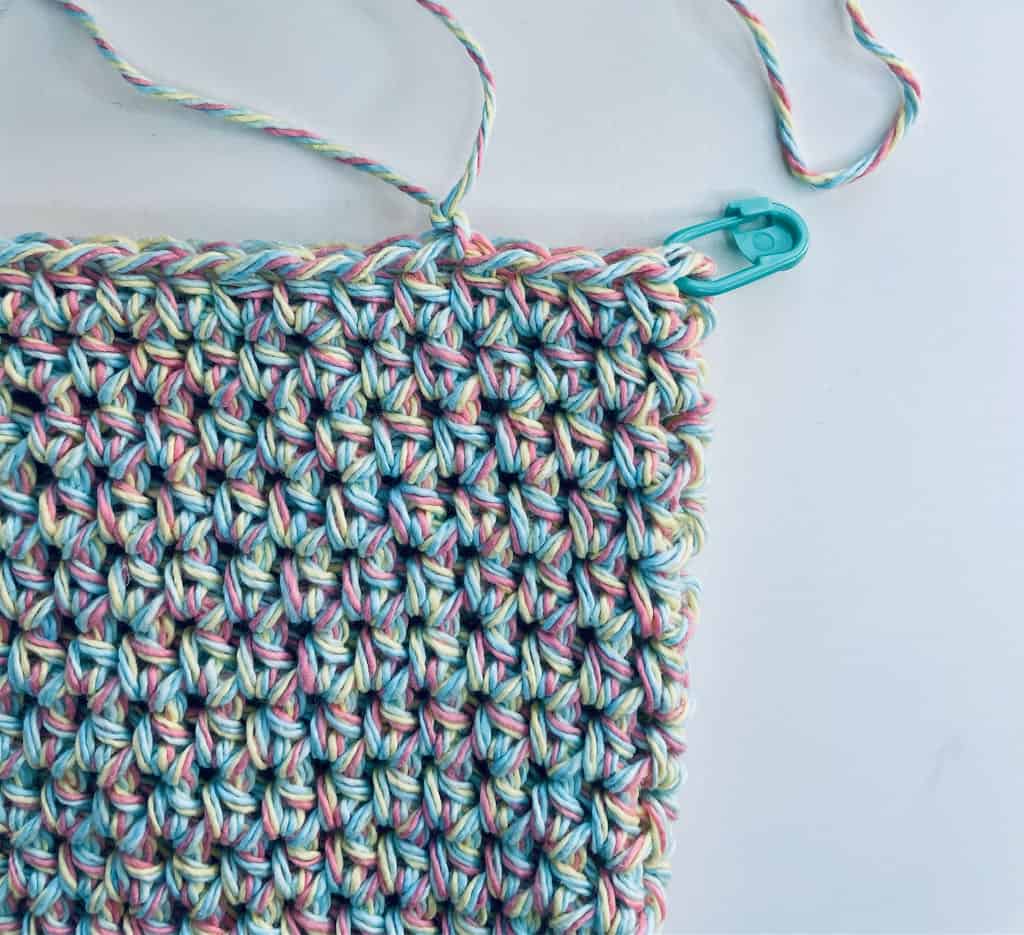
Attaching the straps to the opposite side of the bag
Notes
- Use a whip stitch seam to attach the straps to the opposite side of the bag.
- When sewing the straps to the top edge of the bag, catch both loops of the strap AND the top of the bag for a more stable seam.
- Be careful not to twist the strap.
Turn the bag over. You’ll be sewing the strap ends to the opposite side of the bag.
If the long tail is on the side of the strap nearest the marker, start seaming in the 4th st from the marker and work toward the center of the bag. If the long tail is on the side of the strap nearest the center of the bag, start seaming in the 13th st from the marker and work toward the marker. When attached, there should be 3 empty sts between the edge of the strap and the marker (as in the photo).
Edging the straps (Optional)
Notes
- While the edging is optional, it is highly recommended because it minimizes stretching of the straps. It also gives a nice finishing touch to the strap edges.
- A sc is wider than it is tall. Work 2 sc for every 3 rows around the edge of each strap to create an edge that lies flat.
To work the outer edge of the short strap
With RS facing, attach yarn at marker, rm, ch 1, sc in the same st, sc in each st along the top of the bag, and 2 sc in every 3 rows along the edge of the strap around, join with slip st to beg st and fasten off.
Rep this for the outer edge of the long strap and the inner edges of both straps.
Weave in ends.
To close the bag, thread the long strap through the short strap. Pack it with your favorite WIP.
You’re ready to go!
2 Comments