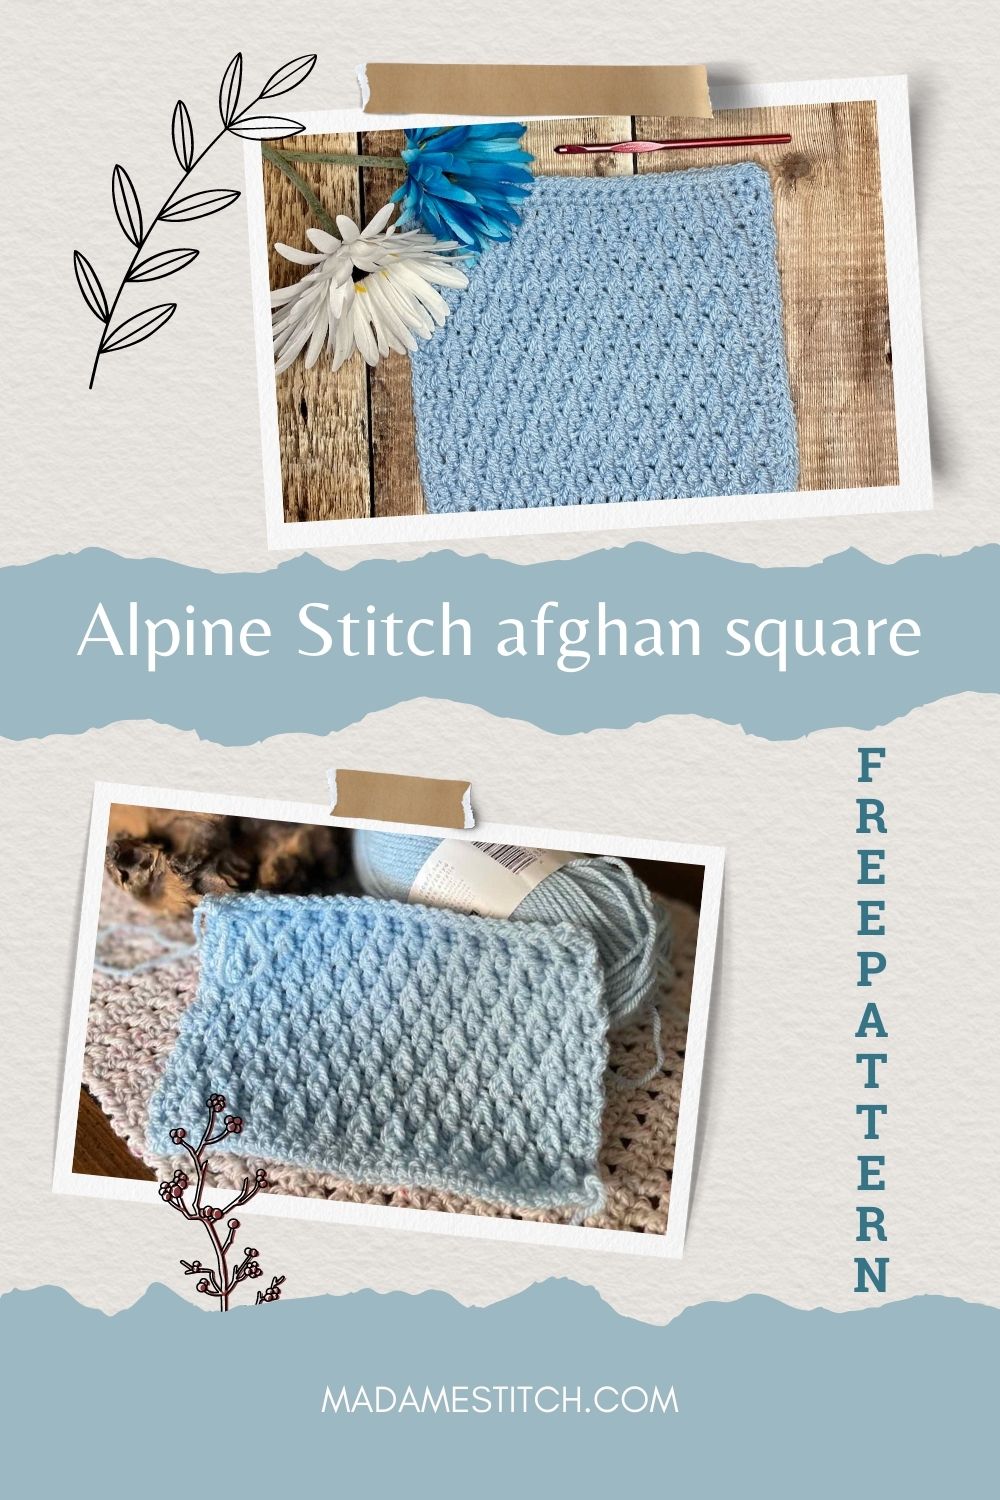
A beautiful crochet alpine stitch afghan square
Create a beautiful blanket or pillow for your home with this crochet alpine stitch afghan square. Free pattern on the blog.
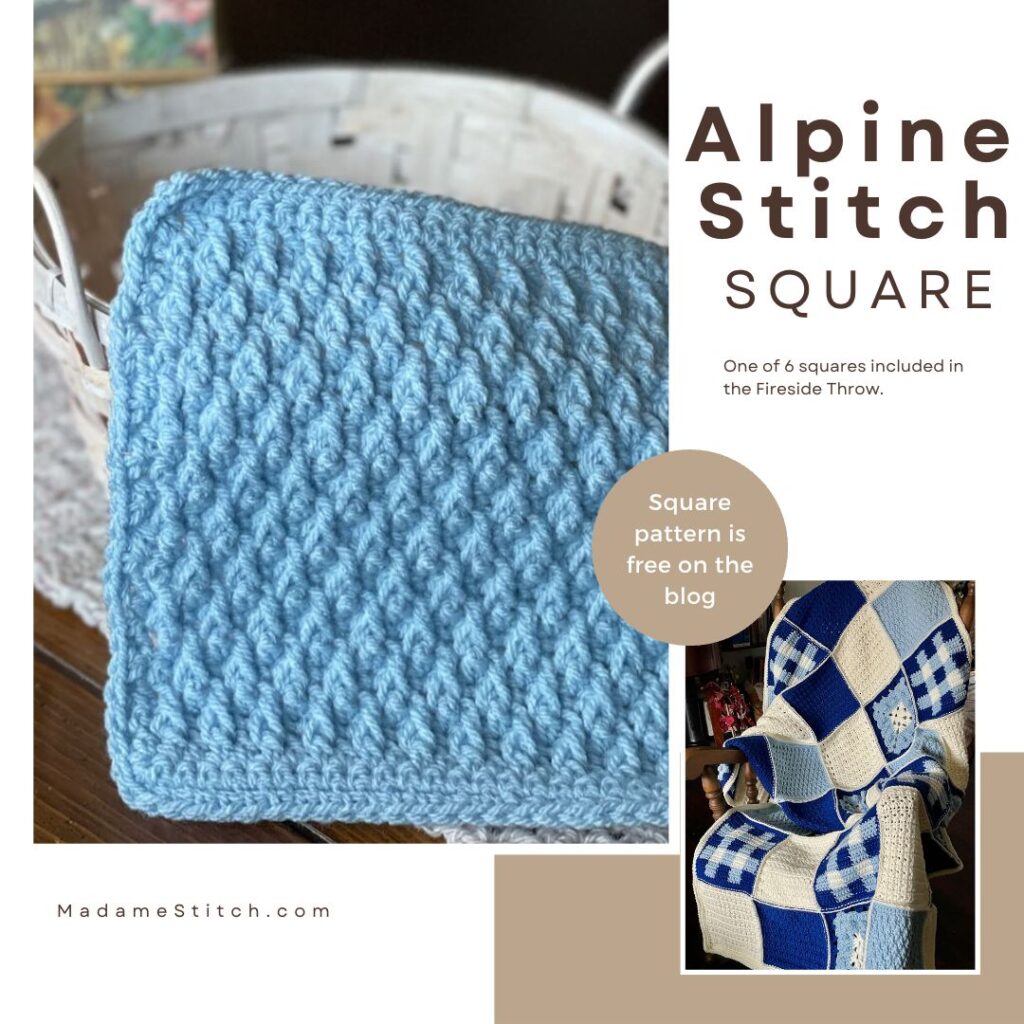
This afghan square was designed as part of the Fireside Throw, a beautiful stitch sampler blanket that’s perfect for cuddling under during the cold winter months.
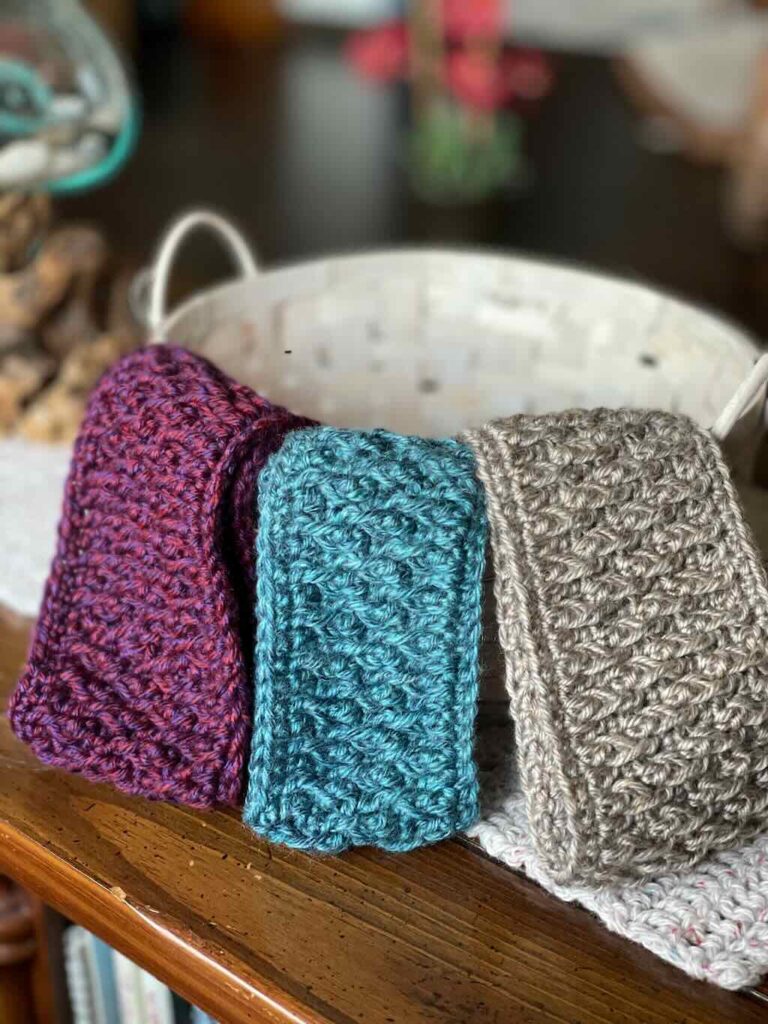
The crochet alpine stitch afghan square offers blocks of elegant surface texture to the overall blanket. It has a beautiful look and feel, adding warmth without adding weight. This crochet alpine stitch afghan square is perfect for other crochet home decor designs like throw pillows.
Design + Construction
I’ve loved the look of the crochet alpine stitch ever since I first saw it. I used it for my Neve headband design which recently released but I’ve been dying to try it in home decor where I think the stitch really shines. Adding this gorgeous crochet alpine stitch afghan square to the Fireside Throw was a must.
The crochet alpine stitch is so easy, the look achieved with front post double crochets that are offset in alternating rows. The overall stitch pattern is a 4-row repeat that alternates the front post double crochet rows with single crochet rows. The stitch provides loads of texture and coverage without being stiff.
This square is not reversible so you’ll need to be sure to have the side with the front post double crochets showing on the right side of the blanket.
The easy 4-row repeat of the crochet alpine stitch is the body of the square. It’s finished off with a round of single crochet to create an easy edge for seaming blocks together.
The Yarn
This post contains affiliate links. That means, if you purchase something using the link, I receive a small commission. You don’t pay any extra and your information is safe. Thanks for supporting my small business.
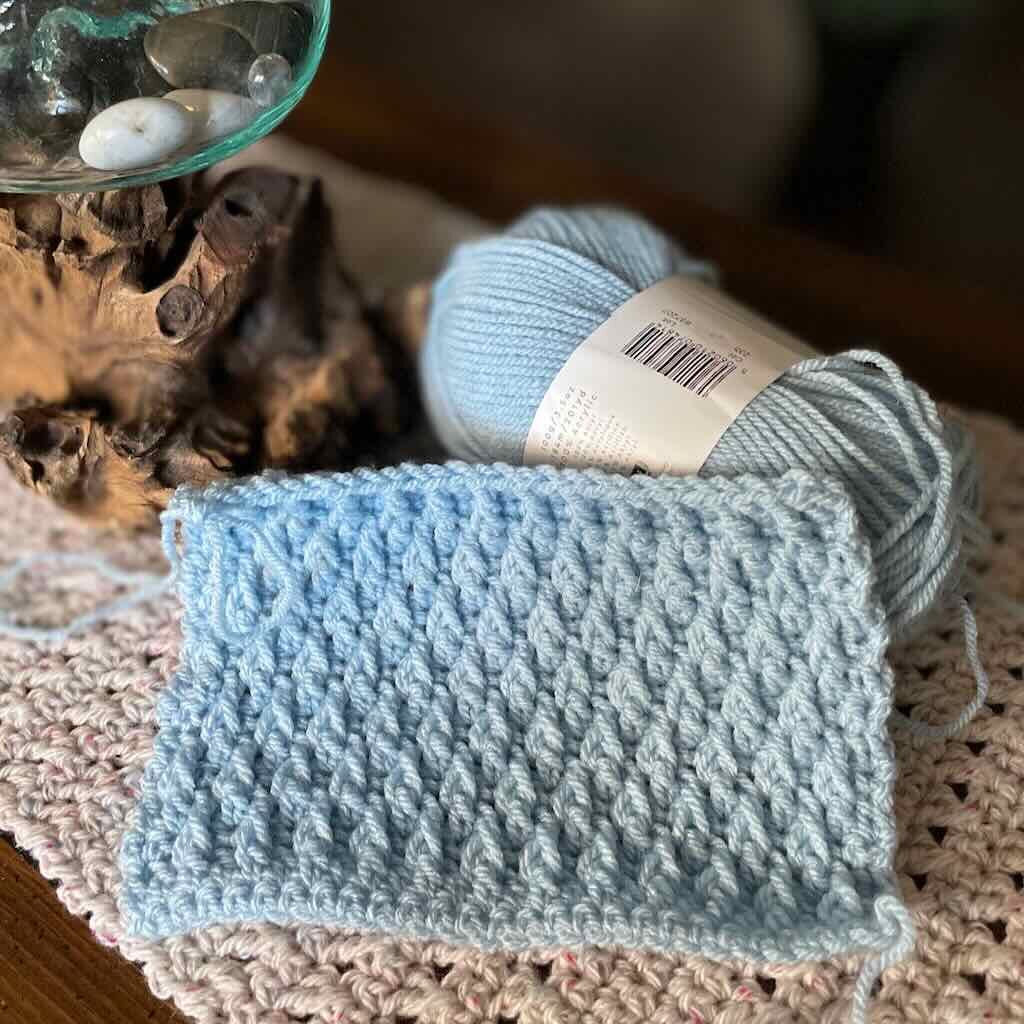
Because this crochet alpine stitch square was designed for the Fireside Throw CAL, the yarn I chose was already determined by what was needed for the entire blanket. In this case, Paintbox Yarns “Simply Aran” in Duck Egg Blue (a medium blue) is what you see in the sample.
I love this yarn because it’s soft and easy to work with. It provides just the right amount of stitch definition for the alpine stitch.
Any worsted weight yarn with a soft but firm twist will work for this square. The square only takes just 1.3oz making it easy to use some of what you have in your stash.
If you prefer to work from a PDF…
I have one available in my Ravelry shop. It’s beautifully formatted and ad-free. You can add it to your favorite digital device or print it out for your pattern library.
Remember, it will always be free on the blog. You can bookmark this page and come back to it anytime.
The Fireside Throw blanket pattern
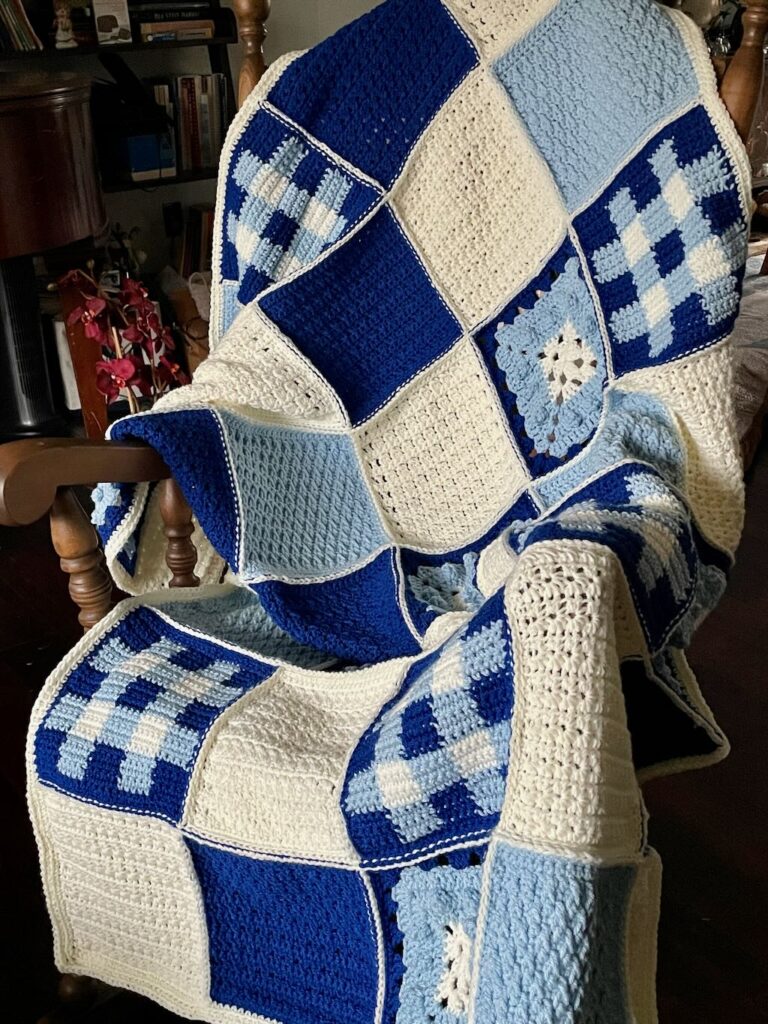
As I mentioned earlier, this square is included in the Fireside Throw CAL. You can purchase the full pattern for $8 through February 13th after which the price increases to $12.
This beautifully formatted PDF includes everything you need to make your very own Fireside Throw. Here’s what you’ll get with your copy:
- Written instructions for all 6 squares in the blanket
- Detailed instructions for assembly and adding the simple border
- Tips that will help you as you make your blanket
Click here to get the full pattern PDF for the Fireside Throw blanket.
Here’s what you need to know to make the crochet alpine stitch afghan square
Thank you for staying on this post and reading my patterns right here on the blog, without copy/pasting. When you stay here to follow the free version of my pattern, I am compensated for my time and energy. This is a great, free way to support a designer. If you would like to save this for later, bookmark the page to save it in your mobile browser.
Yarn
Paintbox Yarns “Simply Aran” 100% acrylic (3.5oz/201yd; 100g/184m)
Color: #235 Duck Egg Blue – approx. 1.3oz per square
Hook
US size H-8 (5mm)
Tools
- Removable stitch marker
- Tapestry needle for weaving in ends
Finished size: Approx. 8.5″ square
Gauge: 13 sts x 13 rows in the Alpine Stitch pattern (Rows 4-7 3 times + 1 more row)
Skill level: Advanced beginner
Abbreviations – US crochet terminology
- beg – beginning
- ch – chain
- dc – double crochet
- FPdc – front post double crochet
- sc – single crochet
- st(s) – stitch(es)
- RS – right side
- WS – wrong side
- YO – yarn over
Special Stitches
The Alpine Stitch is a 4-row repeat pattern where rows of front post double crochet stitches are alternated with rows of single crochet stitches to create a beautiful textured diamond shape pattern on one side and a flat defined pattern on the other side.
For both a photo and video tutorial of the crochet alpine stitch, use the button below.
Invisible Join – Joining at the end of a circle or square worked in the round can leave an unsightly bump when the yarn is simply tied off after a slip stitch join. An invisible join creates a seamless look along the edge of your work.

Stacked single crochet (STsc) – (This stitch is used at the beginning of a row or round to replace the traditional turning ch-3. It has the appearance of a dc.) – Insert hook in same st as loop, YO, draw up loop, YO, pull through 2 loops (bottom sc made), insert hook in left vertical bar of bottom sc, YO, draw up loop, YO, pull through 2 loops (top sc made).

Written Instructions for the Alpine Stitch afghan square
Thank you for staying on this post and reading my patterns right here on the blog, without copy/pasting. When you stay here to follow the free version of my pattern, I am compensated for my time and energy. This is a great, free way to support a designer. If you would like to save this for later, bookmark the page to save it in your mobile browser.
Pattern Notes
- A ch-2 or ch-3 may be substituted for the STsc at any time without altering the appearance or construction of the square.
- Pull up the 1st loop of each FPdc to the height of a regular dc to prevent the square from curling. If it does, block with your favorite method to relax the stitches.
Pattern Instructions
Body
Ch 26.
Row 1 (WS): Sc in 2nd ch from hook and in each ch across, turn. (25 sc)
Row 2 (RS): STsc, dc in next st and in each st across, turn. (25 dc)
Row 3: Ch 1, sc in same st and in each st across, turn. (25 sc)
Row 4: STsc, (FPdc around dc directly below in Row 2, dc in next st) across, turn. (12 FPdc, 13 dc)
Row 5: Ch 1,sc in same st and in each st across, turn. (25 sc)
Row 6: STsc, dc in next st, (FPdc around dc 2 rows directly below) across to last st, dc in last st, turn. (11 FPdc, 14 dc)
Row 7: Ch 1,sc in same st and in each st across, turn. (25 sc)
Rows 8-23: Rep Rows 4-7 4 times.
At the end of Row 23, turn but do not fasten off. Proceed to Edging.
Edging
Note: To evenly space the sc along the row ends, place a marker at the halfway point. Work 11 sc on either side of the marker and into the spot where the marker is for a total of 23 sc between corners.
Top edge: Ch 1, sc in same st and in each st across to last st, 3 sc in last st.
Side 1: Rotate 90 degrees, work 23 sc evenly across side.
Bottom edge: Rotate 90 degrees, 3 sc in 1st foundation ch, sc in next ch and in each ch across to last ch, 3 sc in last ch.
Side 2: Rotate 90 degrees, work 23 sc evenly across side, 2 sc in same sp as 1st st of Top Edge to complete the corner, use invisible slip st join to 1st st of Top Edge.
Fasten off. Block to eliminate curling caused by Alpine stitch.
[mailerlite_form form_id=3]


2 Comments