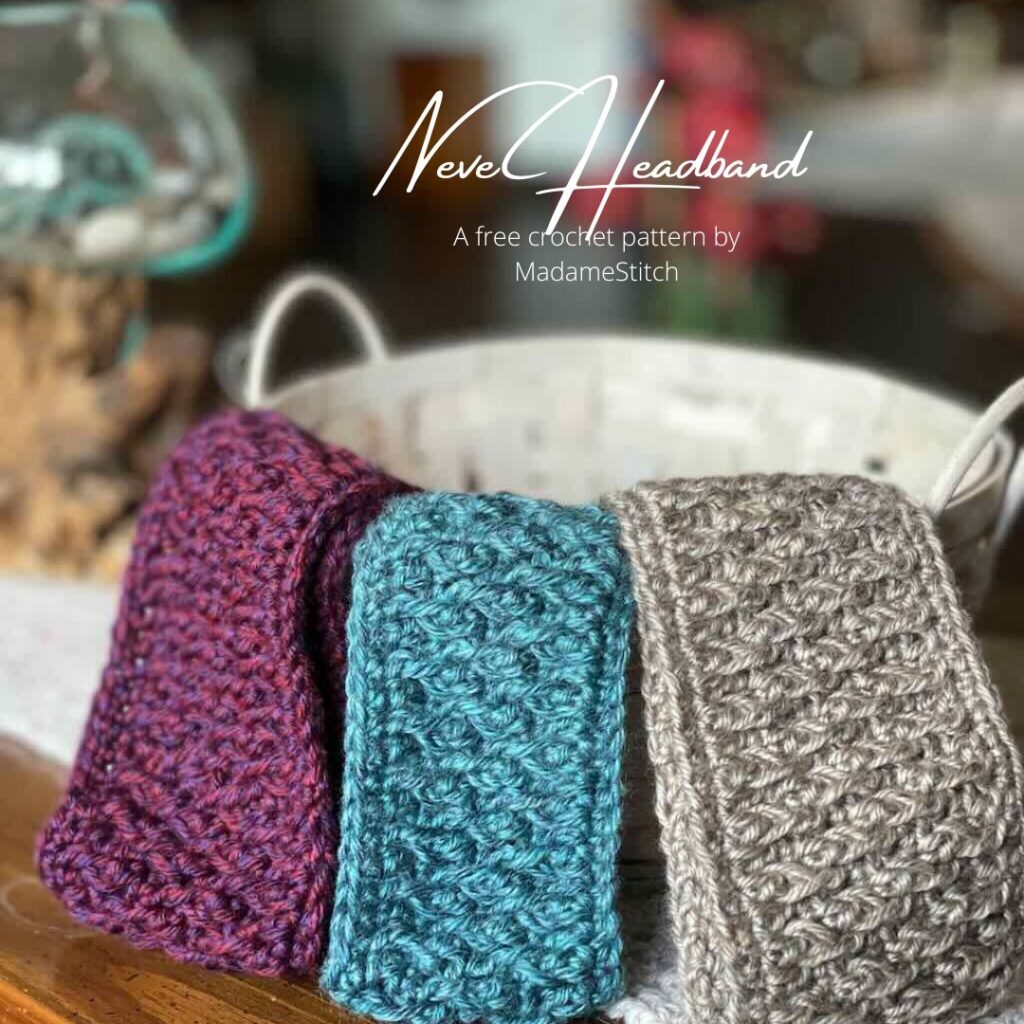
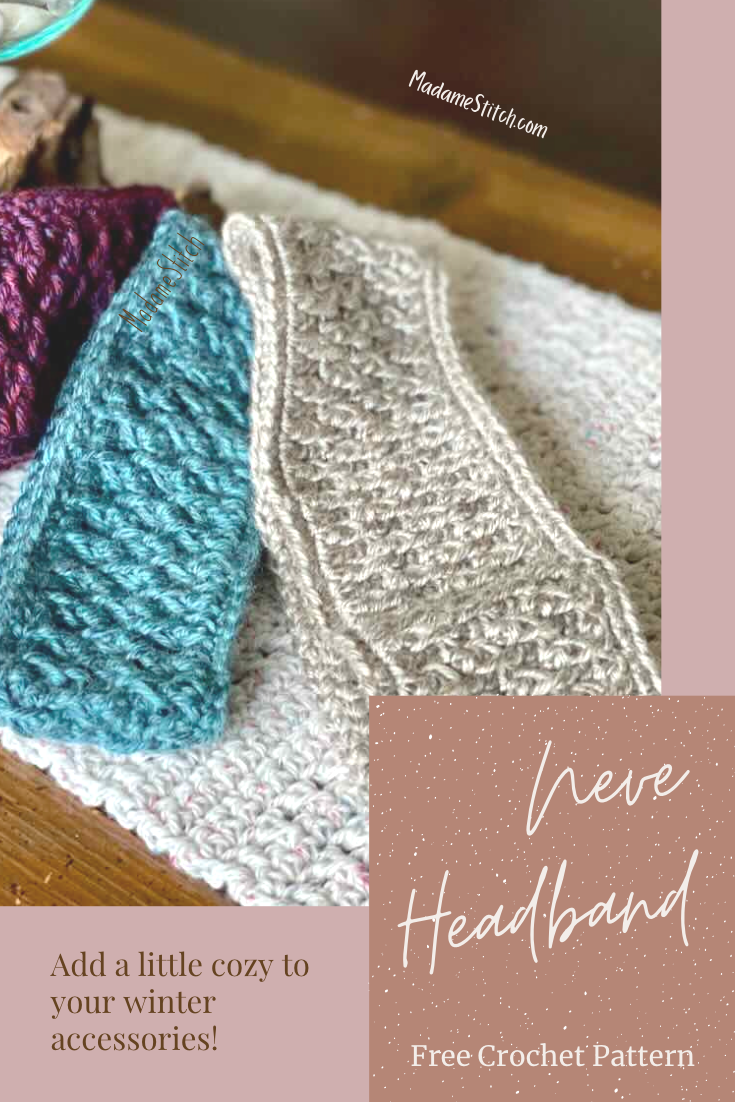
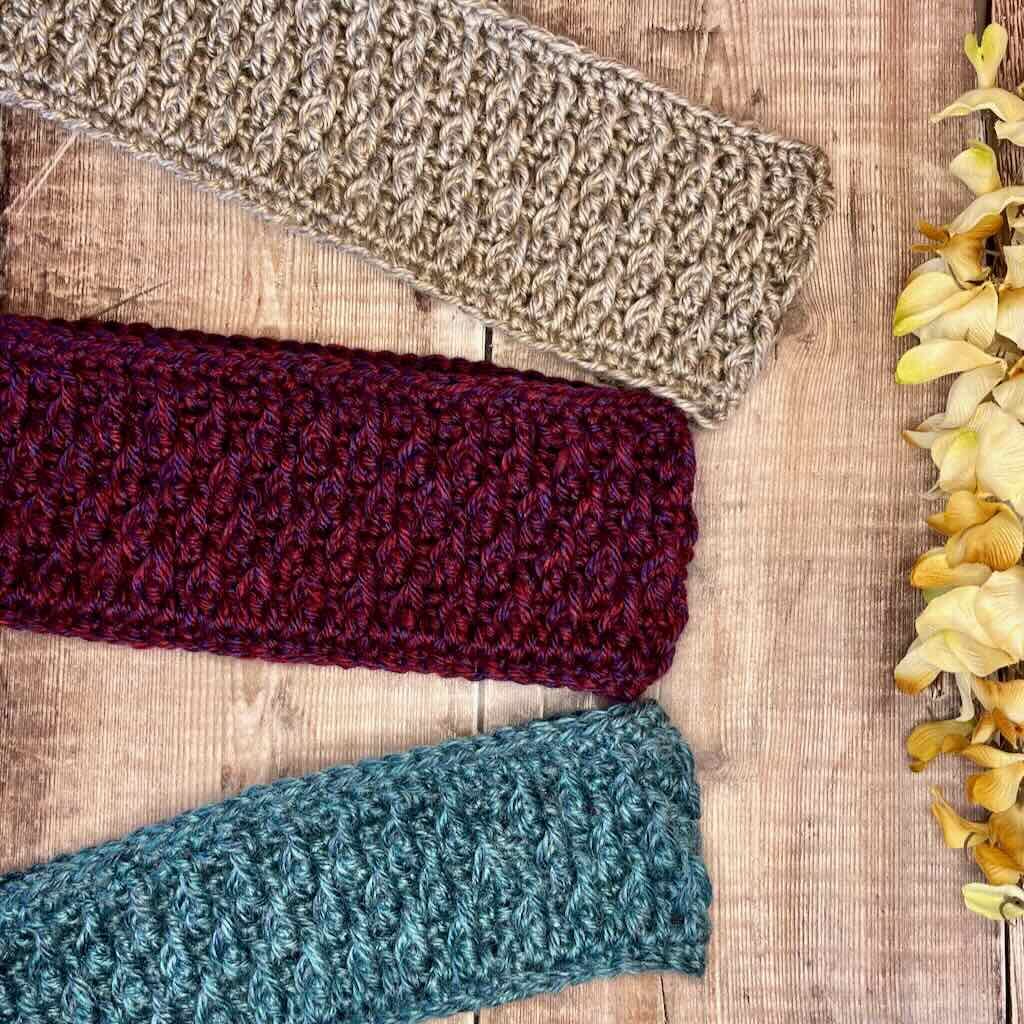
A beautiful alpine stitch headband perfect for winter
Crochet this quick, beginner friendly alpine stitch headband. The crochet pattern is free on the blog.
This post contains affiliate links. That means, if you purchase something using the link, I receive a small commission. You don’t pay any extra and your information is safe. Thanks for supporting my small business.
Headbands and ear warmers are a wonderful alternative to a winter hat, especially if you don’t want the dreaded “hat hair”. They’re especially perfect when you wear your hair up in a ponytail or messy bun.
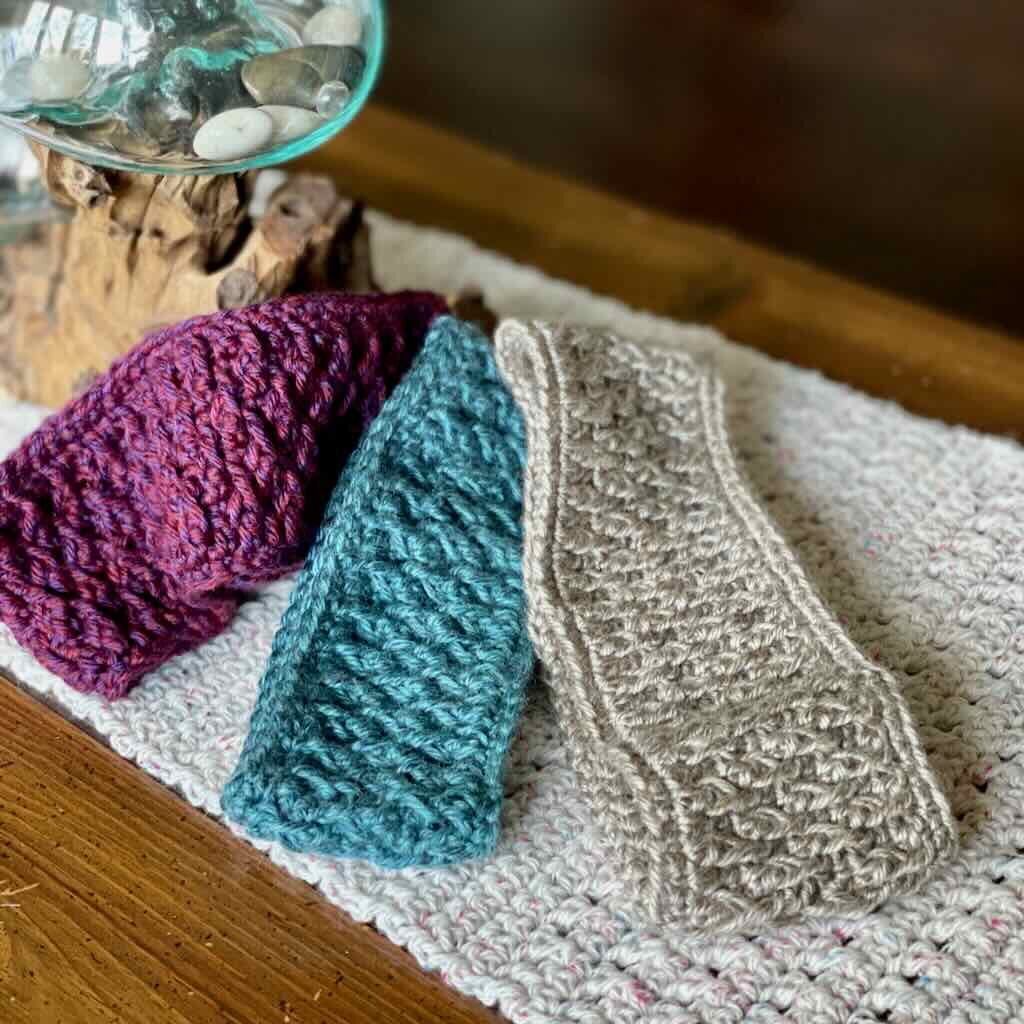
This alpine stitch headband provides loads of textured coverage without being bulky. It’s a stylish solution for those cold winter days with plenty of coverage against the elements.

Design + Construction
I love the look of the alpine stitch. I’ve always wanted to try it in a design but never had the opportunity until now.
The alpine stitch is so easy, the look achieved with front post double crochets that are offset in alternating rows. The stitch provides loads of texture and coverage without being stiff. That makes it the perfect choice for a headband. You certainly don’t want to feel like you’re wearing a vice around your head.
The alpine stitch headband is worked in the round which means there is no seam to sew and only 2 ends to weave in. This alpine stitch headband can definitely be worked up in an evening or weekend so you’ll be wearing yours in no time.
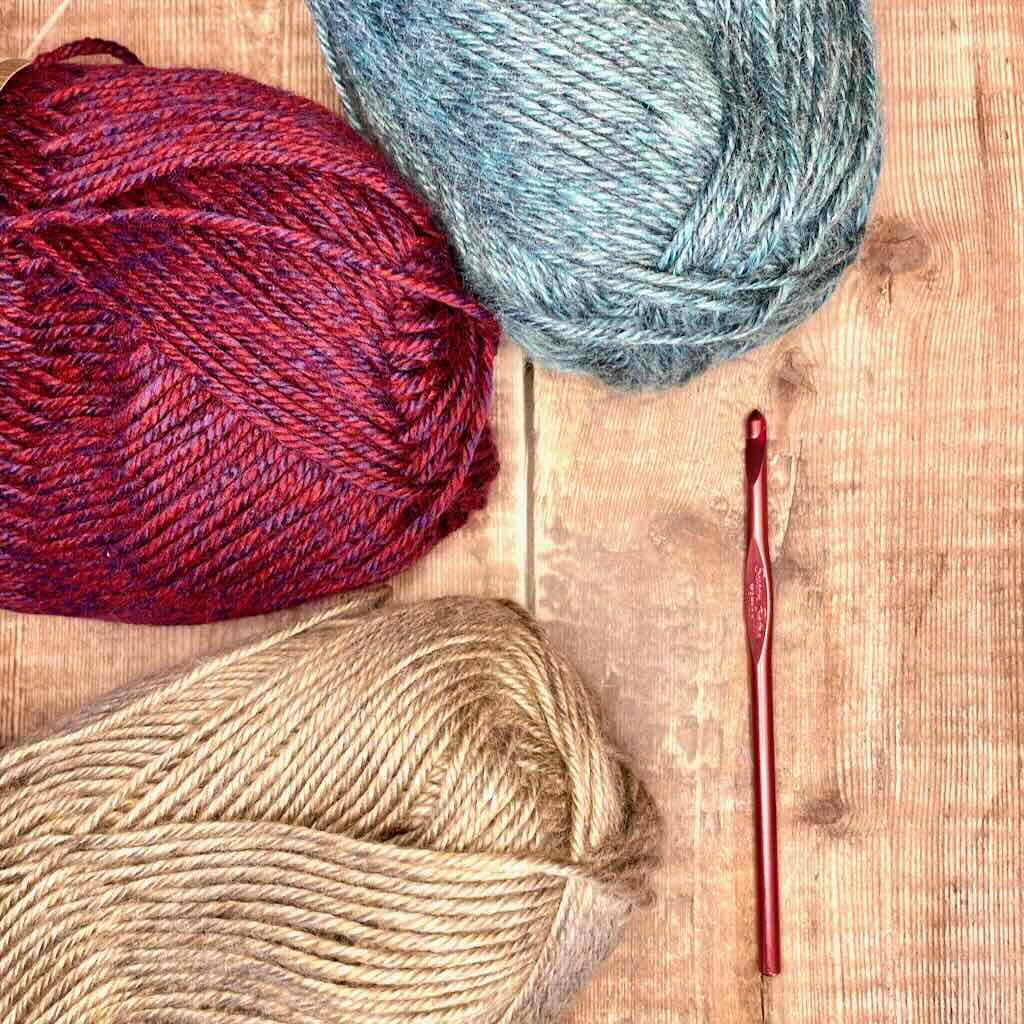
The Yarn for this alpine stitch headband
I chose Lion Brand’s “Heartland” to make this alpine stitch headband for 2 reasons. First, I have a lot of it in my stash. Second and most importantly, I thought it was the perfect choice to highlight the beautiful alpine stitch. Heartland yarn has a beautiful drape with a soft touch.
You can choose any worsted weight yarn you like. Be sure to choose something that’s soft to the touch, appropriate to wear next to your skin. This project makes a fabulous stash buster!
Why buy the PDF when the pattern is free here on the blog?
It’s nice to have a PDF you can download to your favorite device or print out for quick reference. Plus, the PDF includes the following:
- Detailed written instructions
- A handy crochet chart for stitch placement
- You won’t have to scroll through ads or bookmark this page (although you should).
What you’ll need to make the Neve Alpine Stitch Headband
Thank you for staying on this post and reading my patterns right here on the blog, without copy/pasting. When you stay here to follow the free version of my pattern, I am compensated for my time and energy. This is a great, free way to support a designer. If you would like to save this for later, bookmark the page to save it in your mobile browser.
Yarn
Lion Brand “Heartland” 100% acrylic worsted (5oz/251yd; 142g/230m) – 1 skein
Colors used for the samples:
- Glacier Bay #101
- Isle Royale #189
- Grand Canyon #122
Hook
US size I-9 (5.5mm) or size needed to achieve gauge
Finished Sizes
- Child – 17” x 3”
- Adult S/M – 20” x 4”
- Adult L – 22” x 5”
This headband has 0-1” of negative ease, meaning it should be a bit smaller than the head circumference to ensure the headband fits snugly against the head.
Gauge
14 sts in alpine st = 4” (The Adult S/M is 4” wide)
Skill level: Confident beginner
ABBREVIATIONS – US crochet terminology
- beg – beginning
- ch – chain
- dc – double crochet
- FPdc – front post double crochet
- rep – repeat
- rnd(s) – round(s)
- sc – single crochet
- st(s) – stitch(es)
- YO – yarn over
SPECIAL STITCH
Stacked single crochet (STsc) – (This stitch is used at the beginning of a row or round to replace the traditional turning ch-3. It has the appearance of a dc.) – Insert hook in same st as loop, YO, draw up loop, YO, pull through 2 loops (bottom sc made), insert hook in left vertical bar of bottom sc, YO, draw up loop, YO, pull through 2 loops (top sc made).

The Alpine Stitch
The Alpine Stitch is a 4-rnd repeat. In this headband pattern, the repeat begins in Rnd 4.
The FPdc of Rnd 6 alternates with the FPdc of Rnd 4. This alternation creates the overall look of the Alpine Stitch.
The alpine stitch tutorial post is a step by step photo tutorial showing you how to work the 4-row repeat of the alpine stitch. If you prefer a video tutorial, one is included in the post or you can find it on my YouTube channel.
Written instructions for the Neve Alpine Stitch Headband
Thank you for staying on this post and reading my patterns right here on the blog, without copy/pasting. When you stay here to follow the free version of my pattern, I am compensated for my time and energy. This is a great, free way to support a designer. If you would like to save this for later, bookmark the page to save it in your mobile browser.
Pattern Notes
- A ch 2 or ch 3 may be substituted for the STsc.
- Do not turn after any rnd.
- The sc of Rnd 1 are worked into the back bump of the foundation ch to create a more finished appearance along the bottom edge. However, you may use any method of working into the foundation ch you prefer.
- Pull up the first loop of each FPdc to the height of a regular dc to keep your work flat.
PATTERN INSTRUCTIONS
Ch 56 (66, 76). Join with a slip st to form a ring, being careful not to twist.
Rnd 1: Working in the back bump of the foundation chain, ch 1, sc in same ch and in each ch around, join with slip st to beg st. < 56 (66, 76) sc >
Rnd 2: STsc, dc in next st and in each st around, join with slip st to beg st. < 56 (66, 76) dc >
Rnd 3: Ch 1, sc in same st and in each st around, join with slip st to beg st. < 56 (66, 76) sc >
Rnd 4: STsc, [FPdc around next dc 2 rnds directly below, dc in next st] to last st, FPdc around last dc 2 rnds directly below, join with slip st to beg st. < 28 (33, 38) FPdc, 28 (33, 38) dc >
Rnd 5: Rep Rnd 3.
Rnd 6: Ch 1, FPdc around 1st dc 2 rnds directly below, dc in next st, [FPdc around next dc 2 rnds directly below, dc in next st] around, join with slip st to beg st. < 28 (33, 38) FPdc, 28 (33, 38) dc >
Rnd 7: Rep Rnd 3.
Rnds 8-9: Rep Rnds 4-5.
Child size only: Fasten off and weave in ends.
Adult S/M and L
Rnds 10-11: Rep Rnds 6-7.
Adult S/M only: Fasten off and weave in ends.
Adult L only
Rnds 12-13: Rep Rnds 4-5.
Fasten off and weave in ends.

5 Comments