The Fireside Throw – a free crochet along
Join me to make the gorgeous Fireside Throw Blanket in a free crochet along.
There is nothing cozier than a big handmade blanket to cuddle up under when the weather outside is cold. I’ve crocheted a couple of blankets this season and I love how they keep me warm while I work on them. It’s especially comfy when there’s a fire roaring in the fireplace!
The Fireside Throw free crochet along blanket was created with that sentiment in mind. I wanted a crochet blanket that looks as cozy as it feels. And, because it’s always fun to crochet with friends, the blanket is a free crochet along for everybody to join in.
What is a free crochet along?
Participating in a free crochet along is such a special experience. If you’ve never been a part of one, here’s what you can expect when you join a free crochet along.
- Everyone crochets the same project at the same time.
- Each part of the project is released one at a time. That way all of the participants can work at the same pace.
- The fun part comes when everyone is sharing progress photos with the group. It’s so motivating!
How this crochet along works
Join the Facebook group
Don’t miss any of the fun! In the group you can ask questions, share your progress and enjoy all of the other projects.

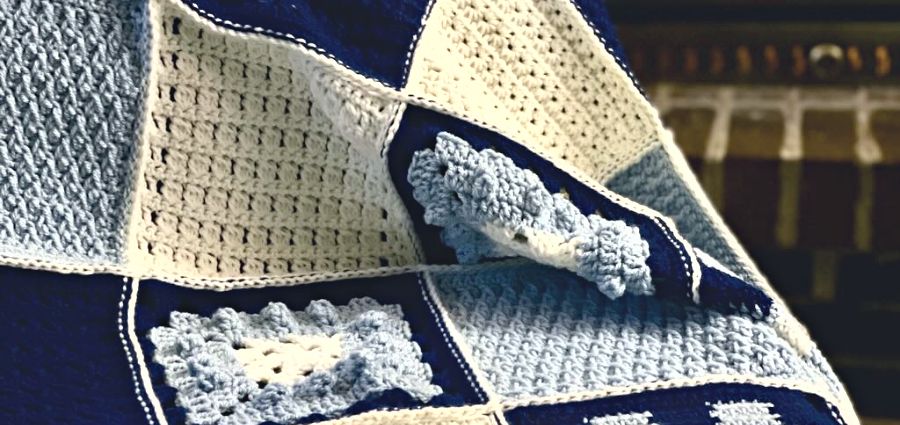
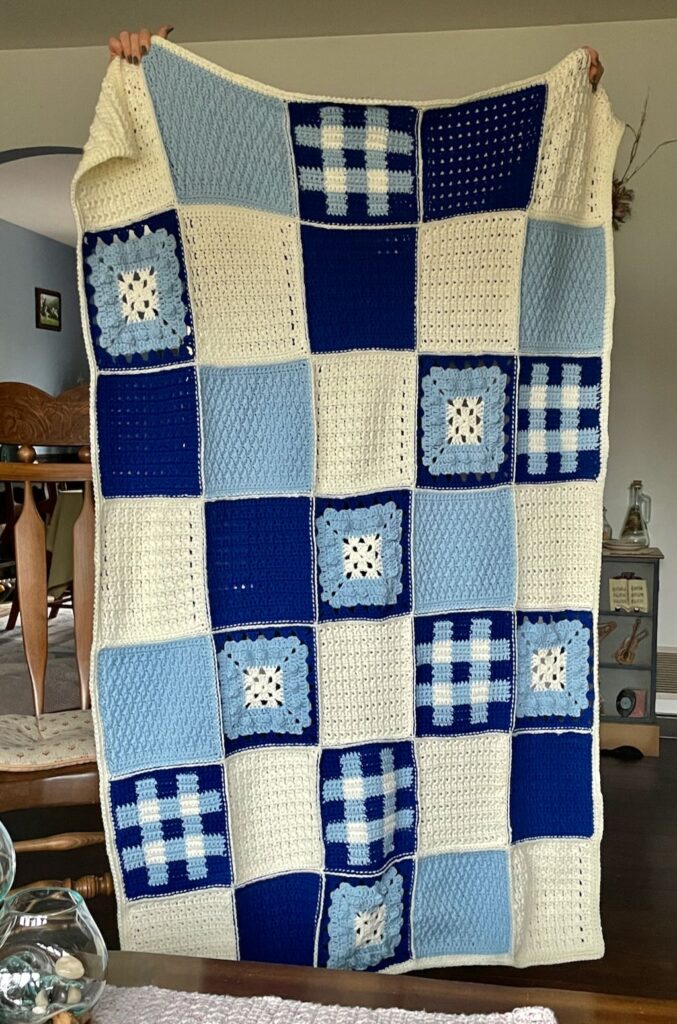
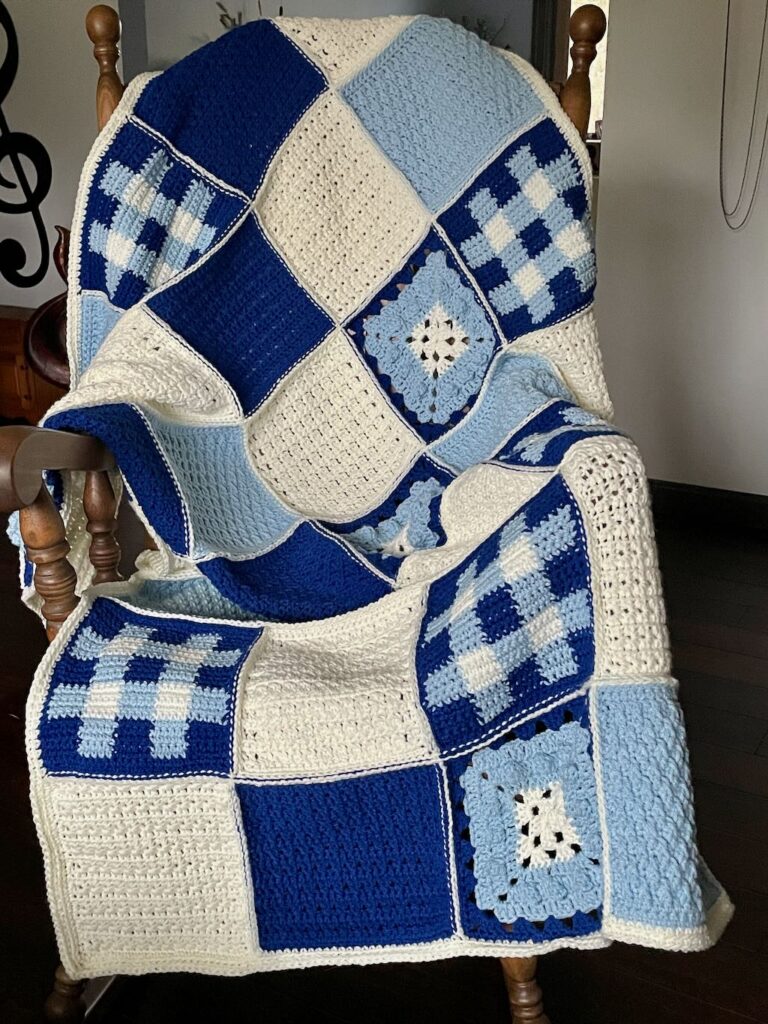
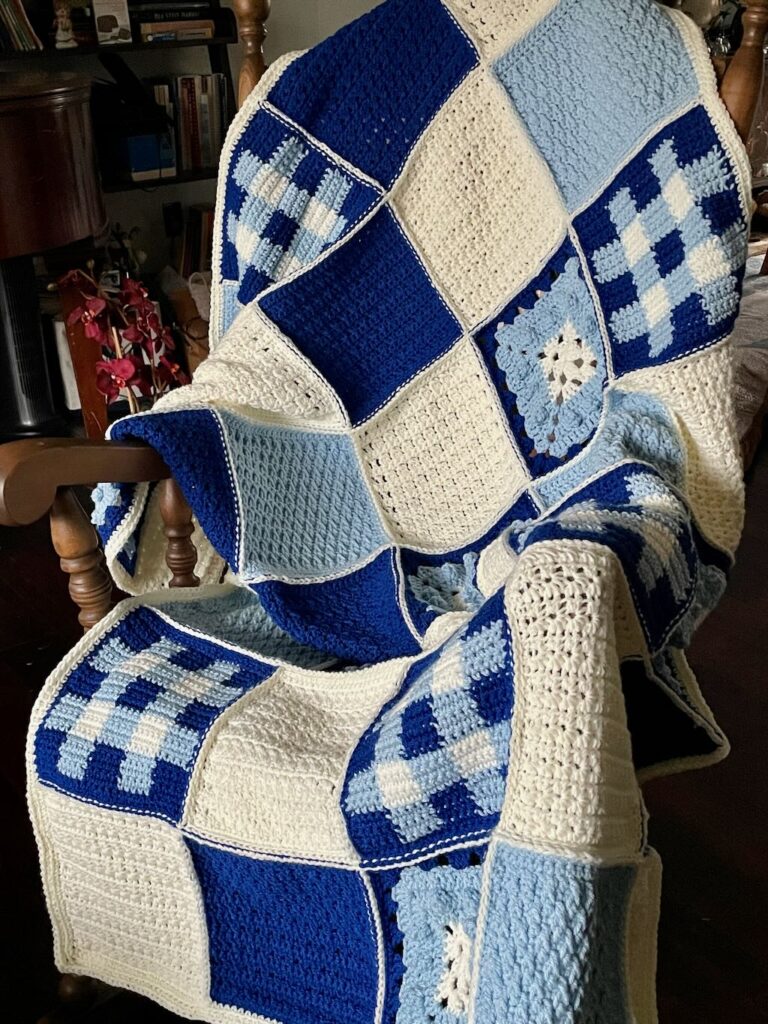
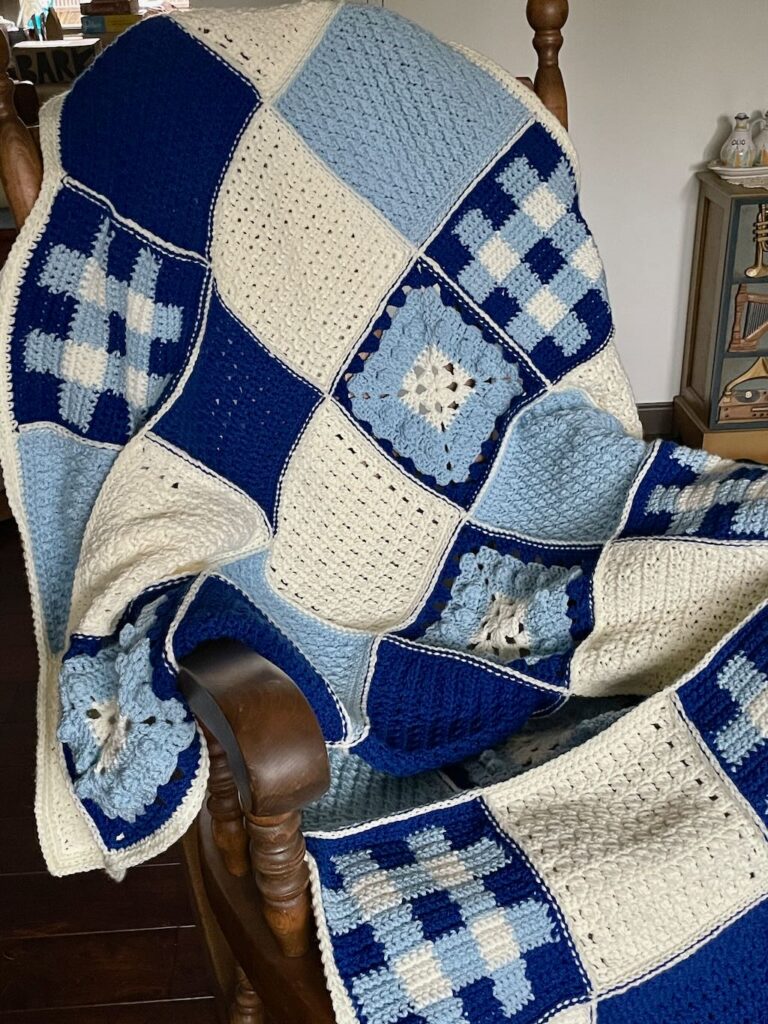
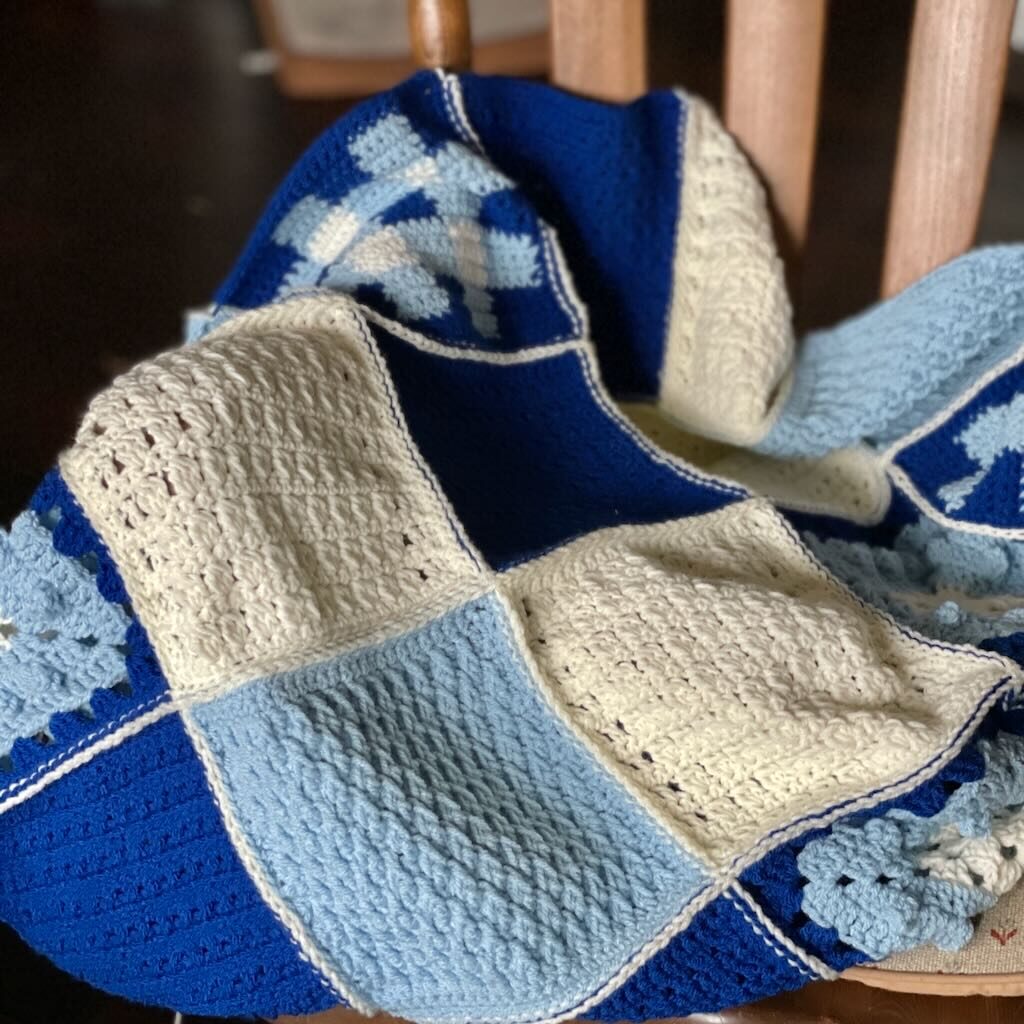
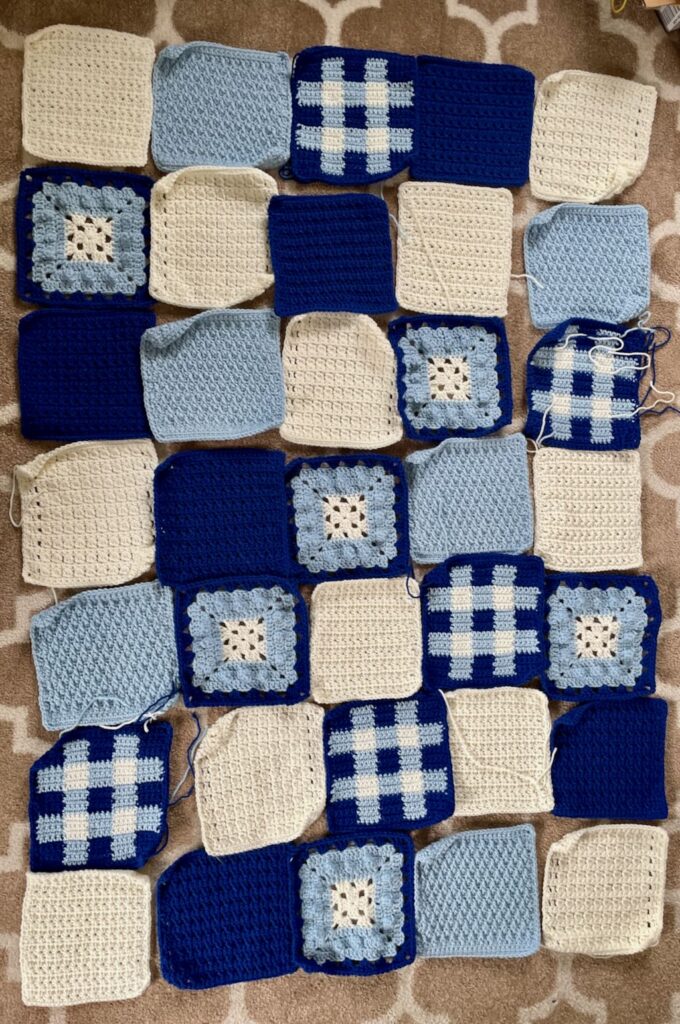
The Blanket Design
The blanket is made of 6 different square designs for a total of 35 squares to complete the blanket. (You’ll only make 5 of one of the squares.) Each square measures approx. 8-8.5″.
The squares are seamed together using a provided assembly chart, then a simple 1″ border is added.
Each square will be released as a separate pattern on the blog, followed by the seaming method and the border.
Finished size: Approx. 44.5″ x 61.5″ based on 8.5″ squares and a 1″ border. Your finished blanket may be a different size based on how big your squares are.
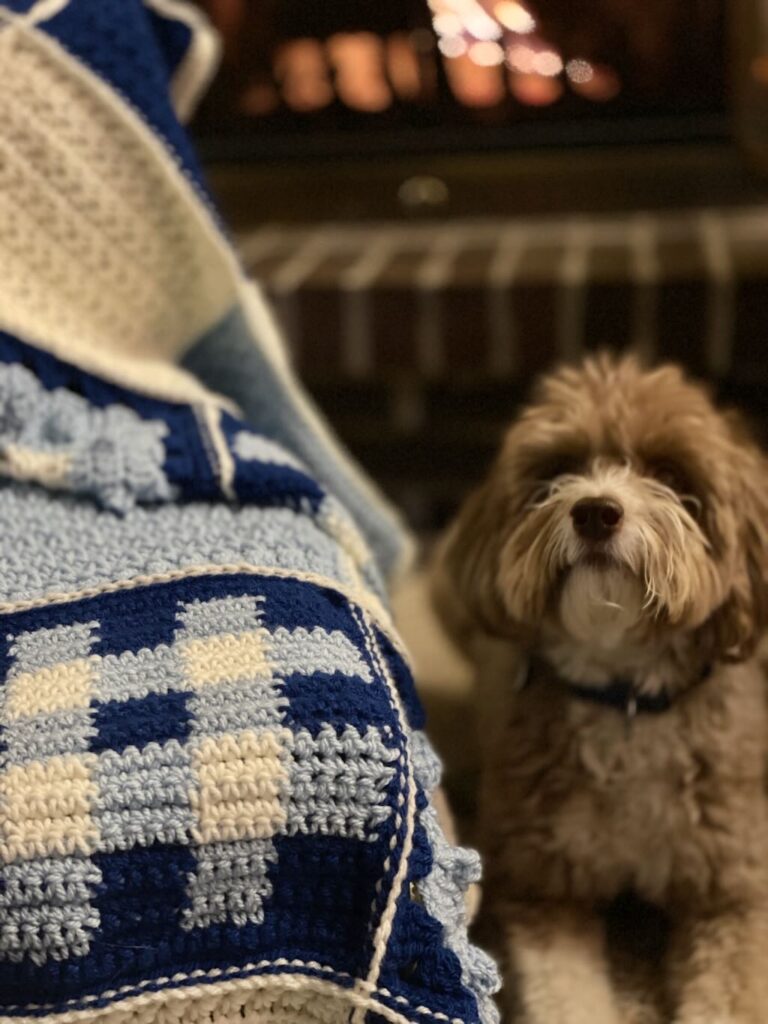
Daisy loved helping me make my own throw!
Stitches you’ll be working
I chose stitches and stitch patterns for the blanket that I felt created an overall textured look. I also wanted stitches and techniques that even the advanced beginner could work.
Here’s an overview of what stitches and techniques you’ll be using:
- The basic stitches: chain, slip stitch, single crochet, double crochet
- Other stitches: Alpine (front post double crochet), Cluster, Crossed double crochet, Popcorn, Star
- Techniques: Working in rounds, working in rows, changing colors
Don’t let this list intimidate you. Each of the 6 squares features one stitch/technique so you’ll have a chance to master one before moving on to the next. Plus, with each new pattern section, you’ll get everything you need to be successful, including charts and tutorials where necessary.
The Yarn
This post contains affiliate links. That means, if you purchase something using the link, I receive a small commission. You don’t pay any extra and your information is safe. Thanks for supporting my small business.
Let’s get down to business!
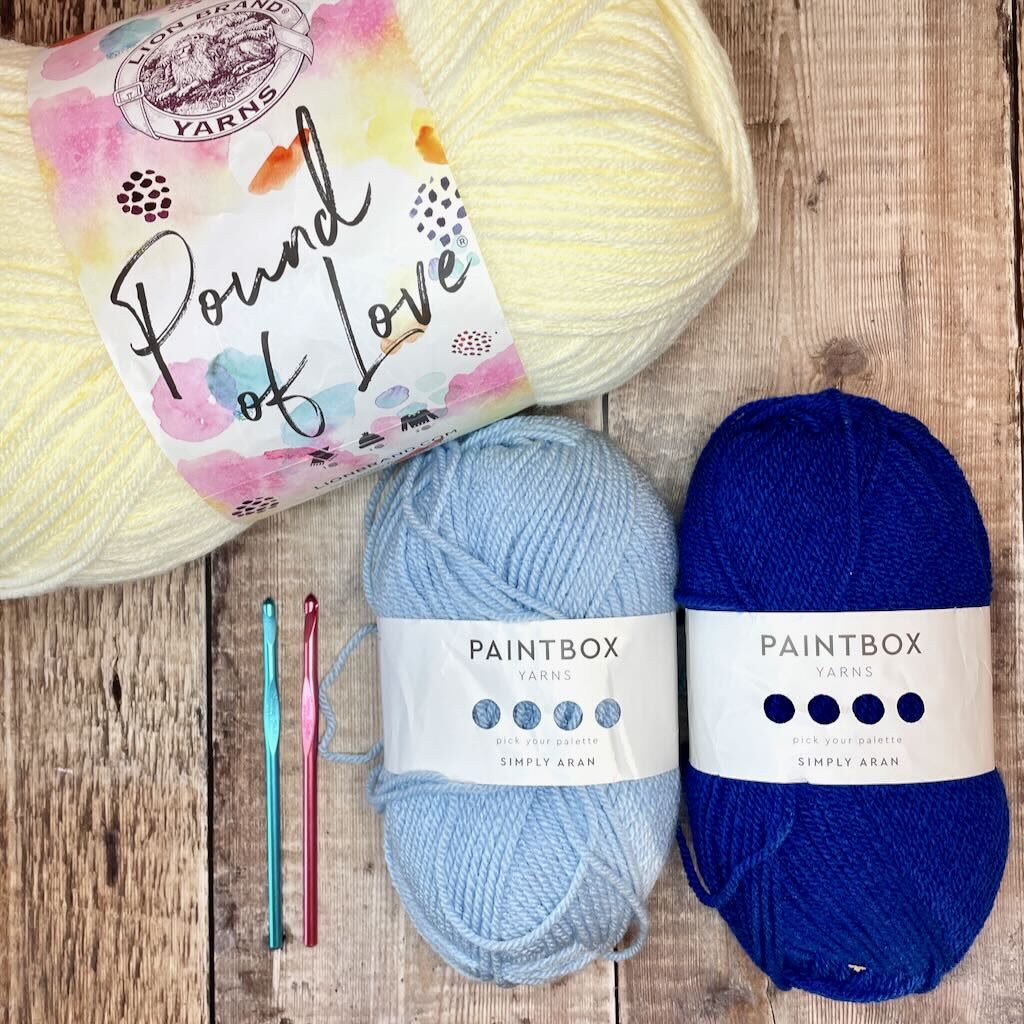
It’s time to gather all the yarn you’ll need for your blanket.
You’ll need 3 coordinating colors – a main color used in the squares and for the seaming and border plus 2 other colors for some of the squares.
Here’s what I used, along with the approximate amounts:
Main color (MC)
Lion Brand “Pound of Love” 100% premium acrylic worsted weight (16 oz/1020 yd; 454 g/932 m)
Color #99 – Antique White – 2 skeins (1 full skein + 3 oz of the second or approx. 1200 yds total)
Color A (CA)
Paintbox Yarns “Simply Aran” 100% acrylic worsted weight (3.5 oz/201 yd; 100 g/184 m)
Color #240 – Royal Blue – 4 skeins or approx. 710 yds total
Color B (CB)
Paintbox Yarns “Simply Aran” 100% acrylic worsted weight (3.5 oz/201 yd; 100 g/184 m)
Color #235 – Duck Egg Blue – 5 skeins or approx. 850 yds total
Keep in mind that these are approximate amounts. Your blanket may take more or less, depending on your tension and hook size.
The Hook
You’ll need at least 2 hooks for this free crochet along. Some of the squares benefit from a slightly larger hook to ensure the square is the correct size. Here’s what I used:
US size H-8 (5mm) and I-9 (5.5mm) (You will need both sizes)
Choose your favorite hooks, ones that are comfortable to use.
Where to purchase the PDF
You can purchase the full pattern PDF during the CAL for just $12.
What you’ll get in the PDF:
- Everything you’ll need to crochet the throw blanket from start to finish
- Pattern for each of the 6 square designs
- Complete Assembly and Border instructions
- Crochet charts and photo tutorials where needed
- A beautifully formatted, easy-to-read ad-free document you can upload to any mobile device
Get the full pattern PDF in my shops. Just click the button to your favorite shop.


You can also get a copy by clicking on the button below!
The Fireside Throw pattern
This is where you’ll find links to each part of the pattern as it’s released. Check back Monday, January 16th, 9am EST, when the first part of the pattern is added to the blog.
Reminder: You can get updates sent directly to your inbox by filling out the form above. Or, you can join the Facebook group. Either way, you’ll be in the know.
Go grab your yarn and hooks and get ready for some fun!
Let’s get started!
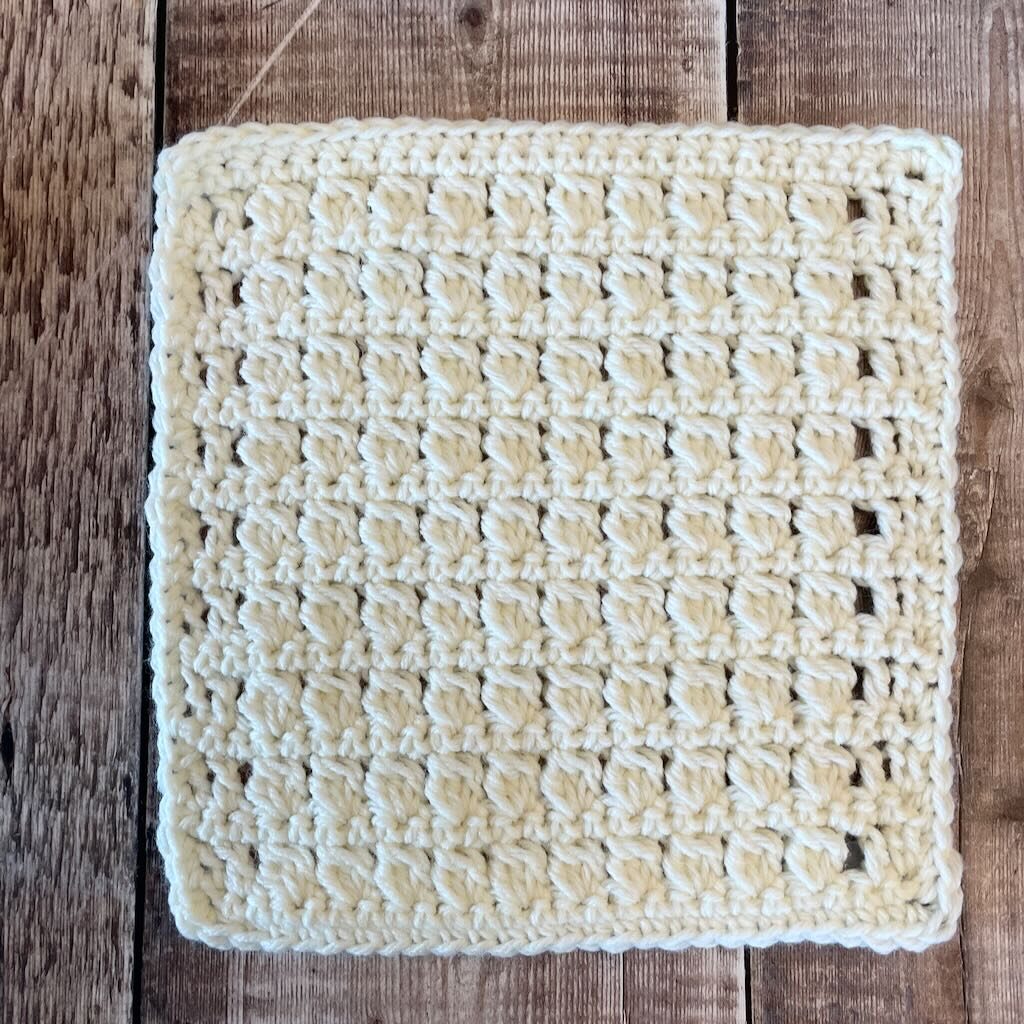
Square #1 – The Cluster St
Make 6 cluster squares for the full blanket.
Square #1 features the 3-dc cluster. The square has beautiful stitch definition on the right side and subtle texture on the wrong side.

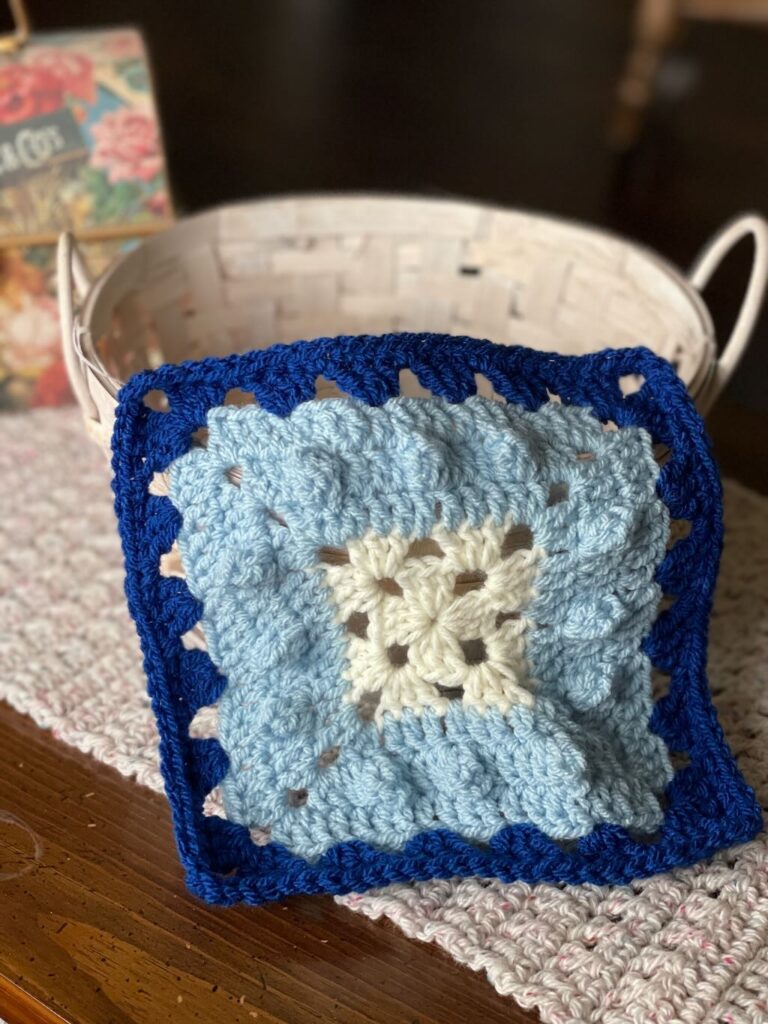
Square #2 – Grab the Popcorn Granny square
Make 6 popcorn granny squares for the full blanket.
Square #2 is a fun variation of the traditional granny square. The middle section of the square is solid double crochet with popcorn stitches sprinkled in it.
Note: This square is a slight variation of the original Grab the Popcorn Granny square. You’ll find the instructions for the Fireside version on the same post.
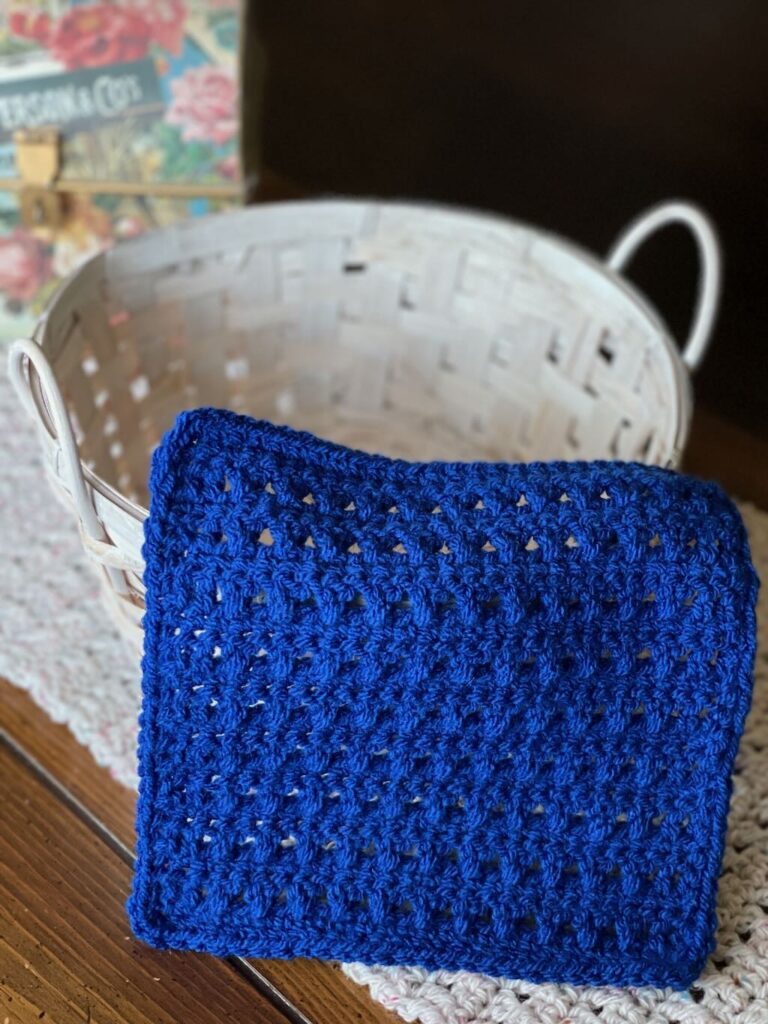
Square #3 – Tracks in the Snow square
Make 6 of the Tracks in the Snow square for the full blanket.
Square #3 features the crossed double crochet, a simple stitch pattern that creates a subtle, slightly open look texture. You’ll love how the square works up!
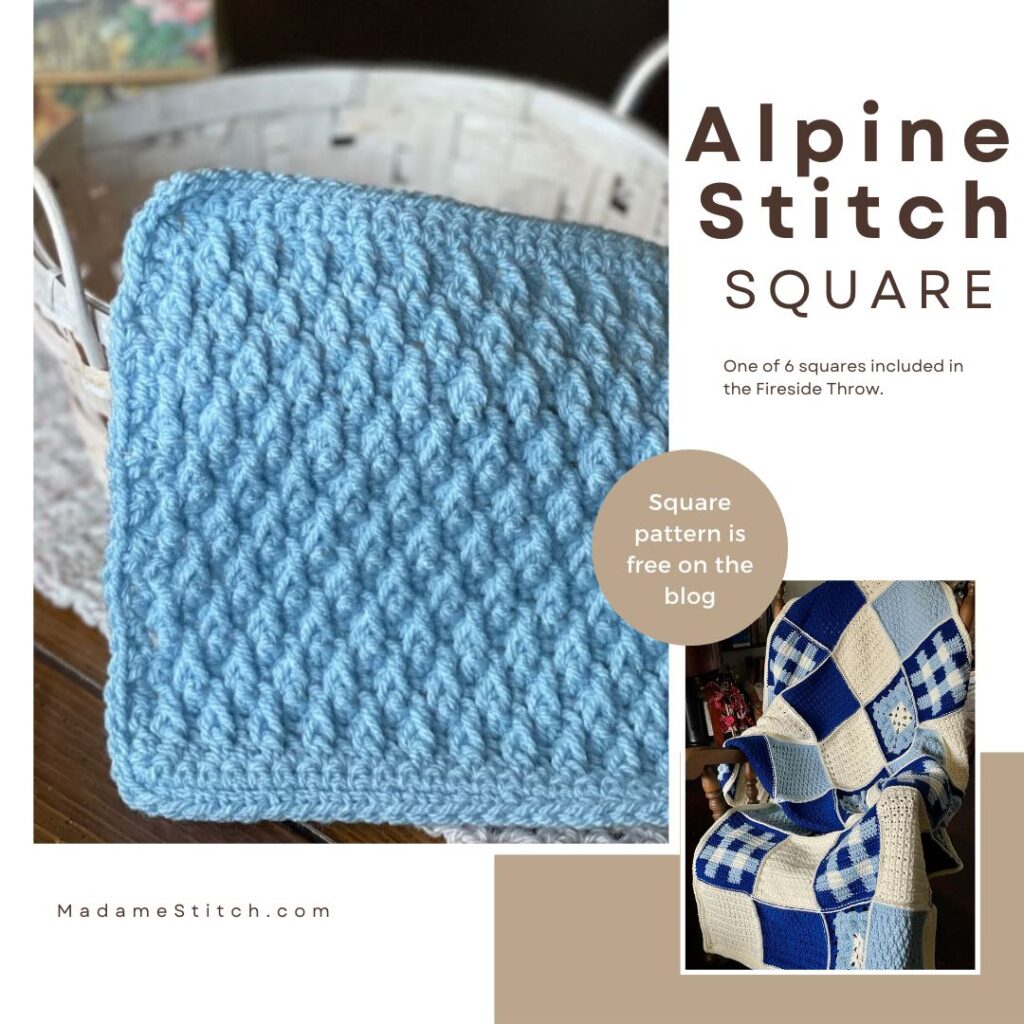
Square #4 – Alpine stitch square
Make 6 of the Alpine stitch square for the full blanket.
Square #4 features the alpine stitch, a beautiful 4-row repeat pattern that creates gorgeous texture and cozy warmth.

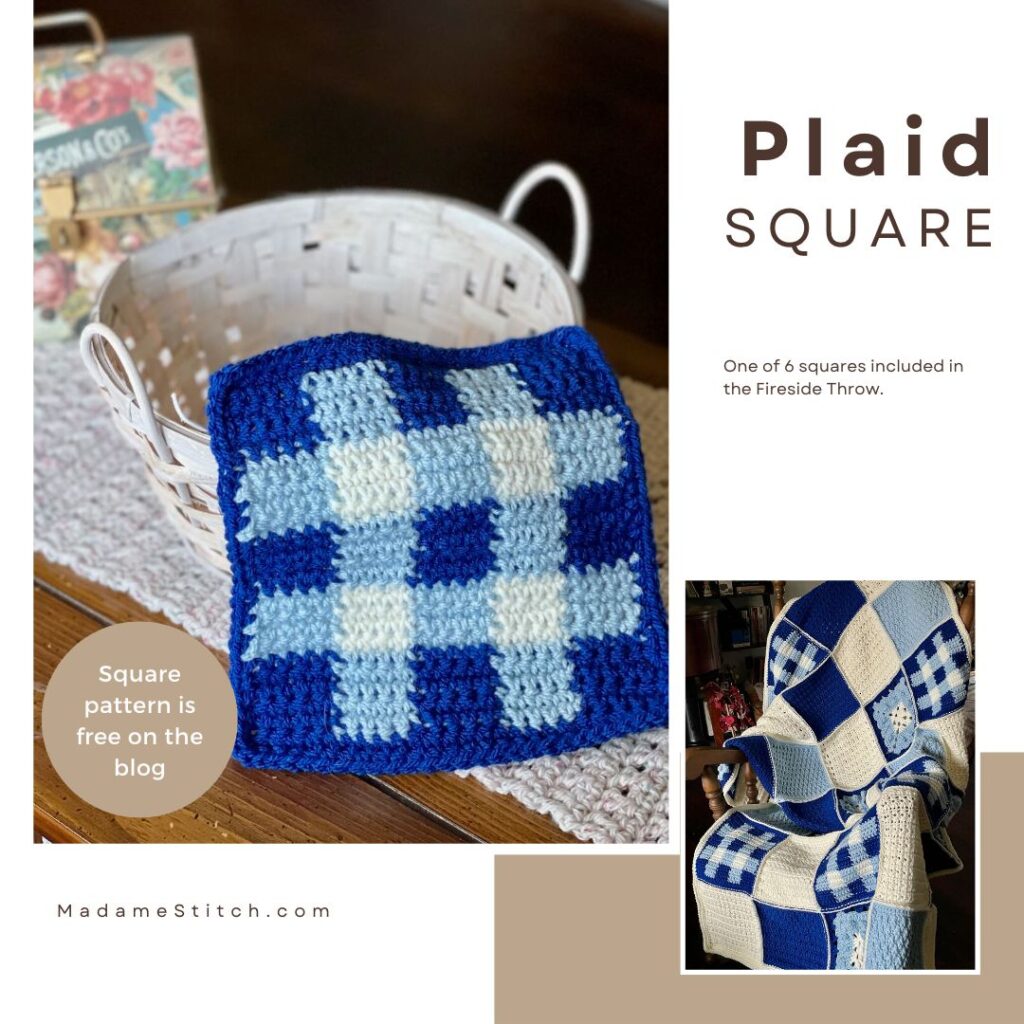
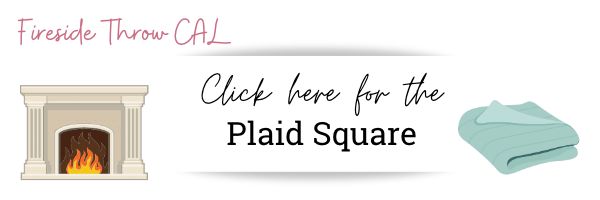
Square #5 – Plaid square
Make 5 of the Plaid square for the full blanket.
Square #5 features a plaid pattern created with 3 colors. The tapestry method of carrying the non-working yarn is an easy technique to learn and use. You’ll have less ends to weave in and a beautiful finished look to your square.
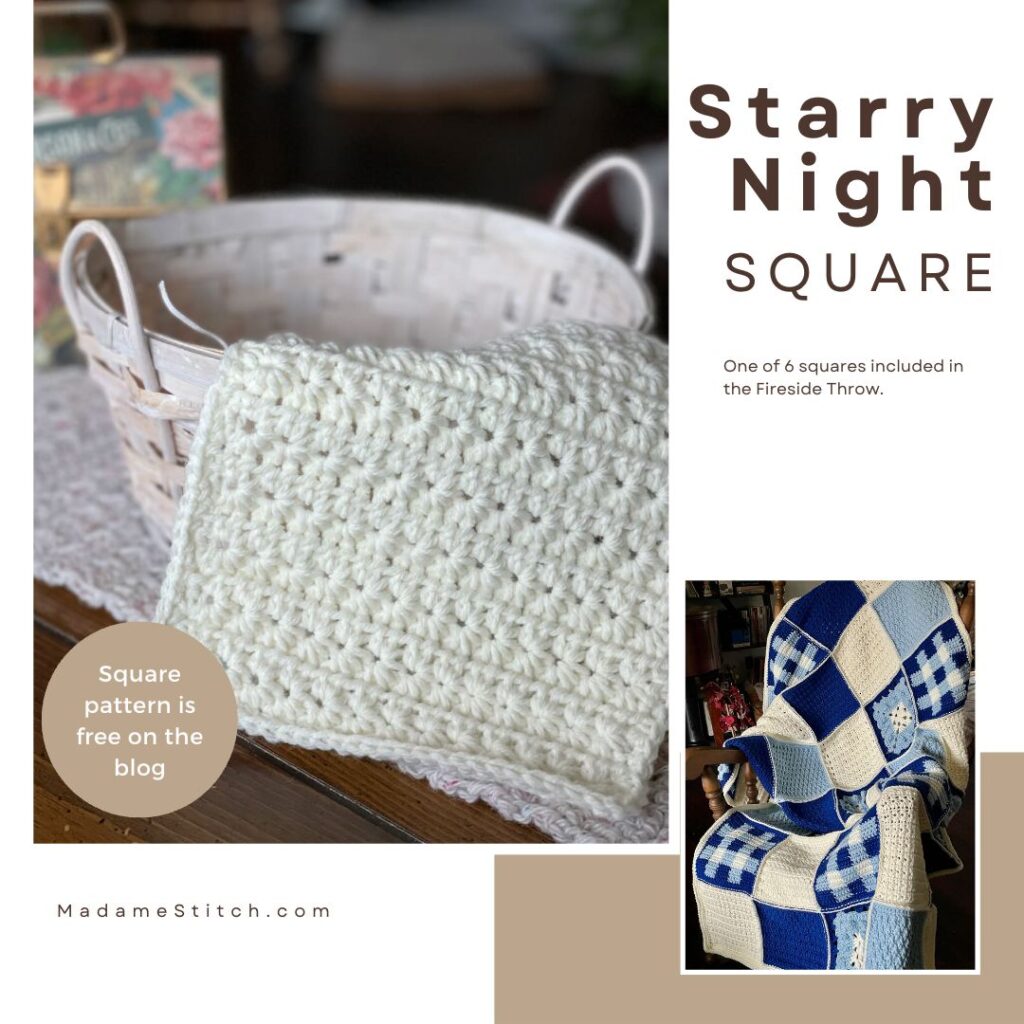
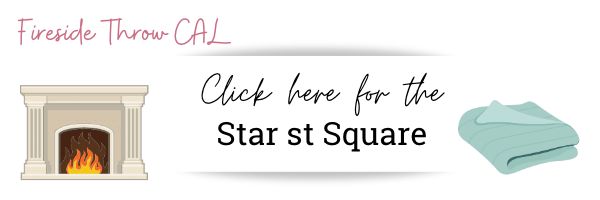
Square #6 – Starry Night square
Make 6 of the Starry Night square for the full blanket.
Square #6 features the star stitch, an easy 2-row repeat that creates little star bursts across the square. The stitch looks complicated but, once you learn where to pull up loops, you’ll be flying across the row!
It’s time to put your Fireside Throw together!
How to assemble the blanket
Lay out the squares according to the chart below. When you look at the laid out squares, they should all be right side showing with the stitch patterns oriented in the correct direction so you’re looking at them top to bottom. Using a slip stitch seam (see the next page), begin where indicated in the chart above.
To get the look of the sample, use a slip stitch seam to connect all of the squares. That means you’ll be working slip stitches to connect the squares to each other.
If you’ve never worked a slip stitch join, this tutorial by Maisie and Ruth will help.
Use the Main Color (MC) to slip stitch join (see yarn list above).
- The slip stitch seam is worked on the right side of the fabric which creates a decorative ridge on the right side.
- The squares are held wrong sides together during joining.
- Work through both loops of both squares. (Some tutorials will have you work through only one loop on each square. That is not the case here.)
- Begin where indicated in the assembly chart above, joining the horizontal seam there.
- Finish all of the horizontal seams before starting on the vertical seams. It will be a bit awkward at first because all of the squares are literally hanging by a thread. However, once you complete at least one of the vertical seams, the blanket will be easier to handle.
Do not weave in the ends. They can be carried under the Border and subsequently secured once the Border is complete.
Blanket border
Abbreviations for this section
- beg – beginning
- ch – chain
- rnd – round
- sc – single crochet
- sc BLO – single crochet back loop only
- st – stitch
With right side of the blanket facing you, attach MC to top right corner st (the middle st of the 3 sc in the corner).
Rnd 1: Ch 1, sc in same st and in each st across to middle st of next corner, [3 sc in middle st, sc in next st and in each st across to middle st of next corner] 3 times, 2 sc in the same st as the beg sc to complete the 1st corner, join with slip st to beg st, do not turn.
Rnd 2: Ch 1, sc BLO in next st and in each st across to middle st of next corner, 3 sc BLO in middle st of next corner, [sc BLO in next st and in each st across to middle st of next corner, 3 sc BLO in middle st of corner] 3 times, join with slip st to beg st.
Fasten off and weave in ends.
Your blanket is done!!!

When will the pdf be released for purchase thankyou from Debbie
I’m still putting the finishing touches on the pattern. At the very latest it will be available on the first day, January 16th.
Best,
Debbie
I am not finding the link to purchase the pattern. I used the links you provided to purchase my yarn so I want to get started as soon as it arrives. I am a slow crocheter though so want the PDF instead of the blog posts to use. Thanks so much.
Patricia,
I’m so happy you’re joining the CAL!
Unfortunately, the full PDF is taking longer than I had anticipated and it’s not quite ready yet. I’m working hard to get it done.
The plan as of today is to have it ready for sale before Friday.
I’m so sorry for the delay and I thank you for your patience!
Best,
Debbie
Thank you so much for your reply. Excited to learn from you.
The instructions state to make 6 of square one (white); however, I count 11 in the picture of the finished blanket. Please clarify ow many of this square is to be made. Thank you, P
Pam,
You should make just 6 of square #1. The other white squares you see in the picture are another square which will be released later on.
Best,
Debbie
Great! Thank you!