| |

A prayer shawl crochet pattern that begins with a gorgeous granny square


The Olivia Prayer Shawl Crochet Pattern provides a mindful crochet experience and a comforting wrap. Worsted weight yarn, a granny square and simple stitches.
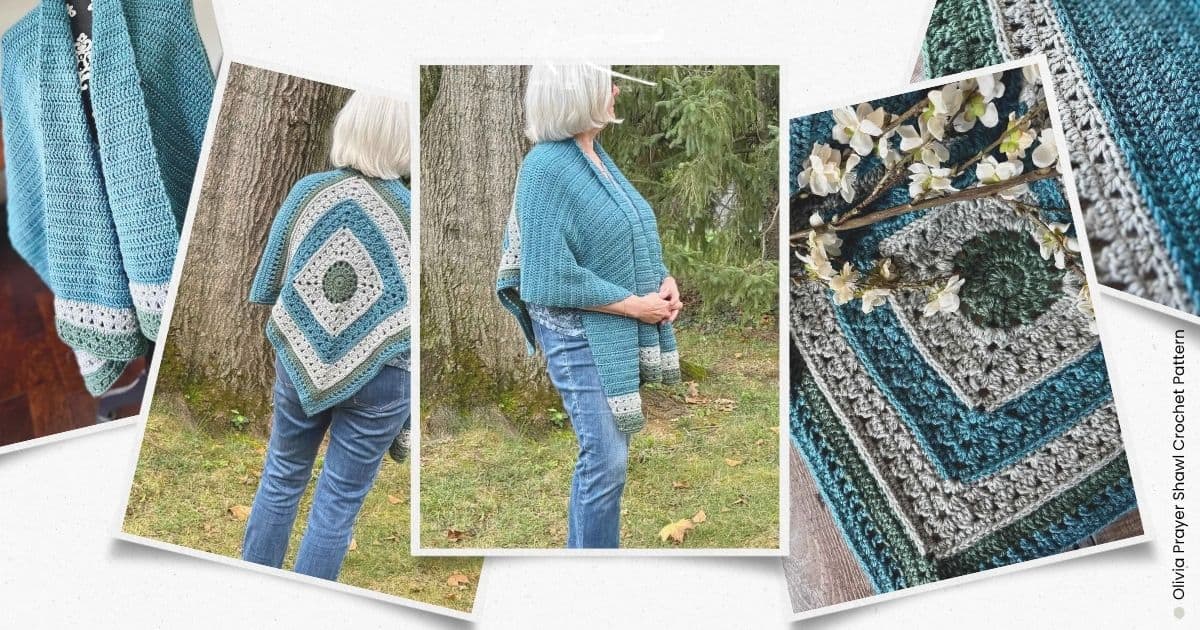
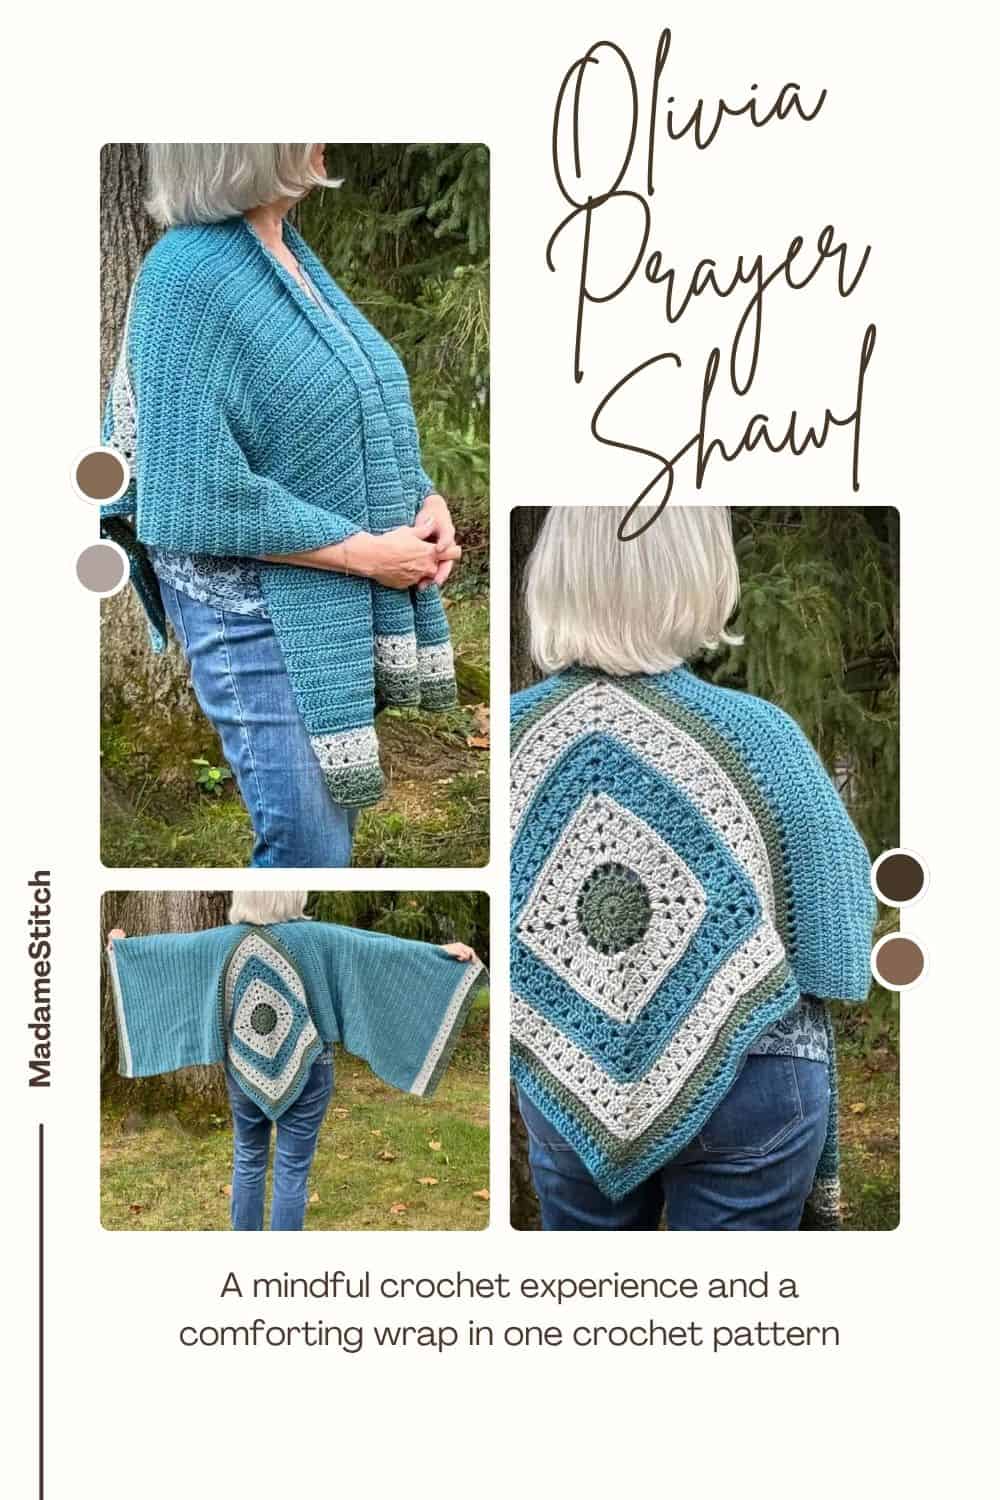
Photos of the Olivia Prayer Shawl


Like a handmade blanket, a crocheted prayer shawl is designed for comfort and warmth, big enough to completely wrap up in.

But, it carries something more.

Our modern-day prayer shawl began as a way of demonstrating the time, energy, thoughts and prayers that went into creating and giving a meaningful gift. It’s a tangible expression of the crocheter’s prayers, with intention woven in from choosing the yarn to the final stitch.

Prayer shawls are usually given to someone facing difficult circumstances, although anyone in need of comfort can find that warmth in one.

Want to know more about the concept of prayer shawls? Check out the post by The Prayer Shawl Ministry.

The Olivia Prayer Shawl

  • Yarn: Any worsted weight yarn (The sample is made with Lion Brand’s “Heartland”)
  • Yardage: 820 yds of a main color (Glacier Bay), 195 yds of the 1st contrasting color (Mount Rainier), 130 yds of the 2nd contrasting color (Rocky Mountains) – all yardages are approximate
  • Hook: US size H-8 (5mm)
  • Skill level: Advanced Beginner/Intermediate
  • Original publish date: August 28, 2026

The Olivia Prayer Shawl design takes it on a path not typical of most shawls.

Instead, this prayer shawl begins with a large granny square which becomes the focal point. The granny square includes subtle texture, provided by working half double crochets in the 3rd loop, creating surface stitching without the extra work.
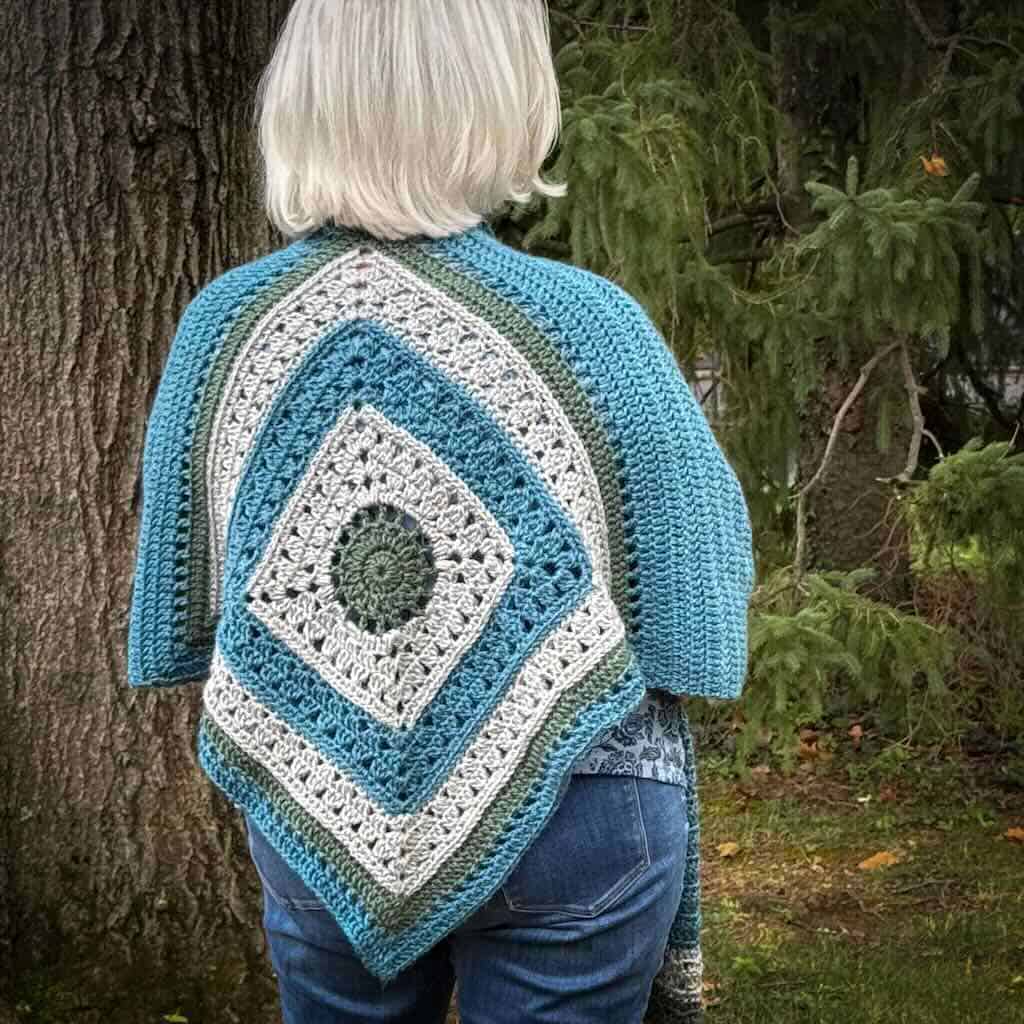
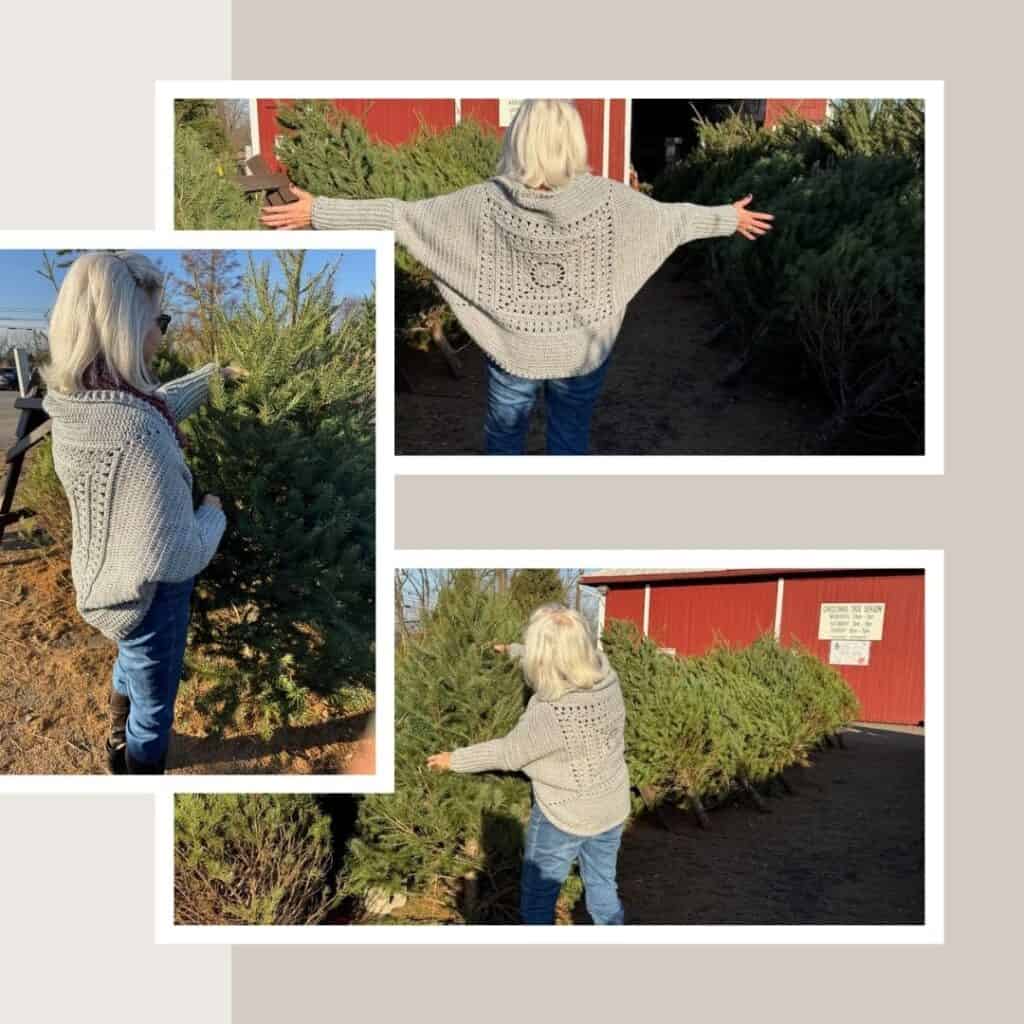
The granny square of the Olivia Prayer Shawl sits at the back

The granny square also features the modern granny stitch, a 2-round or row stitch pattern that’s open and airy.

Worked out from the sides of the granny square, the wings are oversized for more comfy coverage, almost like a wearable blanket.
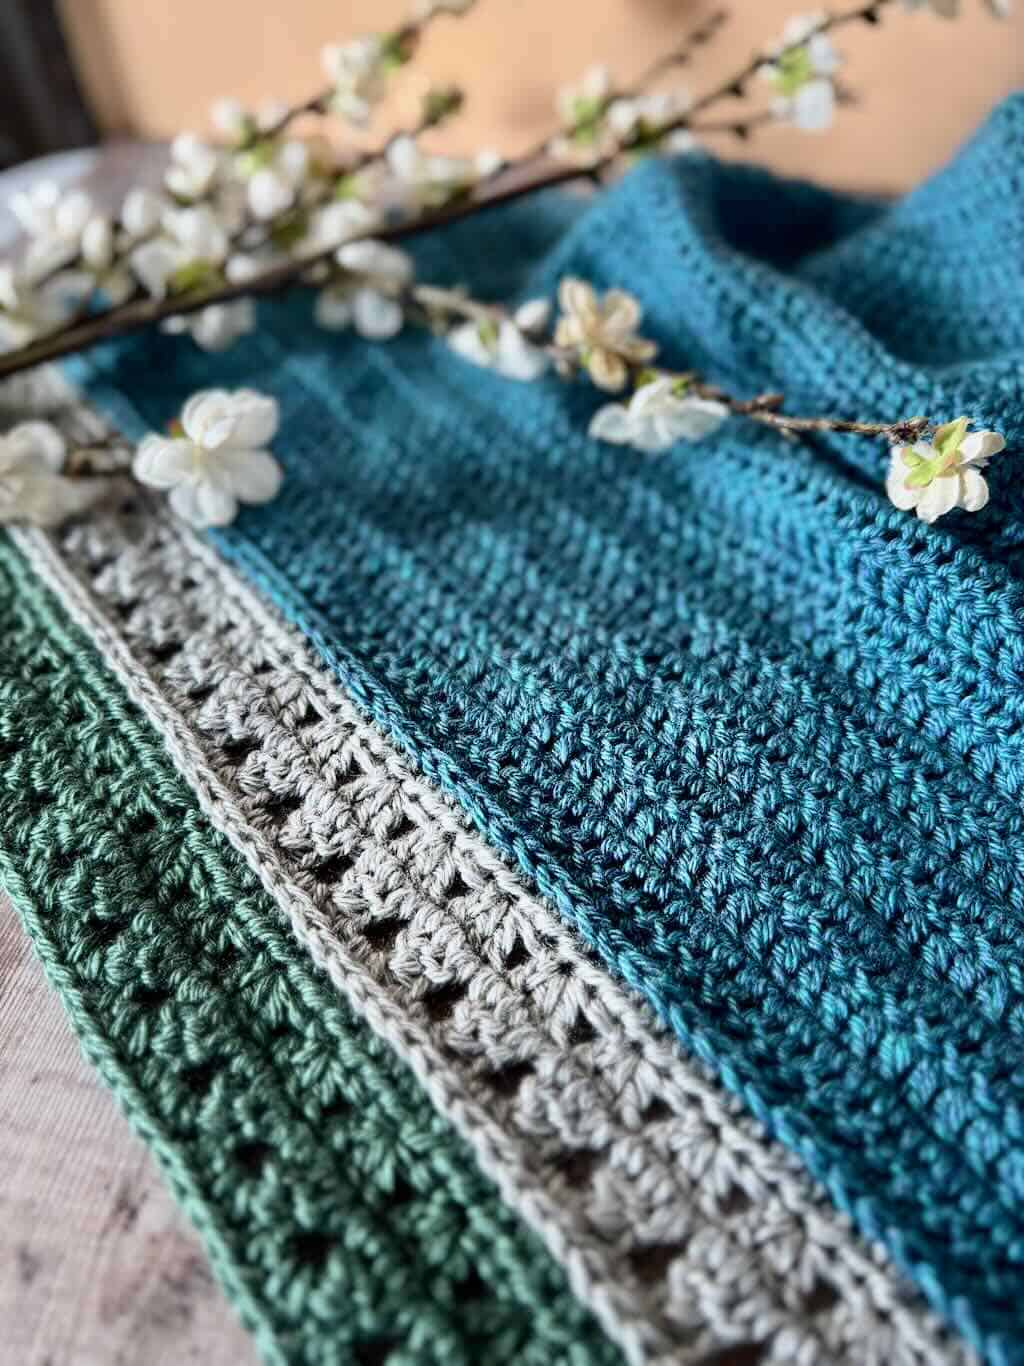
A photo of the end of the Olivia Prayer Shawl wing

The simple repetitive double crochet rows provide the perfect backdrop for offering continued prayers while making the prayer shawl.

The ends of the wings are finished off with the return of the modern granny stitch and the half double crochets in the 3rd loop, bringing the whole design full circle and creating a cohesive look..

Click here to get your free Progress Tracker

A crocheted prayer shawl should be warm, cozy and soft, providing all the comfort the maker intends.

That’s why I chose Lion Brand’s “Heartland”. Of all the yarns I’ve worked with, this yarn by far offers a satisfying maker experience and the cozy comfort the user is looking for.

Of course, because the design is so straightforward, it’s easy to choose another worsted weight yarn that’s perfect for the recipient.
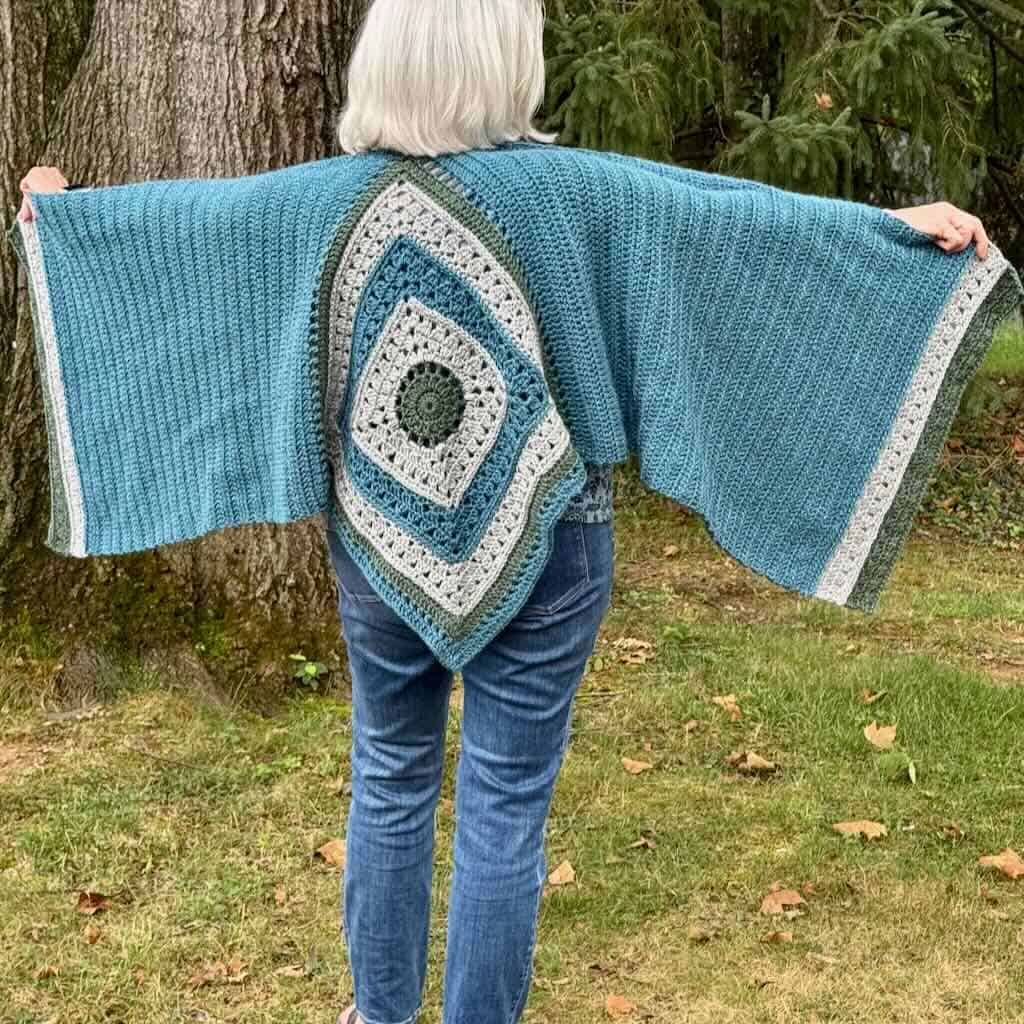
An open view of the Olivia Prayer Shawl

Yarn Substitution


Be sure the yarn you choose for your prayer shawl is a good substitute for “Heartland”. Download my Yarn Substitution Worksheet, walk through the steps, and you can see whether or not your substitute is a good choice.

Click here to sign up to get the free Yarn Substitution Worksheet download.


Or, check out YarnSub.com for some wonderful alternatives.

Pin it for later
An image to pin to Pinterest
  • Simple, repetitive stitches make this prayer shawl a sooting, meditative make, providing hours of comforting crochet without ever feeling complicated.
  • The Olivia Prayer Shawl is oversized for extra coverage, made for wrapping up completely.
  • A granny square at the center adds gorgeous, subtle texture right in the midst of all that simplicity.
  • Worked in one piece, with no seaming required – just steady, uninterrupted progress from start to finish.

Will the prayer shawl look good made in one color?

Absolutely! You can choose any color combination that brings the recipient joy.

Is this prayer shawl easy enough for a beginner crocheter?

Yes. Take your time with any stitches you don’t know and refer to the video tutorial if you have any trouble.

Won’t I get bored as I work the double crochet portions?

If you love mindful crochet that’s perfect for watching your favorite shows and relaxing in your comfy chair, you’ll love those one-stitch parts!

Buy the premium PDF for the Olivia Prayer Shawl, details below

Where to Get the PDF for the Olivia Prayer Shawl


The Olivia Prayer Shawl is a free crochet pattern available in this blog post to Grow subscribers (the account is free). Scroll down to and sign into your account to view the free version.

Upgrade to a printer friendly, downloadable version PDF, available for purchase from one of my shops.

The premium PDF can be uploaded to your favorite mobile device so you can take your Olivia Prayer Shawl project with you to work on whenever you’re out and about.

The PDF is easy to read and beautifully formatted without ads for a great experience. It includes detailed written instructions, a schematic and photos to show you what you’re making.

Get your copy today!

This pattern and everything in it was created by a human - Debbie of MadameStitch

General Information

Yarn

Lion Brand “Heartland” 100% premium acrylic worsted weight (5oz/251yd; 142g/230m)

  • Main color (MC) – Glacier Bay – 820yds
  • Color A (CA) – Mount Rainier – 195 yds
  • Color B (CB) – Rocky Mountains – 130 yds
  • All yardages are approximate. Be sure to have extra on hand.

Hook

US size H-8 (5mm)

Gauge

  • Rnds 1-3 of the granny square = Approx. 4”
  • 13 dc x 8 rows of the wings = Approx. 4″
  • The gauge will be slightly different between the square and the wings because the center of the square constrains the stitches and keeps the double crochets from spreading out. The wings will be a slightly larger gauge than the side measurement of the square.

Finished Measurements
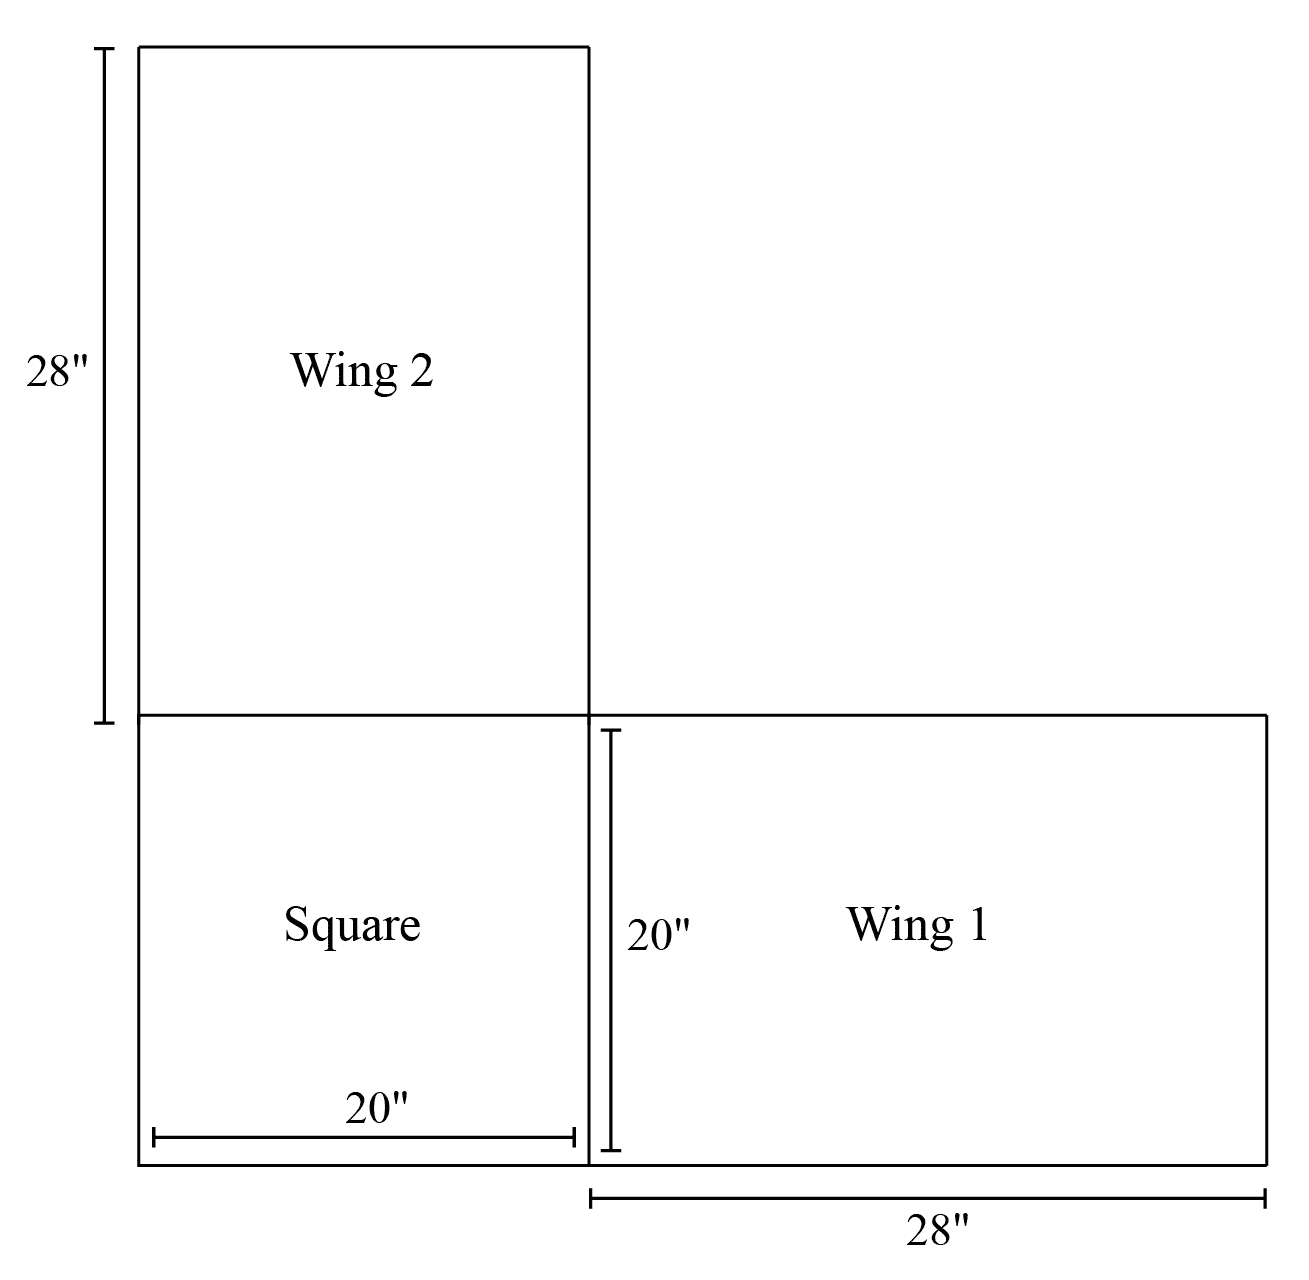
This schematic shows the finished measurements of the Olivia Prayer Shawl

Skill Level: Advanced Beginner/Intermediate

  • beg – beginning
  • ch – chain
  • dc – double crochet
  • half double crochet
  • rep – repeat
  • rnd(s) – round(s)
  • sk – skip
  • sp – space
  • st(s) – stitch(es)
  • RS – right side
  • WS – wrong side
  • YO – yarn over

Repeats

  • (…) – Work everything within the parentheses in the same st or sp.
  • […] – Repeat everything within the brackets the indicated number of times.
  • {…} – Repeat everything within the braces the indicated number of times.

Special Stitches

2 double crochet cluster (2dc cl) – YO, insert hook in the indicated st, YO, pull up a loop, YO, pull through 2 loops, YO, insert hook in the same st, YO, pull up a loop, YO, pull through 2 loops, YO, pull through all 3 loops on hook.

Chain-1 space (ch-1 sp) – The number denotes the number of chains made

Chain-3 corner space (ch-3 corner sp) – The number denotes the number of chains made in a corner space.

Double crochet 2 together (dc2tog) – [YO, insert hook in next st, YO, pull up loop, YO, pull through 2 loops] twice, YO, pull through all loops on the hook.

Double crochet 3 together (dc3tog) – [YO, insert hook in next st, YO, pull up loop, YO, pull through 2 loops] 3 times, YO, pull through all loops on the hook.

Granny stitch (GS) – 3 dc in the same st or sp

Half double crochet in the 3rd loop (hdc 3lp) – YO, insert hook through the 3rd loop that sits just under and behind the top loop of the stitch, YO, pull through the 3rd loop, YO, pull through all 3 loops on the hook to complete the hdc.

Invisible join: At the end of the rnd, remove working loop from hook, insert hook from back to front through the top of the 1st st of the rnd, add working loop back onto hook and pull through to the WS, continue as instructed.
Click here to watch the video tutorial for the invisible join

Puff – [YO, insert hook in the indicated st or sp, YO, pull up a loop] 3 times, YO, pull through all 7 loops on the hook.

Standing double crochet (Standing dc) – Make a slip knot, hold the slip knot firmly against the hook with the forefinger of the same hand, YO, insert hook in the indicated st, YO, pull up a loop, [YO, pull through 2 loops] twice.

Stacked single crochet (STsc) – (This stitch is used at the beginning of a round to replace the traditional turning ch-3. It has the appearance of a dc.) – Insert hook in the same st as the loop, YO, pull up a loop, YO, pull through 2 loops (bottom sc made), insert hook through the left vertical bar of the bottom sc, YO, pull up a loop, YO, pull through 2 loops (top sc made).
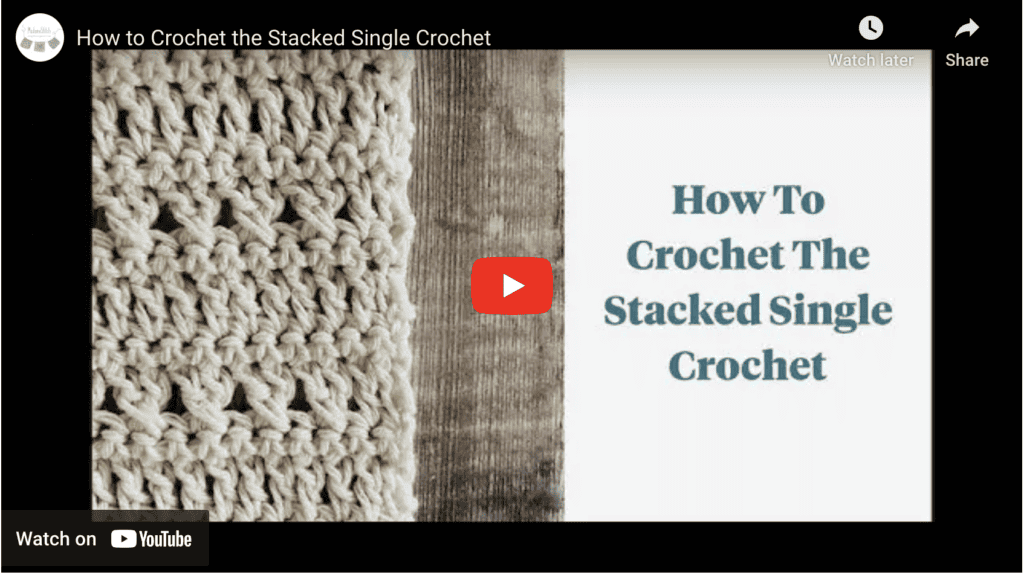
Click here to view the video for the stacked single crochet on YouTube

A full video tutorial is available on YouTube.
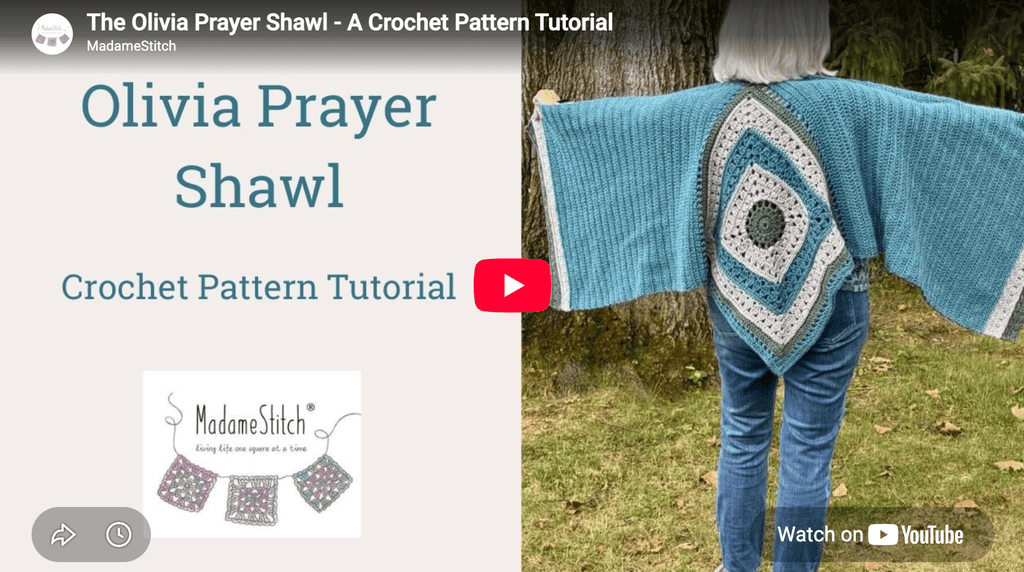
Click here to watch the video tutorial for the Olivia Prayer Shawl

Unlock Exclusive Subscriber Content

To unlock Exclusive Subscriber Content, click on the button in the box below. The Grow.me app window will pop up where you can either create an account or sign in if you already have one.

To create an account, sign in with your existing Google or Facebook account. You can also create an account with an email address and new password.

If you forget your password, simply click the “Forgot my Password”button. I have no access to your Grow account so I’m unable to retrieve or reset your password.

Remember, once you’ve created a Grow account, you never have to do it again. Your Grow account unlocks all the exclusive content created by Grow

Thank you for being a loyal blog subscriber. I hope you enjoy the exclusive content!
Center Square

Notes

  1. Do not turn after any rnd in the granny square. All rnds are worked with RS facing.
  2. A ch-1 at the beg of a row or rnd does not count as a st.
  3. A ch-3 may be substituted for the STsc without altering the construction.
  4. To change colors (unless otherwise instructed), at the final YO of a rnd, drop the working yarn and finish the last st with the new color.

With CB, ch 4, join with slip st to form a ring. OR, use a magic ring, tightening the ring at the end of Rnd 1.

Rnd 1: (STsc, 15 dc) in the ring, join with slip st to beg st. < 16 dc >

Rnd 2: (Ch 2, dc) in the same st (counts as 1st 2dc cl), ch 1, [2dc cl in the next st, ch 1] 15 times, join with slip st to beg dc. < 16 2dc cl, 16 ch-1 sp >

Rnd 3: Slip st into the ch-1 sp, STsc, ch 2, [dc in the next ch-1 sp, ch 2] 15 times, join with slip st to beg st. < 16 dc, 16 ch-2 sp >

Note for Rnd 4: This rnd creates a square shape around the circle.

Rnd 4: With CA, ch 1, hdc in the same st, 3 hdc in the next ch-2 sp, sc in the next st, 3 sc in the next ch-2 sp, sc in the next st, 3 hdc in the next ch-2 sp, hdc in the next st, [(puff, ch 3, puff) in the next ch-2 sp, hdc in the next st, 3 hdc in the next ch-2 sp, sc in the next st, 3 sc in the next ch-2 sp, sc in the next st, 3 hdc in the next ch-2 sp, hdc in the next st] 3 times, (puff, ch 3, puff) in the next ch-2 sp, join with slip st to beg st. Fasten off. < 8 puffs, 20 sc, 32 hdc, 4 ch-3 corner sp >

Note for Rnd 5: Count the hidden st after each corner when skipping 3 sts.

Rnd 5: Continuing with CA, attach yarn to any ch-3 corner sp, (STsc, 2 dc, ch 3, GS) in the same corner sp, [sk 2 sts, GS in the next st] 4 times, sk 3 sts, {(GS, ch 3, GS) in the ch-3 corner sp, [sk 2 sts, GS in the next st] 4 times, sk 3 sts} 3 times, join with slip st to beg st. < 24 GS, 4 ch-3 corner sp >

Rnd 6: (Ch 2, dc2tog) across the GS (counts as 1st dc3tog), ch 2, (dc3tog, ch 3, dc3tog) in the ch-3 corner sp, {ch 2, [dc3tog across the next GS, ch 2] 6 times, (dc3tog, ch 3, dc3tog) in the ch-3 corner sp} 3 times, ch 2, [dc3tog across the next GS, ch 2] 5 times, join with slip st to beg dc2tog. < 32 dc3tog, 28 ch-2 sp, 4 ch-3 corner sp >

Rnd 7: Ch 1, hdc in the same st, 2 hdc in the ch-2 sp, hdc in the top of the last dc3tog before the corner sp, (2 hdc, ch 2, 2 hdc) in the ch-3 corner sp, {[hdc in the top of the next dc3tog, 2 hdc in the next ch-2 sp] 7 times, hdc in the last dc3tog before the corner sp, (2 hdc, ch 2, 2 hdc) in the ch-3 corner sp} 3 times, [hdc in the top of the next dc3tog, 2 hdc in the next ch -2 sp] 6 times, invisible join. < 26 hdc across each side, 4 ch-2 corner sp >

Note for Rnd 8: Be sure to work a hdc 3lp in the hidden st after each corner that may be covered by the corner sts from Rnd 7.

Rnd 8: With MC, ch 1, hdc 3lp in the same st and in each st across to the ch-2 corner sp, [(2 hdc, ch 2, 2 hdc) in the ch-2 corner sp, hdc 3lp in the next st and in each st across to the next ch-2 corner sp] 3 times, (2 hdc, ch 2, 2 hdc) in the ch-2 corner sp, hdc 3lp in the next st and in each st across to the beg st, join with slip st to beg st. < 26 hdc 3lp across each side, 16 hdc, 4 ch-2 corner sp >

Note for Rnd 9: Count the hidden st as one of the skipped sts after each corner.

Rnd 9: (STsc, 2 dc) in the same st (counts as GS), sk 3 sts, GS in the next st, sk 3 sts, (GS, ch 3, GS) in the ch-2 corner sp, {[sk 3 sts, GS in the next st] twice, [sk 2 sts, GS in the next st] 5 times, sk 3 sts, GS in the next st, sk 3 sts, (GS, ch 3, GS) in the ch-2 corner sp} 3 times, sk 3 sts, GS in the next st, sk 3 sts, [GS in the next st, sk 2 sts] 5 times, join with slip st to beg st. < 40 GS, 4 ch-3 corner sp >

Rnd 10: (Ch 2, dc2tog) across the GS (counts as 1st dc3tog), ch 2, [dc3tog across the next GS, ch 2] across to the ch-3 corner sp, (dc3tog, ch 3, dc3tog) in the ch-3 corner sp, {ch 2, [dc3tog across the next GS, ch 2] across to the next ch-3 corner sp, (dc3tog, ch 3, dc3tog) in the ch-3 corner sp} 3 times, ch 2, [dc3tog across the next GS, ch 2] across to the beg dc2tog, join with slip st to beg dc2tog. < 48 dc3tog, 44 ch-2 sp, 4 ch-3 corner sp >

Rnd 11: Ch 1, hdc in the same st, [2 hdc in the ch-2 sp, hdc in the top of the next dc3tog] across to the ch-3 corner sp, (2 hdc, ch 2, 2 hdc) in the ch-3 corner sp, {hdc in the top of the dc3tog, [2 hdc in the ch-2 sp, hdc in the top of the next dc3tog] across to the ch-3 corner sp, (2 hdc, ch 2, 2 hdc) in the ch-3 corner sp} 3 times, hdc in the top of the dc3tog, 2 hdc in the ch-2 sp, [hdc in the top of the next dc3tog, 2 hdc in the ch-2 sp] across to the beg st, invisible join. < 38 hdc across each side, 4 ch-2 corner sp >

Note for Rnd 12: Be sure to work a hdc 3lp in the hidden st after each corner that may be covered by the corner sts from Rnd 11.

Rnd 12: With CA, ch 1, hdc 3lp in the same st and in each st to the ch-2 corner sp, (2 hdc, ch 2, 2 hdc) in the ch-2 corner sp, [hdc 3lp in the next st and in each st across to the next ch-2 corner sp, (2 hdc, ch 2, 2 hdc) in the ch-2 corner sp] 3 times, hdc 3lp in the next st and in each st across to the beg st, join with slip st to beg st.. < 38 hdc 3lp across each side, 16 hdc, 4 ch-2 corner sp >

Note for Rnd 13: Count the hidden st as one of the skipped sts after each corner.

Rnd 13: Slip st in the next 2 sts, (STsc, 2 dc) in the same st, sk 2 sts, [GS in the next st, sk 2 sts] across to the next ch-2 corner sp, (GS, ch 3, GS) in the ch-2 corner sp, {sk 3 sts, [GS in the next st, sk 2 sts] across to the next ch-2 corner sp, (GS, ch 3, GS) in the ch-2 corner sp} 3 times, sk 3 sts, [GS in the next st, sk 2 sts] across to the beg st, join with slip st to beg st. < 60 GS, 4 ch-3 corner sp >

Rnd 14: Rep Rnd 10. < 68 dc3tog, 64 ch-2 sp, 4 ch-3 corner sp >

Rnd 15: Rep Rnd 11. < 53 hdc across each side, 4 ch-2 corner sp >

Rnd 16: With CB, rep Rnd 12. < 53 hdc 3lp across each side, 16 hdc, 4 ch-2 corner sp >

Rnd 17: STsc, dc in the next st and in each st across to the ch-2 corner sp, (2 dc, ch 2, 2 dc) in the ch-2 corner sp, [dc in the next st and in each st across to the next ch-2 corner sp, (2 dc, ch 2, 2 dc) in the ch-2 corner sp] 3 times, dc in the next st and in each st across to the beg st, join with slip st to beg st. < 61 dc across each side, 4 ch-2 corner sp >

Rnd 18: With MC, STsc, ch 1, sk 1 st, [dc in the next st, ch 1, sk 1 st] across to the ch-2 corner sp, {(2 dc, ch 2, 2 dc) in the ch-2 corner sp, [ch 1, sk 1 st, dc in the next st] across, ch 1, sk 1 st} 3 times, (2 dc, ch 2, 2 dc) in the ch-2 corner sp, ch 1, sk 1 st, [dc in the next st, ch 1, sk 1 st] across to the beg st, join with slip st to beg st. < 34 dc along each side, 31 ch-1 sp across each side, 4 ch-2 corner sp >

Rnd 19: STsc in the same st, dc in each ch-1 sp and st across to the ch-2 corner sp, [(2 dc, ch 2, 2 dc) in the ch-2 corner sp, dc in the next st and in each st and ch-1 sp across to the next ch-2 corner sp] 3 times, (2 dc, ch 2, 2 dc) in the ch-2 corner sp, dc in the next st and in each st and ch-1 sp across to the beg st, join with slip st to beg st. < 69 dc across each side, 4 ch-2 corner sp > Fasten off and weave in ends.

Wings

Notes

  1. A ch-1 at the beg of a row does not count as a st.
  2. A ch-3 may be substituted for the STsc without altering the construction.
  3. To change colors (unless otherwise instructed), at the final YO of a rnd, drop the working yarn and finish the st with the new color.

Wing 1

Row 1 (RS): With the RS of the square facing and using MC, Standing dc in any ch-2 corner sp, dc in the next st and in each st across, turn. < 71 dc >

Row 2 (WS): STsc, dc in the next st and in each st across, turn.

Rows 3-44: Rep Row 2.

Row 45 (RS): Ch 1, hdc in the same st and in each st across, turn. < 71 hdc >

Row 46 (WS): With CA, ch 1, hdc 3lp in the same st and in each st across, turn.

Row 47: STsc, sk 1 st, GS in the next st, [sk 2 sts, GS in the next st] across to the last 2 sts, sk 1 st, dc in the last st, turn. < 2 dc, 23 GS >

Row 48: Stsc, ch 1, dc3tog across the top of the GS, [ch 2, dc3tog across the next GS] across, ch 1, dc in the last st, turn. < 2 dc, 23 dc3tog >

Row 49: Ch 1, hdc in the same st, hdc in the ch-1 sp, hdc in the top of the dc3tog, [2 hdc in the ch-2 sp, hdc in the top of the dc3tog] across to the ch-1 sp, hdc in the ch-1 sp, hdc in the last st, turn. < 71 hdc >

Rows 50-53: With CB, rep Rows 46-49.

Fasten off. Be sure to weave in ends on the WS.

Wing 2

With RS facing, attach MC in the same ch-2 corner sp of the square as the end of Row 1 of Wing 1.

For Wing 2, rep Rows 1-53 of Wing 1.

Fasten off and weave in any remaining ends.

Similar Posts

Leave a Reply

Your email address will not be published. Required fields are marked *