The 2026 Granny Stitch Sampler Blanket | A Free Crochet Along
The 2026 Granny Stitch Sampler blanket offers 12 brand new granny squares. It’s free to participate and loads of fun to make.
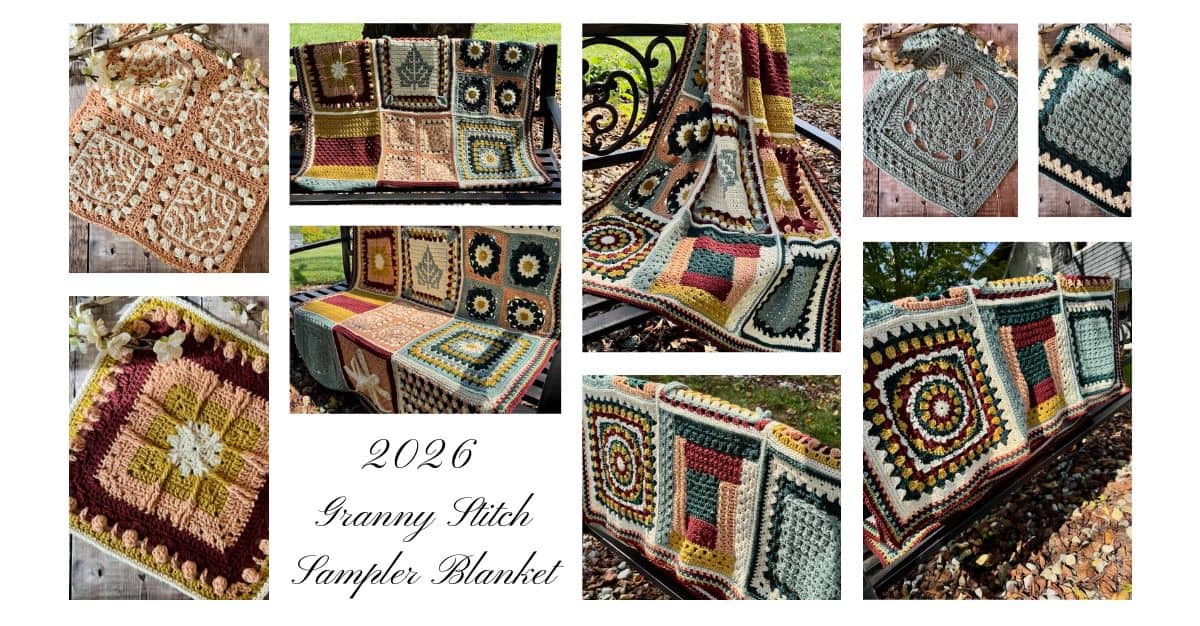
The 2026 Granny Stitch Sampler Blanket Free Crochet Along
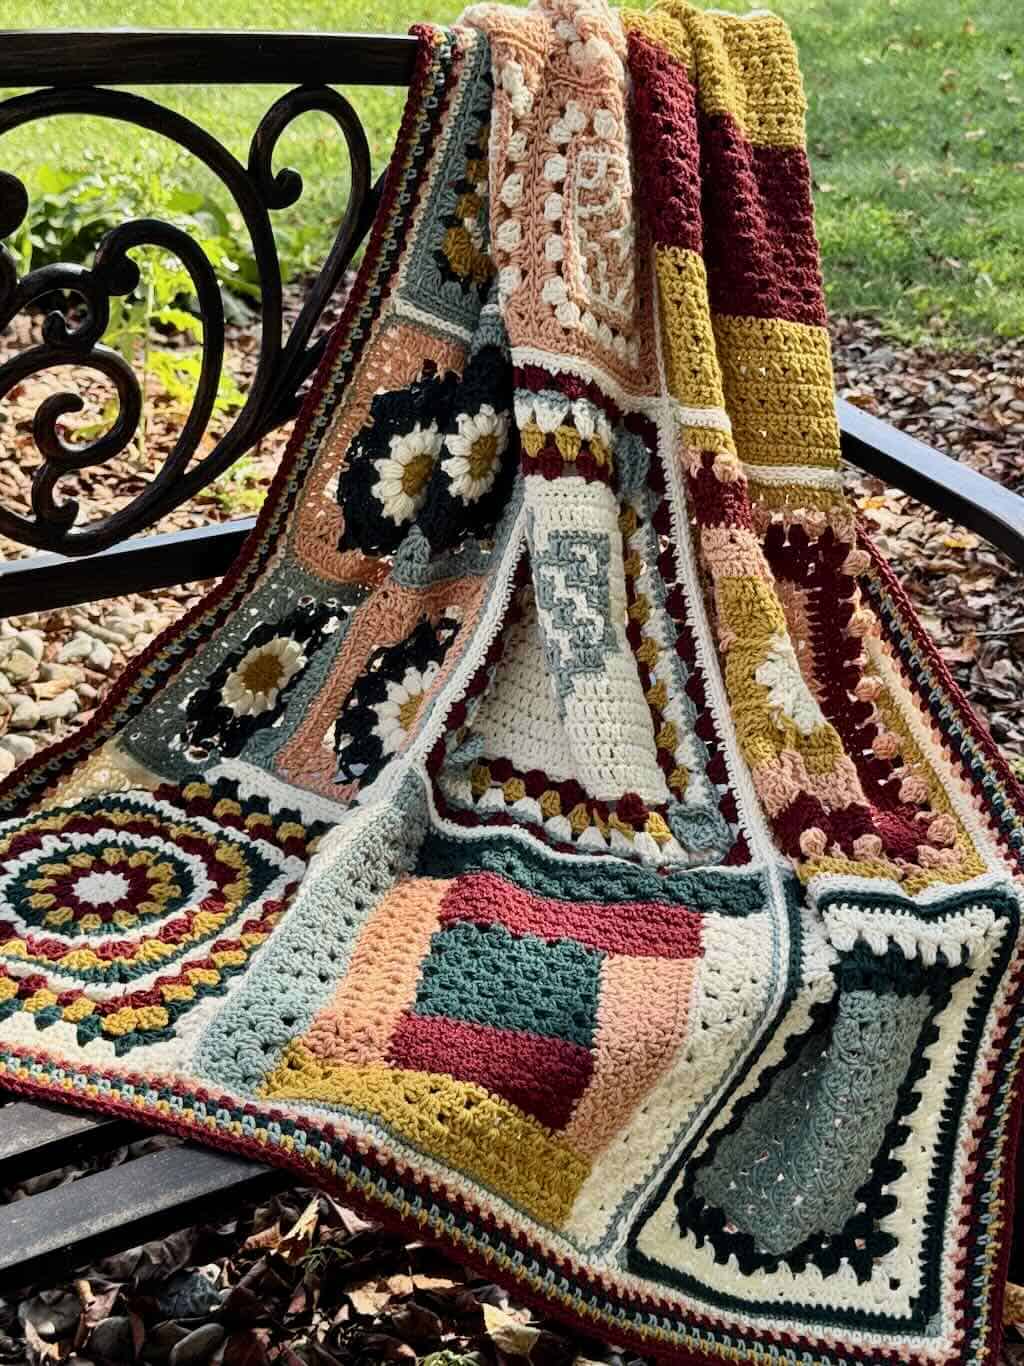
Pattern at a Glance
- Twelve granny squares, each designed by a different crochet designer
- Finished sizes
- Each square measures approx. 12-12.5” across.
- The finished blanket measures approx. 42″ x 54″.
- The entire pattern is free to view on this blog and the designer’s blogs.
- A full pattern eBook PDF is available for purchase for those who prefer to work off the blog.
- Yarn: Any light worsted weight yarn – list the yardage here
- Hook: US size H-8 (5mm) or size needed for gauge
- Original publish date: Sept 16, 2026
About this year’s Granny Stitch Sampler Blanket
My mission for the Granny Stitch Sampler Blanket is simple: to show you just how versatile the classic granny stitch can be.
You know the one—those three double crochets worked together in the same stitch or space. It’s the foundation stitch of the traditional granny square, and yet it never stops surprising us with new possibilities.
Thanks to the creativity of the designers who contributed to this gorgeous blanket, you’ll experience the granny stitch in ways you’ve never seen before.
This year’s Granny Stitch Sampler Blanket is beautiful for your home, cozy for snuggling, perfect for anything you have in mind.
New granny squares paired with one of the coziest yarns I’ve worked with – an unforgettable granny stitch sampler blanket you’ll love making as much as you adore using.
Gather your supplies and plan to immerse yourself in a one-of-a-kind experience, not to mention one of the most gorgeous blankets on your hook!
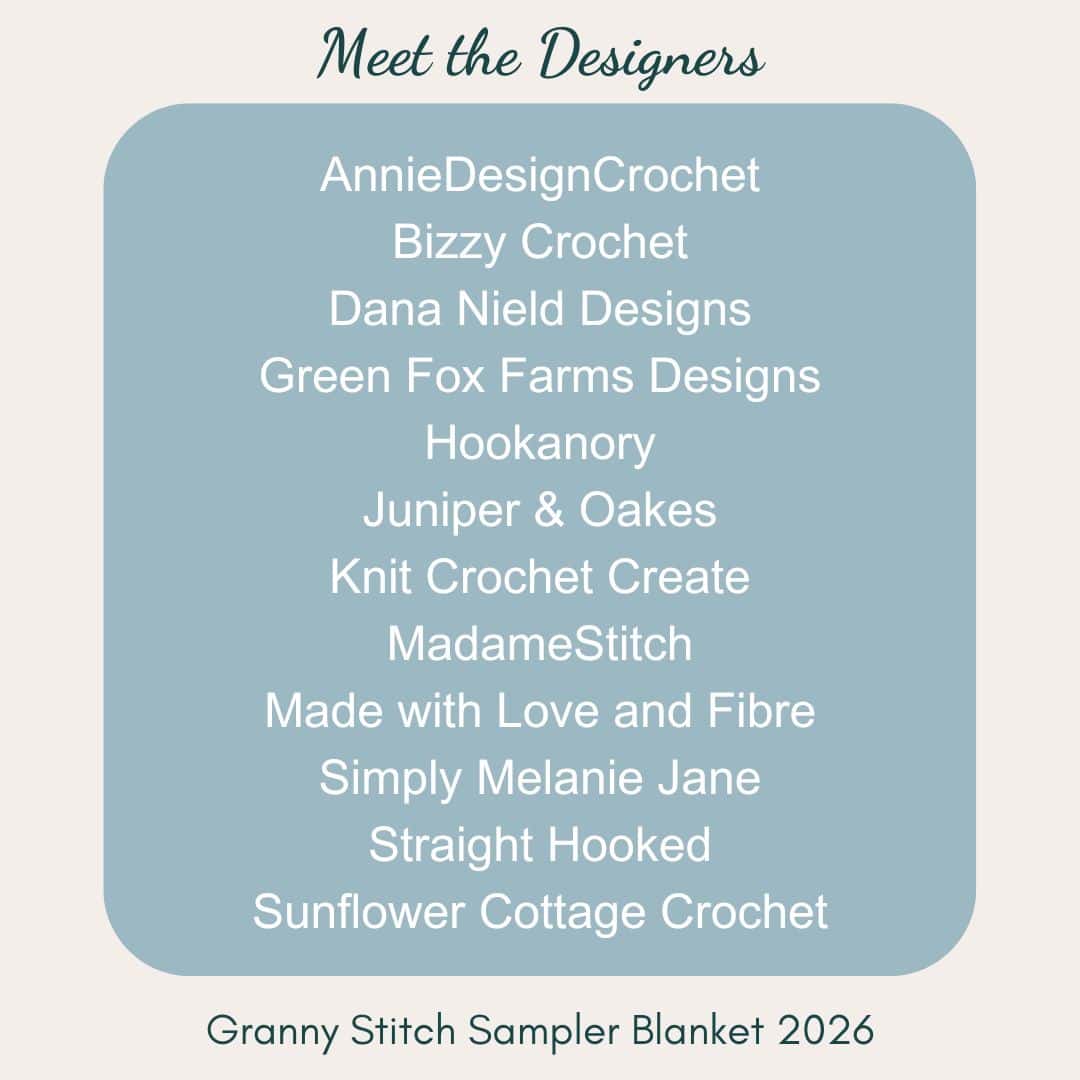
Meet the Designers
I’m thrilled to welcome this year’s group of talented crochet designers to the Granny Stitch Sampler Blanket. Each one has brought her unique style to this collaborative blanket.
Some of them you’ll know and some you many not. This is your chance to broaden your pool of favorite crochet designers with this one-of-a-kind sampler style blanket.
What is a free crochet along?
Participating in a free crochet along is such a special experience.
If you’ve never been a part of one, here’s what you can expect when you join a free crochet along.
- Everyone crochets the same project at the same time.
- Each part of the project is released one at a time. That way all of the participants can work at the same pace.
- The fun part comes when everyone is sharing progress photos with the group. It’s so motivating!
How This Crochet Along Works
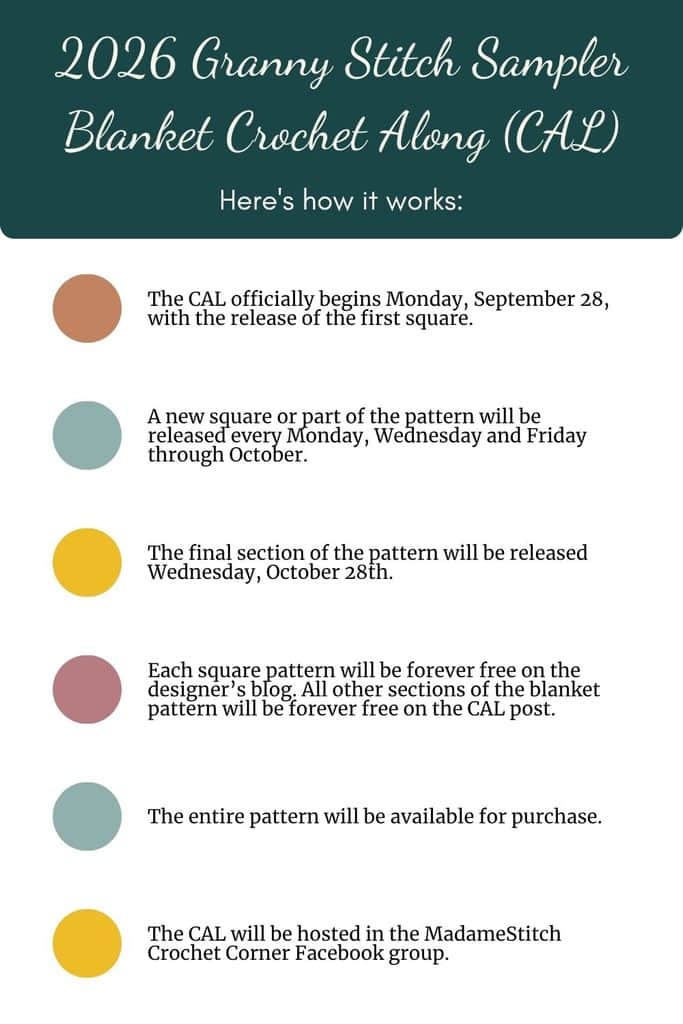
Here’s how to participate in the free crochet along
- The CAL officially begins Monday, September 28th, with the release of the first square.
- A new square or part of the pattern will be released every Monday, Wednesday and Friday through the month of October.
- The final section of the pattern – the Border – will be released Wednesday, October 28th.
- Each square pattern will be forever free on the designer’s blog. All other sections of the blanket pattern will be forever free on this event post.
- The entire pattern will be available for purchase as a downloadable PDF.
- The CAL will be hosted in the MadameStitch Crochet Corner Facebook group.
- Participants can bookmark this post and return on each release day.
Join the Facebook group
For the full experience, join the MadameStitch Crochet Corner group where you can ask questions, share your progress, and enjoy ALL of the other projects.
Sign up for CAL emails
Get updates sent directly to your inbox. Simply click on the button below, fill out your information, and wait for all the CAL goodness to arrive in real time.
Note: Signing up for the email list DOES NOT mean the pattern will be sent to you. It will be available here or on the designer’s blog post.

Purchase the full pattern
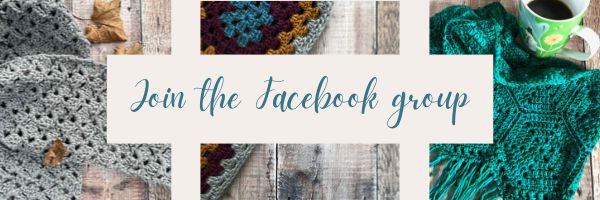
For some, keeping a browser window open to read a pattern is not a problem. But, what if that isn’t you?
Purchase and download a copy of the full pattern to conveniently upload it to any mobile device. It will be there whenever you need it!
You’ll also get an exclusive Color Planner and Progress Tracker included.
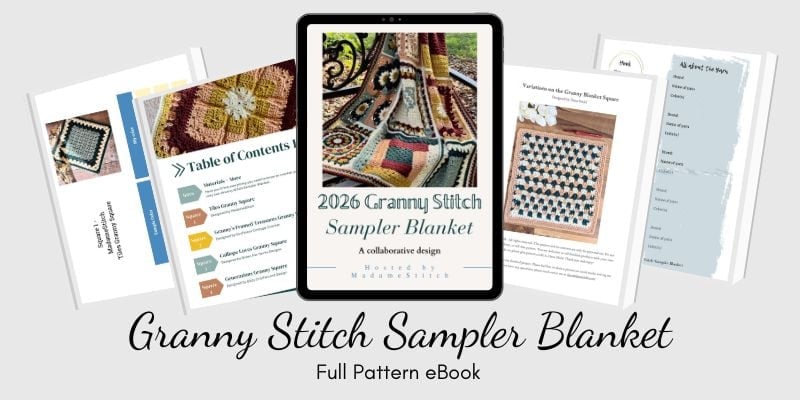
The ebook is now being offered at the presale price of $15.99. The price increases on Monday, Sept. 28th, when the CAL begins so don’t delay!

Frequently Asked Questions
What if I can’t meet the designer’s gauge?
You might need to go up or down a hook size to meet gauge. Also, sometimes you can stop making your square when it reaches 12″ even if you haven’t worked all of the rounds.
Can this blanket be made with yarn from my stash?
Absolutely! The Granny Stitch Sampler Blanket is the perfect way to use up worsted weight yarn you already have.
Will there be a video tutorial for each square?
It’s up to each designer whether or not to provide a video tutorial. Sometimes they’ll include a photo tutorial instead. However, the designers are available for help during the CAL.
The 2026 Granny Stitch Sampler Blanket Starts Here
General Information
Yarn
Lion Brand “Color Theory” 100% acrylic worsted weight (3.5oz/246yd; 100g/225m)
- Tourmaline: 380 yds
- Peacock: 195 yds
- Himalayan Salt: 340 yds
- Beaujolais: 295 yds
- Bee Pollen: 270 yds
- Ivory: 560 yds
Total yardage needed for the blanket: 2100-2200 yds (Have extra yarn on hand)
Hook
US size H-8 (5mm) – This is the hook used by all of the designers. However, to meet gauge in each individual square, you may need a size smaller or larger depending upon your unique tension.
Tools
There are no specific tools necessary for the completion of the Granny Stitch Sampler Blanket. However, you’ll want to have the following on hand:
- Blocking boards and pins
- Removable stitch markers
- Scissors
- Tape measure
- Tapestry needle
Finished Size
Each square is intended to be 12”. However, they may be an average of 12.5” across. As long as all of your squares are approximately the same size, you’ll be fine.
You can adjust the size of each square during blocking to ensure they are all approximately the same size. For the sample, I easily blocked each square to 12.5″ across.
The sample blanket measures approximately 42″ x 54″. Your blanket may be slightly smaller or larger depending upon the size of your finished squares, the seaming method you choose, and the number of rounds for your border. If you prefer to add different border, like one of these, that may also affect your measurements.
Gauge
The gauge for each square is listed in the individual patterns. Be sure you meet gauge for each square.
Skill Level: Intermediate
Because of the variety of stitches and techniques, this year’s Granny Stitch Sampler Blanket is for Intermediate level crocheters.
This is definitely not a beginner level blanket. You’ll need experience reading crochet patterns and it would be helpful for you to have tried a few stitches beyond the basics.
With that said, many of the designers have provided photo and/or video tutorials to help. And, they are available to give you assistance should you need it.
The Square Patterns
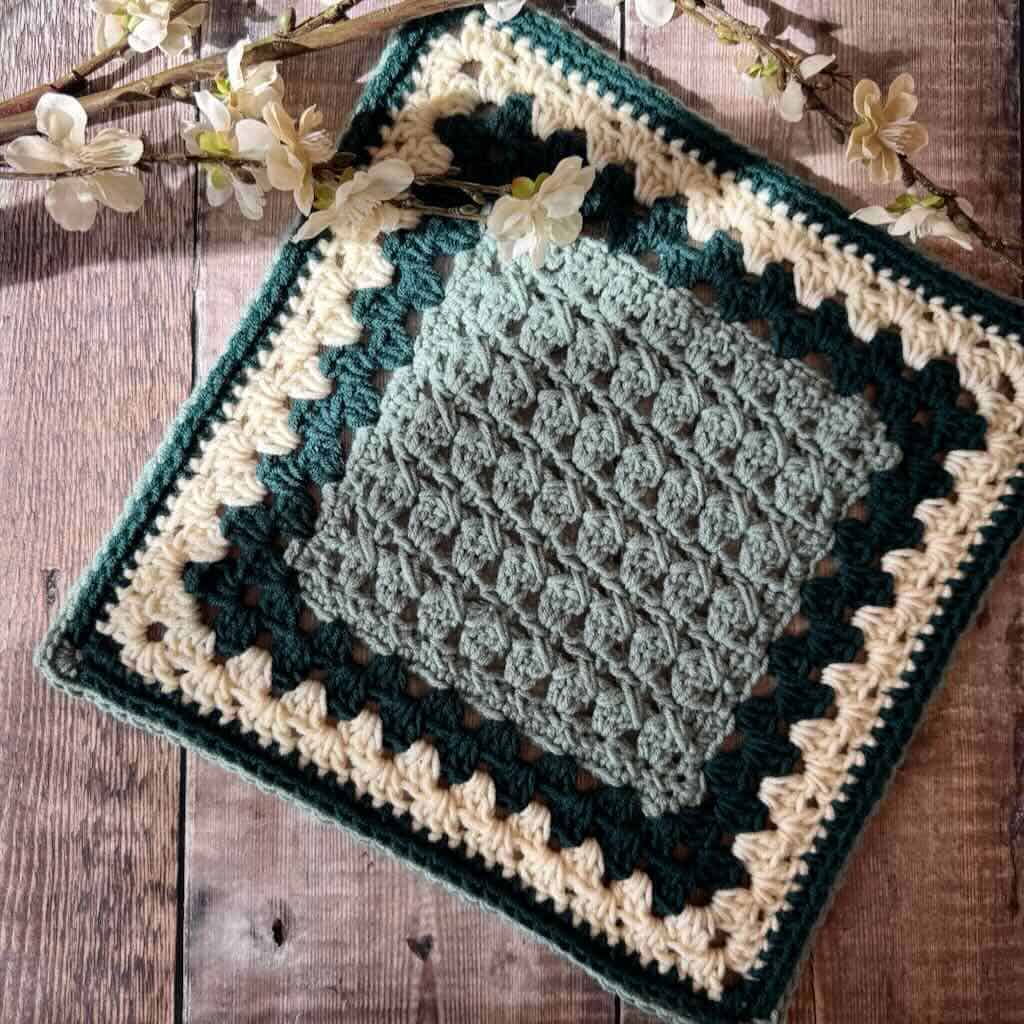
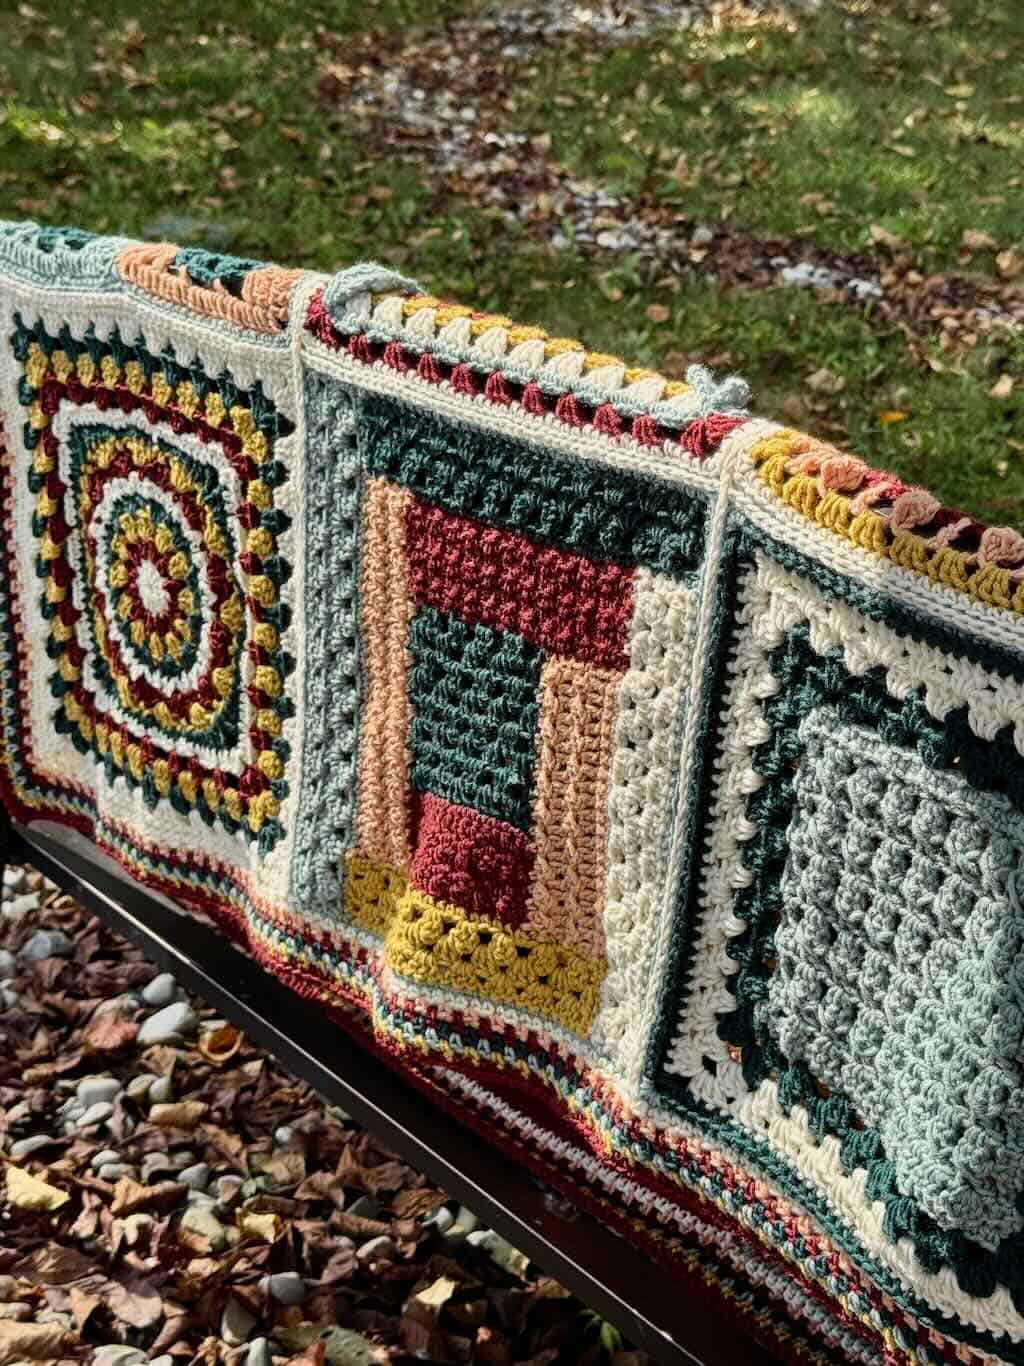
The Tiles Granny Square designed by MadameStitch
The granny stitch meets the crossed V-stitch to create the texture you’ve been craving. The construction, combining back and forth rows with joined rounds, takes the traditional granny square you know and love, and turns it into something that feels both familiar and new.
Click the button below for the free-to-view pattern.

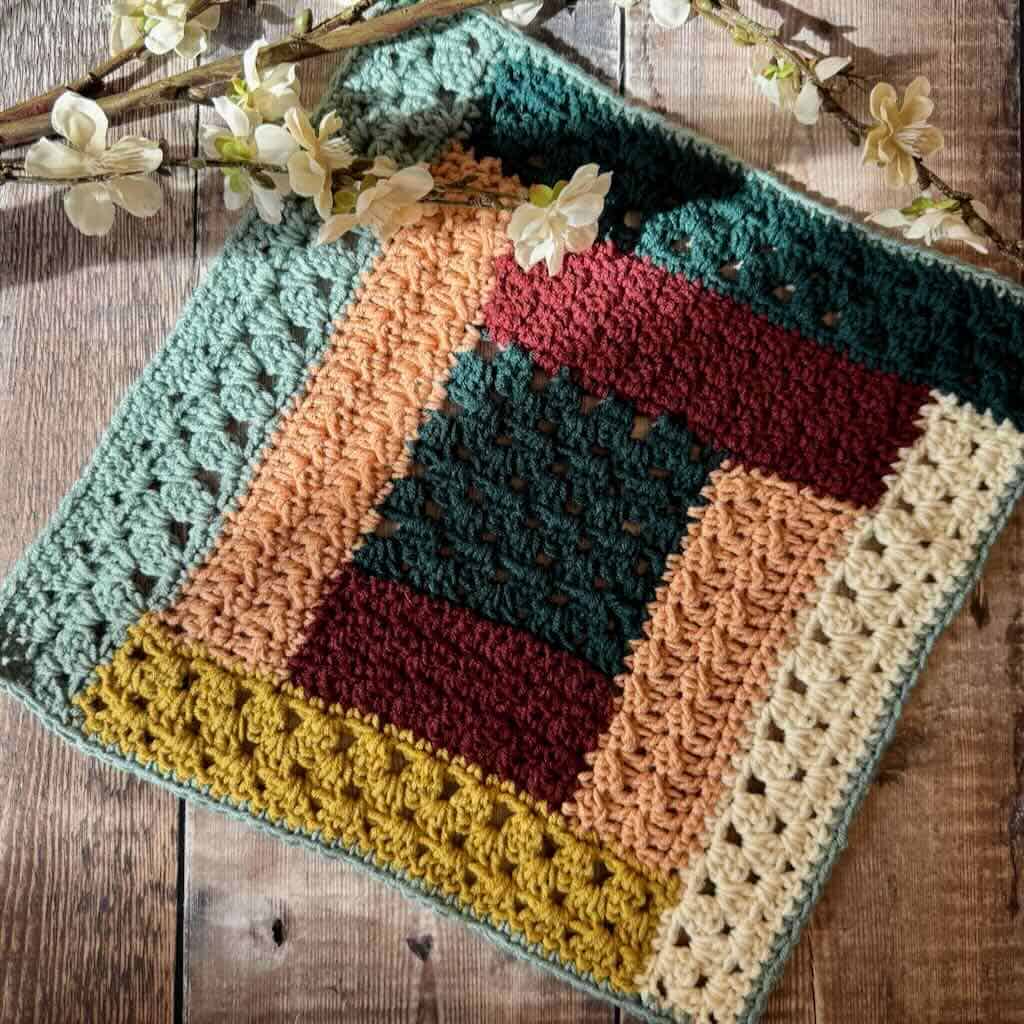
Granny’s Framed Treasure Square designed by Sunflower Cottage Crochet
Inspired by traditional log cabin quilts! This free 12-inch crochet blanket square combines classic granny stitches with a clever, framed construction worked in rows. Perfect for confident beginners and stash-busting, it’s a lovely way to play with color and texture while creating a beautiful addition to your Granny Stitch Sampler Blanket!
Click the button below for the free-to-view pattern.
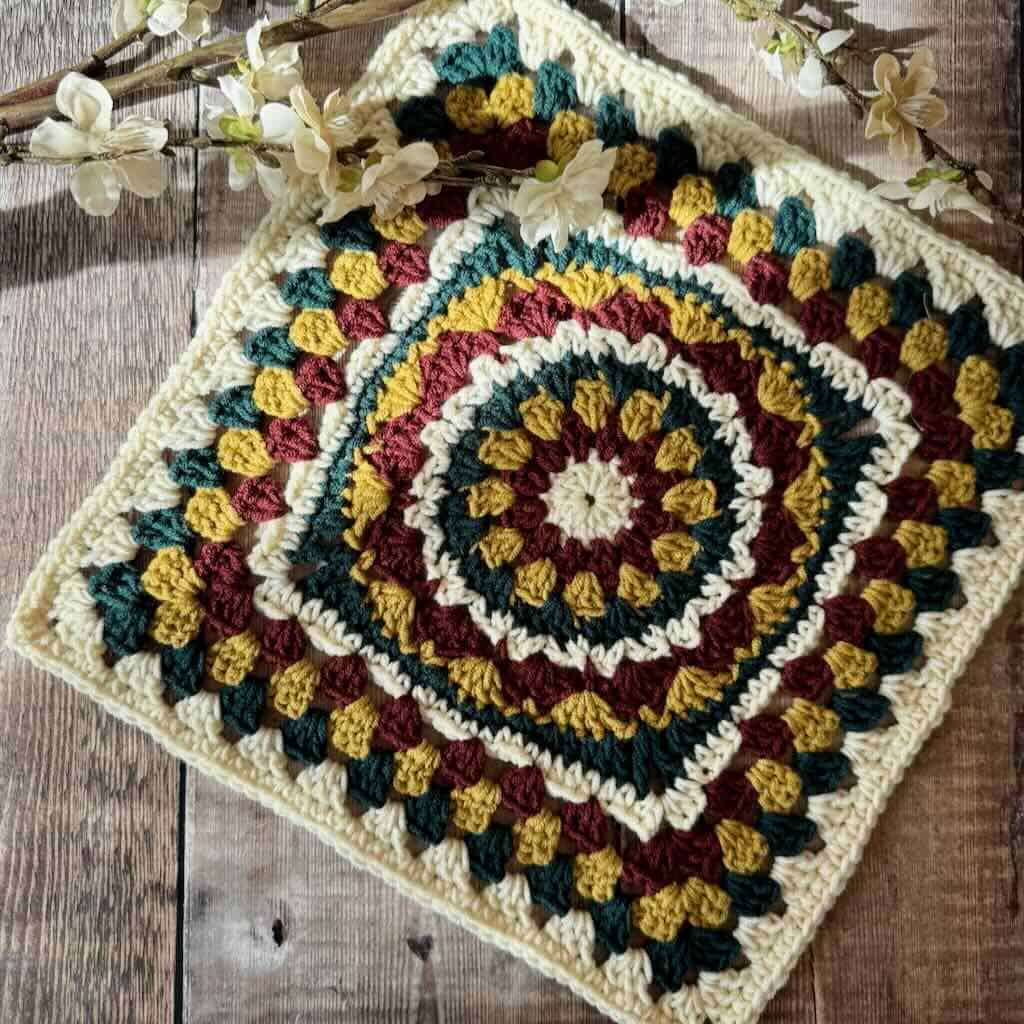
Calliope’s Compass Granny Square designed by Green Fox Farms Designs
Calliope’s Compass starts in the center with my beautiful Calliope motif, which flowers outward into a square, which is then framed in Granny Stitch!
Click the button below for the free-to-view pattern.
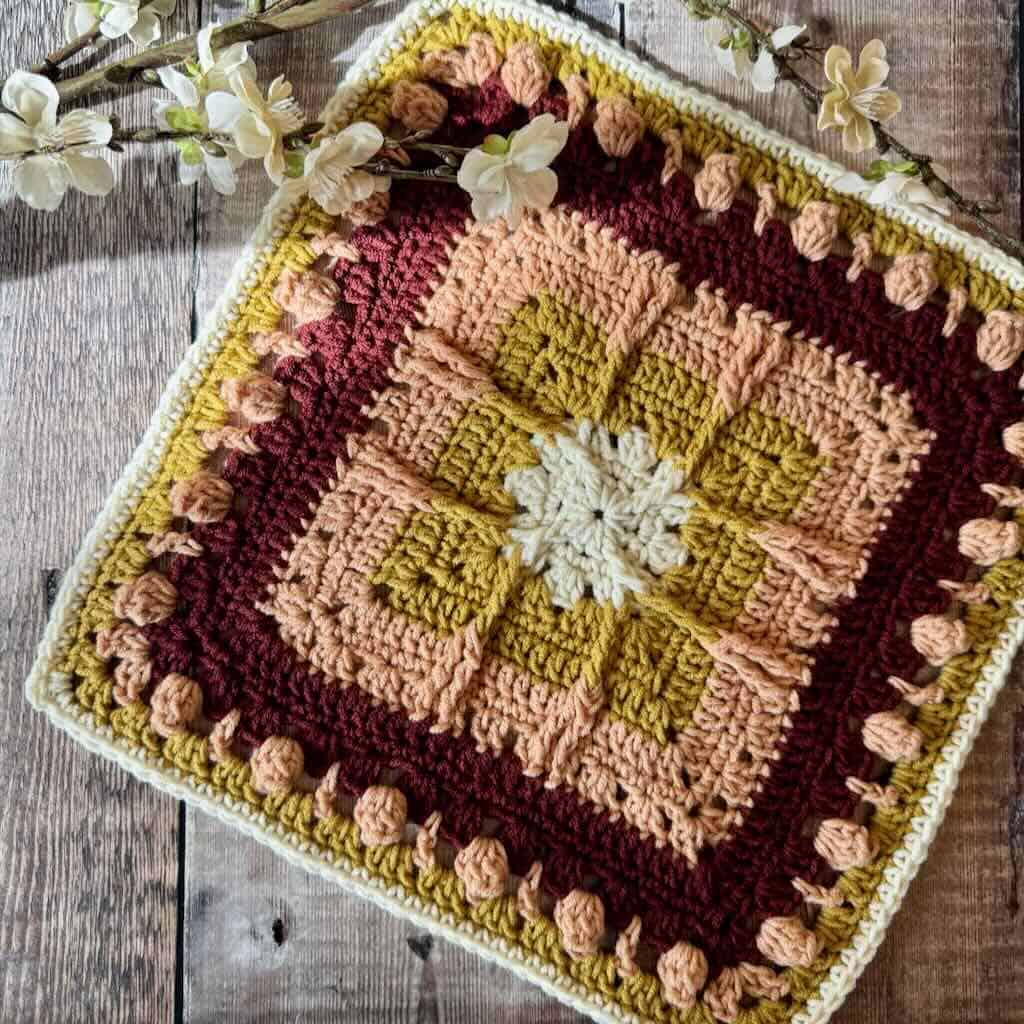
Generations Granny Square designed by Bizzy Crochet and Design
Everything good begins with a grandma. This square represents five generations of women that started with the strength of one. The roots of the older generations rising up to produce the blossoms of the next generations.
Click the button below for the free-to-view pattern.
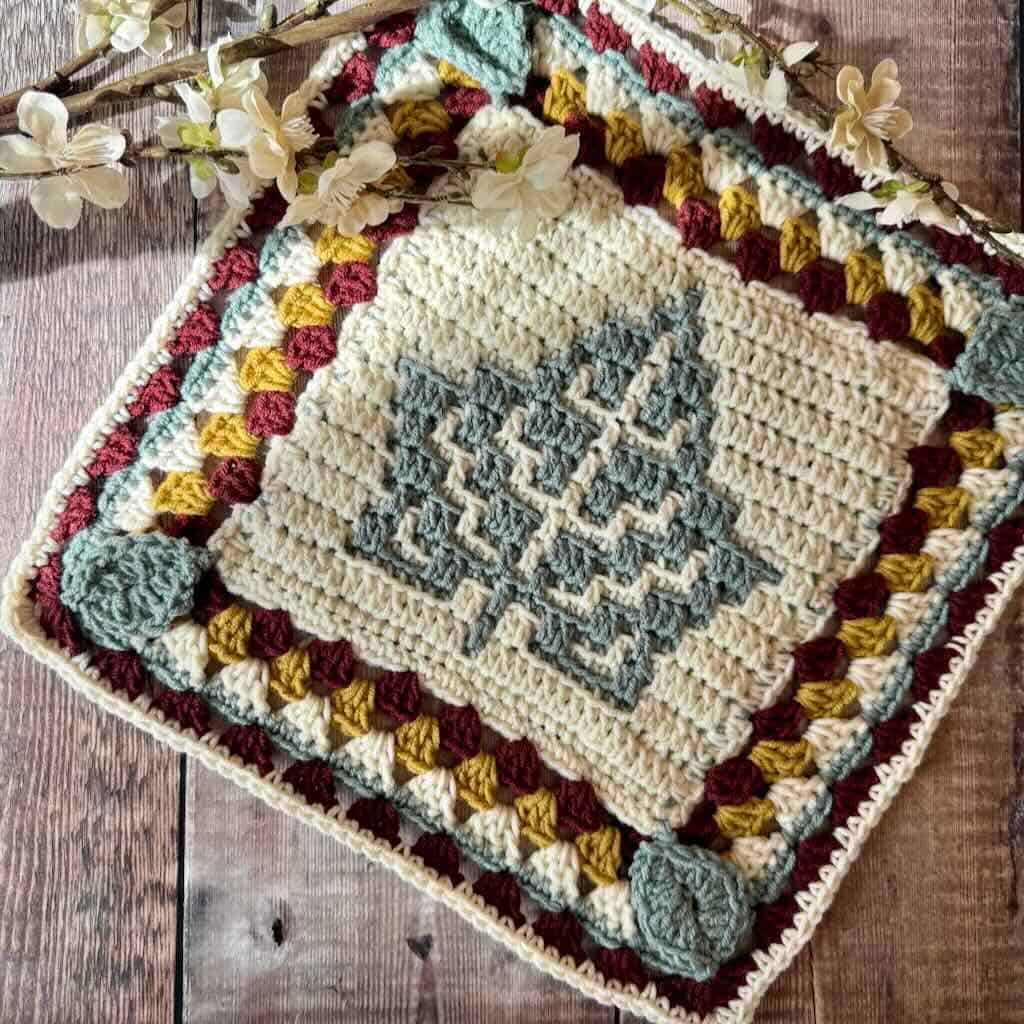
Autumn Ivy Granny Square designed by Hookanory
The Autumn Ivy Granny Square leans into the autumn vibe by including a mosaic crochet Ivy leaf center motif and 3D autumn leaves intertwining the granny stitch border in the corners, giving an organic feel as if they are growing out from the center of the square. The inclusion of these crochet techniques adds both interest and challenge to this make and allows plenty opportunity for adaption and personalization.
Click the button below for the free-to-view pattern.
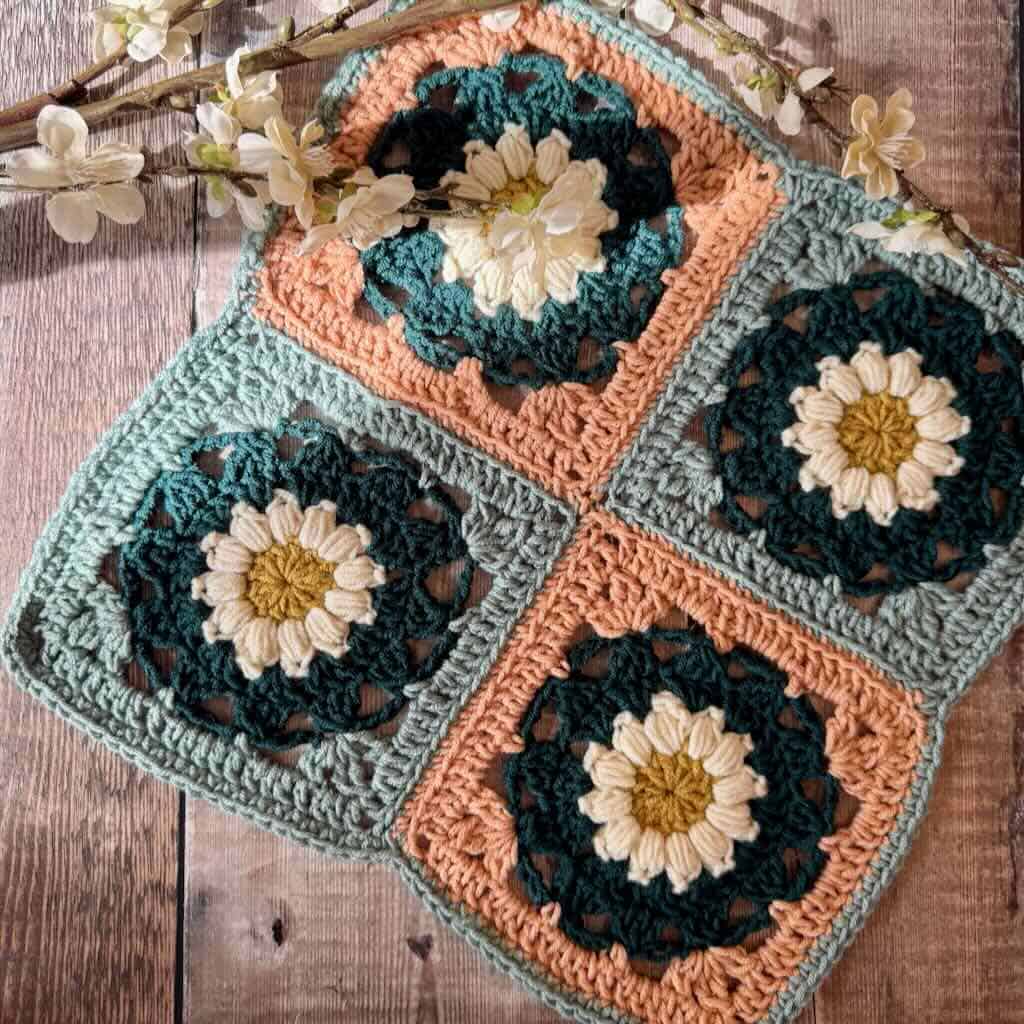
Daisy Patch Granny Square designed by AnnieCrochetDesign
This crochet square is a fun variation on the traditional granny square, made from four smaller squares. Each one features a daisy motif at the center, creating a pretty patchwork effect.
Click the button below for the free-to-view pattern.
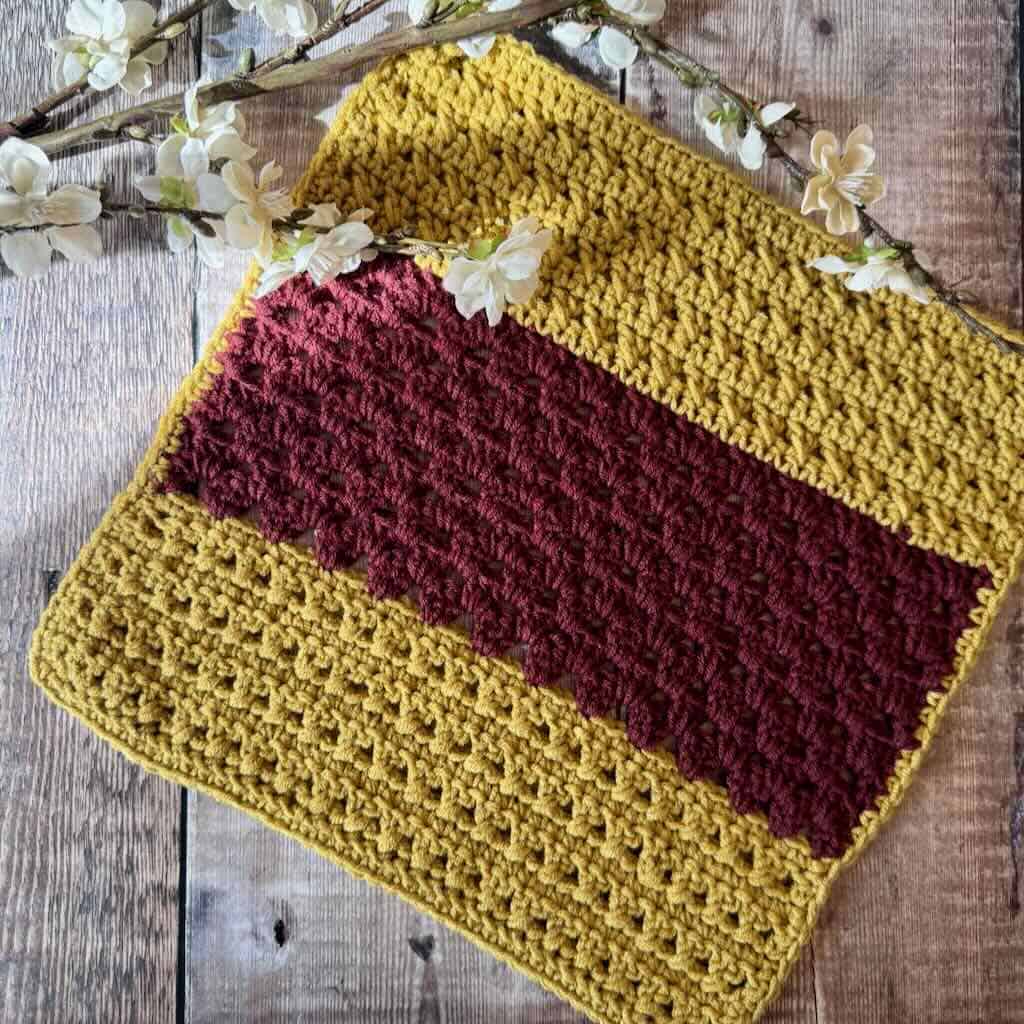
Granny’s Cross Square designed by Simply Melanie Jane
The Granny’s Cross Square blends the classic charm of the granny stitch with the rich texture of crossed double crochet rows for a design that feels both timeless and unique.
Click the button below for the free-to-view pattern.
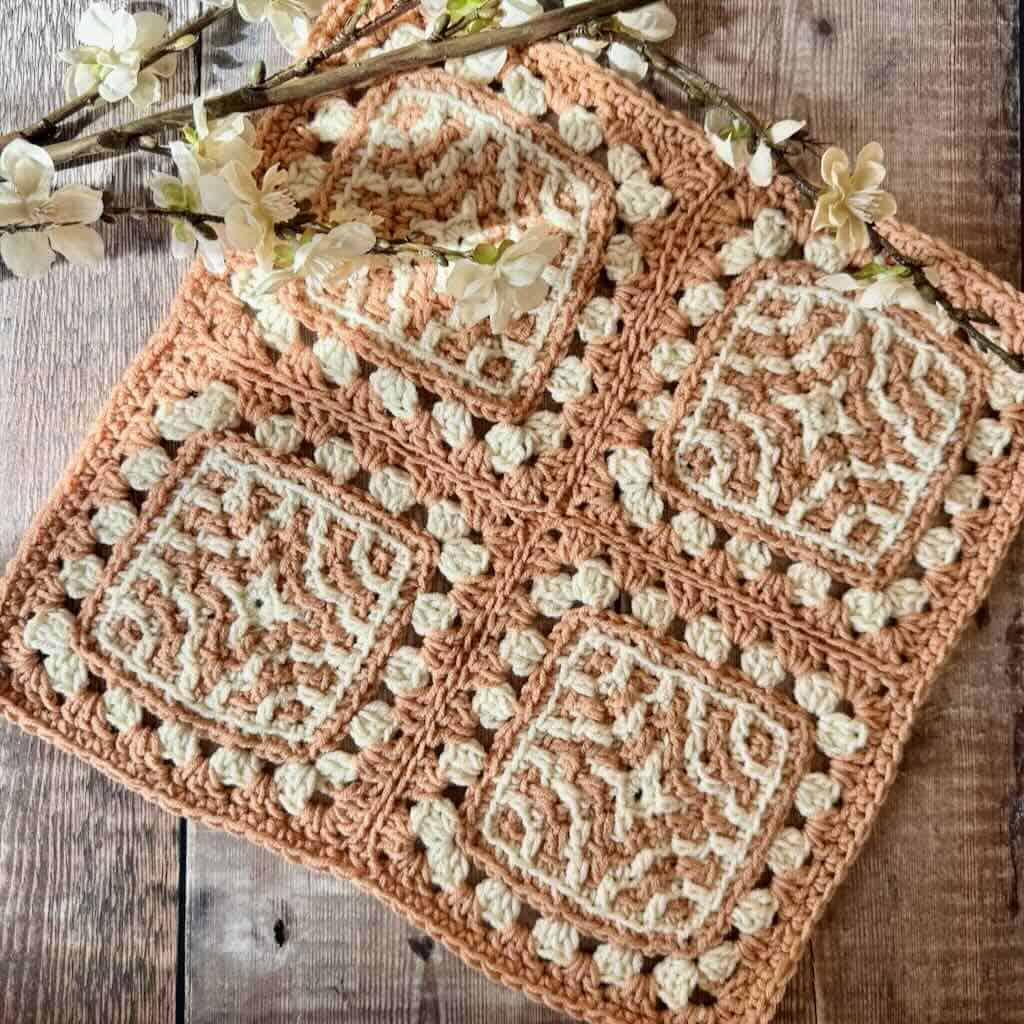
Mosaic 4-Patch Granny Square designed by Juniper & Oakes
The Mosaic 4-Patch Granny Square blends overlay mosaic crochet with the classic granny stitch to create a pattern that’s both eye-catching and fun to make. If you enjoy mixing techniques and trying something a little different, I think you’re going to have a lot of fun with this one.
Click the button below for the free-to-view pattern.
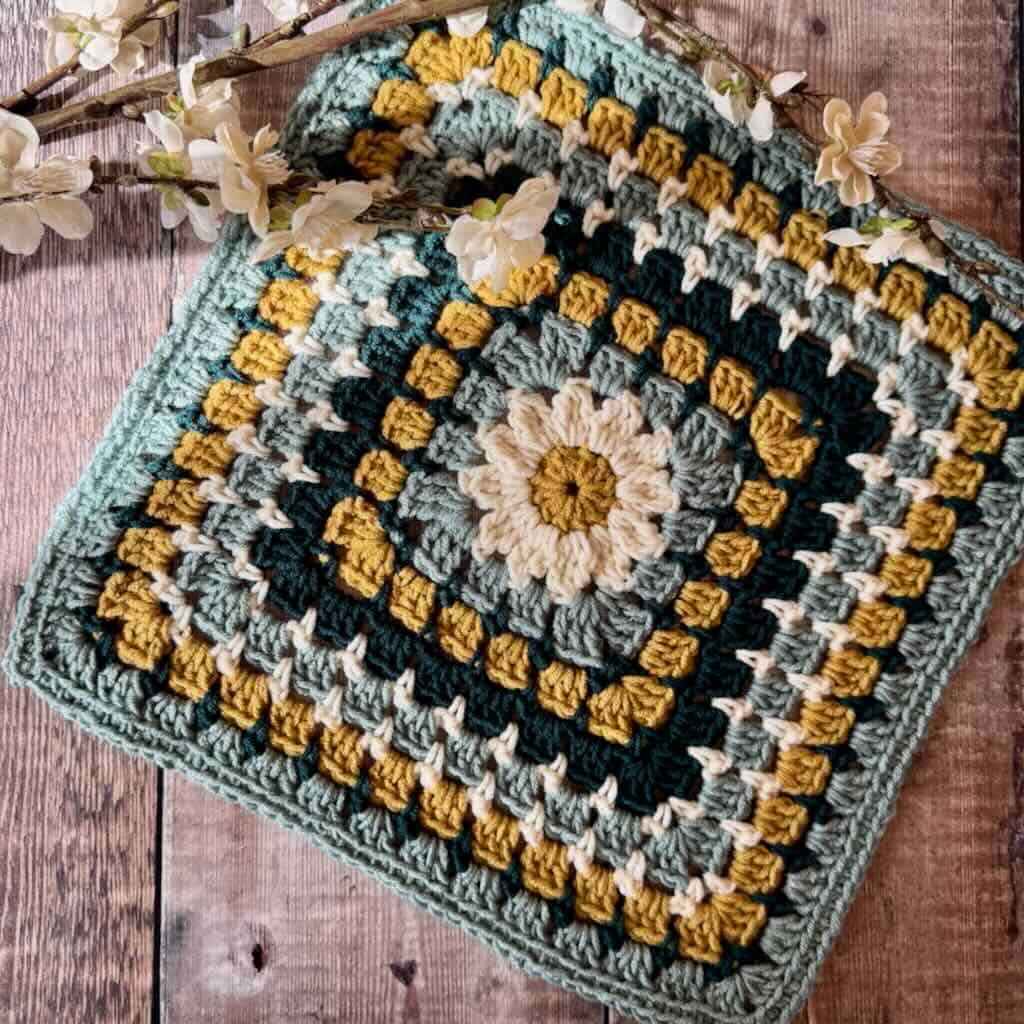
Framed Daisy Granny Square designed by Knit Crochet Create
The Framed Daisy Square brings together two of my favorite techniques in one beautiful design – the classic daisy motif and the bold granny block stitch. The daisy sits at the center, framed by alternating rounds of granny clusters and single crochet, to build a colorful, structured border.
Click the button below for the free-to-view pattern.
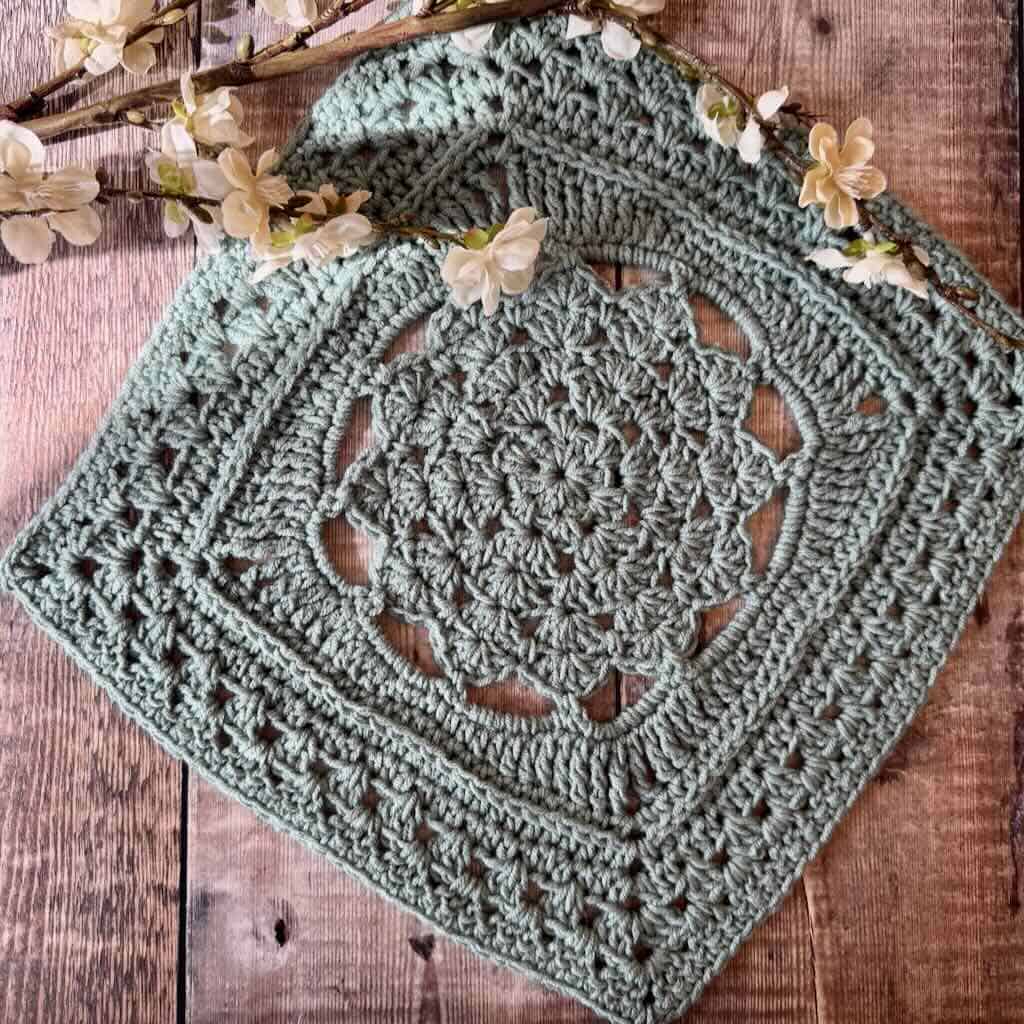
Sunshine Granny Square designed by Straight Hooked
Add a ray of sunshine to your blanket with the Sunshine Square. The heart of the square resembles a delightful sun that becomes a traditional granny square at the edges.
Click the button below for the free-to-view pattern.
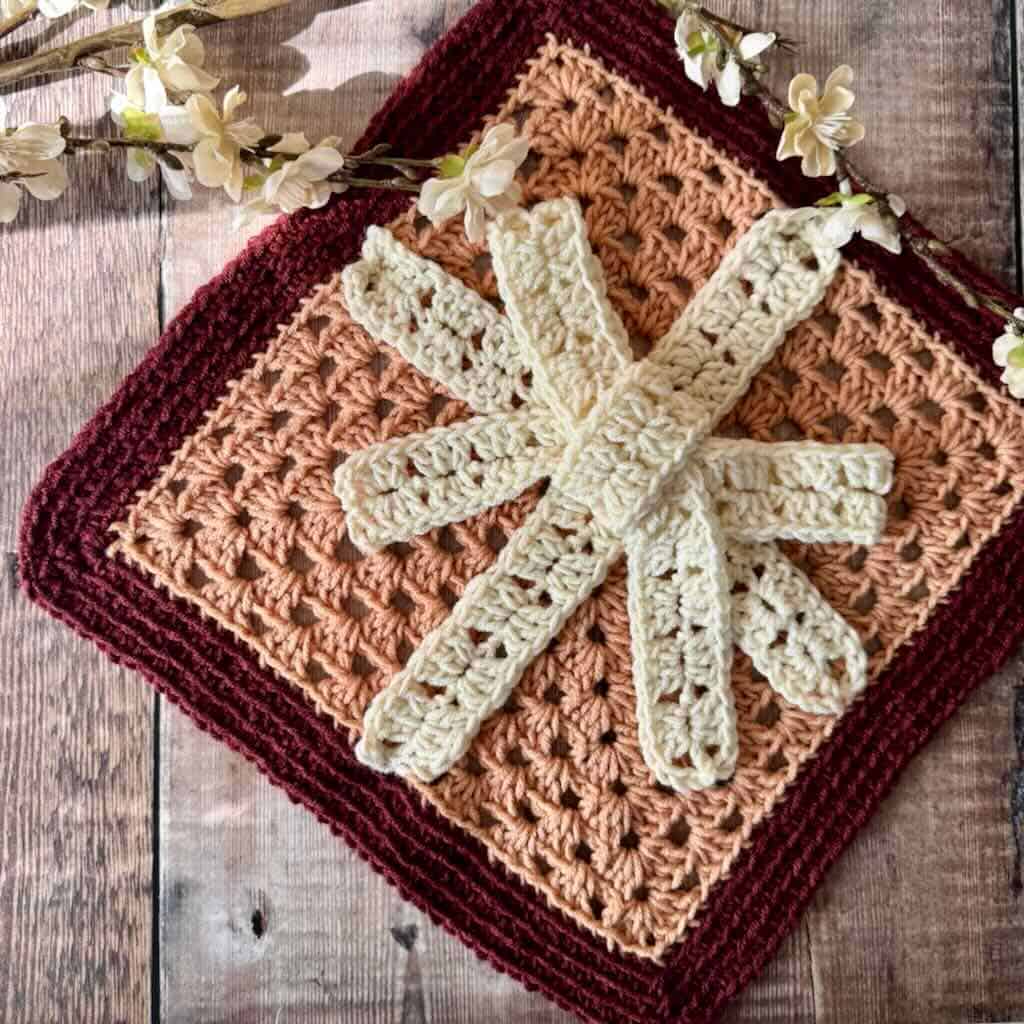
Granny’s Gift Square designed by Made with Love and Fibres
This 12” square block is a fun make for crocheters, featuring the traditional granny stitch in a different format. The simple stitches and interesting construction make this an enjoyably relaxing make and an excellent portable project to carry with you on the go.
Click the button below for the free-to-view pattern.
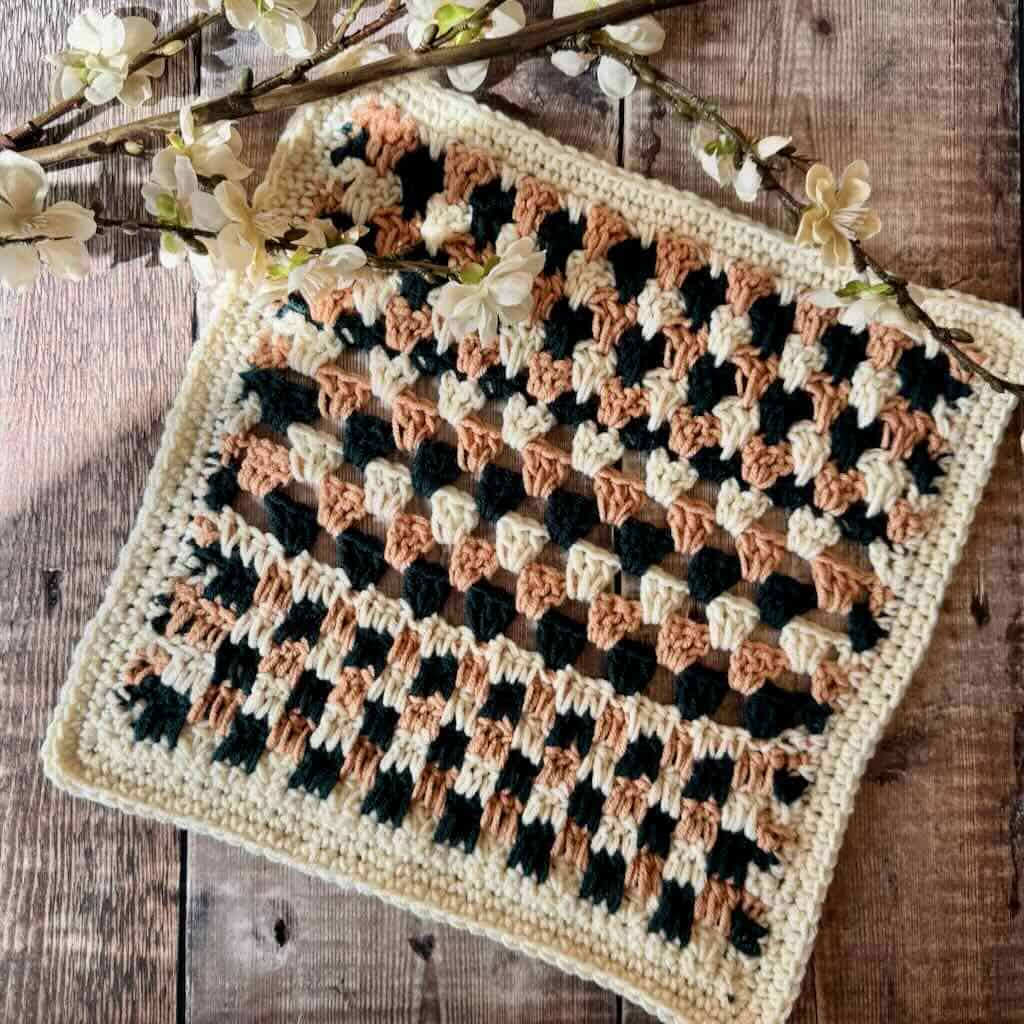
Variations on the Granny Blanket Square designed by Dana Nield Designs
Learn three variations on the traditional granny stitch with this sampler-style blanket square! The square features three stitches with a similar construction: the classic granny stitch, the granny spike stitch, and the block stitch. Each of the stitches featured are one-row repeats on their own, so you can see which stitches you love for future projects!
Click the button below for the free-to-view pattern.
Seaming the Squares Together
Note: Before beginning to seam the squares together, weave in the ends and block them. I recommend light steam blocking.
The square numbers in the following chart correspond to the order in which the squares were released:
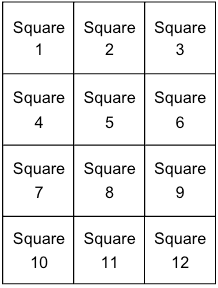
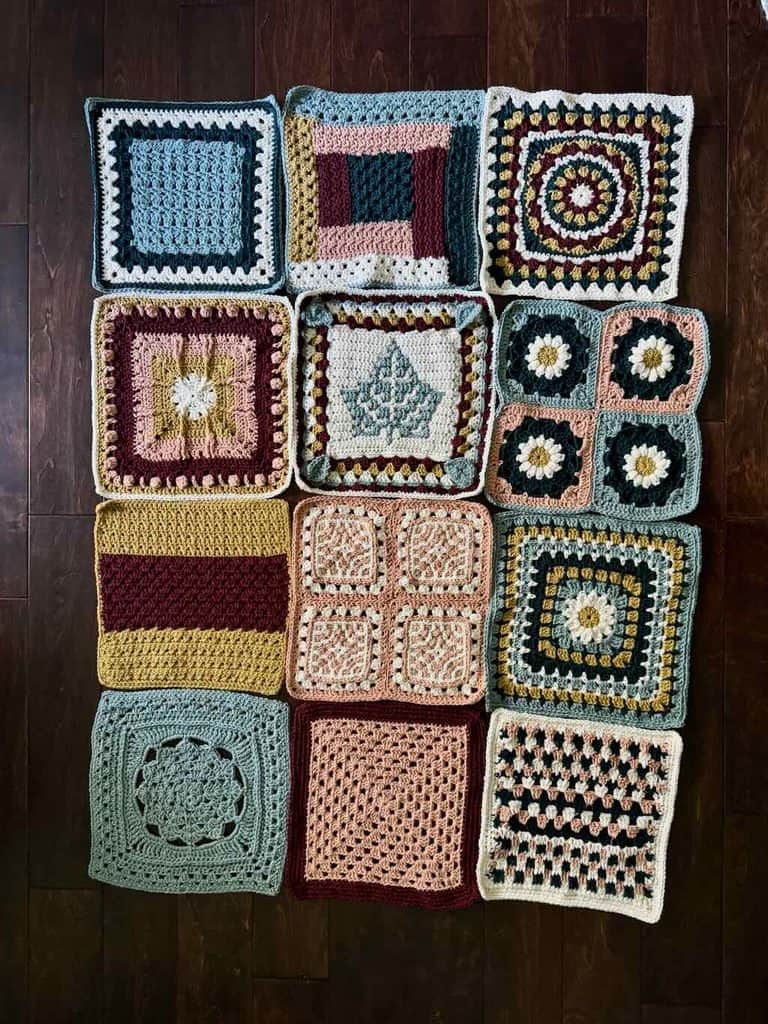
How to assemble the blanket:
- Lay out the squares according to the chart above. When you look at the laid out squares, they should all be right side showing, with the stitch patterns oriented in the correct direction so you’re looking at them top to bottom.
- Using a flat slip stitch seam (or the joining method of your choice), begin by seaming the horizontal seam that starts between Squares 3 & 6.
- Sew all horizontal seams first, then sew the vertical seams.
- Do not weave in the ends. They can be carried under the Border and subsequently secured once the Border is complete.
Flat Slip Stitch Seam
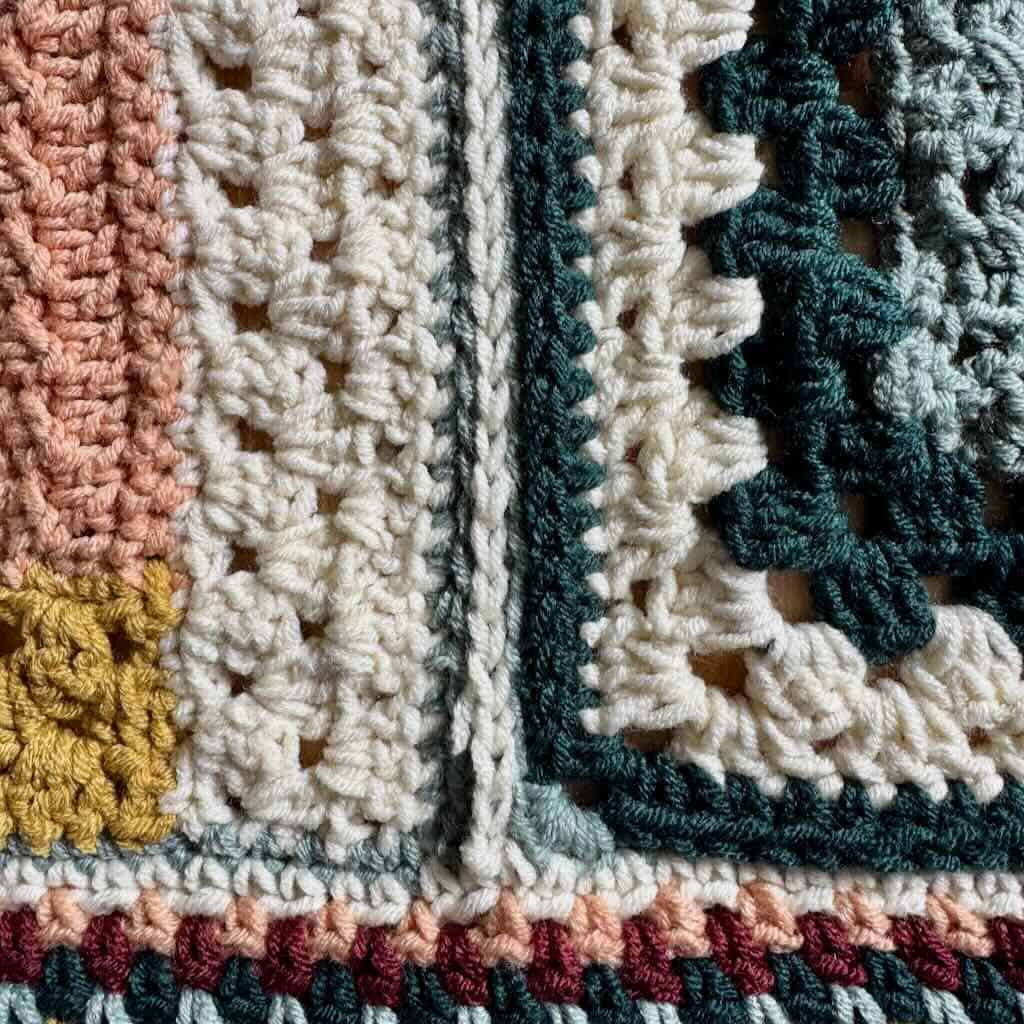
A flat slip stitch seam is worked on the RS of the blanket. This method creates a beautiful surface element that sits flush with the rest of the blanket.

Other methods that work well:
- Whip stitch seam
- Slip stitch seam
- Mattress stitch seam
You can explore these and several other ways to join granny squares in this post.
Tips for success in seaming
- Slip st loosely or use a size larger hook to ensure the seams aren’t too tight.
- When working the vertical seams, make sure the loop across the seam to new squares isn’t too loose.
- The number of sts along the side of each square may differ. Place a marker in the center st of each square side to help line up the sts as you work the seam.
Linen Stitch Border
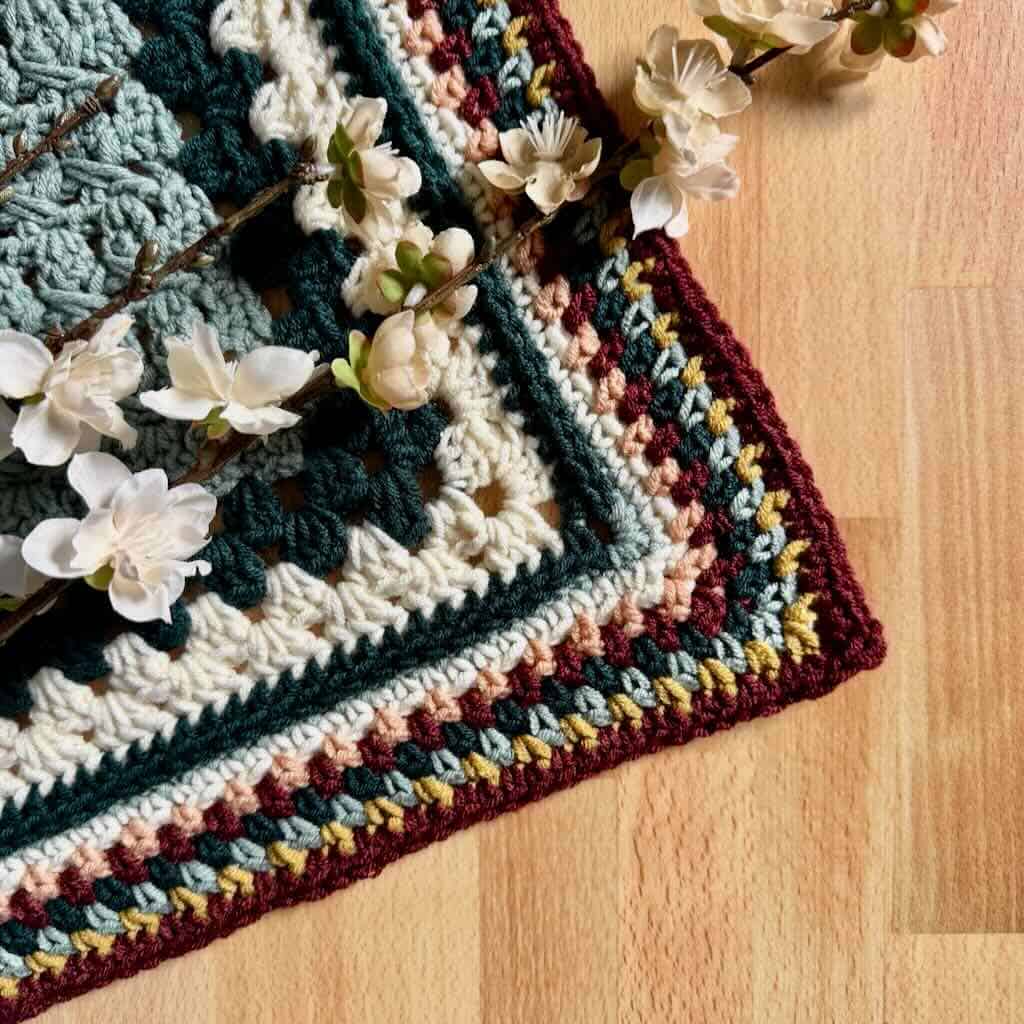
Notes
- The number of stitches along each side of the blanket will vary from one maker to the next. With a linen stitch border, the technique works no matter what the number is.
- You can change colors using any method you like. I chose to fasten off after each round and start the next round in another corner to offset the yarn ends.
- The beauty of the linen stitch border is that you can work as many or as few rounds as you like. Simply rep Rnd 3.
Note for Rnd 1: Work single crochets evenly across each seam end to match the spacing of the single crochets around it.
Rnd 1: Attach Ivory to any corner, ch 1, [(sc, ch 2, sc) in the same corner sp, sc in the next st and in each st across to the next blanket corner] 4 times, join with slip st to beg st. Fasten off.
Note for Rnd 2: There may or may not be a st to sk before a corner sp.
Rnd 2: Attach Himalayan Salt to any ch-2 sp, ch 1, (sc, ch 2, sc) in the same ch-2 corner sp, ch 1, sk 1 st, [sc in the next st, ch 1, sk 1 st] across to the next ch-2 corner sp, {(sc, ch 2, sc) in the ch-2 corner sp, ch 1, sk 1 st, [sc in the next st, ch 1, sk 1 st] across to the next ch-2 corner sp]} 3 times, join with slip st to beg st. Fasten off.
Rnd 3: Attach Beaujolais to any ch-2 sp, ch 1, (sc, ch 2, sc) in the same ch-2 corner sp, ch 1, [sc in the next ch-1 sp, ch 1] across to the next ch-2 corner sp, {(sc, ch 2, sc) in the ch-2 corner sp, ch 1, [sc in the next ch-1 sp, ch 1] across to the next ch-2 corner sp]} 3 times, join with slip st to beg st. Fasten off.
Rnd 4: With Peacock, rep Rnd 3.
Rnd 5: With Tourmaline, rep Rnd 3.
Rnd 6: With Bee Pollen, rep Rnd 3.
Rnd 7: With Beaujolais, rep Rnd 3.
Fasten off and weave in all ends.


I just purchased the full PDF for the Granny Stitch Sampler Blanket (Invoice #000002641). When I tried to open the file, I was told it wasn’t found. Also, I have not received an email confirmation about this purchase. How to do I access this file. Love the patterns. Thanks
Regina,
I’m sorry you’re having trouble accessing the file.
To make things easy for you, I’ve just emailed you the link to the file.
Enjoy!
-Debbie
Hello why do we receive a square pattern that cannot be printed
Sunshine sq is the 2nd one that will have to be replaced please
Marie,
The only guarantee for this CAL is that the square instructions are free to view on the designer’s blog. Sometimes a designer will prevent print/copy and paste functions on her blog to protect her content from being stolen. It’s not meant to be an inconvenience to crocheters.
Best,
Debbie
ok I am confused on Sunshine Granny Square designed by Straight Hooked – I keep getting 16 sts instead of 24 in row two can someone help me understand this pattern? I am a visual Audio learner but willing to figure it out – just need a little help understanding this part of the pattern – Once row two is fixed for me I think it will make more sense.
Amelia,
There are 2 ways to get the help you need with the Sunshine Square. Ask the question in the MadameStitch Crochet Corner Facebook group where the event is being run. Or, contact the designer – Straight Hooked – directly through email. You can find that on her website.
Best,
Debbie