The 9 Best Ways for Joining Granny Squares in a Blanket
Joining granny squares is just as important as any other finishing technique for your blanket. Post includes helpful tips plus 10 of my favorite seaming methods.
The 9 Best Ways for Joining Granny Squares in a Blanket
You’ve spent weeks crocheting your granny squares. Now it’s time to join them. Which method should you choose?
There are so many ways of joining granny squares in a gorgeous blanket. From invisible to decorative, how you join your granny squares can be just as important to the finished look as the granny squares themselves. Choosing the right one for your blanket involves some planning.
In this blog post, you’ll learn things to consider before joining granny squares. I’ll also show you some of my favorite methods so you can begin to make a decision for your own granny square blanket.
What to consider when joining granny squares
You’ve worked a long time getting your granny squares ready for that special blanket. Because you’ve put so much effort into making that part of your blanket perfect, why not make sure everything else comes together just right?
Let’s talk about some of the things you should consider when choosing how you’ll seam your granny squares.
What will the seam look like?
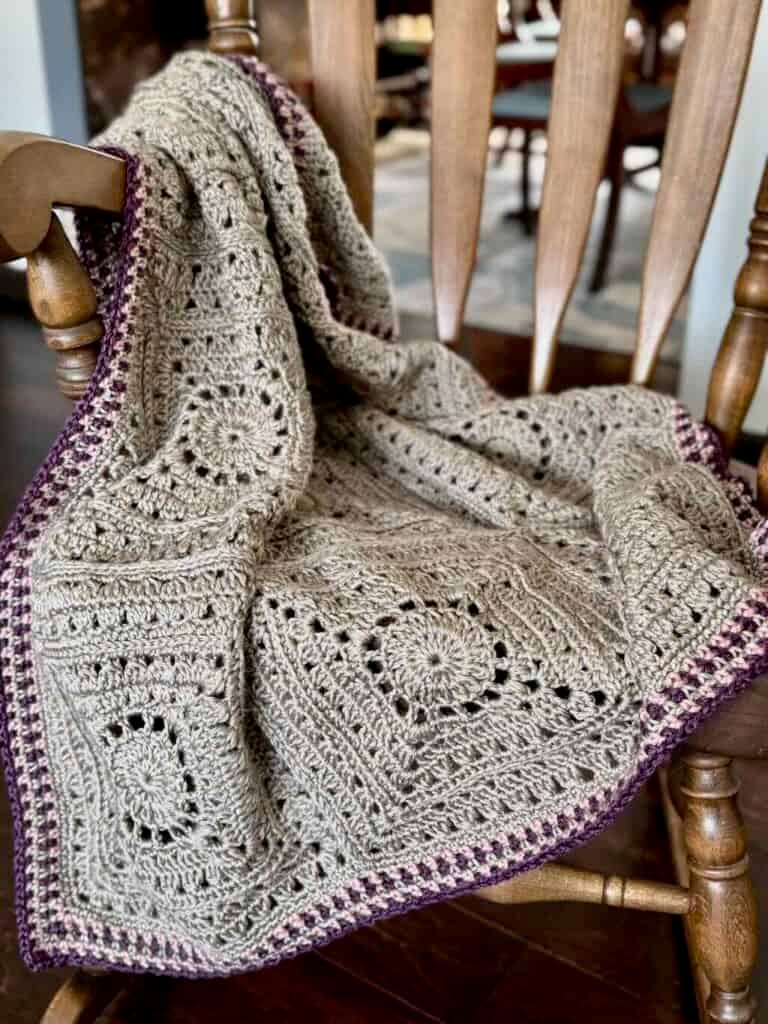
Sometimes the seam you choose becomes part of the overall design, perhaps adding a pop of color or texture that enhances the look of the granny squares.
Other times you might simply want a hidden seam that doesn’t add or detract from the look of the granny squares. In this case, the squares are the star of the show.
Joining granny squares becomes a design choice as much as it is a way to connect your squares.
How will the seam affect the drape and stretch of the overall granny square blanket?
It may not have entered your mind that the method you choose for joining granny squares can have an impact on how much drape and stretch your finished blanket has.
If you’re looking for a seaming method that simply secures the granny squares in place and doesn’t have a lot of give, the mattress stitch is a great choice.
However, for a load of stretch, choose something like the mesh or braid that adds some breathing space between the squares.
At the same time, factor in the weight of the yarn your granny squares are made with. The heavier and thicker the yarn, the less drape your finished blanket might have.
The method for joining granny squares should enhance your finished blanket, not constrain it.
How will the seam hold up to repeated use?
Consider who your recipient is and how the blanket will be used.
A toddler blanket that will be dragged everywhere and probably subjected to repeated washings is not a good candidate for a decorative seaming method. It needs something sturdy that still fits the character of the granny square construction.
However, you can certainly be a little more creative with a granny square blanket intended for purely decorative purposes.
Knowing the level of use and laundering can help determine the ideal seaming method for joining granny squares.
How fast will I be able to finish the blanket?
When I finish making all the granny squares for my blanket, I feel like the whole blanket should just magically be done. I just want to be finished.
In my brain, seaming falls into the same category as weaving in ends – let’s just get it done.
Maybe that granny square blanket is a gift that has a deadline attached. Admit it – you’ve been caught at least once rushing to finish in time so the finishing touches need to be quick and effective.
You can certainly choose a method for joining granny squares that fits your timeline.

What’s the skill level of the seaming method?
It’s not always a matter of what looks best. Choosing a method for joining granny squares should match your skill level as well.
There’s nothing wrong with challenging your skill level a little bit. But, my theory is that your crochet experience should be an enjoyable one. Working a seam that’s too difficult can certainly ruin the entire blanket making experience.
It’s less likely your seams will look good if you’ve struggled with the seaming method you chose.
If you’re unsure about a seaming method, practice it on a couple of squares. Before you commit to an entire blanket, test out your skills. Think of it as making a gauge swatch, but for the seam.
Is the seam reversible?
Seaming methods like the flat slip stitch seam look different depending upon what side of the blanket you’re looking at.
On the other hand, mattress stitch and whip stitch will look nearly identical on both sides.
If your finished blanket needs to look the same no matter which side you’re looking at, choose a method of joining granny squares that doesn’t have a right or wrong side.
Get your blanket ready before joining the granny squares
Your seaming method can’t do all the work to make your blanket look beautiful. Here are some things you can do before seaming that will ensure the best outcome.
- The number one fix for seams that don’t lie flat is to block the squares to a consistent size. Don’t skip this step!
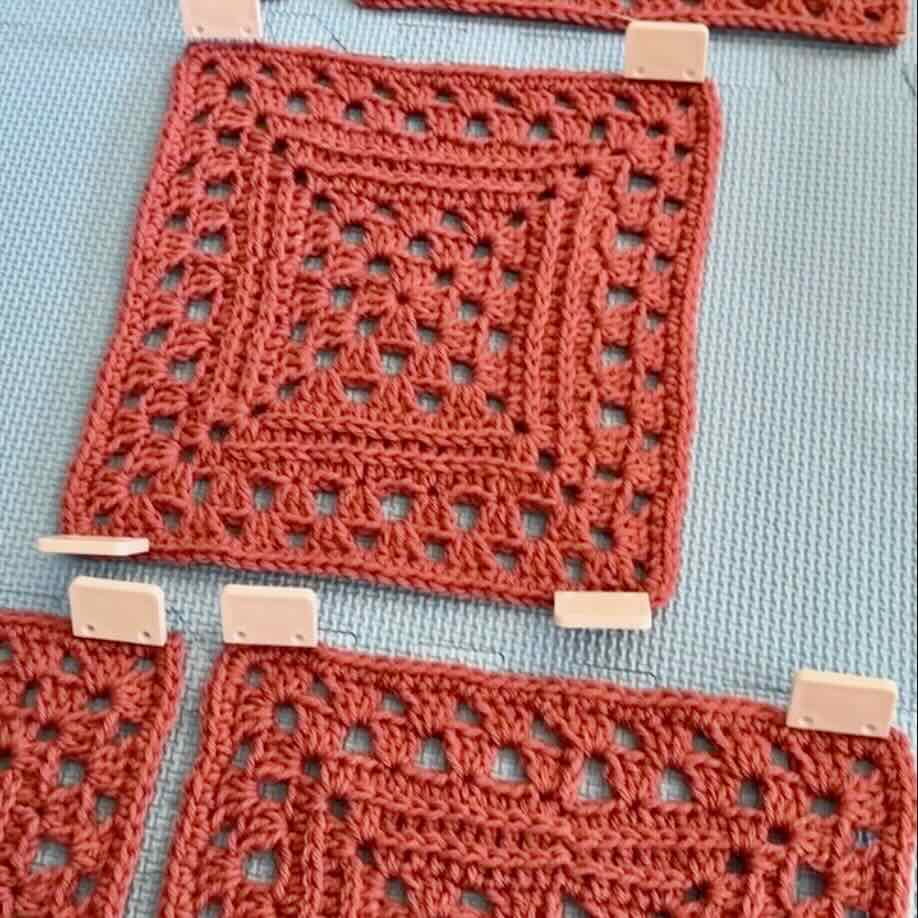
- Lay out the blanket and photograph it before joining the granny squares. Even if all of your squares look the same, you’ll get a sense of how your finished blanket will look. You’ll make an informed decision about what seaming method to choose by seeing everything laid out.
- Use stitch markers to connect the granny squares and mark corresponding spots along the edges. This small step will ensure that your stitches are aligned when joining granny squares.
- Choose the seaming yarn, either matching or contrast. When you see your granny squares laid out, you’ll get a sense of what works best.
- Decide on what order you’ll be joining the granny squares. I recommend working the shorter seams first, usually the horizontal ones, then seam all the vertical ones.
The Collection
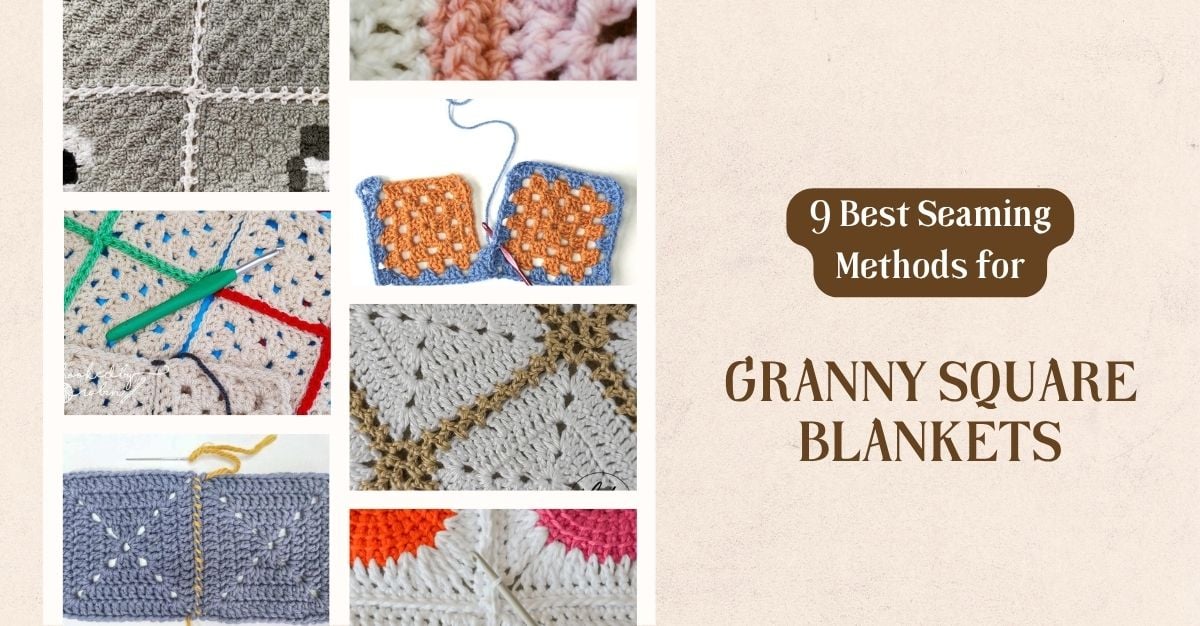
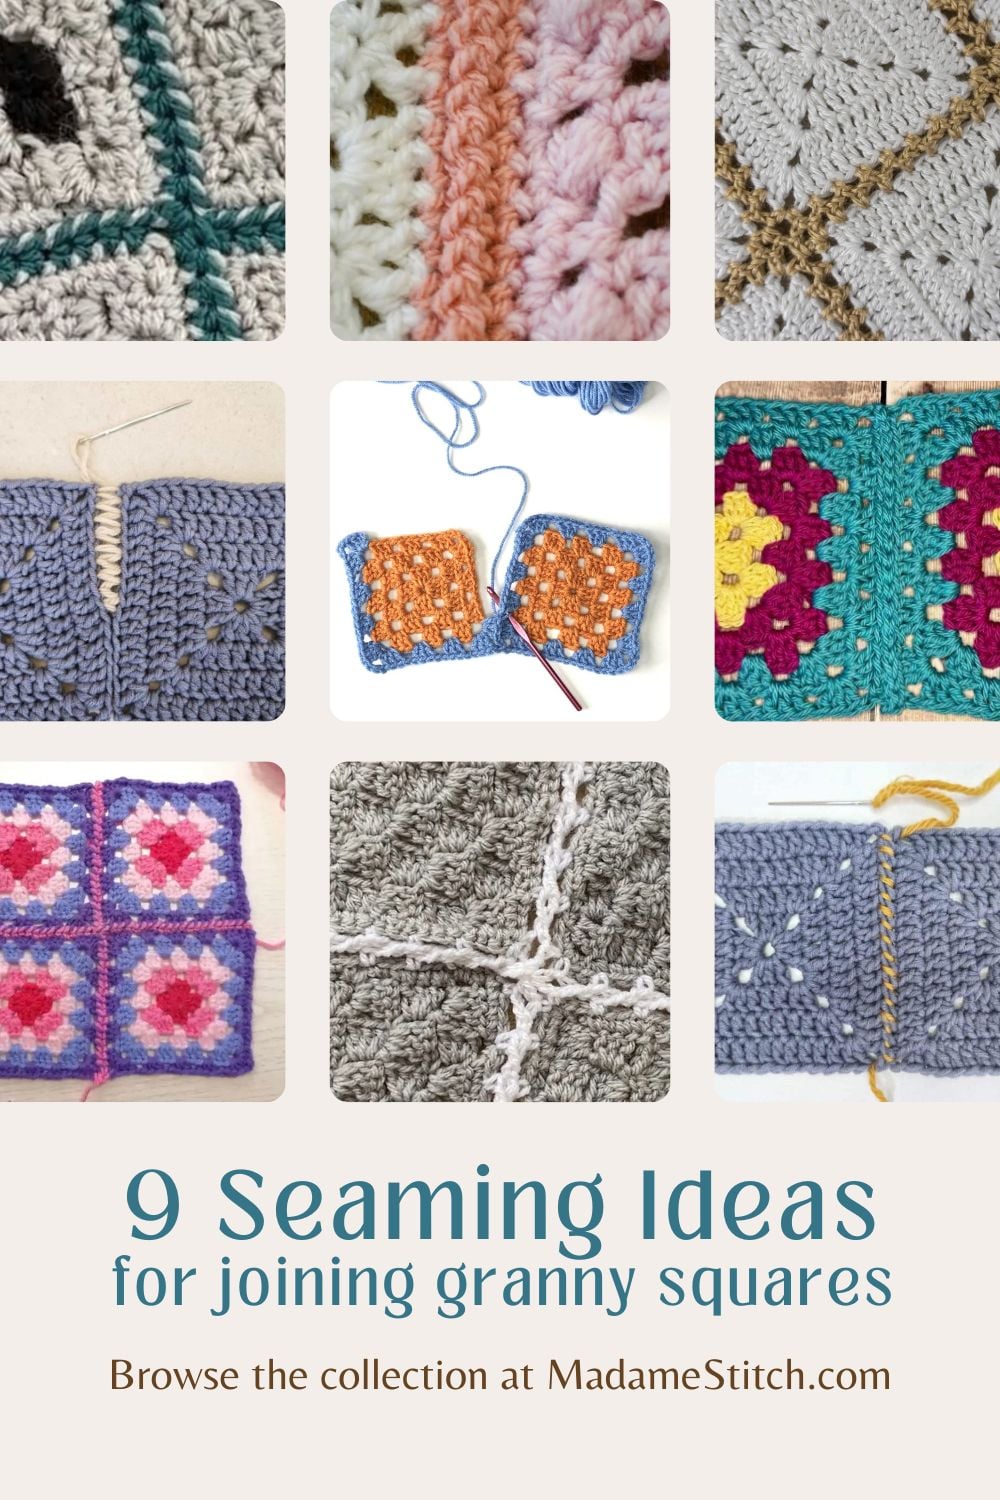
While there are so many ways of joining granny squares, these methods include some of the most common as well as some of my favorites.
Try one for your next blanket!
Flat Slip Stitch Seam
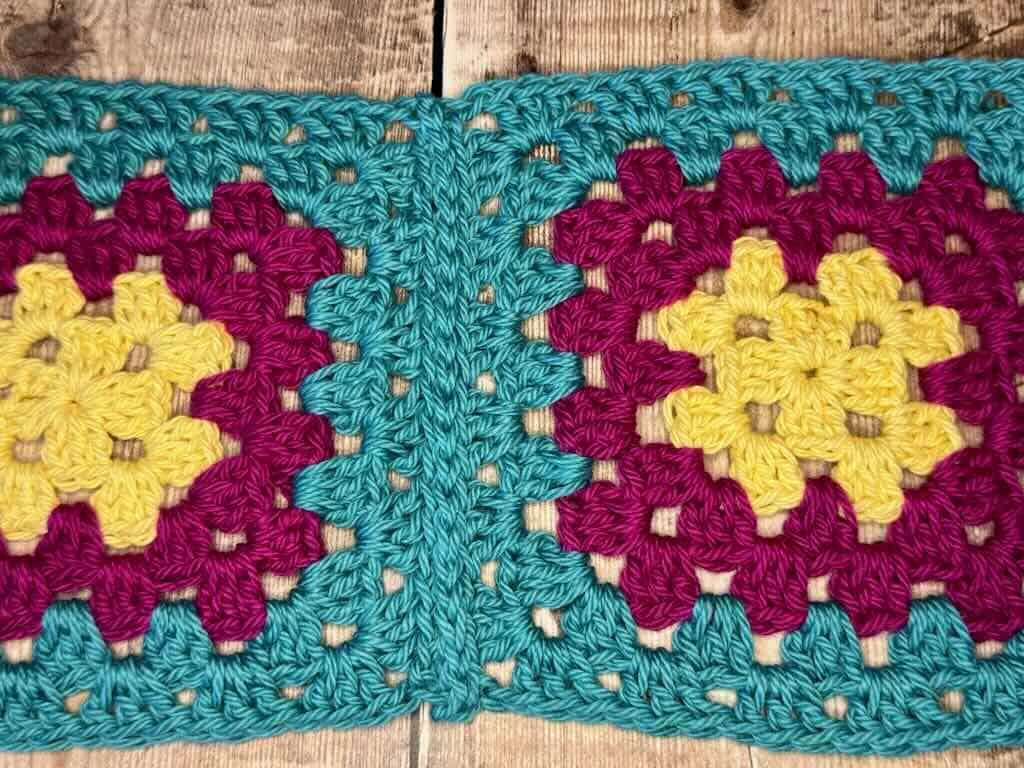
I fell in love with this method of joining granny squares a couple of years ago when working on the annual Granny Stitch Sampler Blanket. It adds beautiful, subtle texture while allowing you to crochet the seam rather than sewing it with a needle.
Photo credit: MadameStitch
Whip Stitch Seam
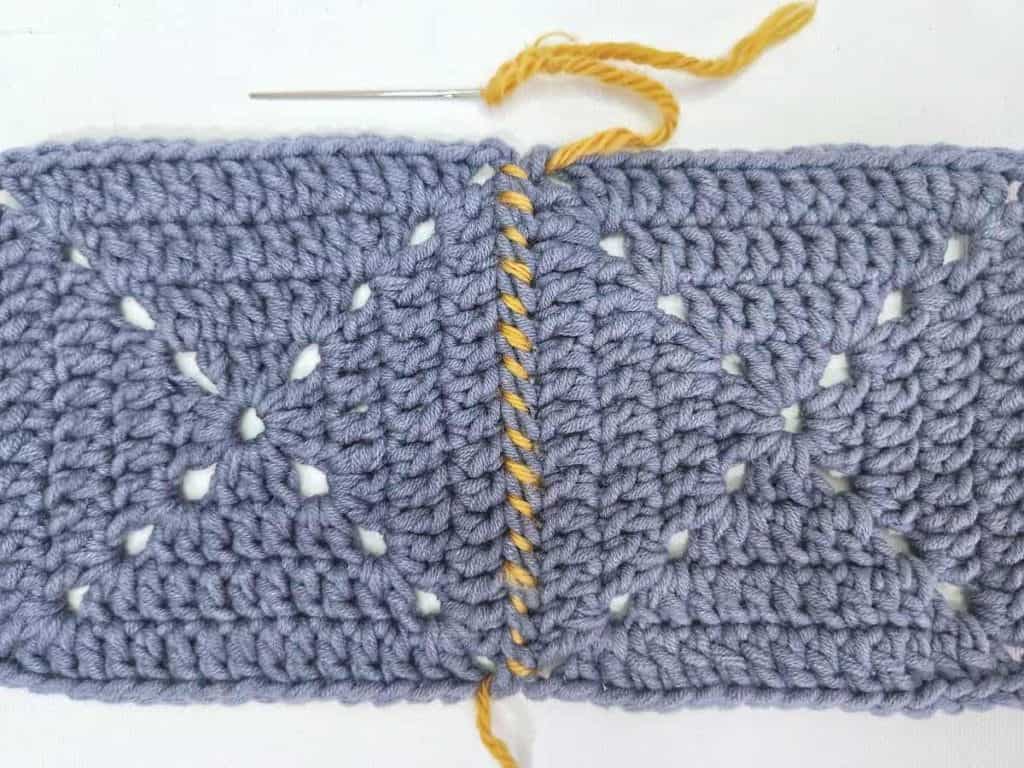
This tutorial from Made by Gootie demonstrates one of the most common ways of joining granny squares. Every crocheter should know the whip stitch because it can be used in so many contexts, not just for blankets.
Photo credit: Made by Gootie
Flat Half Double Crochet Join
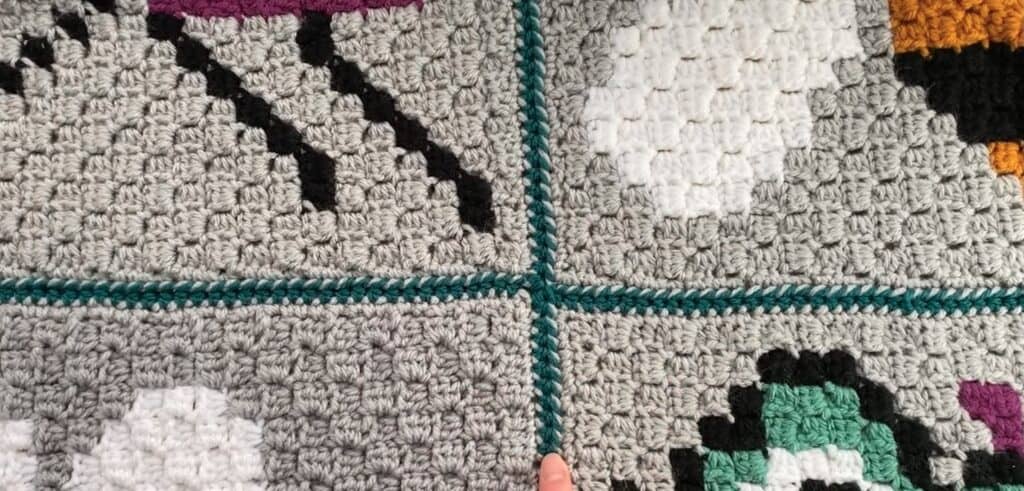
This seaming method from Elimee Designs is closely related to the flat slip stitch seam. Because you’re working a half double crochet instead of a slip stitch, the seam sits higher off the surface of the blanket and provides a bit more texture.
Photo credit: Elimee Designs
Mattress Stitch
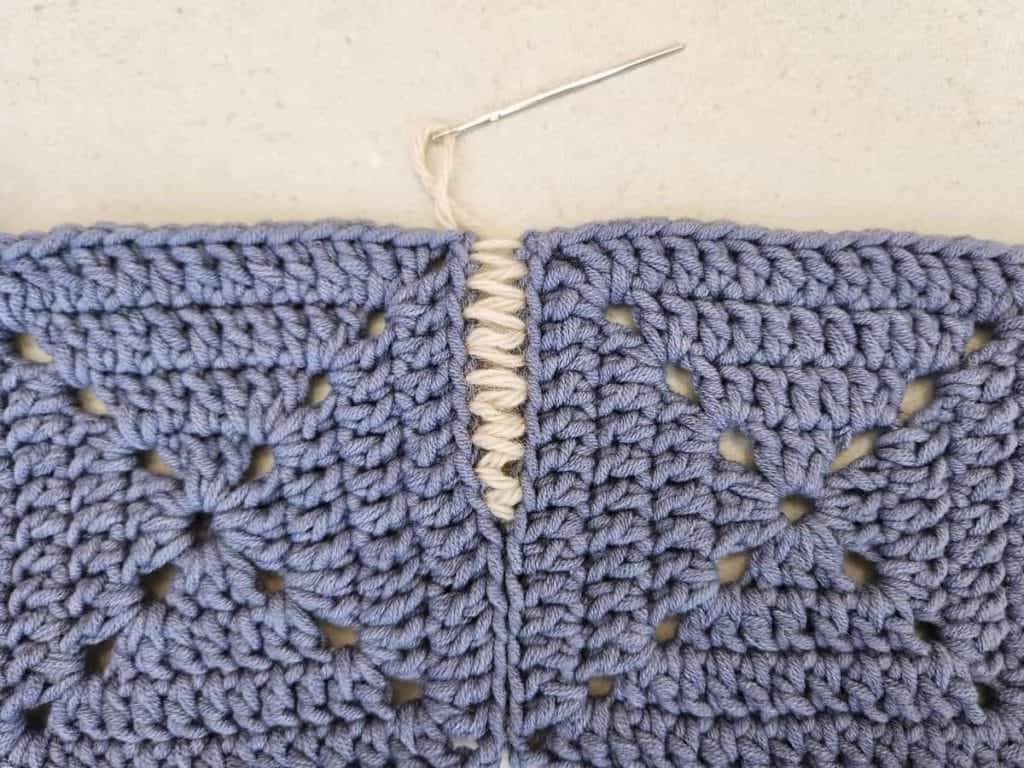
When you want your seam to completely disappear, both on the front and the back, this method, demonstrated by Made by Gootie, is the one you want to use. It takes a little practice to get it even but it’s great for creating a seamless look.
Photo credit: Made by Gootie
Single Crochet Join
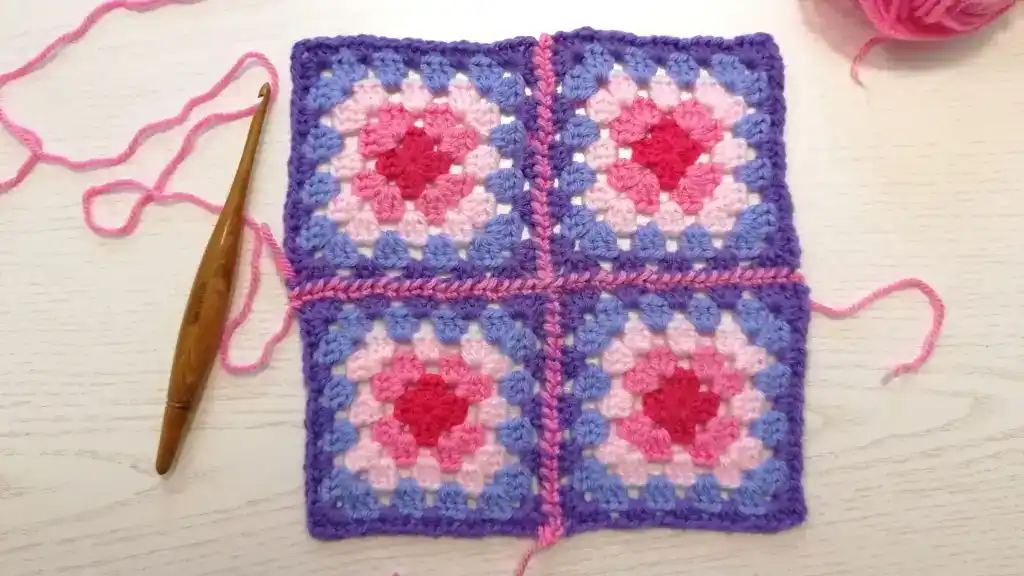
This method, from Gorgeous Crafts, is great for adding a pop of color and a bit of texture to your blanket, simply by working single crochets (UK double crochets) to join your granny squares. Another method that only requires you to crochet.
Photo credit: Gorgeous Crafts
You can find a different tutorial for this method, from Hooked by Robin, here
Single Crochet Mesh Seam
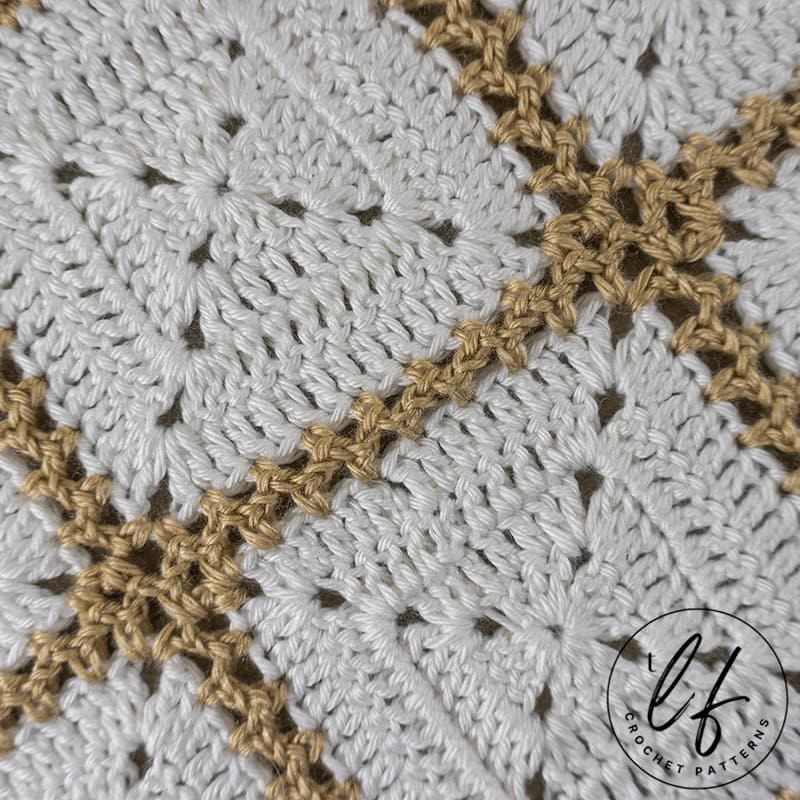
If you’re looking for any easy decorative seam, this one from The Loophole Fox is a wonderful choice. it’s perfect for blankets that need a little extra drape or a lacier look. Single crochets and chains are all you need to know.
Photo credit: The Loophole Fox
Flat Braid Join
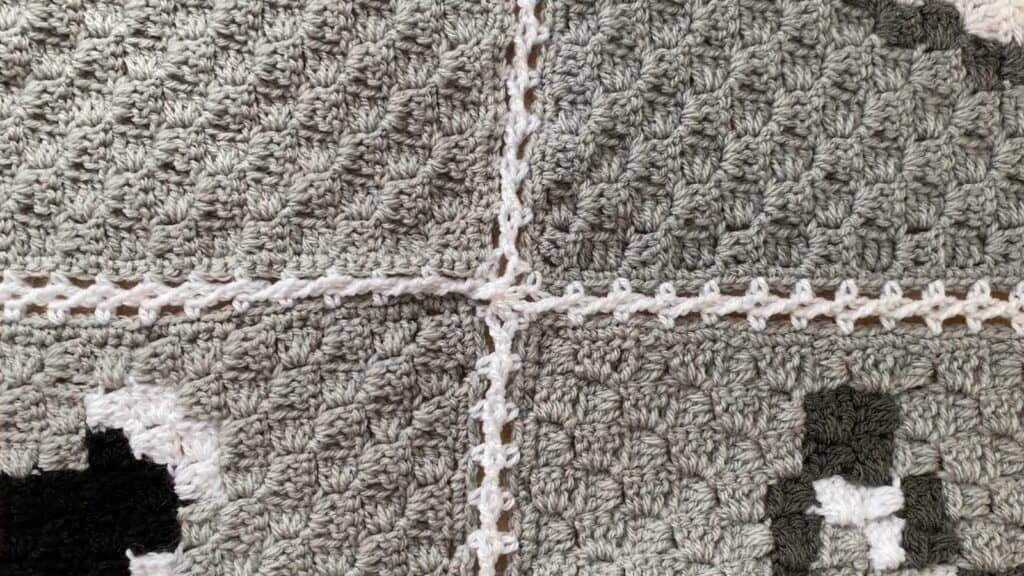
Continuing with decorative ways of joining granny squares, the flat braid join from Elimee Designs uses single crochets and chains to create a slightly more intricate look than the mesh seam. It’s not difficult but is a little more involved than the other joining methods listed here.
Photo credit: Elimee Designs
Join as you Go
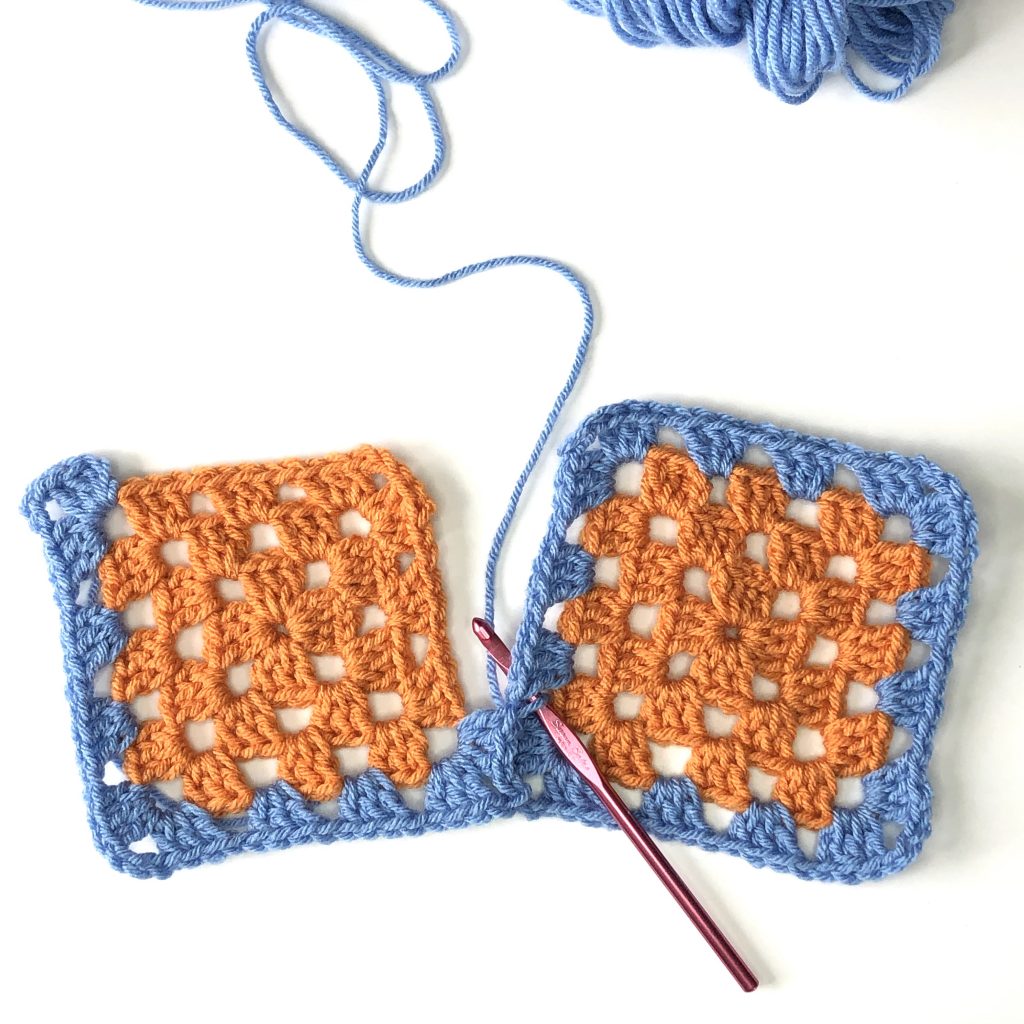
When you really need to get your blanket done without a lot of extra fuss, this is the method for you. My join as you go (JAYGO) method uses the final round of each granny square to join it with slip stitches to the previous square. When all of the granny squares are finished, joining the granny squares is already done.
Photo credit: MadameStitch
Zig Zag Slip Stitch Join
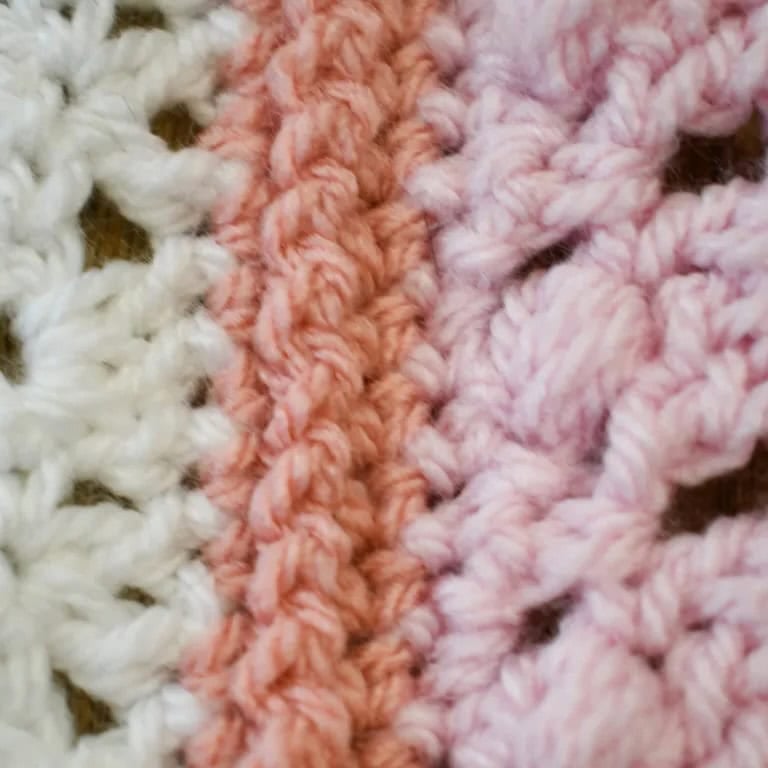
This method for joining granny squares, from Sunflower Cottage Crochet, is a variation of the slip stitch join with a twist. It adds a bit of texture and visual interest to your blanket without adding bulk.
Photo credit: Sunflower Cottage Crochet
This list is by no means exhaustive. Use this list as a starting point and experiment with what works best for your blanket. Then, if you’re looking for something else, simply search “joining granny squares” and you’ll get links to other seaming methods.
Frequently Asked Questions
Do I really need to block my squares for joining them?
Generally, yes. Blocking ensures all of your squares are the same size and it evens out the stitches for a more professional-looking finish.
Can I use more than one type of seaming method for my blanket?
It’s certainly possible to use 2 different seaming methods for joining granny squares in the same blanket. Try working the horizontal seams with one and the vertical seams with another to see how it looks.
What is the most invisible join?
The mattress stitch, hands down. It’s so invisible you can use any color yarn you want for the seams and it won’t show!