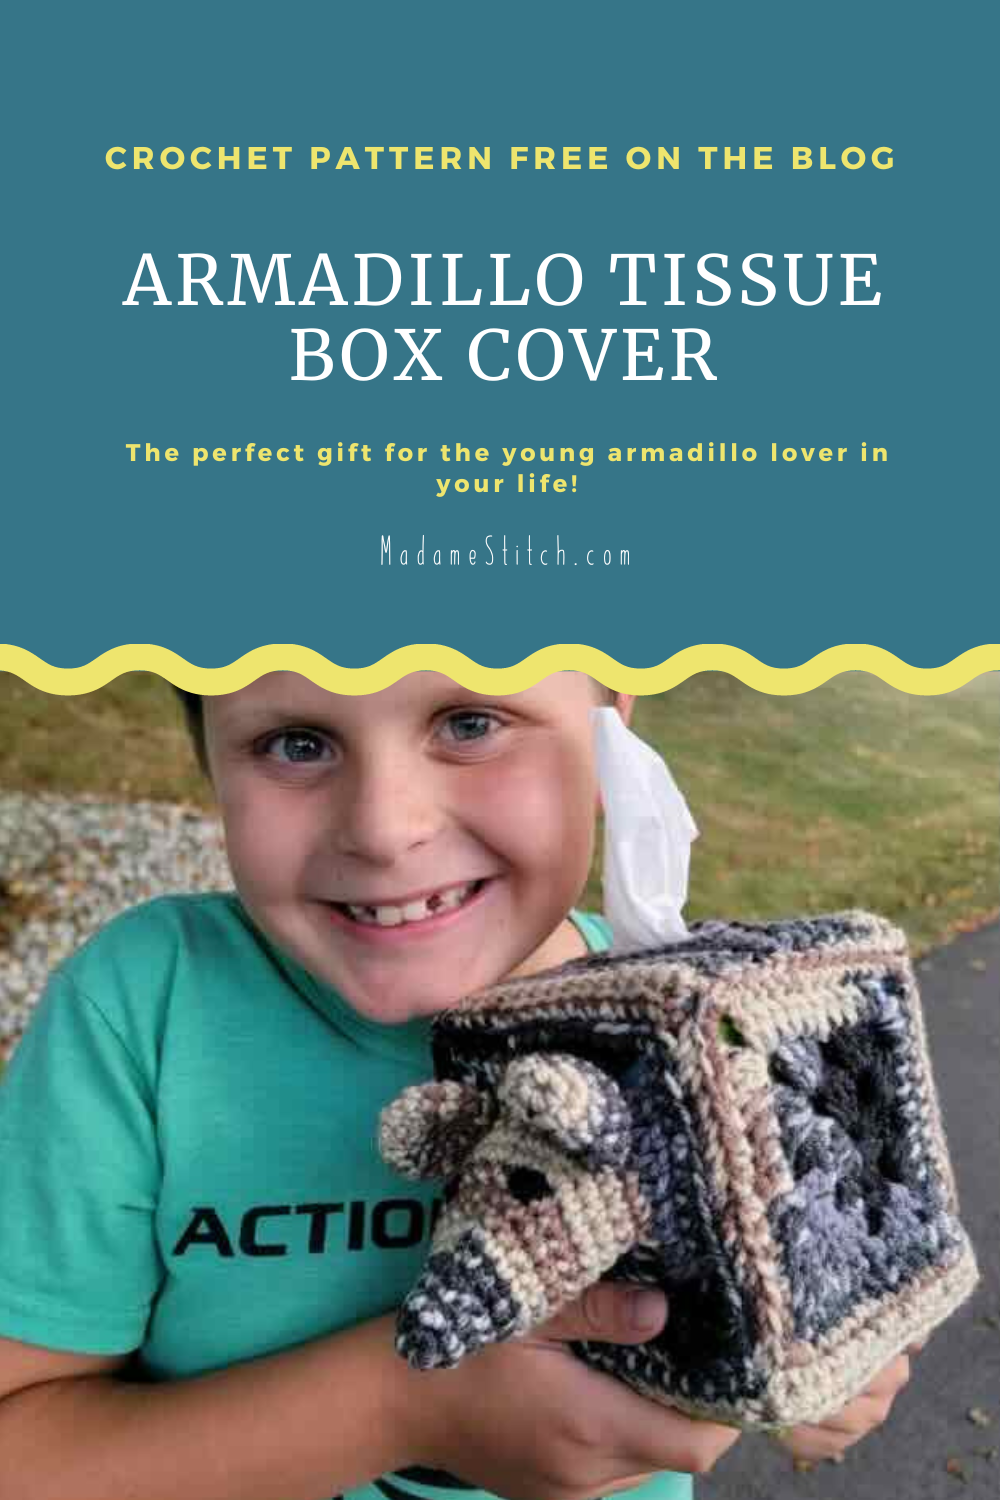
Free Armadillo Tissue Box Cover Crochet Pattern
Crochet an armadillo tissue box cover for the armadillo-loving child in your life. It puts the ‘fun’ in ‘functional’!
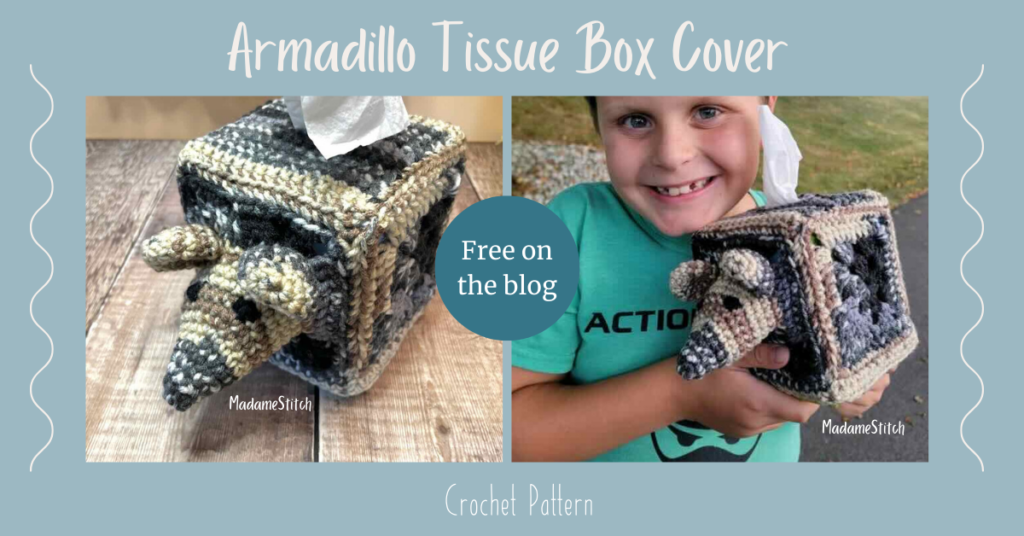
An armadillo tissue box cover might seem like a weird thing to crochet. But, if you have a child in your life who’s obsessed with everything armadillo, a tissue box cover is the perfect gift.
How did I come to make an armadillo tissue box cover, you ask? It certainly doesn’t fit in with my home décor. So, let me tell you about how this gem came about.
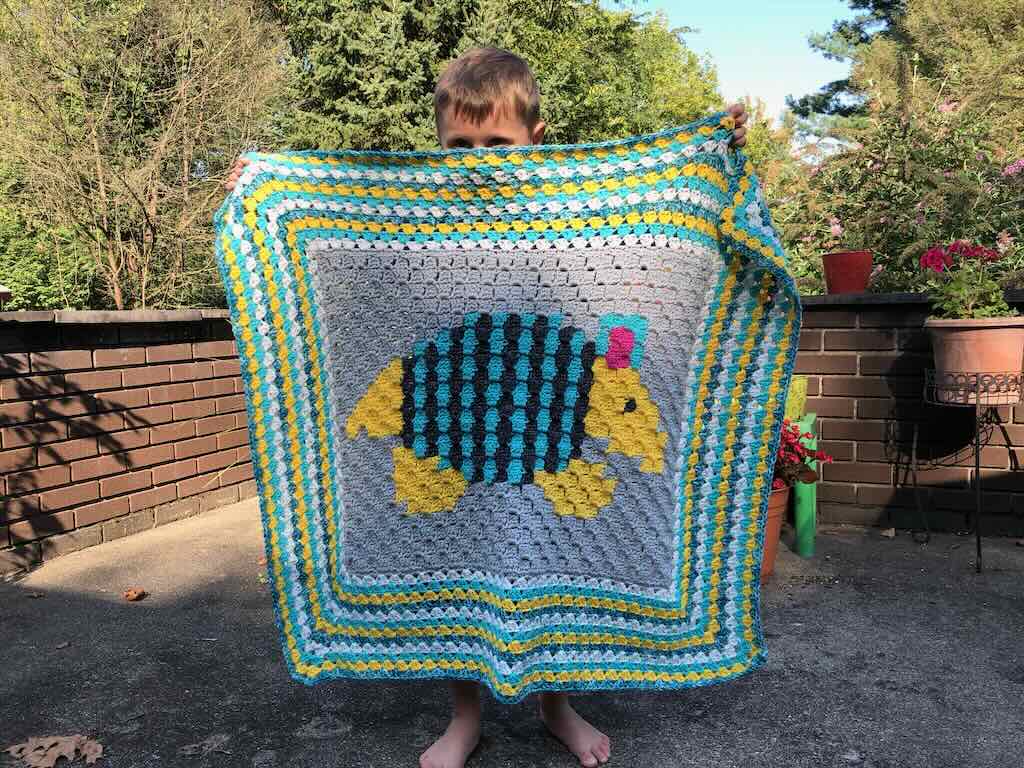
My younger grandson is absolutely obsessed with armadillos. He has stuffed ones all over his room. He has armadillos in every facet of his life, right down to his school notebook.
Because his birthday is also Granny Square Day, every year for his birthday I give him a handmade gift that has some element of a granny square in it. I actually made him a C2C + granny stitch armadillo blanket a few years ago. And, no, I haven’t written up a pattern for this one yet.
He keeps a box of tissues in his bedroom because he has allergies. It’s only logical that this year’s gift would be a granny square themed armadillo tissue box cover, right?!
Design + Construction of the Armadillo Tissue Box Cover
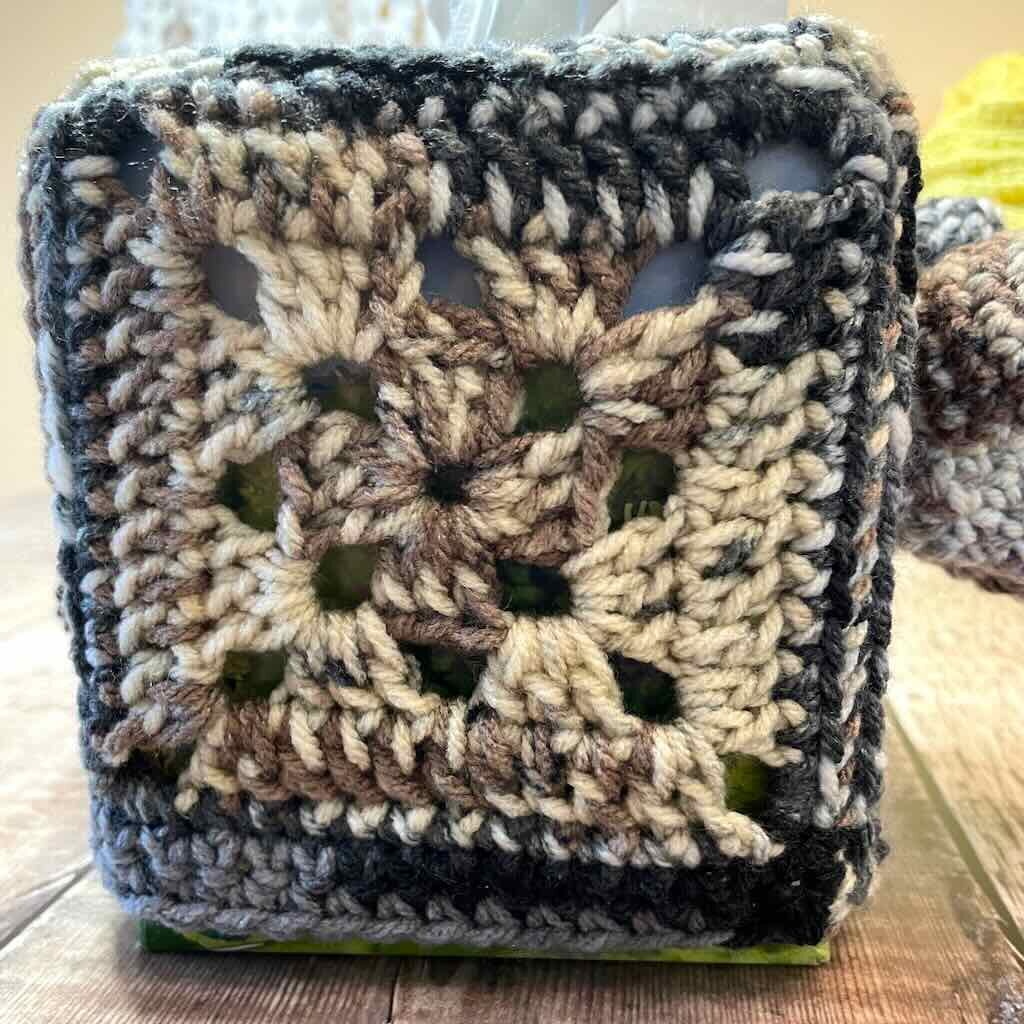
I decided on a cover for a cube tissue box because the shape made it easier to incorporate granny squares in the design. While the sides are almost square, I managed to adapt the granny squares to easily fit the rectangular sides of the tissue box.
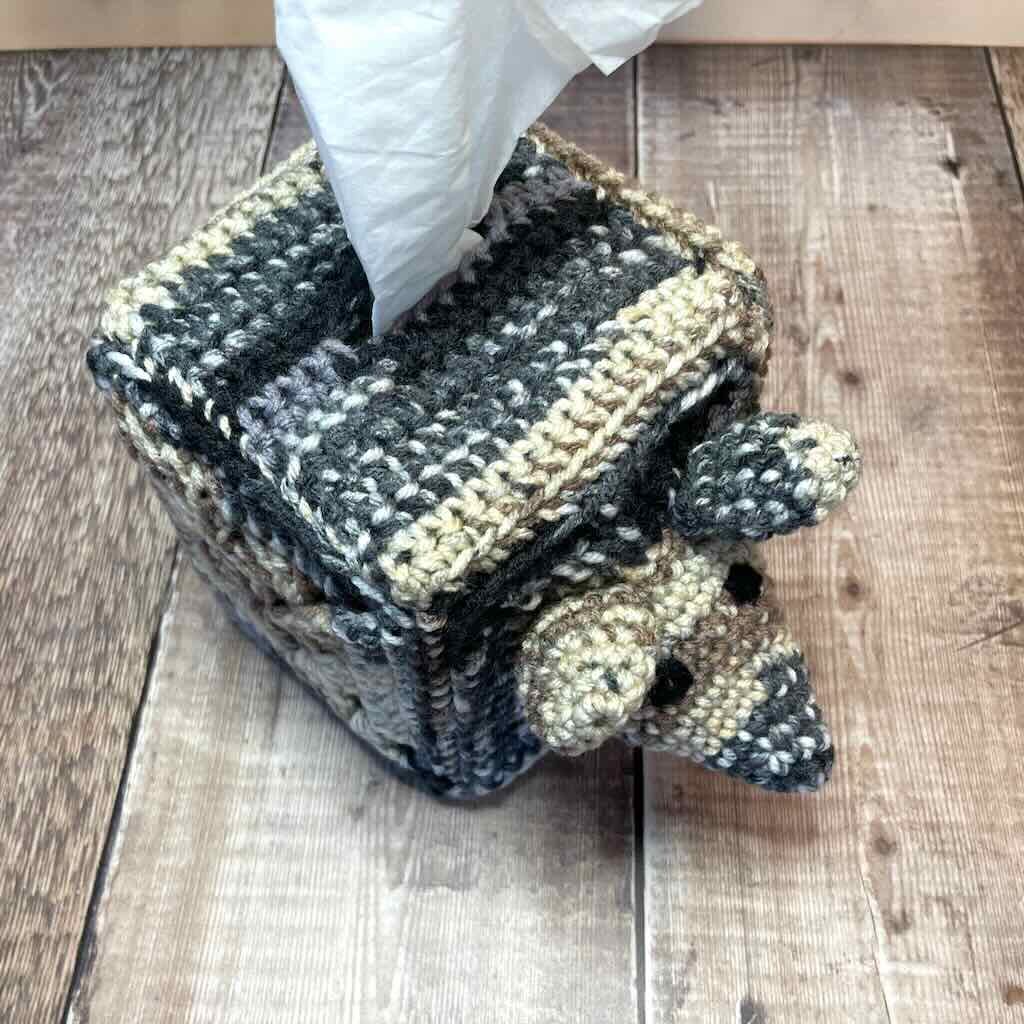
The top square has a slit worked into it to allow for the tissue to poke through.
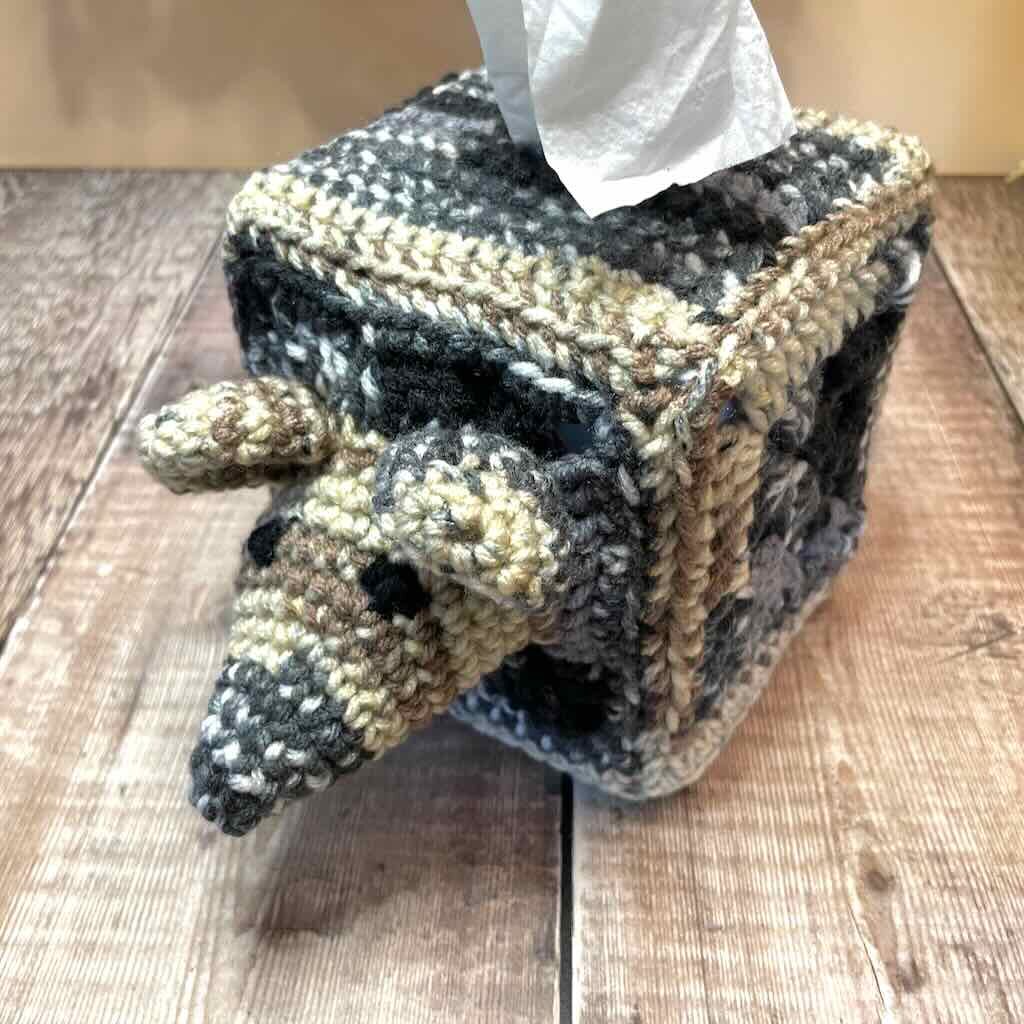
The head presented a bit of a challenge because I don’t often do amigurumi. After doing some research, though, I found just the right formula for increases to give me a conical shape that best matched the shape of an armadillo’s head. The way it’s attached to one of the granny squares then makes it angle down and look more like an armadillo’s head.
A cute little tail on the back side of the cover completes the look. The cover slips on and off the tissue box easily.
The Yarn for the Armadillo Tissue Box Cover
Any worsted weight yarn will work for this armadillo tissue box cover. You only need about 3oz which is just under what a standard skein of worsted weight has. I used a skein from my stash.
The color possibilities for the Armadillo Tissue Box Cover are endless. Choose colors that are closer to a realistic version of an armadillo. Or, go wild with fun colors for a more whimsical look. Think about the recipient of the tissue box cover and tailor the color choices to something they’ll simply adore.
Why buy the PDF when the pattern is free here?
- The PDF is easy to read and beautifully formatted.
- The PDF includes a crochet chart and schematics.
- You won’t have to scroll through any ads; everything you need is in one convenient document.
What you’ll need to make the Armadillo Tissue Box Cover
Thank you for staying on this post and reading my patterns right here on the blog, without copy/pasting. When you stay here to follow the free version of my pattern, I am compensated for my time and energy. This is a great, free way to support a designer. If you would like to save this for later, bookmark the page to save it in your mobile browser.
Yarn
For the sample:
Hobby Lobby “I Love This Yarn Print” 100% acrylic worsted weight (5oz/252yds; 142g/230m) – Approx. 3oz needed – Color #520 – Naturals Stripe
A small amount of black yarn for the embroidered eyes
Hooks
- US size H-8 (5mm) for squares
- US size G-6 (4mm) for head, ears and tail
Materials + Tools
- Cube shaped tissue box
- Fiberfill – small amount for the head
- Removable stitch marker
- Tapestry needle for seaming, adding the eyes, and weaving in ends
Finished size
Fits a cube shaped tissue box – 4″ wide x 4.5″ high
Skill level: Advanced beginner/Intermediate
Abbreviations – US crochet terminology
- beg – beginning
- BLO – back loop only
- ch – chain
- dc – double crochet
- MR – magic ring
- rnd(s) – round(s)
- sc – single crochet
- sc inc – single crochet increase – work 2 sc in the same st
- sk – skip
- sp – space
- st(s) – stitch(es)
- STsc – stacked single crochet

Pattern Notes
- The extension on the granny square ensures that the sides extend and cover to the bottom of the tissue box. The tissue box isn’t a perfect cube.
- When making the head and ears, place a marker in the first st of each rnd to keep track of where you are. Move it up with each subsequent rnd.
Written Instructions for the Armadillo Tissue Box Cover
Thank you for staying on this post and reading my patterns right here on the blog, without copy/pasting. When you stay here to follow the free version of my pattern, I am compensated for my time and energy. This is a great, free way to support a designer. If you would like to save this for later, bookmark the page to save it in your mobile browser.
Granny squares – Make 4
With 5mm hook, ch 4, join with slip st to form ring.
Rnd 1: STsc, 2 dc in ring, ch 3, (3 dc in ring, ch 3) 3 times, join with slip st to beg st.
Rnd 2: Slip st in each st to corner and into corner sp, (STsc, 2 dc, ch 3, 3 dc) in corner, ch 1, [(3 dc, ch 3, 3 dc) in next corner, ch 1] 3 times, join with slip st to beg st.
Rnd 3: STsc, dc in next 2 sts, (2 dc, ch 3, 2 dc) in corner, [dc in each st and ch-1 sp across to next corner, (2 dc, ch 3, 2 dc) in next corner] 3 times, dc in each st and ch-1 sp across to beg st, join with slip st to beg st.
Rnd 4: Ch 1, sc in same st and in each st around, working 3 sc in each corner sp, join with slip st to beg st. (Be sure there are 15 sc along the side, counting from the middle st of one corner to the middle st of the next corner.)
Fasten off. Continue to square extension instructions.
Extension for each square
Note: The extensions will sit at the bottom of the each side once assembled in a ring.
Row 1: With wrong side facing, attach yarn to middle st of any corner of a granny square. With 5mm hook, ch 1, sc in same st and each st across to middle st of next corner, turn. (15 sc)
Row 2: Ch 1, sc in same st and in each st across.
Fasten off and weave in ends. Block the squares to ensure they are the correct size.
Finished size of grannies with extensions: 4” x 4.5” (the measurements for the side of a cube shaped tissue box)
With right sides held together, sew the 4 squares together along the 4.5″ sides in a ring to form the sides of the cover. Be careful not to twist when connecting the first square to the fourth.
Set aside and proceed to the square for the top of the box.
Square for top of tissue box – Make 1
Note: This square has a slit in the center that allows the tissue to poke through.
With 5mm hook, ch 16.
Row 1: Sc in 2nd ch from hook and in each ch across, turn. (15 sc)
Rows 2-9: Ch 1, sc in same st and in each st across, turn.
Row 10: Ch 1, sc in same st and in next 3 sts, ch 7, sk 7 sts, sc in last 4 sts, turn. (8 sc, 7 ch)
Row 11: Ch 1, sc in same st and in each st and ch across, turn. (15 sc)
Rows 12-18: Rep Row 2.
Attach the top square to the ring of grannies set aside.
Step 1: With right sides held together, line up the corners of the top square with the seams of the ring of grannies, making sure the extensions are on the opposite side of the ring from the top square.
Step 2: With the tapestry needle and a long piece of yarn, sew the top square to the ring of grannies through BLO all the way around the top square. Note: Sewing through BLO will allow the seam to lay flat over the top edges of the tissue box.
Step 3: Weave in ends and turn right side out.
Head – Make 1
Rnd 1: With 4mm hook, make a MR, 6 sc in ring, pull tight to close hole. (6 sc)
Rnd 2: (Sc inc, sc in next 2 sts) twice. (8 sc)
Rnd 3: (Sc inc, sc in next 3 sts) twice. (10 sc)
Rnd 4: (Sc inc, sc in next 4 sts) twice. (12 sc)
Rnd 5: (Sc inc, sc in next 5 sts) twice. (14 sc)
Rnd 6: (Sc inc, sc in next 6 sts) twice. (16 sc)
Rnd 7: (Sc inc, sc in next 7 sts) twice. (18 sc)
Rnd 8: (Sc inc, sc in next 8 sts) twice. (20 sc)
Rnd 9: (Sc inc, sc in next 9 sts) twice. (22 sc)
Rnd 10: (Sc inc, sc in next 10 sts) twice. (24 sc)
Rnd 11: (Sc inc, sc in next 11 sts) twice. (26 sc)
Rnd 12: (Sc inc, sc in next 12 sts) twice. (28 sc)
Rnd 13: (Sc inc, sc in next 13 sts) twice. (30 sc)
Fasten off and weave in ends.
Attach head to square
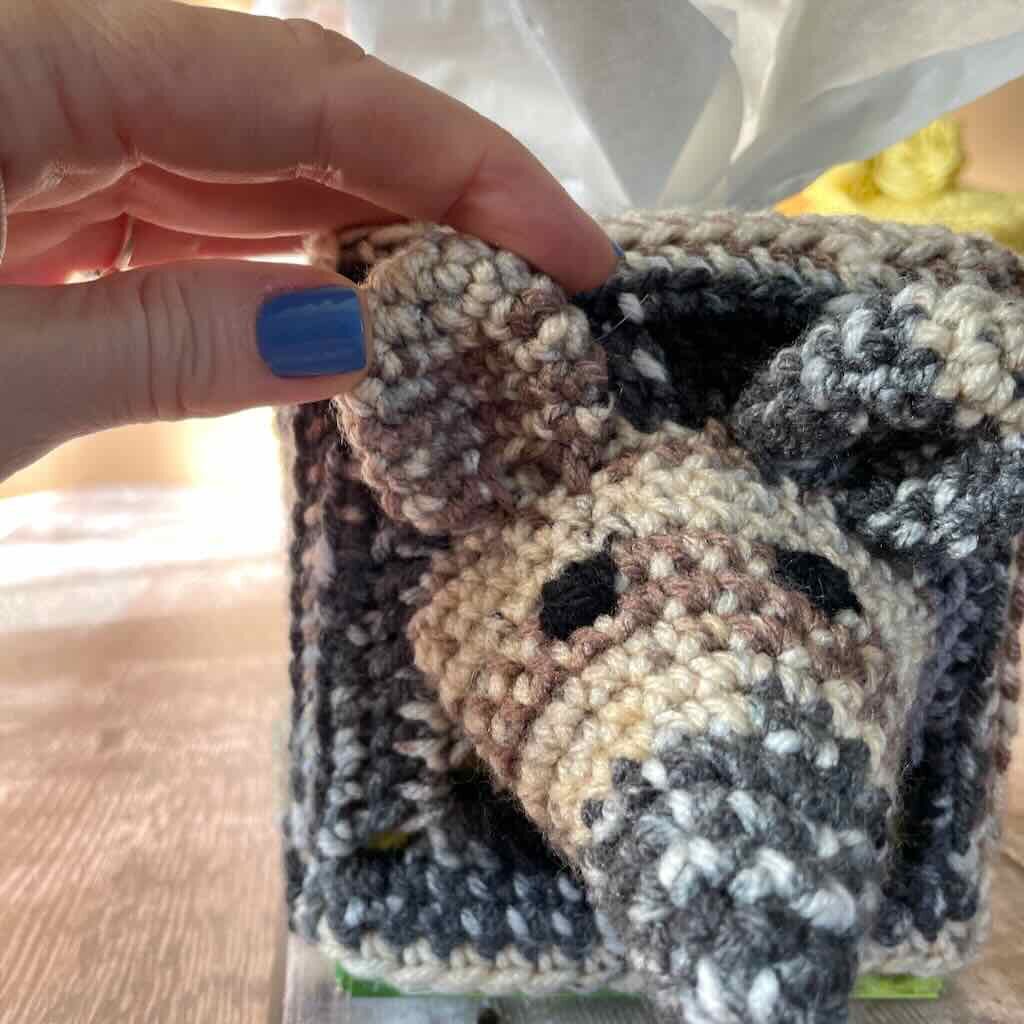
Stuff the head with some firmness. Position the head over one of the side granny squares, centering it so that the bottom edge of the head is fairly flat across the center of the square and the top edge is rounded. This will cause the head to droop slightly, just like an armadillo’s.
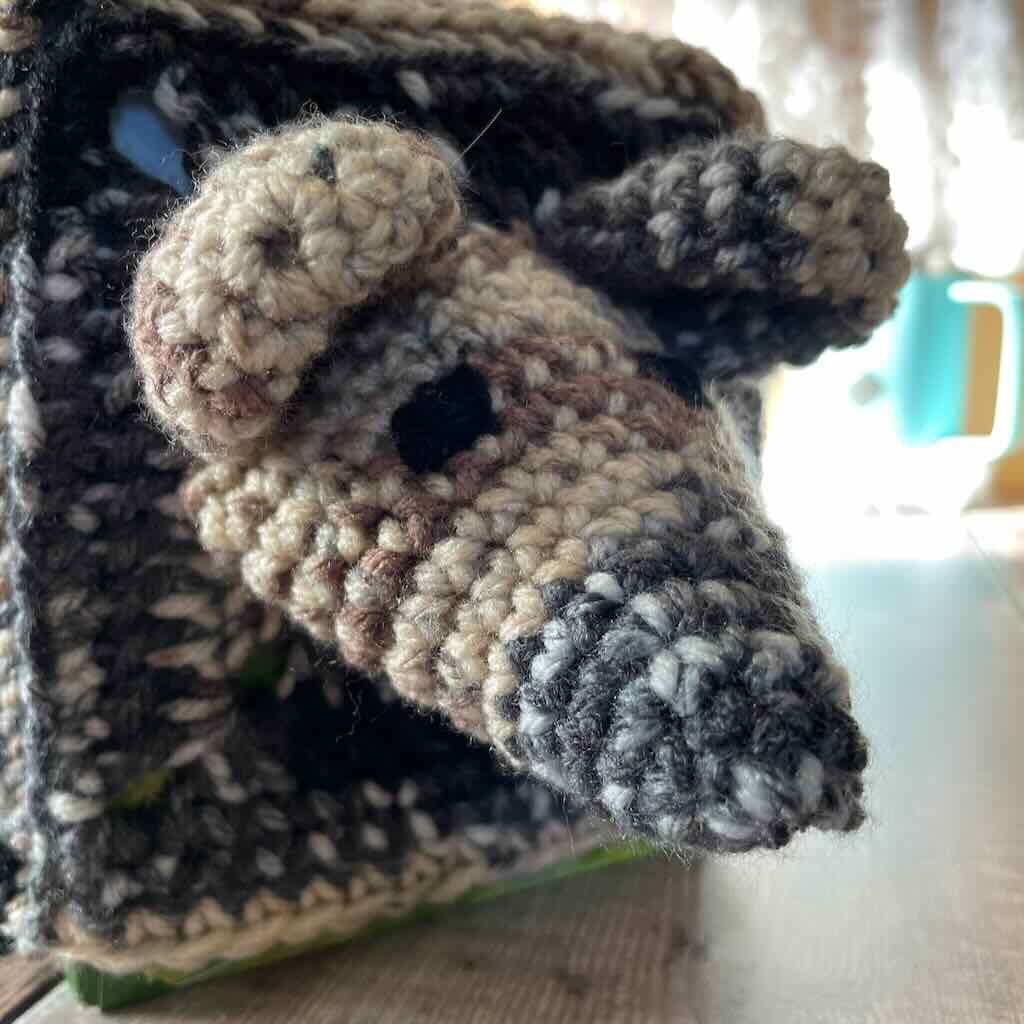
Eyes
Thread black yarn in the tapestry needle. Embroider 2 eyes on the upper side of the armadillo head, centered near the top of the head as per the photo. Stitch over the same spot several times for each eye.
Ears – Make 2
Rnd 1: With 4mm hook, make a MR, 6 sc in ring, pull tight to close hole. (6 sc)
Rnd 2: Sc inc in each st around. (12 sc)
Rnd 3: (Sc inc, sc in next 5 sts) twice. (14 sc)
Rnd 4: (Sc inc, sc in next 6 sts) twice. (16 sc)
Rnds 5-7: Sc in each st around. (16 sc)
Fold ear in half and stitch together at the bottom to create a curve in the ear. Sew an ear to each side of head near where the head is attached to the granny square.
Tail
With 4mm hook, ch 10.
Remove the loop from the hook. Thread the loop through the center of the granny square that’s on the opposite side of the tissue box from the head. Place the loop back on the hook.
Sc in each ch to last ch, slip st in last ch.
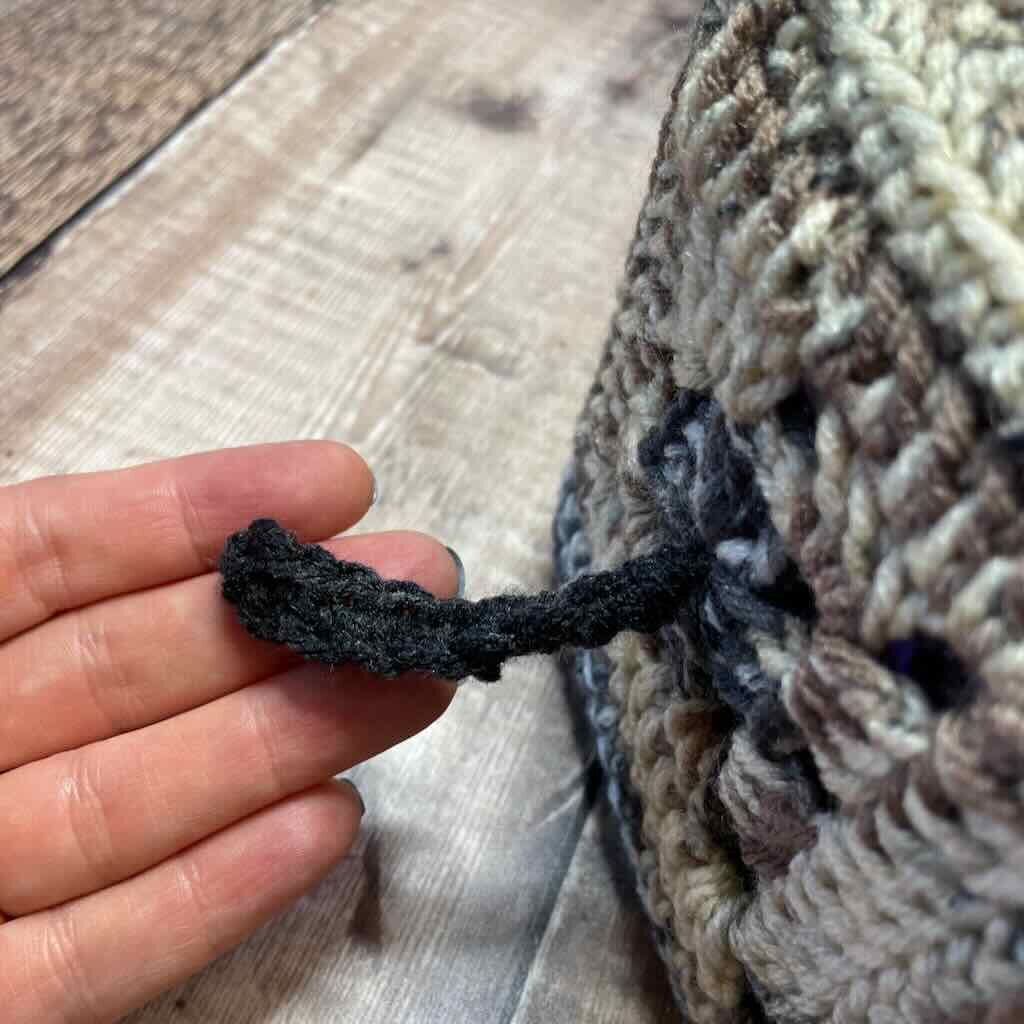
Fasten off and weave in ends.
Insert tissue box and pull a tissue out through the slit in the top.
More home décor items in the MadameStitch shop
[mailerlite_form form_id=3]


Do you have a pattern for the armadillo afghan?
As I said in the blog post, I haven’t written one up yet…stay tuned!