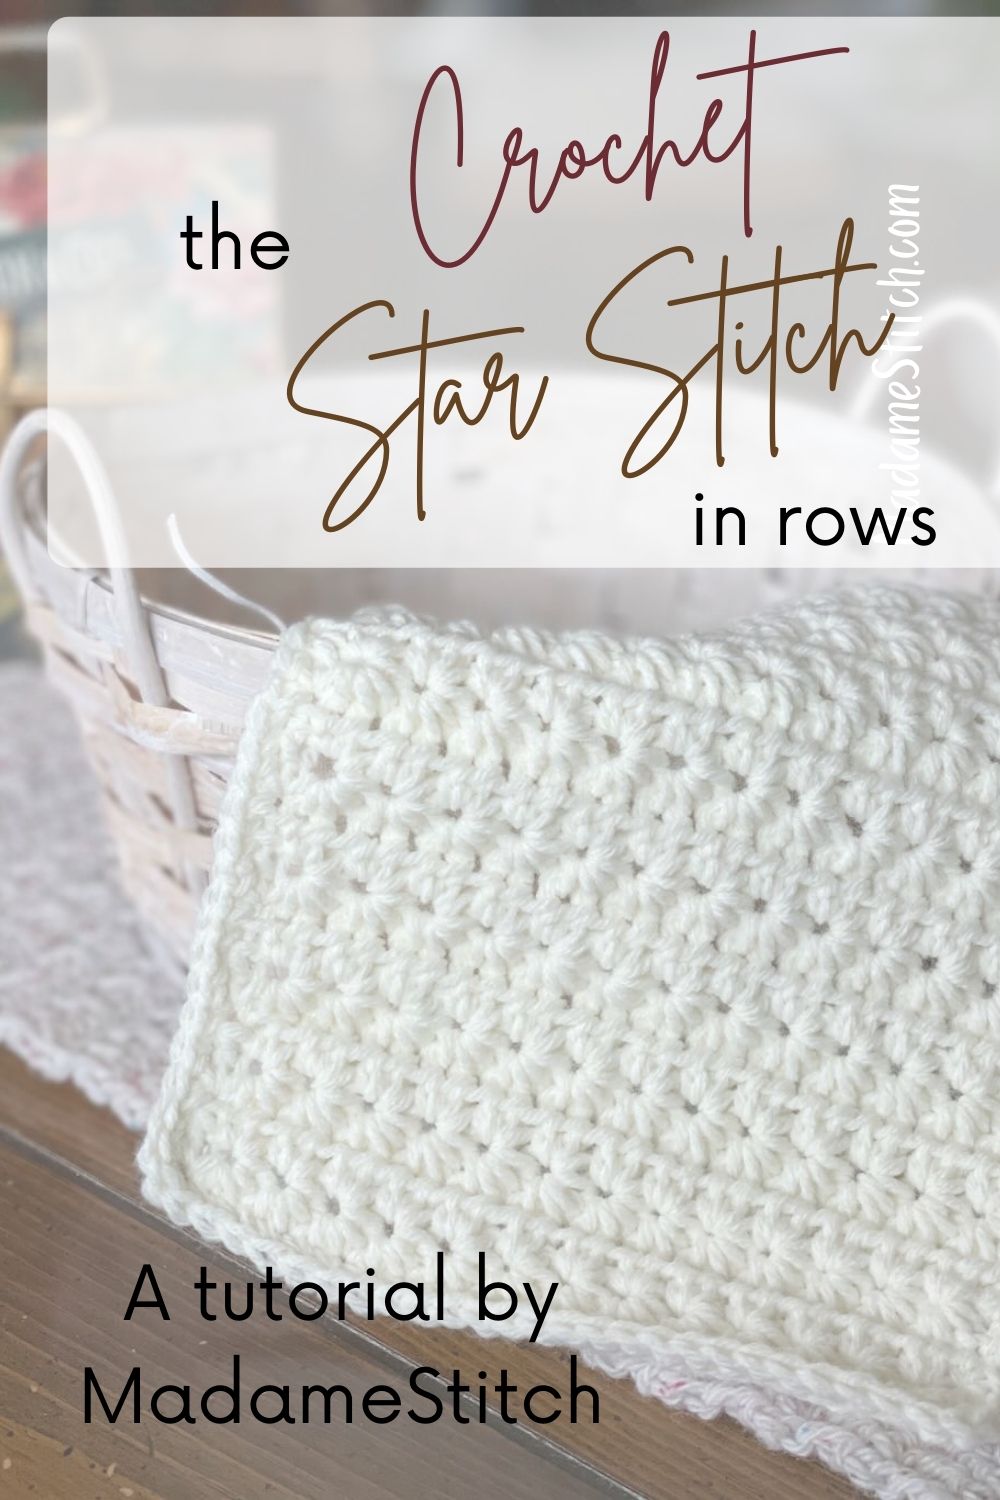
Learn the beautiful crochet star stitch worked in rows
Learn the crochet star stitch worked in rows in this comprehensive tutorial.
I’ve always loved the look of the crochet star stitch. It looks so intricate that I was sure it was a complicated stitch. And, because I gravitate toward easy, mindful stitches and patterns, it took me a long time to come around to the crochet star stitch.
I’ve started using this beautiful stitch in my designs. As it turns out, it’s one of the most mindful stitches I’ve learned over the years. Once you get the rhythm of pulling up loops to make each crochet star stitch, you won’t want to stop.
This tutorial will show you how to work the crochet star stitch in back and forth rows wherever in the project you happen to be working it.
What is the crochet star stitch?
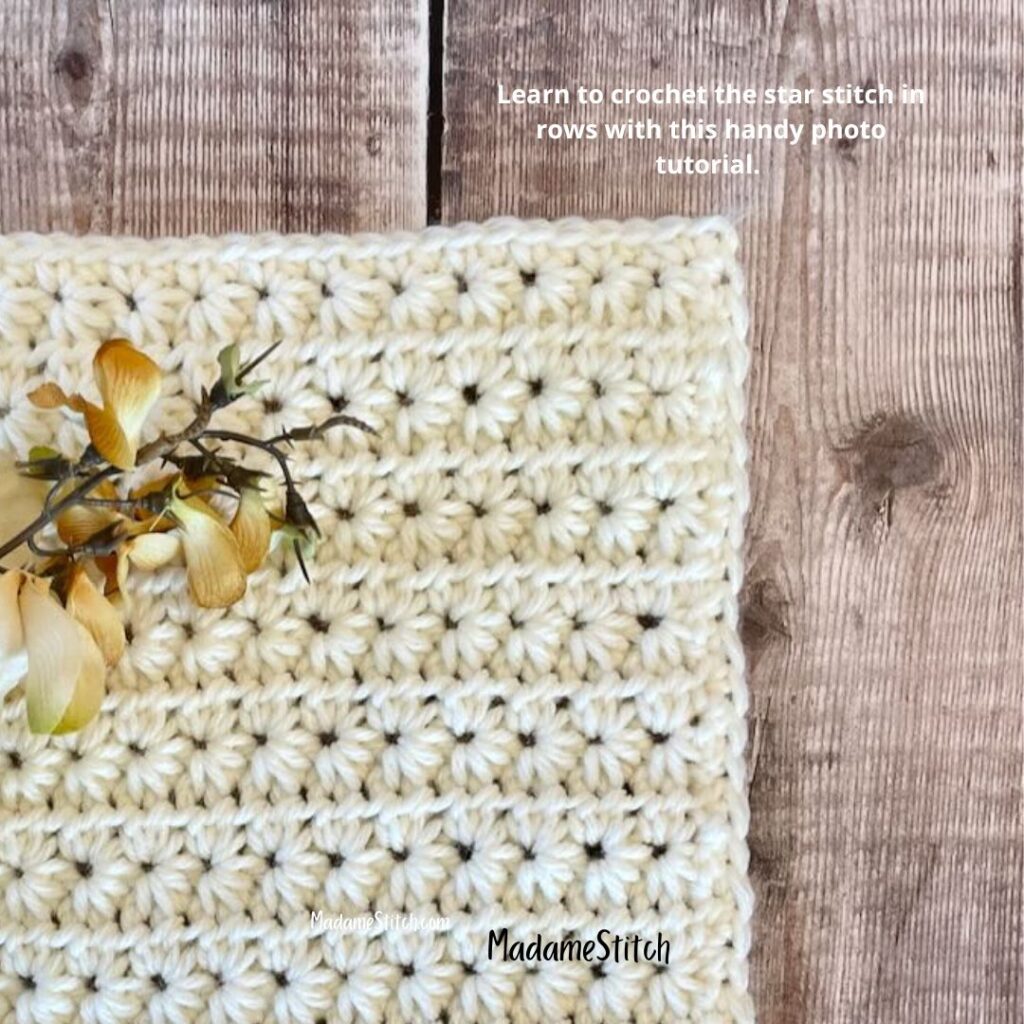
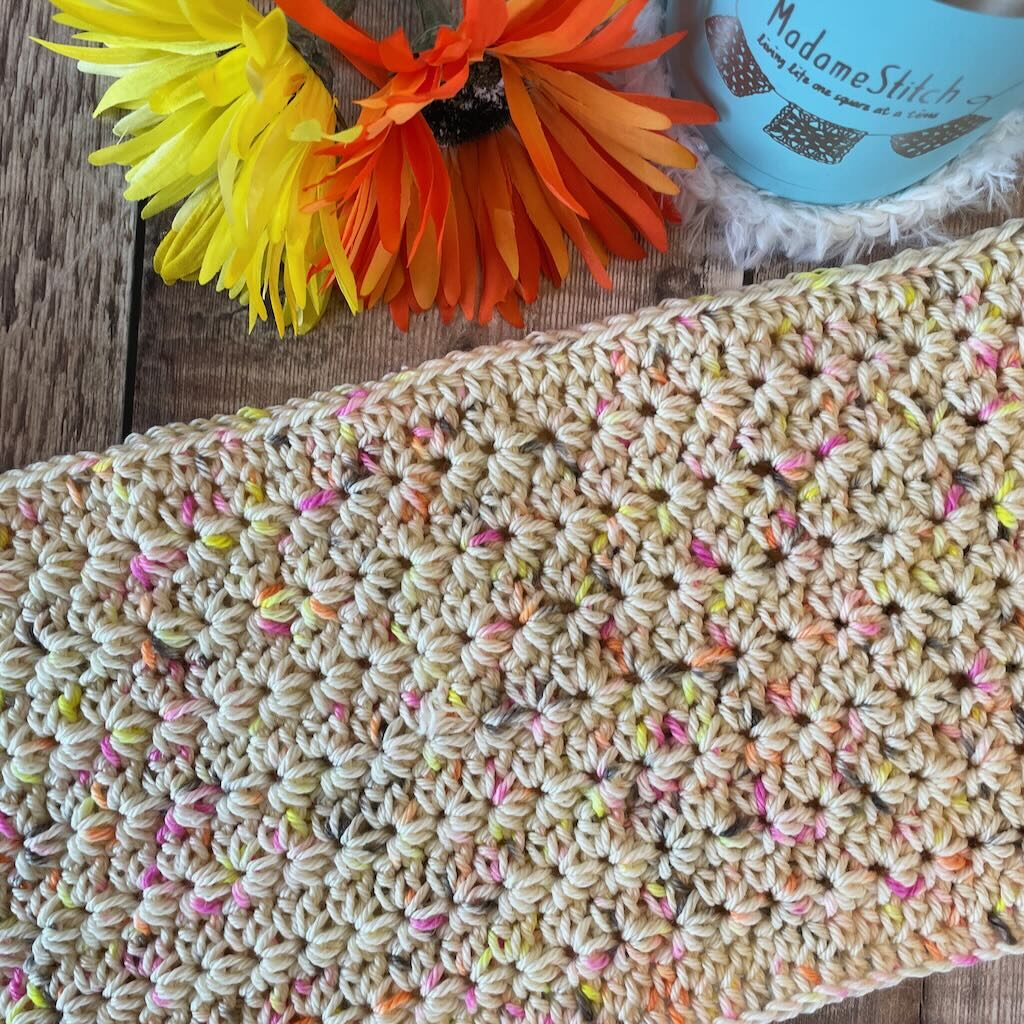
The crochet star stitch is also known by the name Daisy stitch or Marguerite stitch. It’s a simple 2-row repeat that creates a star burst pattern on the right side of the work.
In the first row of the pattern, loops are pulled up in a sc5tog pattern and closed with a chain to form the eye of the star stitch. The second row of the pattern is half double crochets worked in the eye to complete the star burst pattern on the right side of the fabric.
The beautiful dense texture that results from the crochet star stitch is perfect for winter blankets like the Fireside Throw. It’s versatile enough to be included in wearables and accessories, too.
The crochet star stitch looks complicated but it’s really easy to learn. The only tricky part is learning where to pick up loops to make the star stitch work. That’s what I’ll be showing you in this tutorial.
Note: You can make star stitches with a varying number of spikes as well as substituting single crochets for the half double crochets, so you may find different instructions for different variations of the crochet star stitch. These directions are for making a common five-spike crochet star stitch, completed with a row of half double crochets, but the tutorial will help you understand how to make any variation of the stitch.
The crochet star stitch is similar to a sc5tog.
Single crochet 5 together simply means that you pull up loops in 5 consecutive stitches before finishing the single crochet. The crochet star stitch is really a sc5tog except that the loops are pulled up partly from parts of the previous star stitch and partly from unworked stitches in the row. The concept is the same, though.
How to use this tutorial
This tutorial shows you the variations of the crochet star stitch depending upon where in the project the star stitch is worked. Skip to the part of this tutorial that shows you how to work the star stitch where you are.
Abbreviations used in this tutorial – US crochet terminology
- ch – chain
- hdc – half double crochet
- st – stitch
- YO – yarn over
The crochet star stitch tutorial starts here.
Work the version of the star stitch that corresponds to where you are in the project – working into the foundation chain, starting a row of star stitch, or working the star stitch across the row.
Each row of star stitch is always followed by a row of hdc to complete the star burst pattern on the right side of the fabric.
Beginning foundation chain star stitch
When working in rows, this version of the star stitch will be the first one you make into the foundation chain. Let’s begin:
Insert hook in 2nd ch from hook, YO, pull up a loop (2 loops on hook)
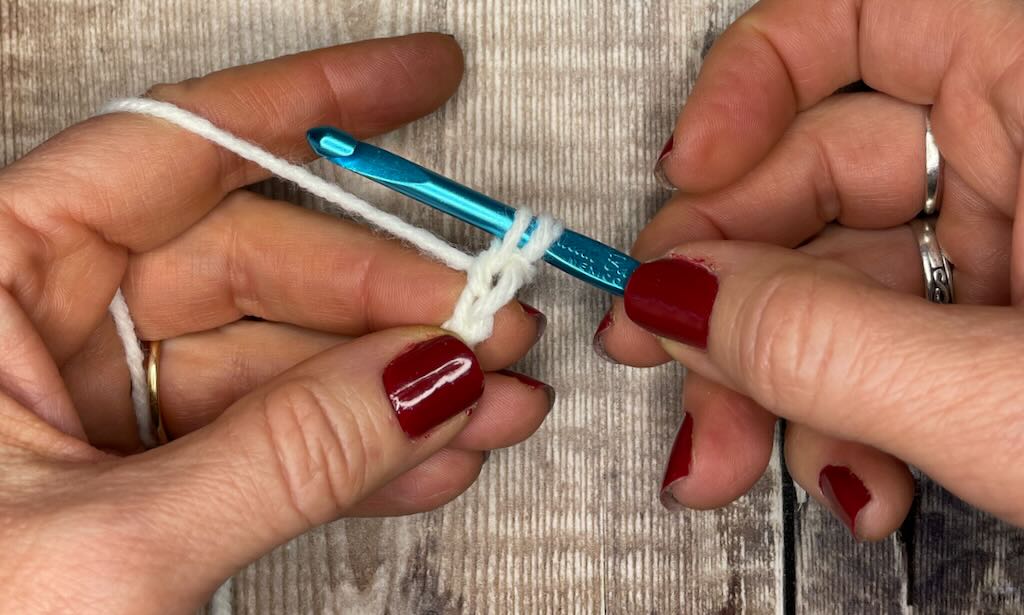
[Insert hook in next ch, YO, pull up a loop] 4 times (6 loops on hook)
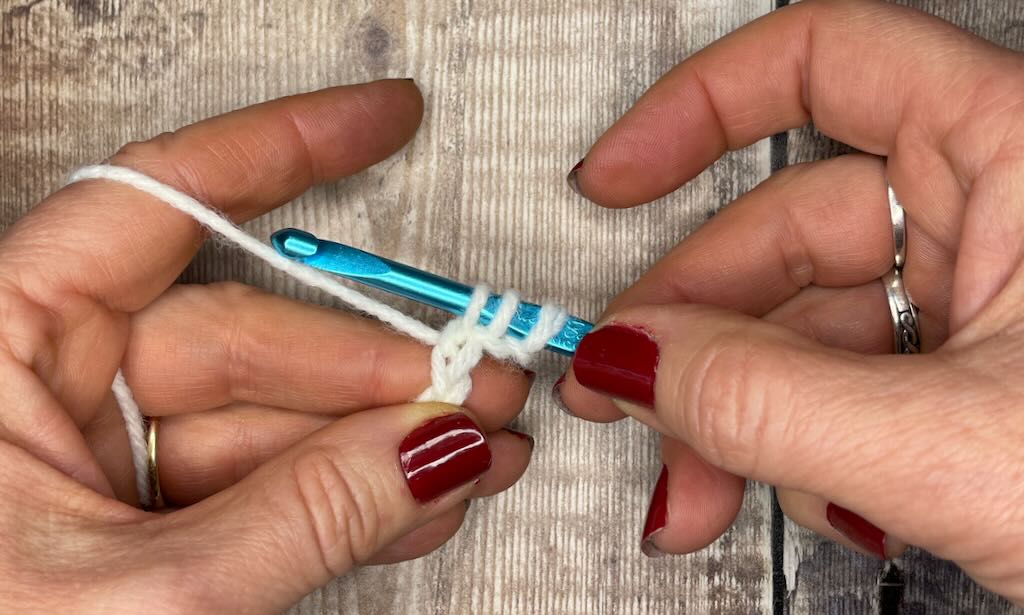
YO, pull through all 6 loops. (This completes a sc5tog)
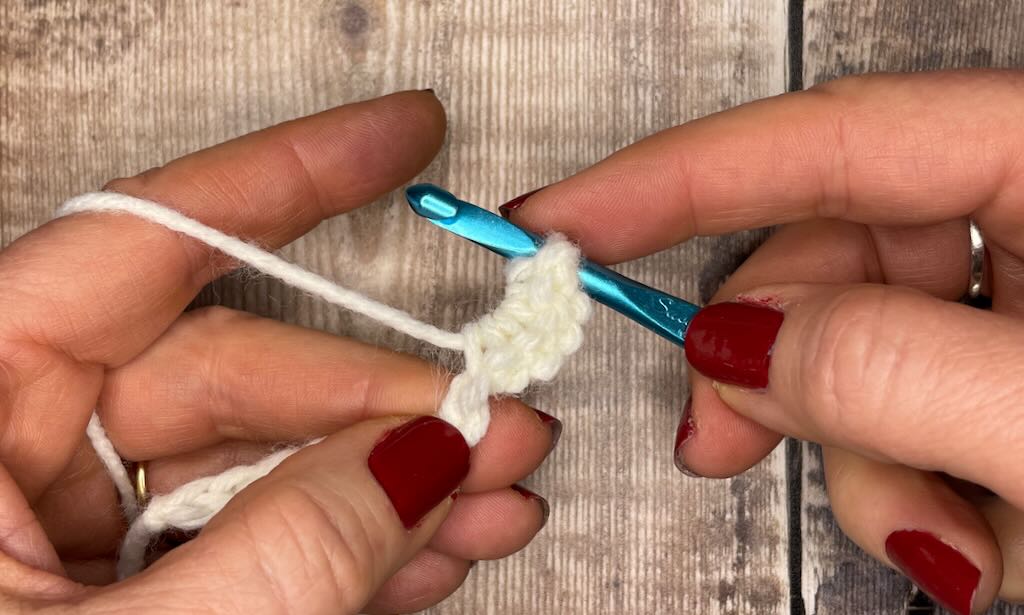
Ch 1 to complete the star stitch and create the eye of the star stitch.
Star stitch at beginning of the row
This version of the star stitch is the one you’ll work at the beginning of a new row. The ch 3 in this case doesn’t count as a stitch but instead serves as the start of the first star stitch.
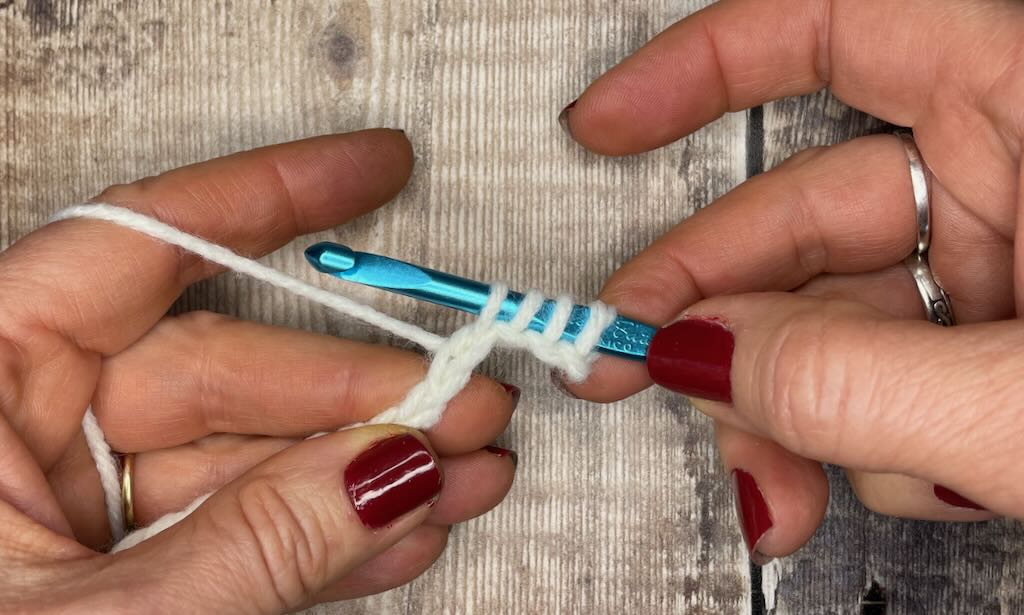
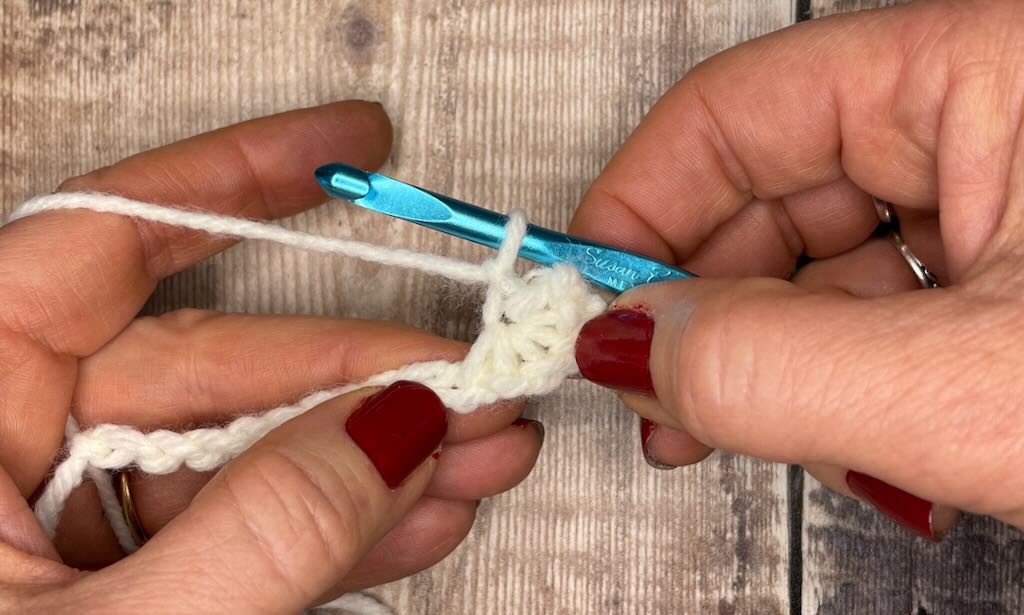
Ch 3, insert hook in 2nd ch from hook, YO, pull up a loop (2 loops on hook)
Insert hook in next ch, YO, pull up a loop (3 loops on hook)
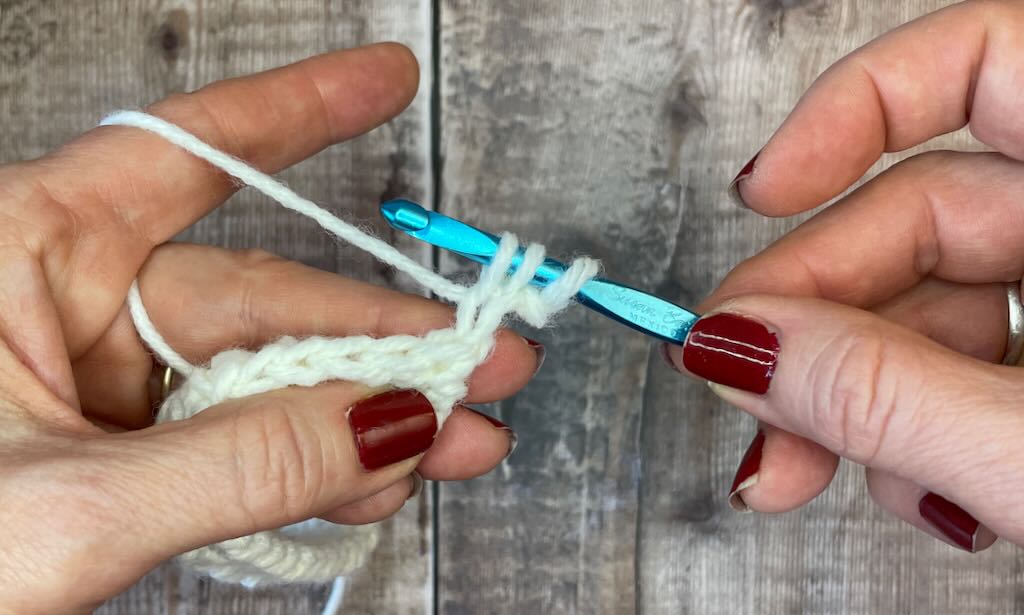
Insert hook into 1st hdc (the one at the bottom of the ch-3), YO, pull up a loop (4 loops on hook)
Insert hook into next unworked hdc, YO, pull up a loop (5 loops on hook)
Insert hook into next unworked hdc, YO, pull up a loop (6 loops on hook)
YO, pull through all 6 loops on hook (This completes a sc5tog)
Ch 1 to complete the star stitch and create the eye of the star stitch.
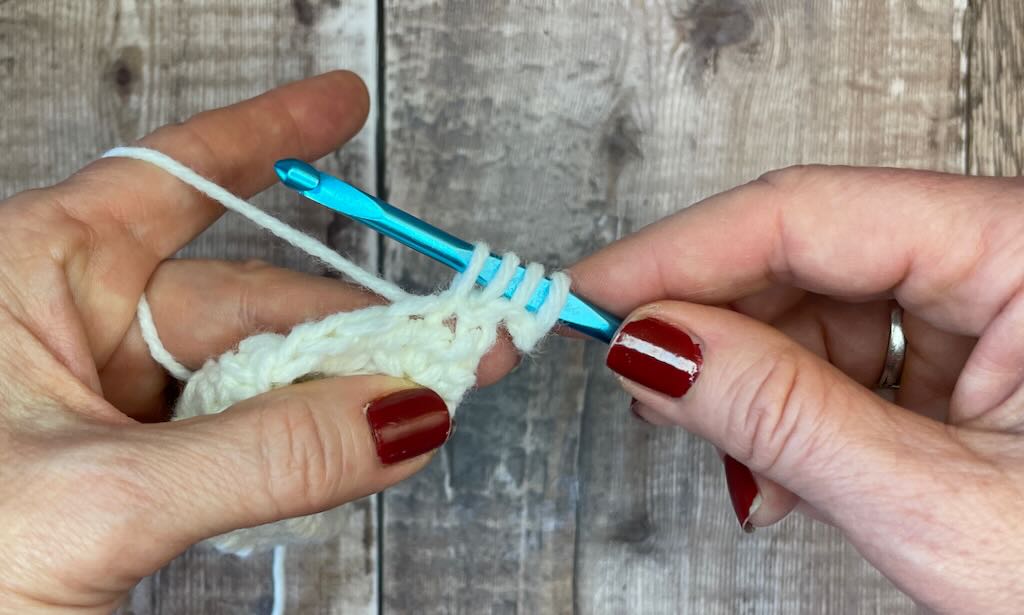
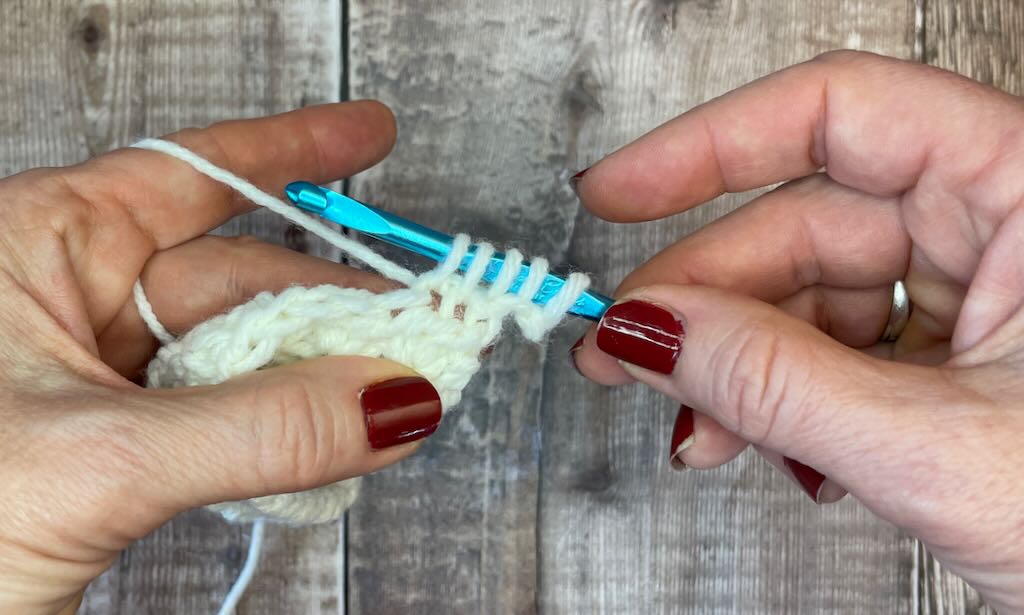
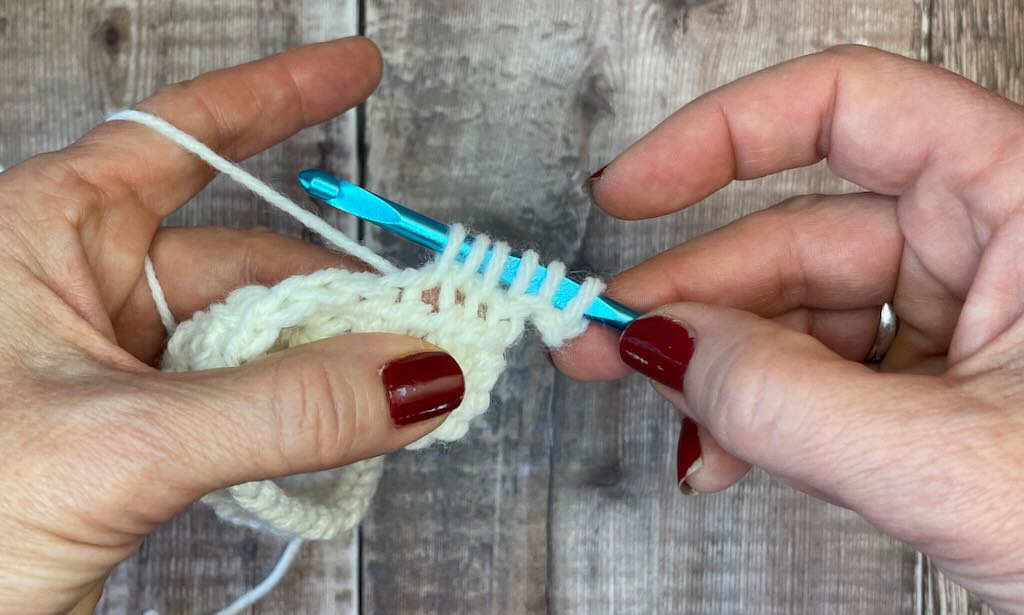
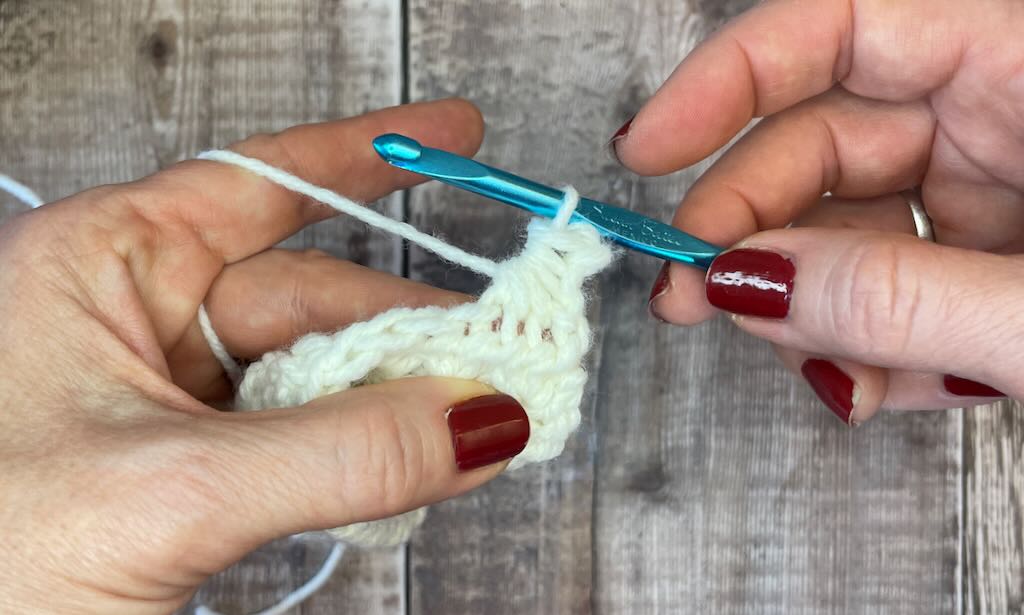
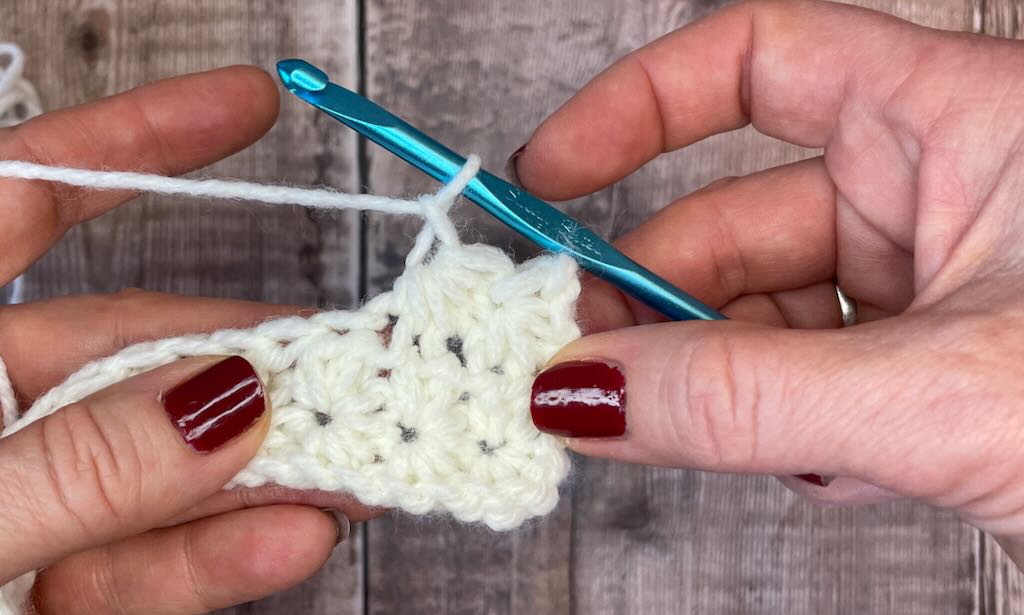
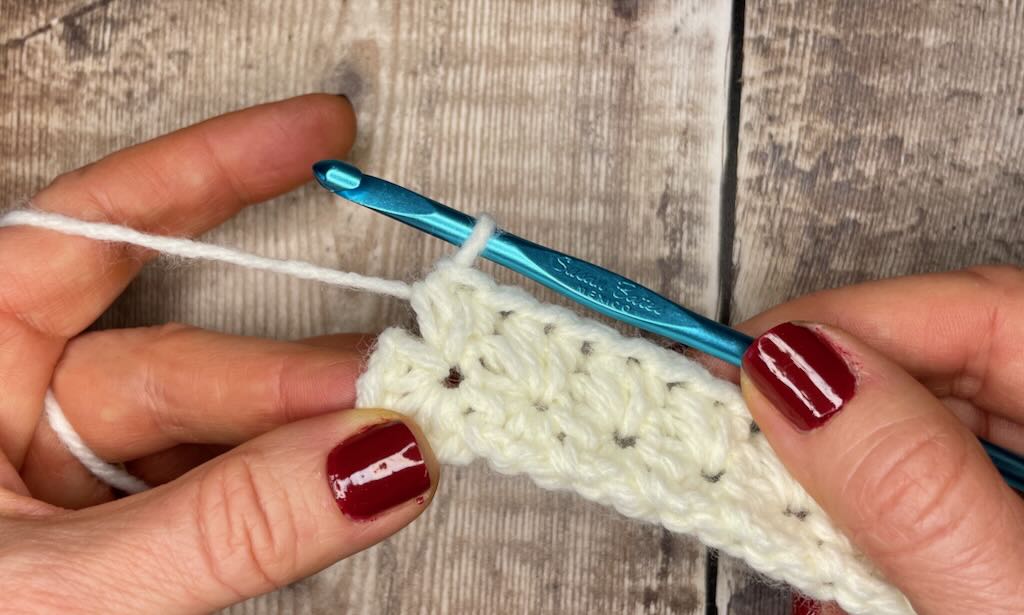
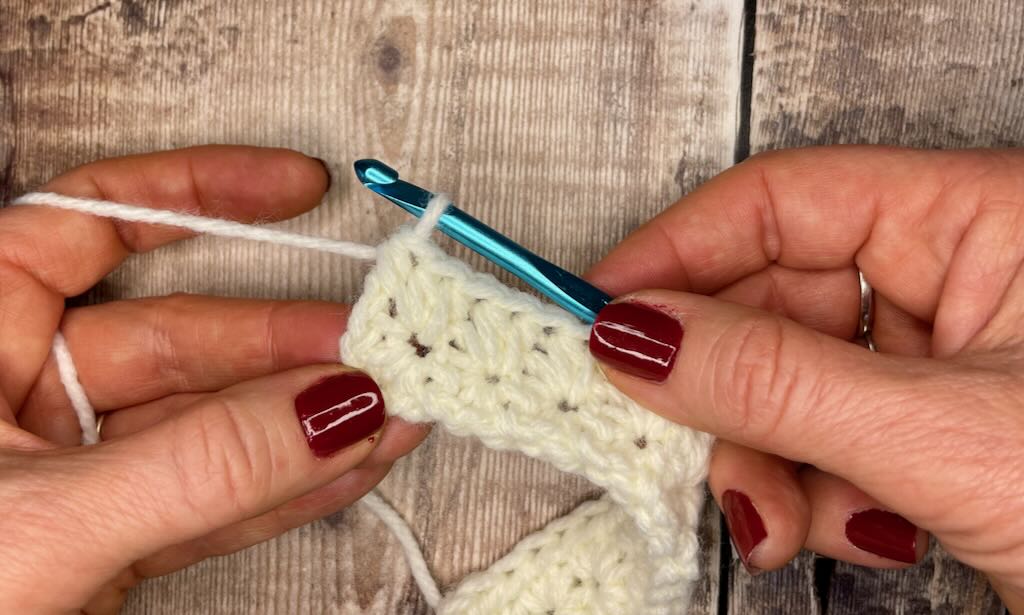
Star stitch across the row
This version of the star stitch will be worked across the row, once you’ve worked the first star stitch to establish the pattern.
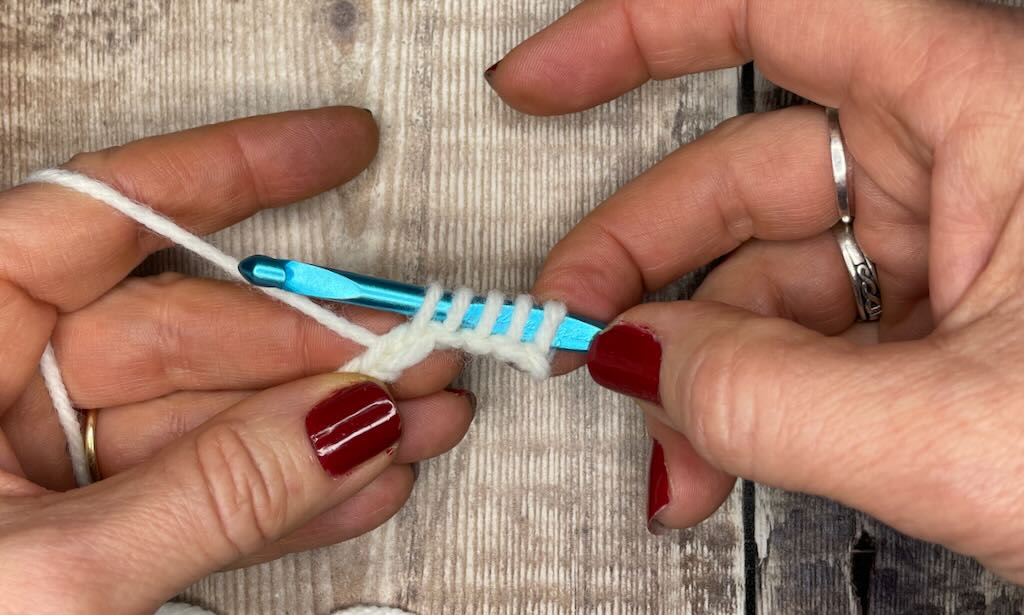
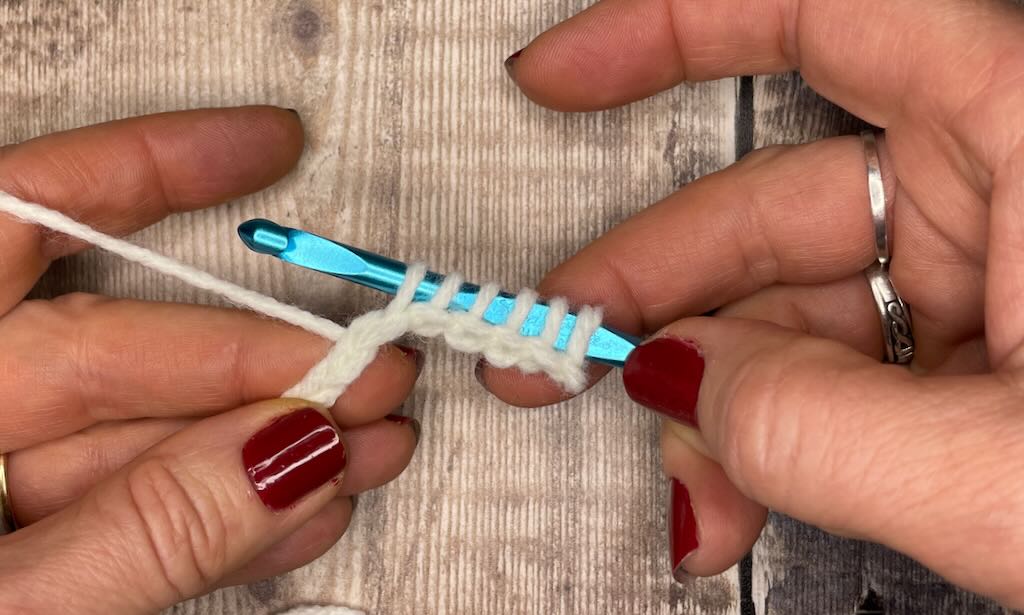
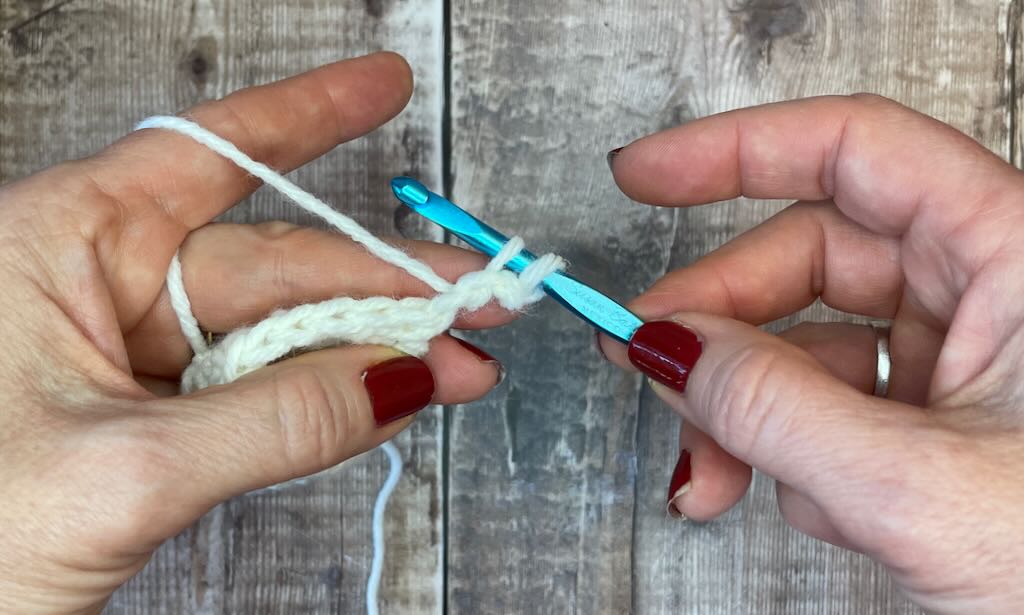
Insert hook into ch-1 (eye) just made, YO, pull up a loop (2 loops on hook)
Insert hook into last loop pulled up in previous star stitch, YO, pull up a loop (3 loops on hook)
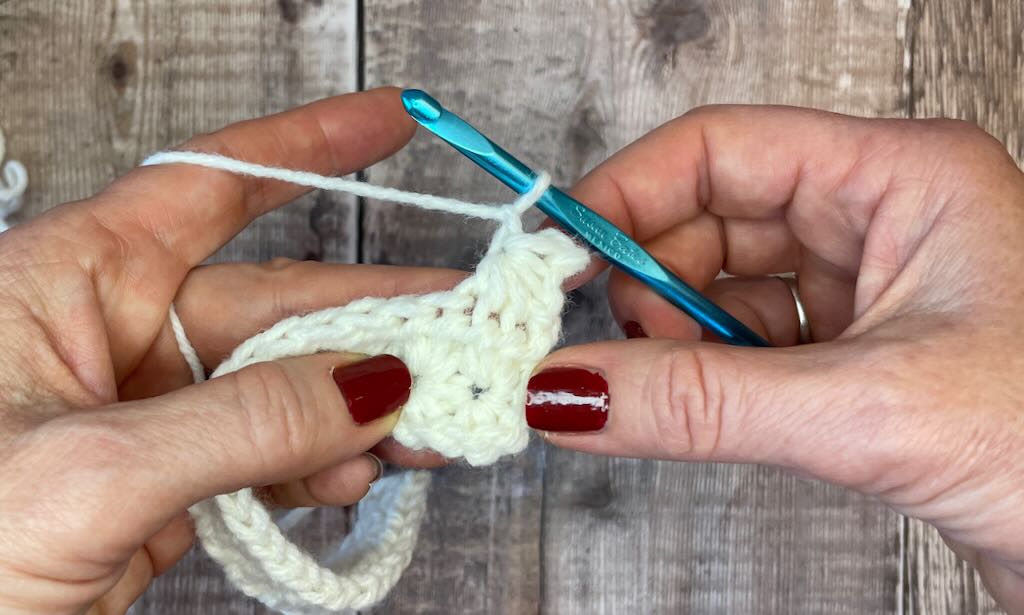
Insert hook into same st as the last loop of the previous star stitch, YO, pull up a loop (4 loops on hook)
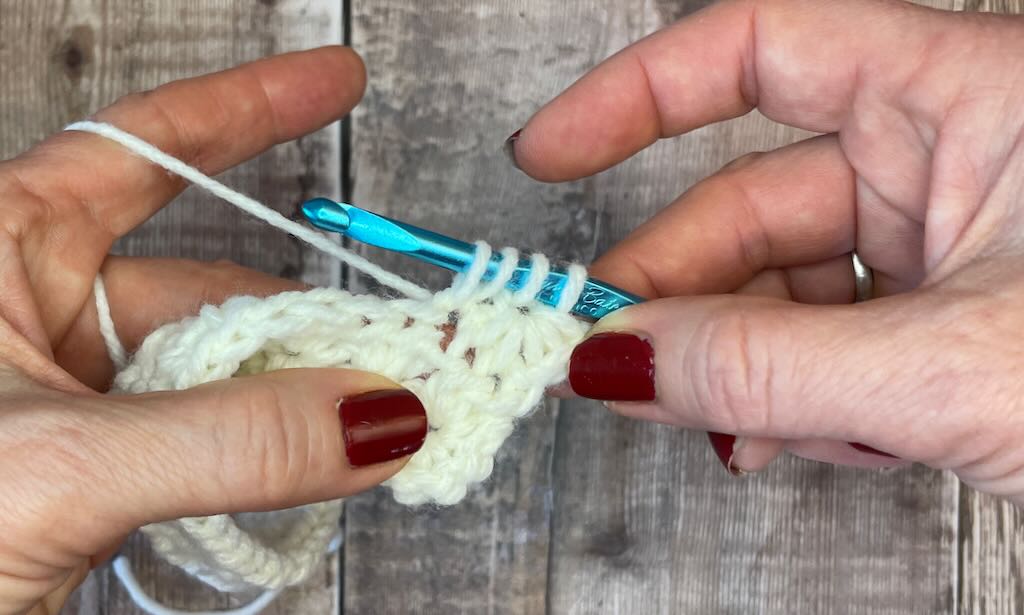
Insert hook into next unworked st, YO, pull up a loop (5 loops on hook)
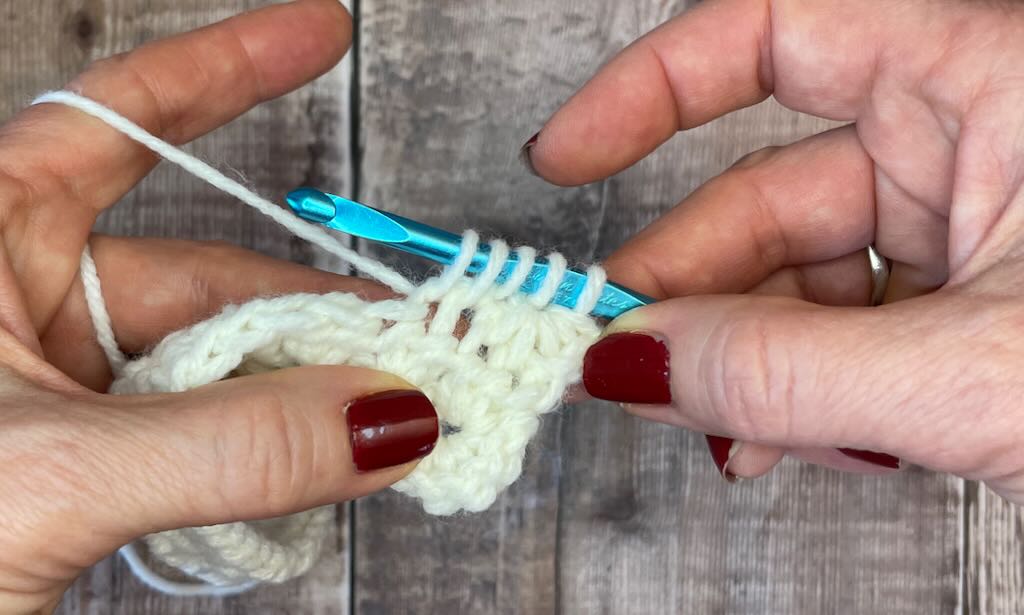
Insert hook into next unworked st, YO, pull up a loop (6 loops on hook)
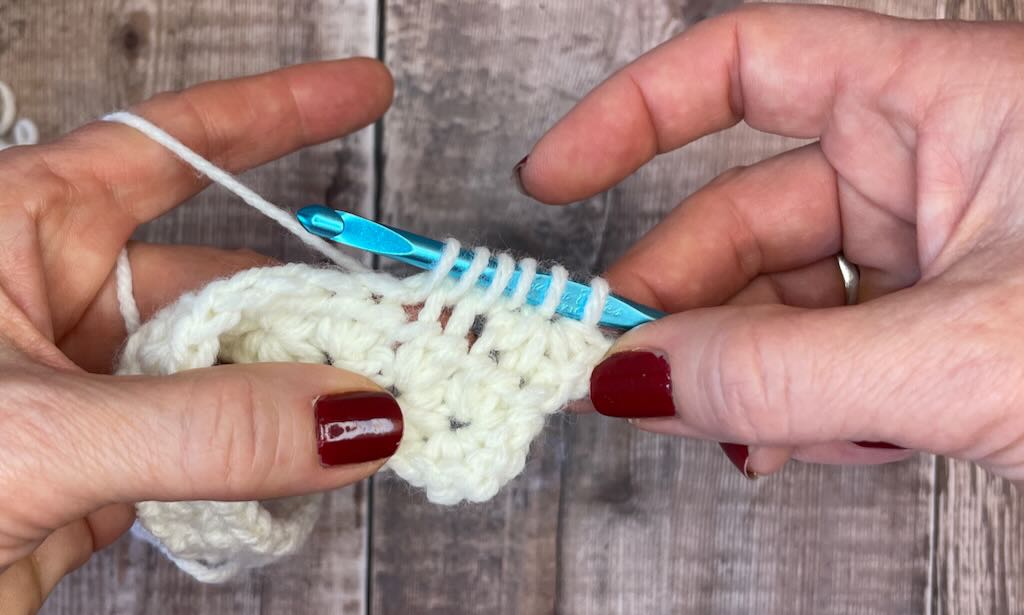
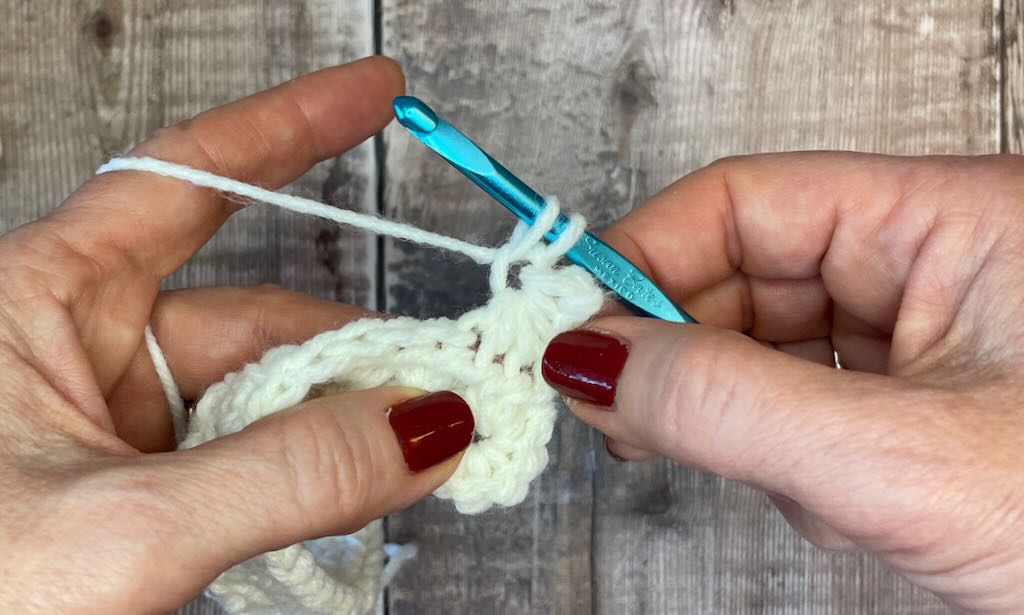
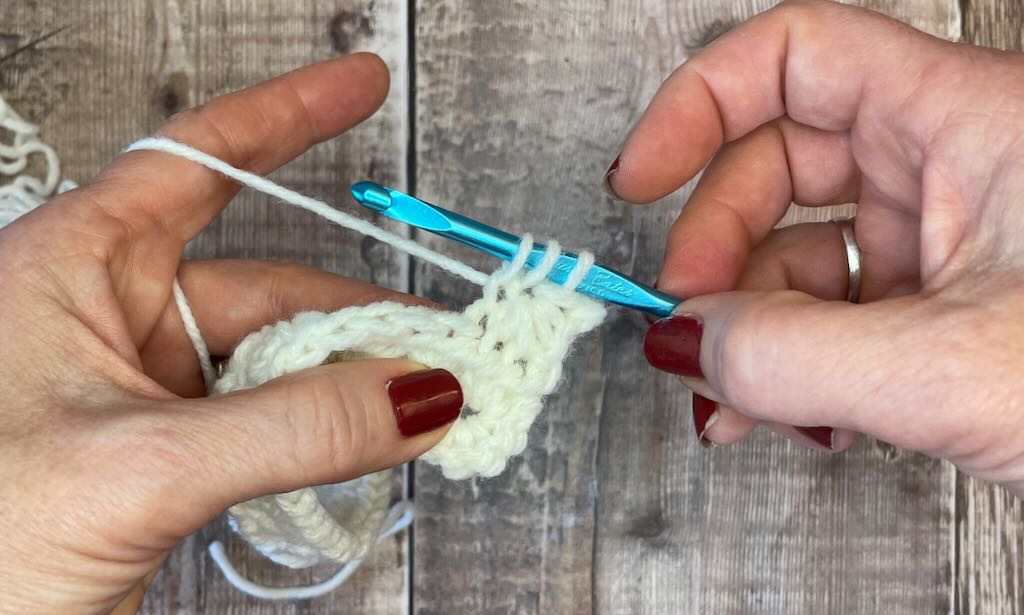
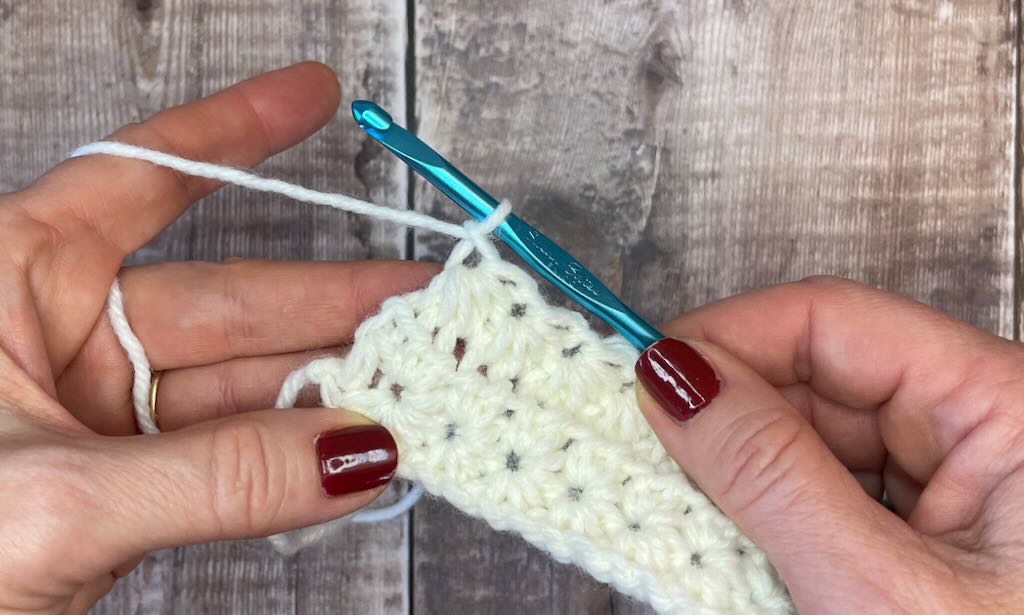
YO, pull through all 6 loops on hook (This completes a sc5tog)
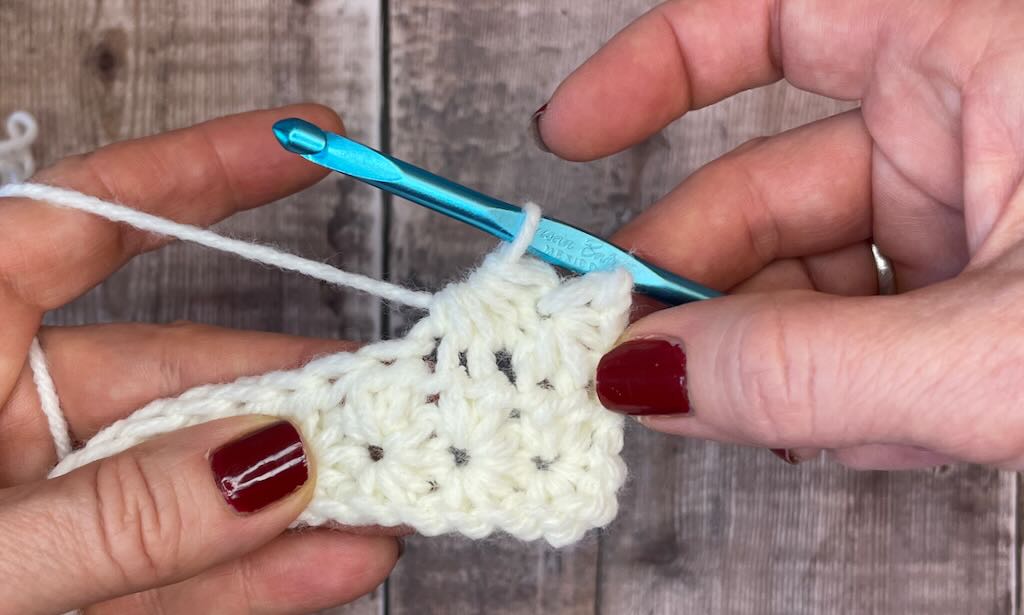
Ch 1 to complete the star stitch and create the eye of the star stitch.
At the end of this row, I work a hdc in the last st of the row to create an even, straight side edge. Some designers do not use this extra stitch. Follow the instructions for the pattern you’re working.
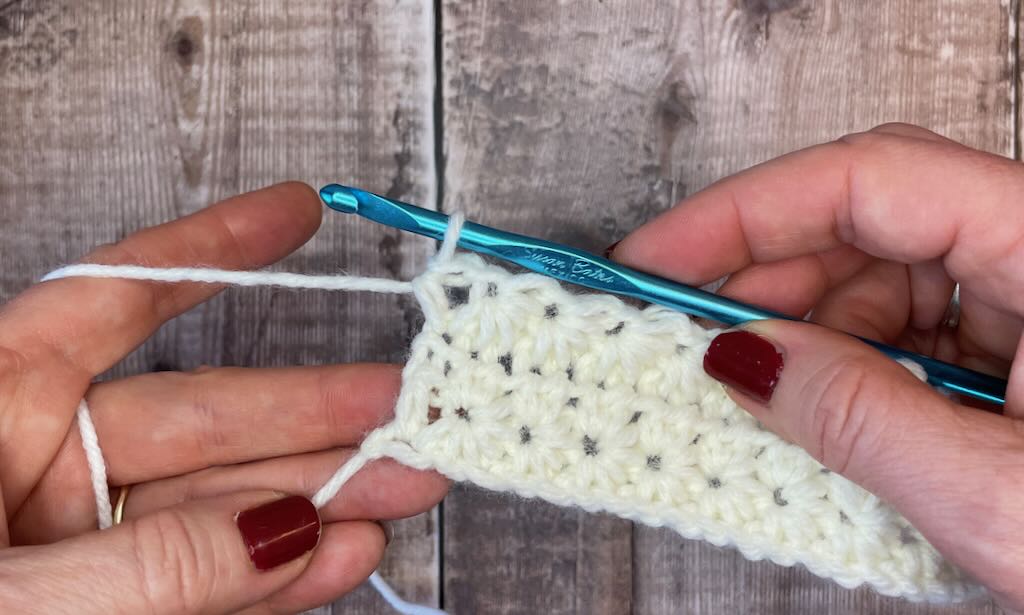
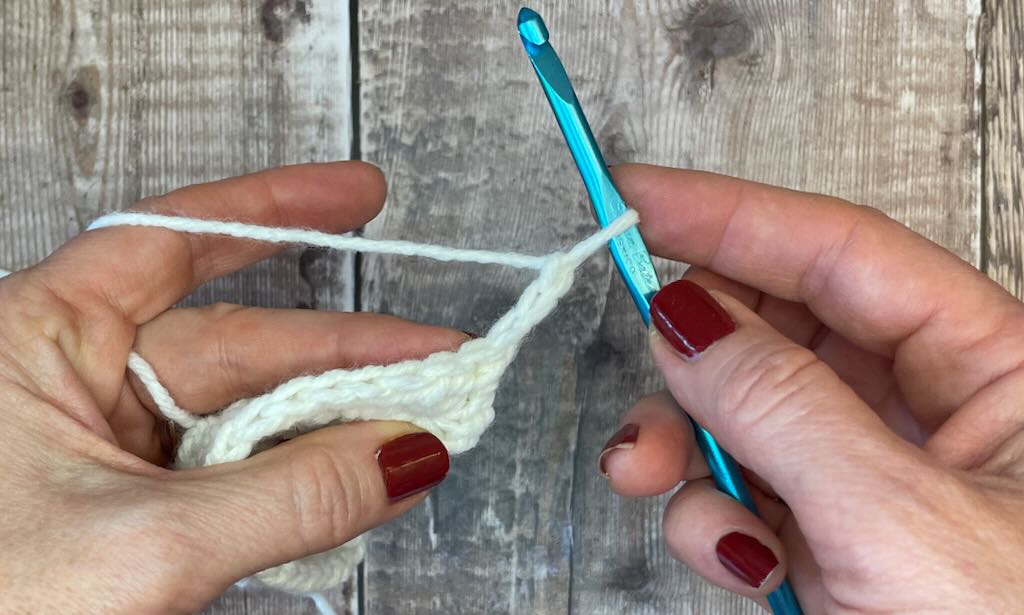
Hdc row
The second row of any crochet star stitch pattern is a row of hdc (in this case) to complete the star burst pattern on the right side of the fabric.
To begin the row, ch 1, 2 hdc in the eye of the first star stitch.
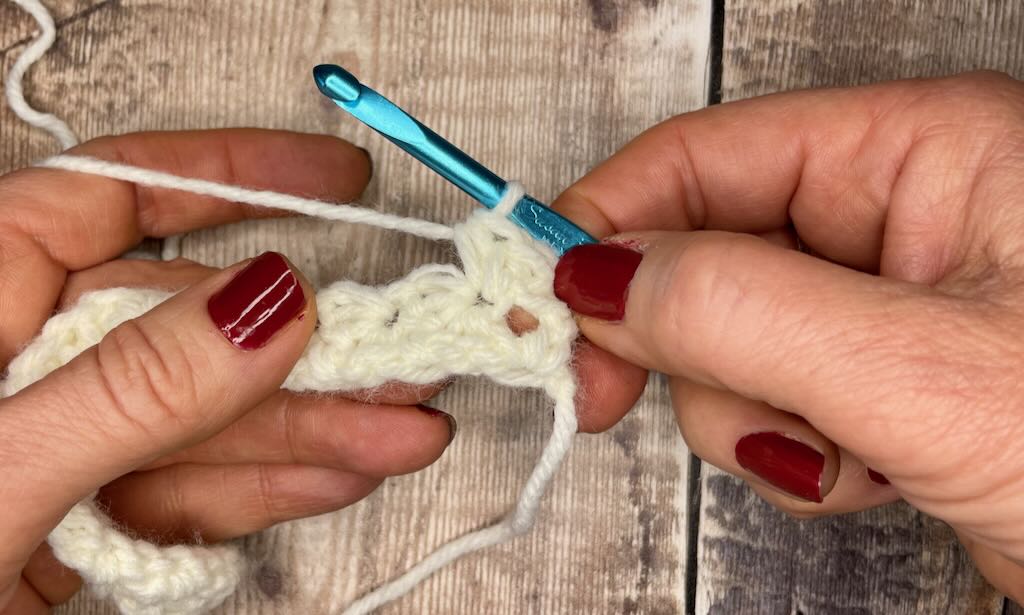
Work 2 hdc in each eye across the row.
Work 1 hdc in the last st of the row.
Designs that use the crochet star stitch in rows
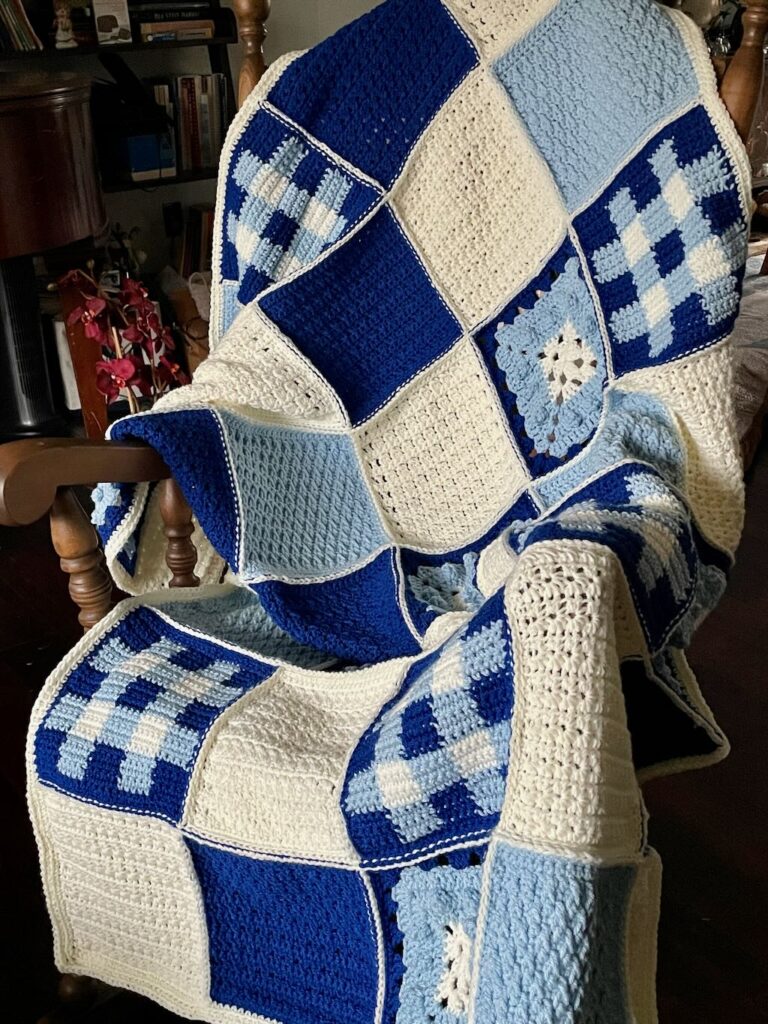
My Starry Night afghan square is a perfect example of the crochet star stitch worked in rows.
This afghan square is included in the Fireside Throw, a beautiful winter blanket that features 6 different square designs. You can purchase the full pattern PDF by clicking on the photo below.
[mailerlite_form form_id=3]


One Comment