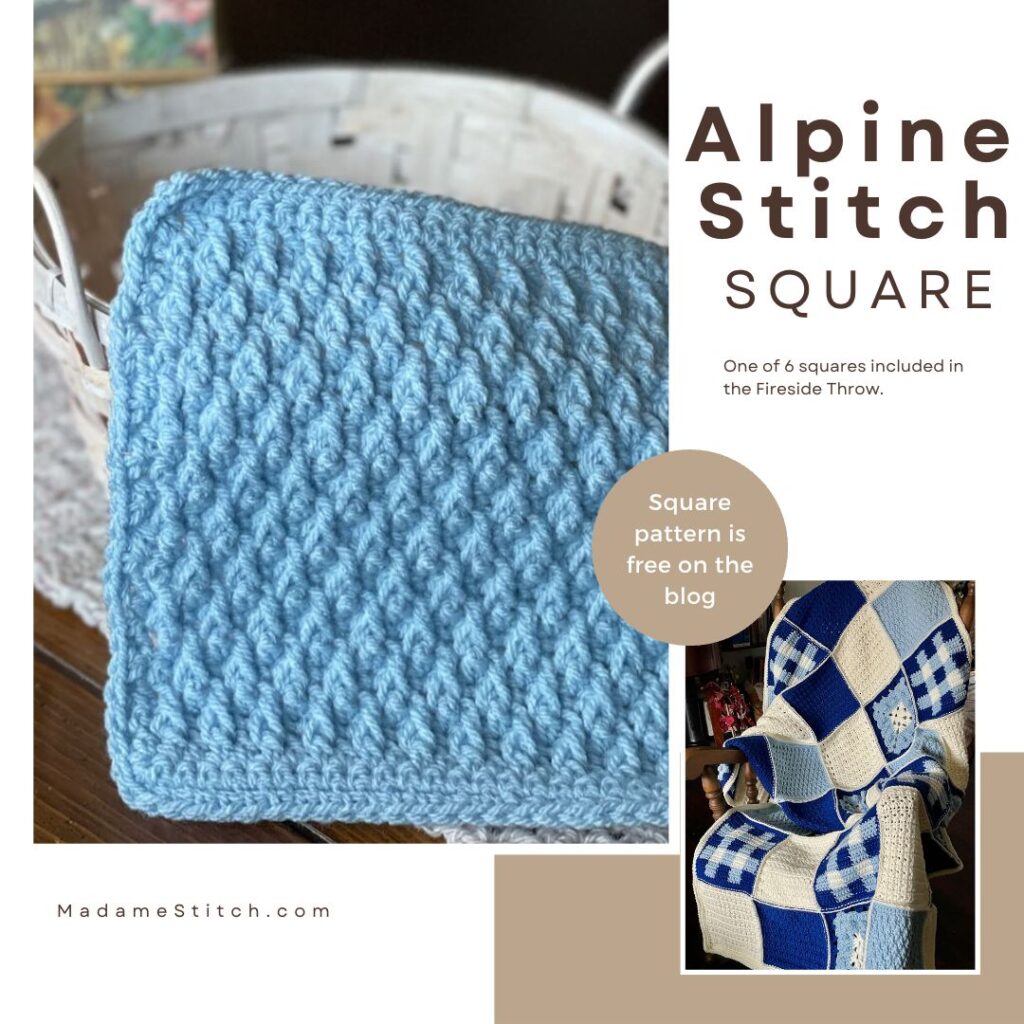
A snuggly alpine stitch pillow to beautify your home
This alpine stitch pillow will add a touch of warmth and beauty to any room in the house. The crochet pattern is free on the blog.
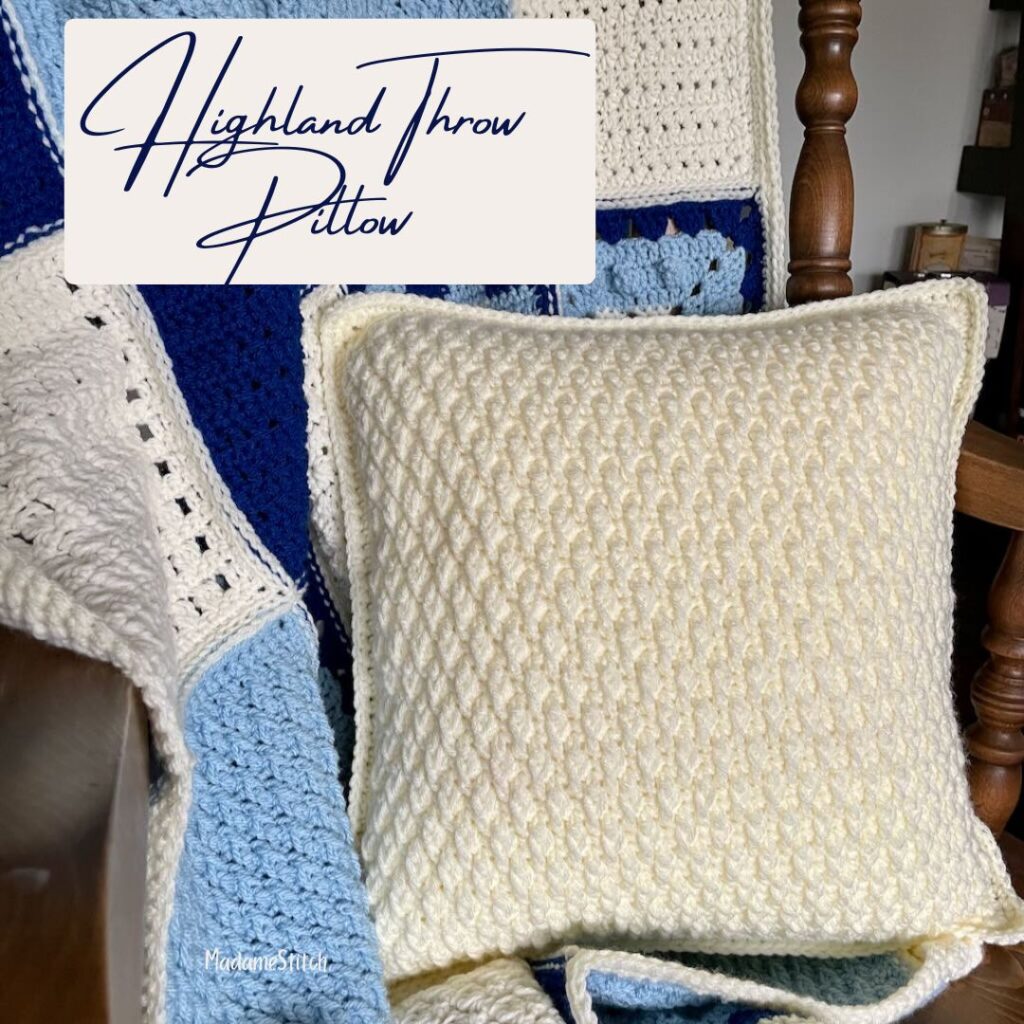
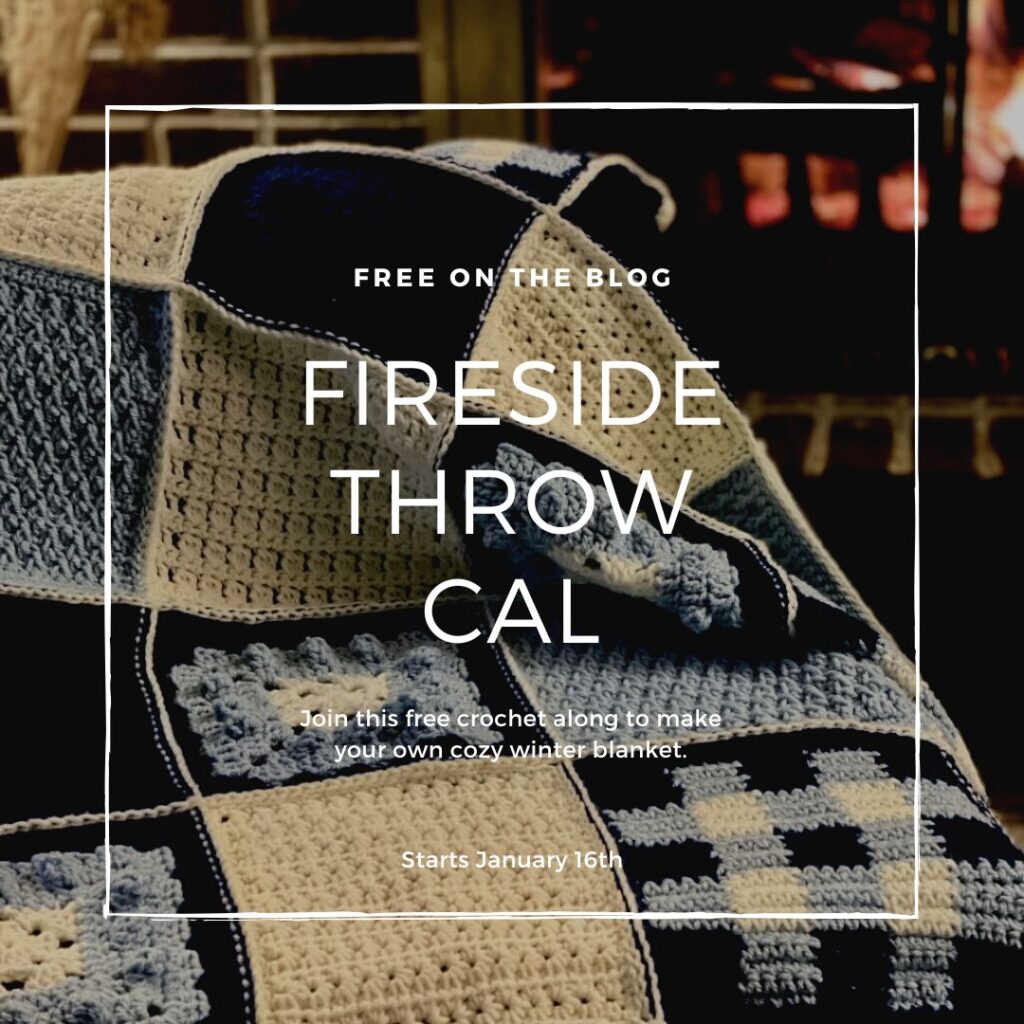
When I was designing and making the Fireside Throw for the crochet along, I had a lot of the main color yarn left over when I was finished. I decided the blanket needed a companion so I used that leftover yarn to crochet the Highland Throw Pillow.
This alpine stitch pillow is so snuggly, cozy and really does make the perfect partner to the Fireside Throw. Both the alpine stitch pillow and the Fireside Throw blanket add a touch of warmth to any room in the house during the cold winter months.
By the way, I knew I had a winner when my husband grabbed and gave it a big squeeze!
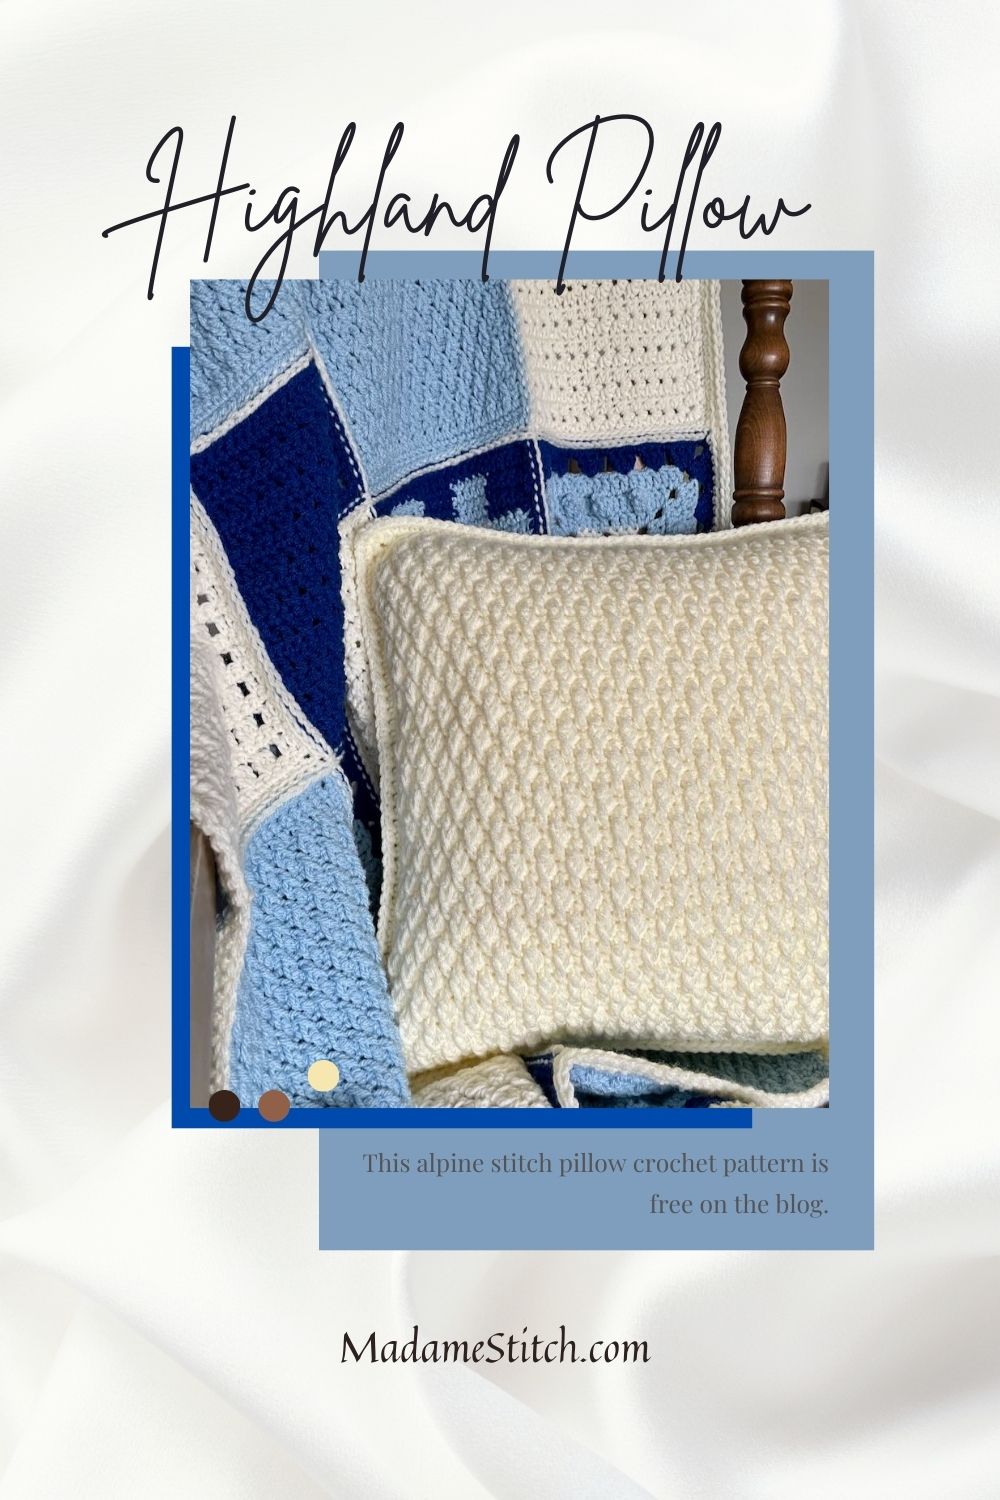
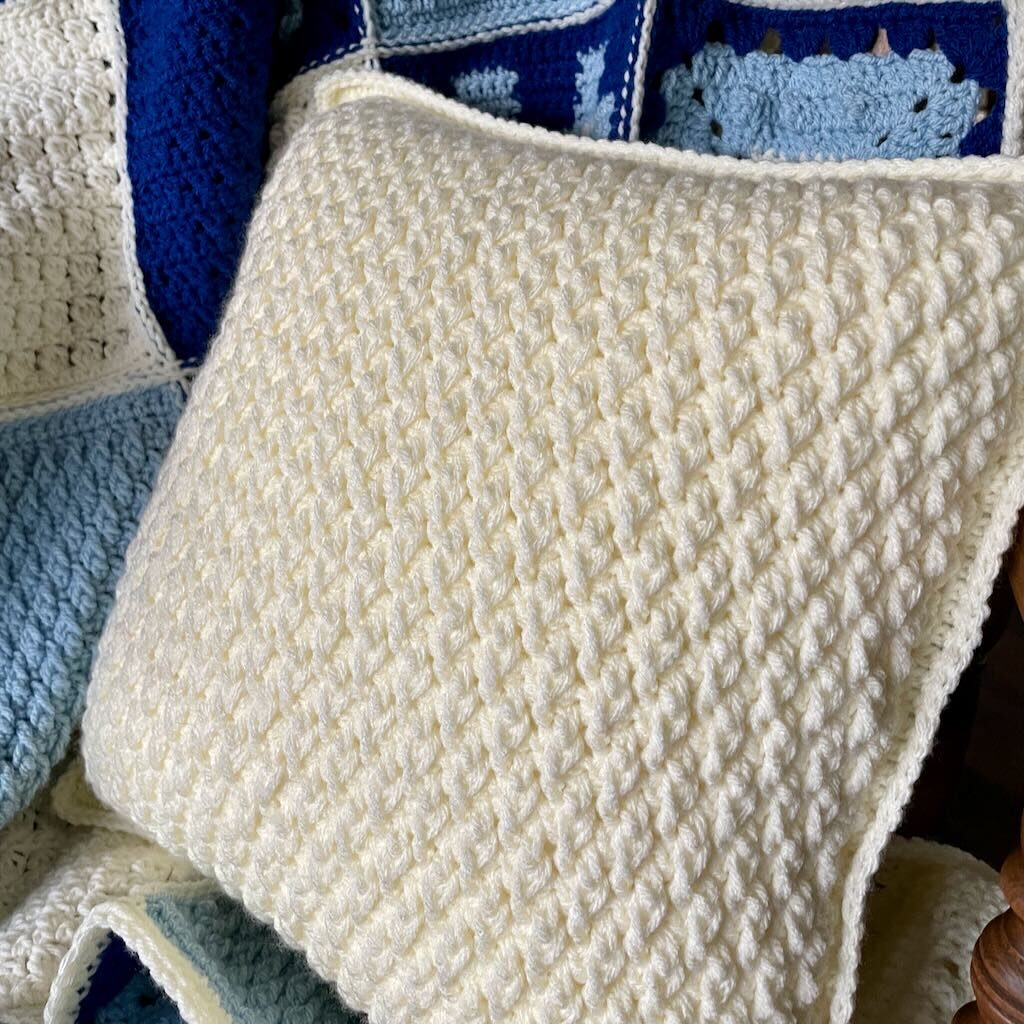
The Highland Throw Pillow
Design + Construction of the alpine stitch pillow
This alpine stitch pillow is a simple design, a quick, beginner friendly crochet make.
The crochet alpine stitch is the star of the show, creating a beautiful wintry texture that just begs to be cuddled with. The stitch pattern is an easy to work, easy to remember 4-row repeat which means you’ll have a relaxing, mindful crochet project to work on.
Two identical squares are made for the alpine stitch pillow. Once you get started, the alpine stitch pattern is very intuitive. After a round of single crochet is worked around each square, the squares are single crocheted together to create this alpine stitch pillow.
I designed this beautiful alpine stitch pillow to go with my Fireside Throw Blanket. This blanket was originally designed as a free crochet along.
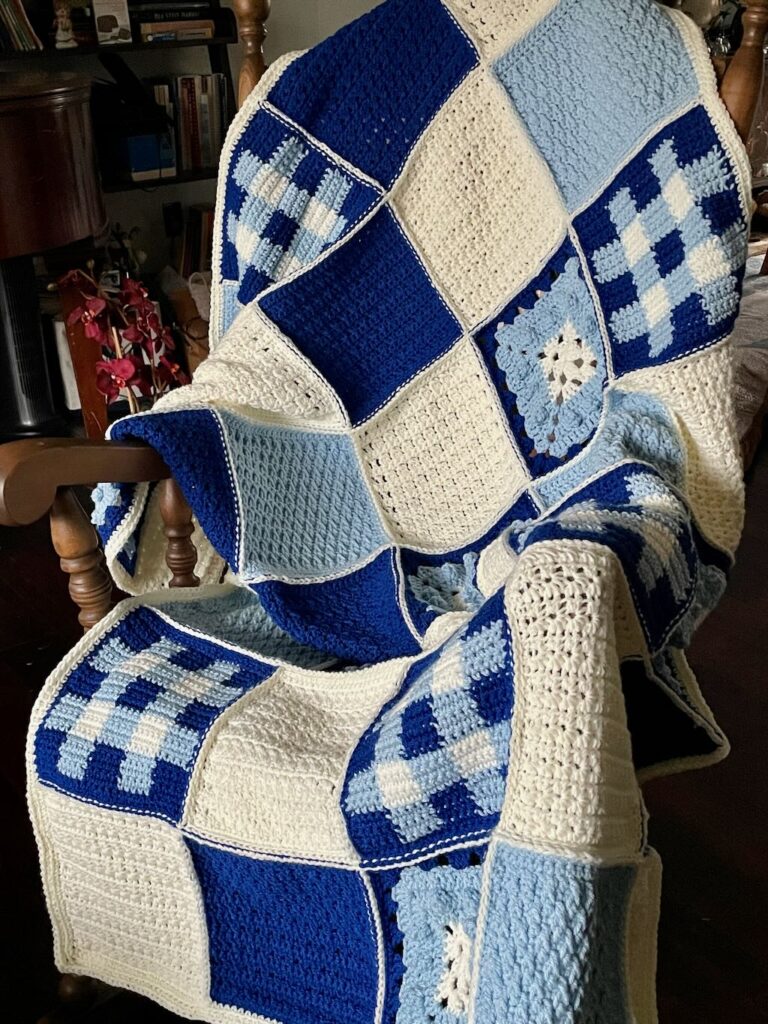
The perfect match for your Highland Throw Pillow, it’s an elegant, cozy blanket that adds a touch of warmth to any space it’s a part of.
The pattern is completely free to view on my blog.
Or, if you prefer a downloadable, printable PDF, the pattern for the Fireside Throw Blanket is available in my Ravelry shop and in my Etsy shop.
About the Yarn
This post contains affiliate links. That means, if you purchase something using the link, I receive a small commission. You don’t pay any extra and your information is safe. Thanks for supporting my small business.
Any worsted weight will work for this alpine stitch pillow. Choose a color and fiber that coordinates well with the room decor where your alpine stitch pillow will hang out.
For this alpine stitch pillow, I chose Lion Brand’s “Pound of Love”, the yarn I had left over from the Fireside Throw. It’s soft, easy to work with and creates a beautiful finished look. I fell in love with this yarn when I was working on the Friends with Granny blanket and discovered how soft the yarn was. It comes in economical 16oz skeins making it the perfect choice for larger projects.
Where to get the PDF for the Highland Throw Pillow
The free pattern for the Highland Throw Alpine Stitch Pillow is in this blog post. Scroll down to view the free version (be sure you’re a blog subscriber.
If you’d like a printer friendly, downloadable version of the PDF for this alpine stitch pillow, I recommend you purchase the premium version from one of my shops.
The premium PDF can be uploaded to your favorite mobile device so you can take your alpine stitch pillow project with you to work on whenever you’re out and about.
The PDF is easy to read and beautifully formatted without ads for a great experience. It includes detailed written instructions and a chart for stitch placement.
Get your copy today!


The Highland Throw Pillow free pattern
Thank you for staying on this post and reading my patterns right here on the blog, without copy/pasting. When you stay here to follow the free version of my pattern, I am compensated for my time and energy. This is a great, free way to support a designer. If you would like to save this for later, bookmark the page to save it in your mobile browser.
General Information
Yarn
Lion Brand “Pound of Love” 100% premium acrylic worsted weight (16 oz/1020 yd; 454 g/932 m)
Color #99 – Antique White – Approx. 4 oz needed for entire pillow
Hook
US size H-8 (5mm) – My favorite is Susan Bates
Tools
- 16” square poly-fil pillow form – I love these
- Removable stitch markers
- Tapestry needle for weaving in ends
Finished size: 16″ square excluding border
Gauge: Approx. 12 sts x 12 rows = 4″ in alpine st (Rows 4-7 3 times)
Skill level: Confident beginner
Abbreviations – US crochet terminology
- beg – beginning
- ch – chain
- dc – double crochet
- FPdc – front post double crochet
- rep – repeat
- rnd(s) – round(s)
- sc – single crochet
- st(s) – stitch(es)
- RS – right side
- WS – wrong side
Special Stitches


Pattern Notes
Thank you for staying on this post and reading my patterns right here on the blog, without copy/pasting. When you stay here to follow the free version of my pattern, I am compensated for my time and energy. This is a great, free way to support a designer. If you would like to save this for later, bookmark the page to save it in your mobile browser.
- A ch 1 at the beginning of a row does not count as a stitch.
- A ch-3 can be substituted for the STsc without changing the construction or look of the squares.
- The square panels are slightly smaller than the pillow form. As they are sewn together and the pillow form is inserted, they stretch out for a snug fit around the pillow form. Blocking shouldn’t be necessary because the slight pull will eliminate the curl caused by the FPdc.
- Pull up the 1st loop of each FPdc to the height of a regular dc to prevent the square from curling and adversely affecting your gauge.

2 Comments