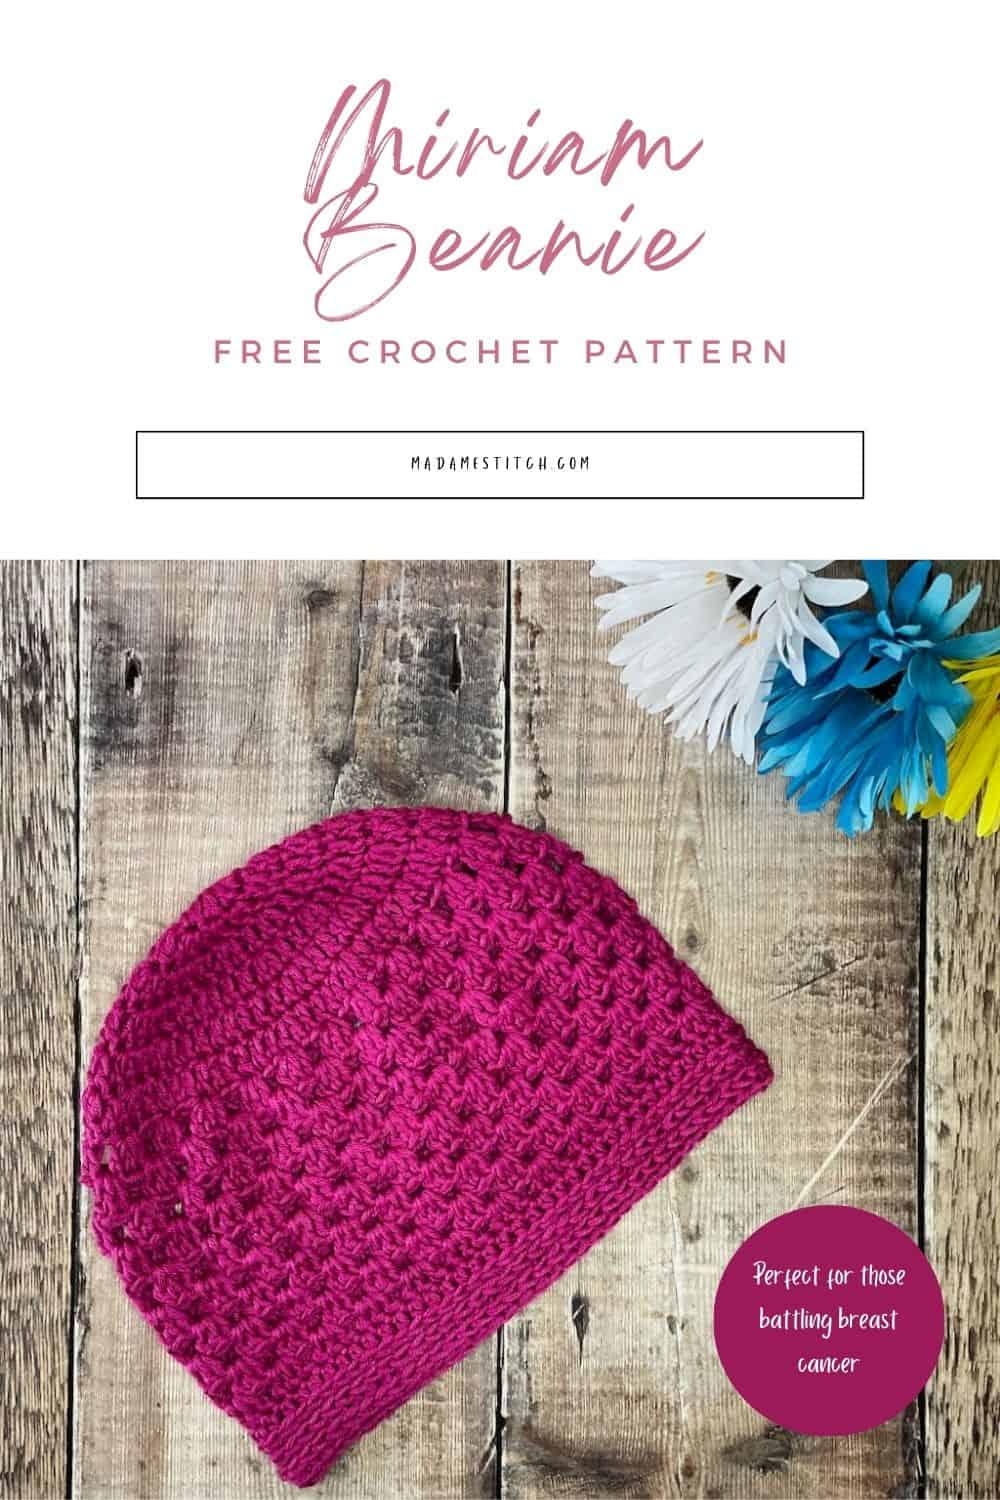
A granny stitch crochet beanie that shows love to those affected by cancer
A comfortable, soothing granny stitch crochet beanie for cancer warriors. Stay warm and positive with this handmade, soft hat that’s cozy against sensitive skin.
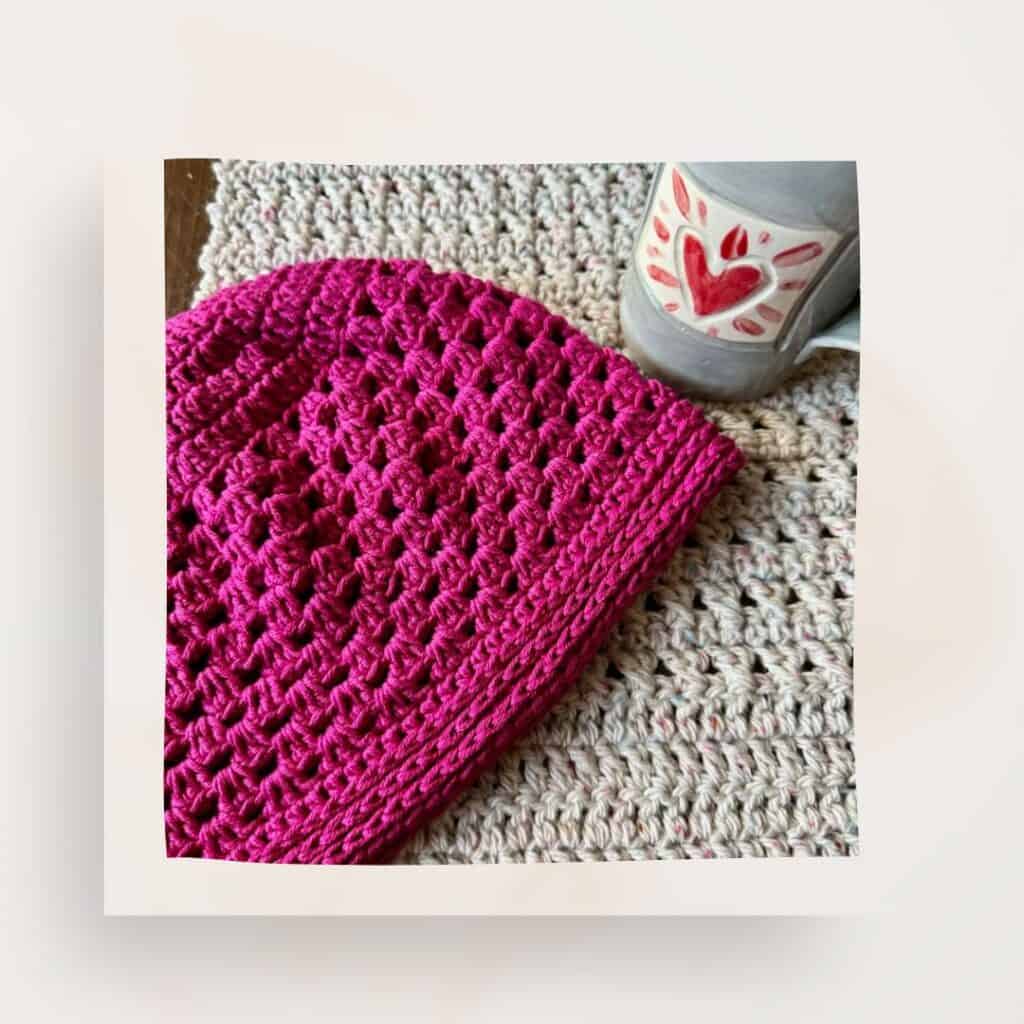
The Miriam Crochet Beanie
The Miriam beanie, a beautiful crochet creation, is more than just a piece of handmade accessory. It represents hope, warmth, and love for those in the midst of a challenging battle against cancer. Crafted as part of the annual Cancer Challenge hosted by Christine of Sweet Potato 3, this granny stitch crochet beanie is a testament to the power of community and compassion.
Cancer touches the lives of so many so creating a crochet beanie isn’t just a craft project; it’s a heartfelt gesture of support. Through the Cancer Challenge, crocheters gather yarn and hook to provide a tangible source of comfort and encouragement.
As part of the Crochet Challenge, I was asked to choose a color that represented the cancer type I was supporting with my Miriam crochet beanie. I chose pink in honor of breast cancer. Here’s the back story…
When my daughter was a teenager, she was moved by a TV commercial she saw for the Susan G. Koman 3-Day Walk for breast cancer. So, we signed up, raised money, and walked the 60 miles. We did that for several years even though we didn’t directly know anyone affected by breast cancer. I can’t adequately express how moving it was to be in the midst of such passion and support.
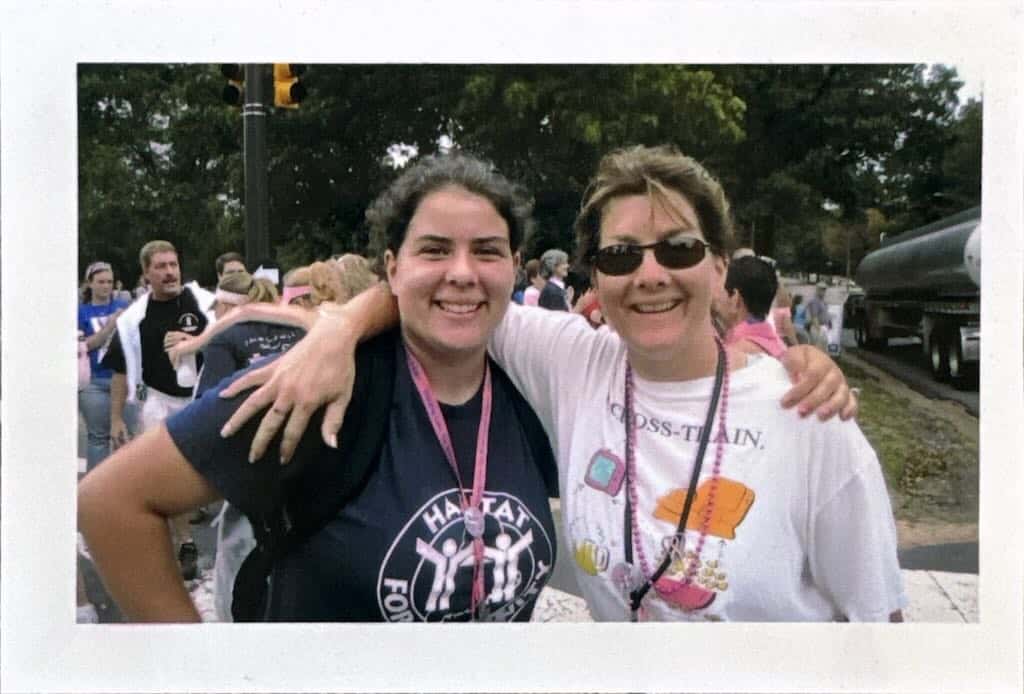
It is my privilege to participate in the Crochet Cancer Challenge with a crochet beanie that honors those fighting breast cancer.
Design + Construction of the Miriam Crochet Beanie
When I found out I would be designing a hat for this year’s Cancer Challenge, I went straight to my beloved granny stitch. I can’t think of a better stitch for a crochet beanie like this. It’s the perfect stitch to provide gentle coverage and breathability all at the same time.
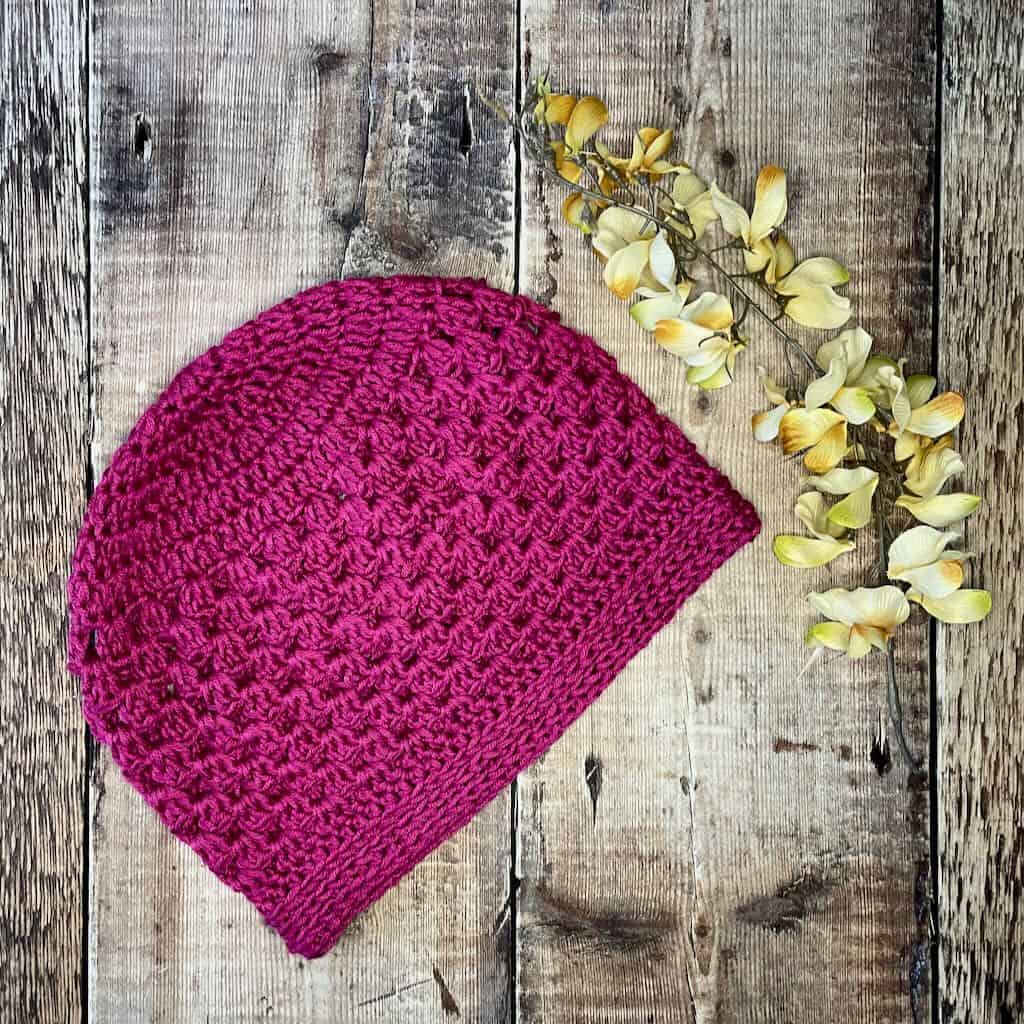
The Miriam crochet beanie begins with a double crochet flat circle which is where the sizing magic happens. Depending upon how many rounds are worked here in the flat circle, you’ll be able to create a finished size that best fits the recipient.
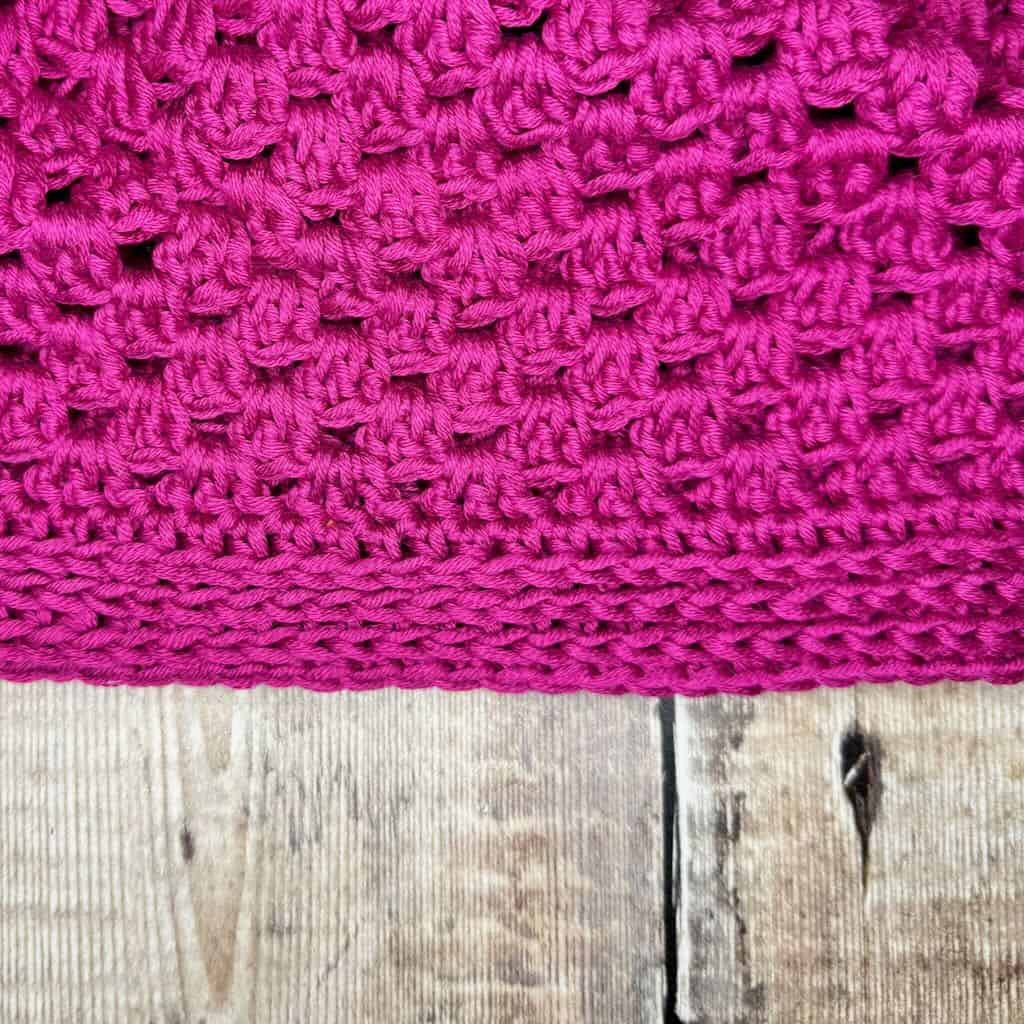
Once the flat circle is completed, the body of the crochet beanie is worked in rounds of granny stitch. The crochet beanie is finished off with half double crochets worked in the third loop for a beautifully simple bottom border.
The Miriam beanie is the perfect project for those who are new to crocheting hats. The simple construction and its small size provides a quick project for those who want to create something for those who are seeking comfort.

The Yarn
This post contains affiliate links. That means, if you purchase something using the link, I receive a small commission. You don’t pay any extra and your information is safe. Thanks for supporting my small business.
Hair loss during chemo treatment is common. The exposed skin left by that hair loss is often very sensitive; the need to provide head cover is great. That’s why it’s incredibly important to choose a yarn that doesn’t irritate that sensitive skin.
I chose Lion Brand’s Coboo for my crochet beanie because it ticks off all the boxes for crocheting for sensitive skin. Cotton blends and bamboo yarns provide the necessary softness and breathability to prevent an adverse reaction. Coboo is not only soft and non-allergenic, it comes in absolutely gorgeous saturated colors.
Lion Brand’s Coboo is a DK weight yarn. Lion Brand’s Truboo, a 100% bamboo DK weight, is a nice alternative if you’re making the Miriam crochet beanie as a chemo cap.
The Miriam Beanie is also great for general use. Use any DK weight yarn you like but be sure to check your gauge before beginning construction.

The pattern is free here. So, why do I need to buy the PDF?
Every crocheter has her own style of setting up a project. Some are happy just working from the free pattern here on the blog.
But, if you prefer to work from a beautifully formatted, ad-free PDF that you can print out to make notes on or add to your favorite mobile device, purchasing the PDF is the way to go.
The PDF for the Miriam crochet beanie is available in all my shops. Simply click on the button for your favorite shop and you’re on your way!


The Crochet Cancer Challenge
The Crochet Cancer Challenge hosted by Christine of Sweet Potato 3 is an annual event to raise awareness and garner support for those dealing with a cancer diagnosis and treatment.
The event features daily hat patterns specifically designed for those struggling with hair loss related to chemo treatment or for those who are supporting a cancer patient.
The Miriam Crochet Beanie was one of the featured designs in the 2023 event. Click here to see all the other beautiful designs you can make for donation.
The Miriam Crochet Beanie free pattern starts here.
Thank you for staying on this post and reading my patterns right here on the blog, without copy/pasting. When you stay here to follow the free version of my pattern, I am compensated for my time and energy. This is a great, free way to support a designer. If you would like to save this for later, bookmark the page to save it in your mobile browser.
Yarn
Lion Brand “Coboo” 51% cotton, 49% rayon from bamboo DK weight (3.5oz/232yd; 100g/212m) in Magenta #144
Yarn needed for each size (amounts are approximate):
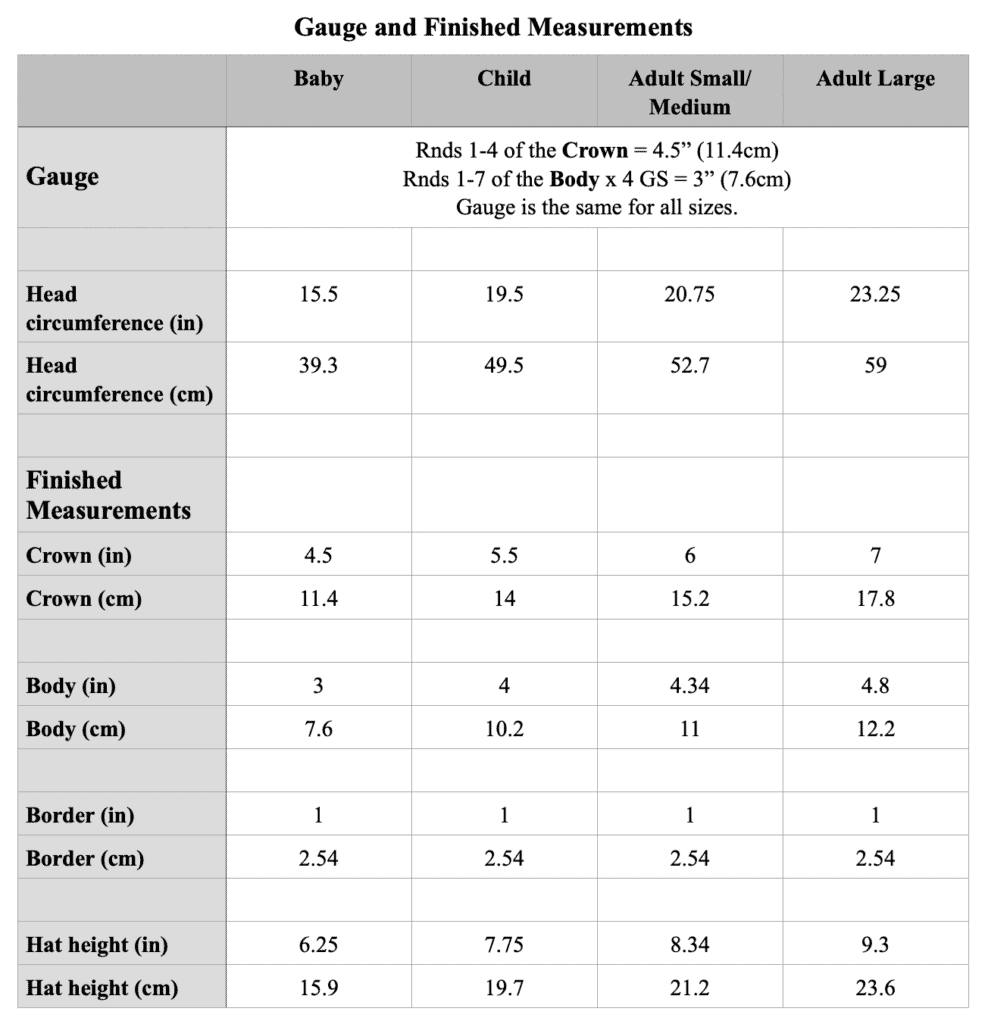
- Baby: 70-80 yds
- Child: 100-110 yds
- Adult Small/Medium: 130-140 yds
- Adult Large: 150-160 yds
Hook
US size H-8 (5mm) or size needed for gauge
Skill level: Adventurous beginner (understanding working a flat circle, working in the round, and working in the 3rd loop is helpful)
Abbreviations – US crochet terminology
- beg – beginning
- ch – chain
- dc – double crochet
- hdc – half double crochet
- MR – magic ring
- rep – repeat
- rnd(s) – round(s)
- sc – single crochet
- sp – space
- st(s) – stitch(es)
- RS – right side
- WS – wrong side
- YO – yarn over
Special Stitches
Granny stitch (GS) – 3 dc in the same sp or st
Half double crochet in the 3rd loop (hdc 3lp) – YO, insert hook in 3rd loop (on backside of st), YO, draw up loop, YO, pull through all 3 loops on hook. Note: The hdc 3lp is worked in the same way as a typical hdc with the hook inserted in the loop that sits under the top 2 loops on the back side of the st.
Single crochet in the 3rd loop (sc 3lp) – Insert hook in 3rd loop, YO, draw up loop, YO, pull through 2 loops on hook. Note: The sc 3lp is worked in the same way as a typical sc with the hook inserted in the loop that sits under the top 2 loops on the back side of the st.
Invisible join: At the end of the rnd, remove working loop from hook, insert hook from back to front through the top of the 1st st of the rnd, add working loop back onto hook and pull through to the WS of the hat, continue as instructed. Note: An invisible join is used in the Border section to hide the seam when working the stitches in the 3rd loop.

Stacked single crochet (STsc) – (This stitch is used at the beginning of a row or round to replace the traditional turning ch-3. It has the appearance of a dc.) – Insert hook in same st as loop, YO, draw up loop, YO, pull through 2 loops (bottom sc made), insert hook in left vertical bar of bottom sc, YO, draw up loop, YO, pull through 2 loops (top sc made).

The Miriam Crochet Beanie Written Instructions
Pattern Notes
- The finished hat has 0-1”negative ease for a slightly snug fit.
- Do not turn after any rnd.
- Ch-1 at the beg of a rnd does not count as a st.
- Ch-2 at the beg of a rnd counts as a dc.
- While a STsc can be used at the beginning of each round in the Body of the hat, a ch-2 works better for the construction.
Pattern Instructions for the crochet beanie
Crown
Rnd 1: MR, ch 3, 11 dc in the ring, join with slip st to top of beg ch-3, pull to close the ring. (12 dc)
Rnd 2: STsc, dc in the same st, 2 dc in next st and in each st around, join with slip st to beg st. (24 dc)
Rnd 3: STsc, dc in the same st, dc in the next st, [2 dc in the next st, dc in the next st] around, join with slip st to beg st. (36 dc)
Rnd 4: STsc, dc in the same st, dc in the next 2 sts, [2 dc in the next st, dc in the next 2 sts] around, join with slip st to beg st. (48 dc)
Stop here for Baby. Do not fasten off; proceed to Body of Hat.
Rnd 5: STsc, dc in the same st, dc in the next 3 sts, [2 dc in the next st, dc in the next 3 sts] around, join with slip st to beg st. (60 dc)
Stop here for Child. Do not fasten off; proceed to Body of Hat.
Rnd 6: STsc, dc in the same st, dc in the next 4 sts, [2 dc in the next st, dc in the next 4 sts] around, join with slip st to beg st. (72 dc)
Stop here for Adult Small/Medium. Do not fasten off; proceed to Body of Hat.
Rnd 7: STsc, dc in the same st, dc in the next 5 sts, [2 dc in the next st, dc in the next 5 sts] around, join with slip st to beg st. (84 dc)
For Adult Large, do not fasten off; proceed to Body of Hat.
Body of Hat
Rnd 1: Ch 2, 2 dc in the same st, [sk 2 sts, GS in the next st] around, join with slip st to beg ch-2. < 16 (20, 24, 28) GS >
Note: The GS is worked between GS of the previous rnd in the sp where a ch-1 would normally be.
Rnd 2: Ch 2, GS in the next sp and in each sp around, 2 dc in the same sp as the beg ch-2 to complete the 1st GS, join with slip st to beg ch-2.
Rnd 3: Slip st in sp, (ch 2, 2 dc) in the same sp, GS in the next sp and in each sp around, join with slip st to beg ch-2.
Rnds 4 – 7: Rep Rnds 2-3 twice.
Stop here for Baby. Do not fasten off; proceed to Border.
Rnds 8-9: Rep Rnds 2-3.
Stop here for Child. Do not fasten off; proceed to Border.
Rnd 10: Rep Rnd 2.
Stop here for Adult Sm/Med. Do not fasten off; proceed to Border.
Rnd 11: Rep Rnd 3.
For Adult Large, do not fasten off; proceed to Border.
Note: If you’d like your beanie to be a bit longer with more coverage for your ears, work the final round of the Body to your preferred length. Reminder that the Border adds 1”.
Border
Note: Use the invisible join to hide the seam in the following rnds.
Rnd 1: Ch 1, hdc in the same st and in each st around, join. < 48 (60, 72, 84) hdc >
Rnd 2: Ch 1, hdc 3lp in the same st and in each st around, join. < 48 (60, 72, 84) hdc 3lp >
Rnd 3: Rep Rnd 2.
Rnd 4: Ch 1, sc 3lp in the same st and in each st around, join. < 48 (60, 72, 84) sc 3lp >
Fasten off and weave in ends.
Congratulations! Your crochet beanie is done and ready to wear!
More MadameStitch designs

Who do we give these hats to. I live in Arizona and have crocheted about 20 pink hats for cancer patients.
Harriet,
The hats can be donated to any cancer patient or organization you like. We aren’t gathering the donations, just counting pledges.
Any cancer hospital in your area would be able to direct you to an appropriate donation site. Give them a call and they should be able to help you.
Best,
Debbie
where can you send chemo hats
I’m not sure. That’s something you’ll need to work out with your local medical facilities. I don’t have a service to collect chemo hats.
Thanks for your commitment!
-Debbie